Use the Email Settings page to add or remove the email recipients for system and MTA event notifications and for scheduled reports.
.png)
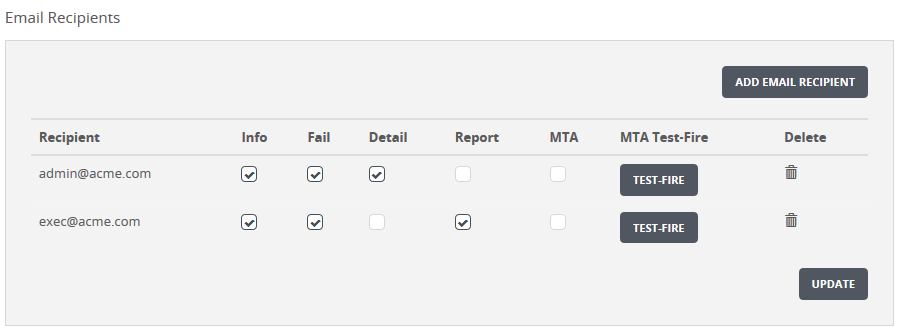
Click the Settings tab.
Click Email in the sidebar.
Locate the Email Recipients section.
Click Add Email Recipient.
Enter the email address of the user in the Add Email Recipient box and then click Add Recipient.
(Optional) Clear the Info, Fail, Detail, and Scan checkboxes as needed to customize the notifications the user will receive. (See Configuring system event notifications using the Web UI for details.)
Click Add Email Recipient.
Enter the email address of the user in the Add Email Recipient box and then click Add Recipient.
Make sure the Report checkbox remains selected.
(Optional) Clear the Info, Fail, Detail, and Scan checkboxes to prevent the user from receiving system event notifications as well as scheduled reports.
Click Add Email Recipient.
Enter the email alias that will forward MTA notifications in the Add Email Recipient box and then click Add Recipient. Use an email alias only. Do not use a real email address. No mail other than notifications will be delivered to this recipient.
Select the MTA checkbox.
Note
Only one alias can be enabled for MTA notifications. If this checkbox is selected for another alias, you must clear it before you can perform this step.
(Optional) Click Test-Fire to make sure the alias can receive notifications.
Click Update to save your changes.
Note
See Configuring MTA event notifications using the Web UI for information about enabling MTA notifications and configuring when they are sent.
Click the icon in the Delete column.
When prompted, click OK to confirm the action.