Use the Email Policy Configuration page to configure notices.
Note
Before you configure "block" notices, you need to enable them. Go to the Email Policy Configuration page. In the Analysis Modes section, select the Send block notice to original recipient(s) checkbox.
Click the Settings tab.
Click Email Policy in the sidebar.
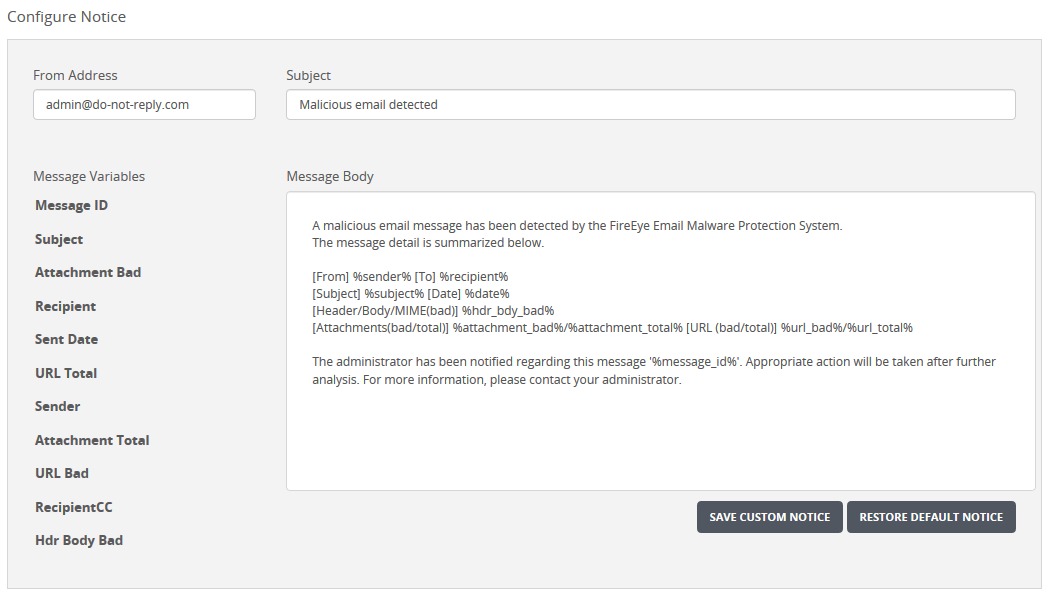
Locate the Configure Notice section.
Configure the email notice header text:
Enter a valid email address in the From Address box. This is the email address that will be in the From: header of the email notice.
(Optional) Change the text in the Subject box. This text will be in the Subject: header of the email notices.
(Optional) Customize the message body.
Enter the text. You can click items in the Message Variables table to add variables that will be replaced with relevant text when the notice is sent. (For details, see the Email Security — Server User Guide.)
Click Save Custom Notice.
Note
To clear the customization, click Restore Default Notice.
Locate the Configure Notice Recipients section.
To add "admin" notice recipients:
Enter the administrator's email address in the Admin box.
Click Add. The administrator is added to the Recipient list on the left.
Repeat these steps for additional administrators.
To add "bcc" notice recipients:
Enter the analyst's email address in the bCC box.
Click Add. The analyst is added to the Recipient list on the right.
Repeat these steps for additional analysts.
Locate the recipient or recipients in one of the Recipient lists.
Select the Delete checkbox next to the email address for each recipient.
Click Remove Selected Recipient under the list.