You configure URL Dynamic Analysis (also called DUA) by using the fields of the Live Interface Configuration area in the Email MTA Configuration page.
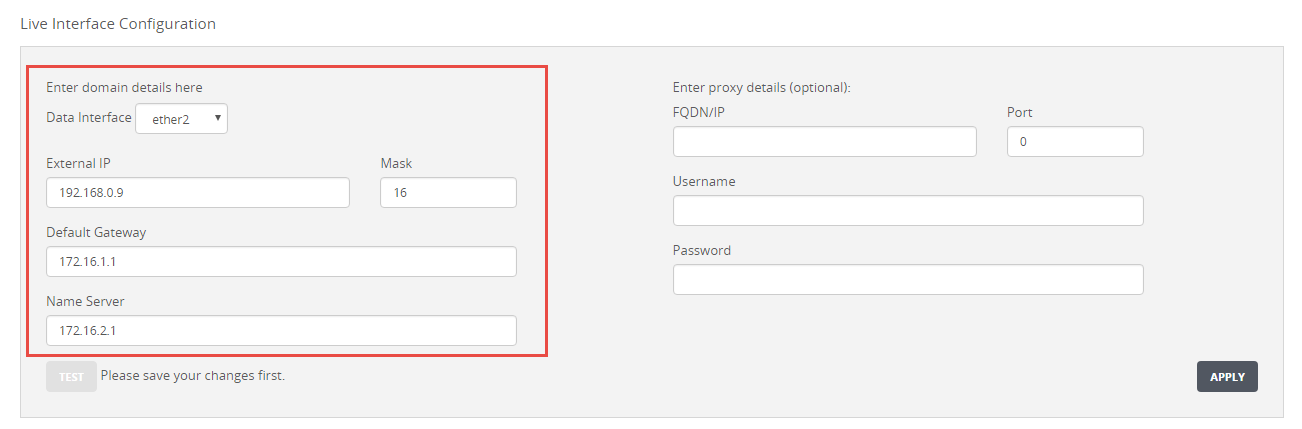
You specify the settings of the live ether 1 or ether2 interface under the "Enter domain details here" label in the Live Interface Configuration area.
Field | Description |
|---|---|
Data Interface | The live ether1 or ether2 data interface. |
External IP | External IPv4 address of the live ether1 or ether2 interface. |
Mask | Mask length for the live ether1 or ether2 interface. |
Default Gateway | IPv4 address of the node used by the live ether1 or ether2 interface to access the Internet default gateway.
|
Name Server | IPv4 address of the Domain Name System (DNS) name server for the live ether1 or ether2 interface. |
In the Web UI, choose Settings > Email MTA.
Choose the live ether1 or ether2 data interface in the Data Interface drop-down list.
Enter the IPv4 address and mask length for the live ether1 or ether2 interface in the External IP and Mask fields.
Enter the IPv4 address of the default gateway for the live ether1 or ether2 interface in the Default Gateway field.
Enter the IPv4 address of the DNS name server for the live ether1 or ether2 interface in the Name Server field.
Click Apply to save your changes.
Click Test. Verify the network connectivity between the live ether1 or ether2 interface and the Internet. A message is displayed if end-to-end connectivity is successful or not.
If the connectivity test succeeds, the following message is displayed:

If the connectivity test fails, one of the following messages displays. Correct the configuration, click Apply, and then test the connection again before you continue.

