To install the Trellix DLP Network hardware appliance on the four-post 19-inch rack, use the rack-mounting kit. You can use the kit with most industry-standard rack cabinets.
For each mounting rail, use the following steps.
At the front of the rack, position the right or left mounting rail on the corresponding side so that the mounting bracket aligns with the rack holes.
Caution
Always load the rack from the bottom up. If you are installing multiple appliances, start with the lowest available position.
Slide rail installation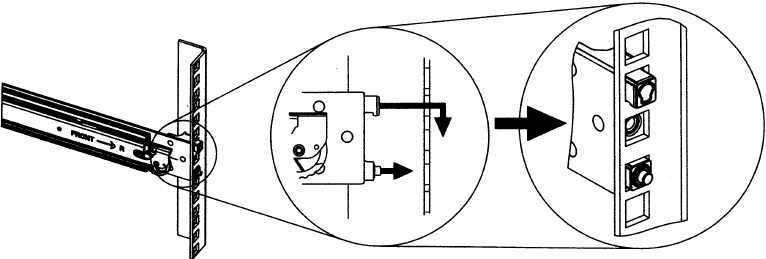
At the back of the rack, pull the back mounting-bracket (extending the mounting rail) so that it aligns with the rack holes.
On each side of the rack, ensure that the mounting rails are the same level.
Install rail to rack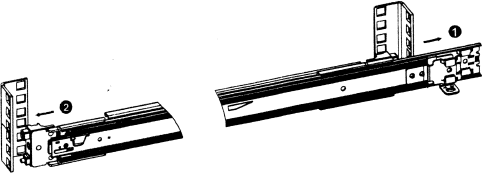
Clip the rail to the rack and secure it with the tie wraps.
Slide both rails so they are fully extended.
Full extend slide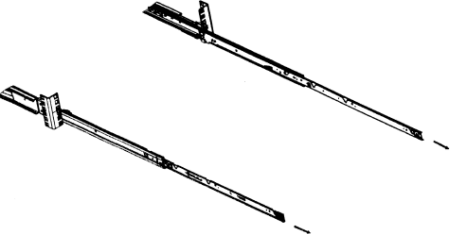
Take assistance and lift the Trellix DLP Network appliance and install the chassis to the rail on both the sides.
Drop in the rear spool first, then the middle, then the front.
Install the appliance to rail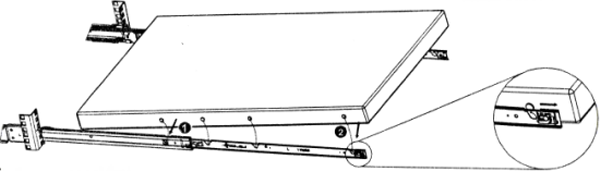
Caution
At least two people are required to lift and attach the Trellix DLP Network appliance to the rack.
If necessary, attach the lockable bezel to protect the front panel.
Lift the release tab and push the Trellix DLP Network appliance into the rack.
Lift release tab and push appliance into rack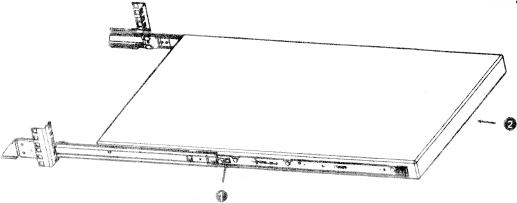
To remove the Trellix DLP Network appliance from the rack, lift the release tab next to the chassis front spool, then lift it out of the rails.