To install the Trellix DLP 8800 hardware appliance on the four-post 19-inch rack, use the rack-mounting kit. You can use the kit with most industry-standard rack cabinets.
The chassis is shipped with two sets of rack rails, one set for the right side of the chassis and the other for the left. Each rail set consists of inner rail set and the outer mounting rail that must be secured to the rack. Separate the rail set provided in the package by pushing the release tab down.
Set up the rail set.
The front inner rail is pre-attached to the chassis. Fix the inner back rail to the chassis. To fix the back inner rail to the chassis, push the rail in and slide it slightly so as to fit into the clamped holes, align and secure the screw.
Fix the back inner rail to the chassis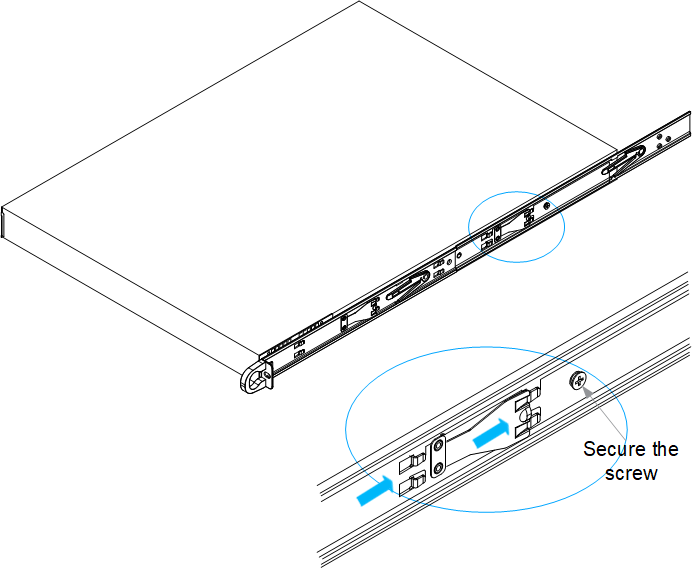
Set up the mounting rails, which have to be secured to the rack.
Set up the outer mounting rail set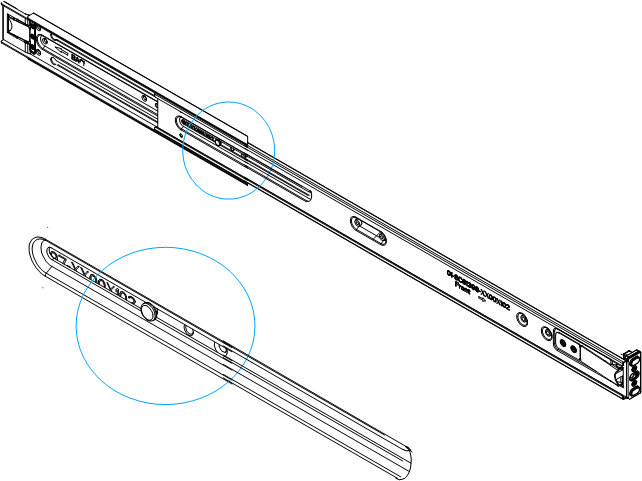
The outer rails are extendible. Make sure that the sliding shuttle is locked.
Install the outer mounting rails onto the rack. For each mounting rail, use the following steps.
At the front of the rack, position the right or left mounting rail on the corresponding side so that the mounting bracket aligns with the rack holes.
Caution
Always load the rack from the bottom up. If you are installing multiple appliances, start with the lowest available position.
At the back of the rack, pull the back mounting-bracket (extending the mounting rail) so that it aligns with the rack holes.
On each side of the rack, make sure that the mounting rails are at the same level.
Clip the rail into the rack until the quick release bracket snaps into place, securing the rail to the rack.
Mount outer rail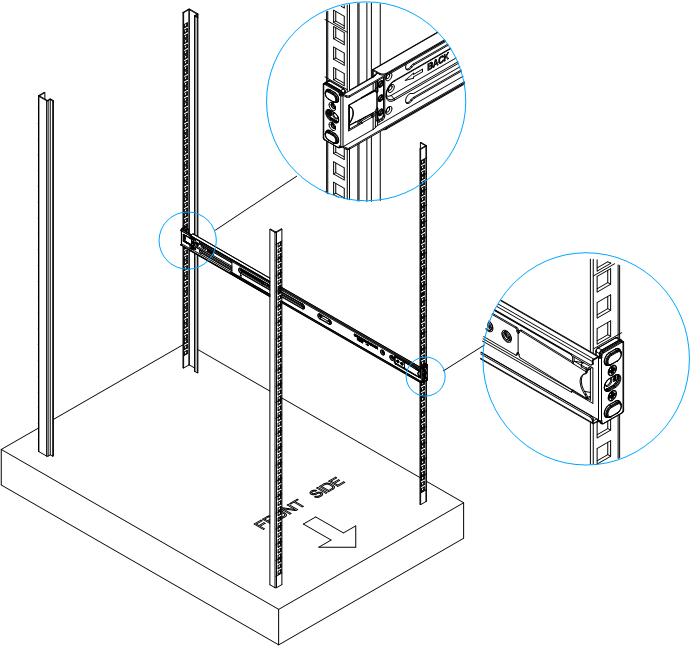
Install the chassis into a rack
Take assistance and lift the Trellix DLP Network appliance and install the chassis to the rail on both the sides.
Caution
At least two people are required to lift and attach the Trellix DLP Network appliance to the rack.
Drop in the rear spool first and then the front.
Lift the release tab and push the Trellix DLP Network appliance into the rack. Slide both rails so they are fully extended.
Install the chassis into the rack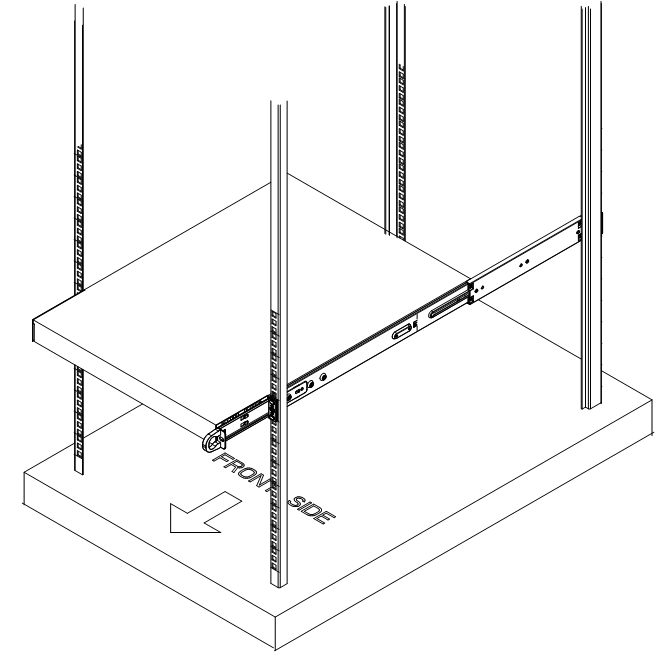
Use the shipped screws to secure the front of the chassis to the rack.
Secure the chassis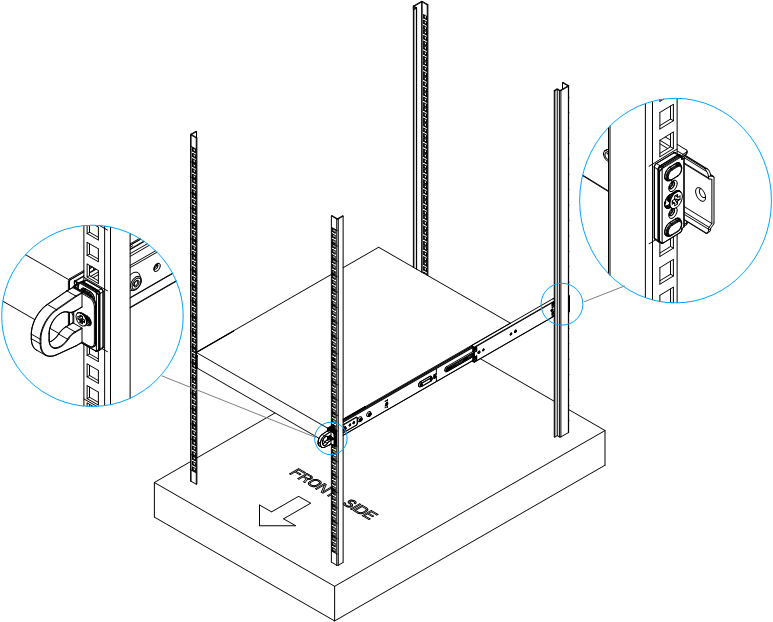
To remove the Trellix DLP Network appliance from the rack, lift the release tab next to the chassis front spool, then lift the appliance out of the rails.