Quarantine notification emails alert you that a message has been quarantined, if your administrator has enabled the feature. The content displayed in the notification is configured by your administrator. Dependent on what your administrator has enabled, you can release messages from the quarantine, preview quarantined messages, and access your complete message quarantine and the allowed and blocked senders list through the provided links.
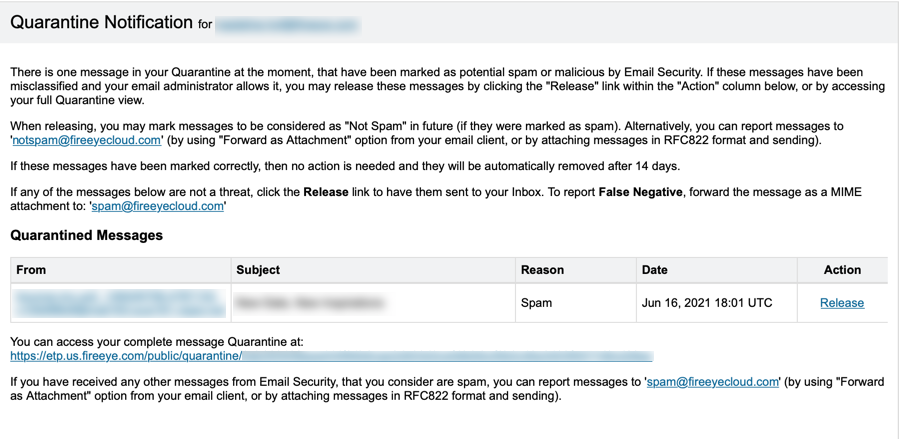
When you release a message, you can select Report as not spam. If your administrator has enabled the feature, you then have two more options:
To send only the headers of the message with the report, select Headers only.
To add the sender to a safe list and bypass spam checks, select Add From header address to Allowed Sender Address list.
To release a message from quarantine:
Open the quarantine notification email.
In the action column, click Release.
Note
If your administrator has enabled the feature, you can select Release and Allow Sender for inbound emails. "Add from header address to Allowed Sender Address list" will be checked on the next screen.
(Optional) On the Email Digest page, select Report as not spam.
Select Headers only.
Select Add from header address to Allowed Sender Address list.
If nothing is checked, the email is released with no other action taken.
Click Confirm Release.
Instant notifications
Under Identification section, enter information into the Name and Description fields.
Note
Asterisks indicate that information is required for that particular field.
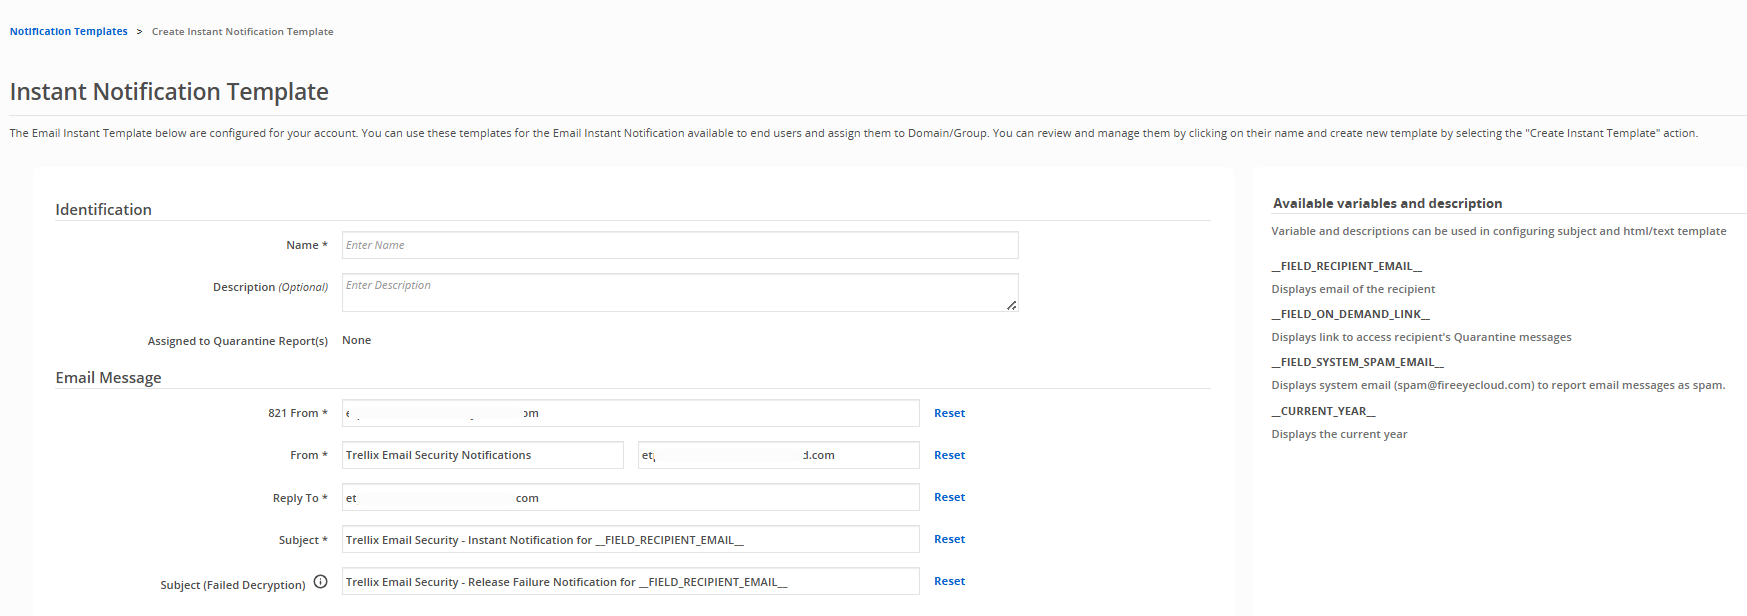
Under Email Message section, you can customize the following attributes:
821 From
From
Reply To
Subject
Subject (Failed Decryption) : Select this subject for the following situation - When rescan from the end user fails due to incorrect password or email is quarantined again due to some other verdict fail.
Warning
Changing "821 From' or "From" may change how messages are processed by next hop MTA. Administrators may need to allow list the address being used to bypass AntiSpam and Sender Verification (SPF/DKIM/DMARC) functionality to achieve reliable delivery of the notification emails.
After changes are made to any field, you can restore them to their original setting by clicking Reset.
Use the available variables to configure the subject field, HTML body, or text body of a template. You can do the following with the variables:
Change information in the subject line of an email digest
Add information to an email digest body or footer
List of available variables_FIELD_RECIPIENT_EMAIL_
Displays email of the recipient.
_FIELD_ON_DEMAND_LINK_
Displays link to access recipient's Quarantine messages.
_FIELD_SYSTEM_SPAM_EMAIL_
Displays system email (spam@fireeyecloud.com) to report email messages as spam.
__CURRENT_YEAR__
Displays the current year.
Customize the HTML and Text template of email quarantine notifications. You can configure the email body, email footer, and logo included in the message. The table containing the list of quarantined emails will be placed between the body and the footer contents that you configure.
Important
You must make the same edits to both the HTML template and text template for changes to appear in email digests. If changes are made to only one template, they will not appear in the other.
To customize the logo and logo background color that appears in the email digest:
On the HTML Template tab, click Choose File.
Upload an image from your computer. Images cannot exceed 300 KB in size.
Click on the HTML color code and select a color for the logo background.
To customize the HTML email body and footer:
Click on the HTML Template tab.
Make desired changes to the default email body and footer.
Click Preview to review changes.
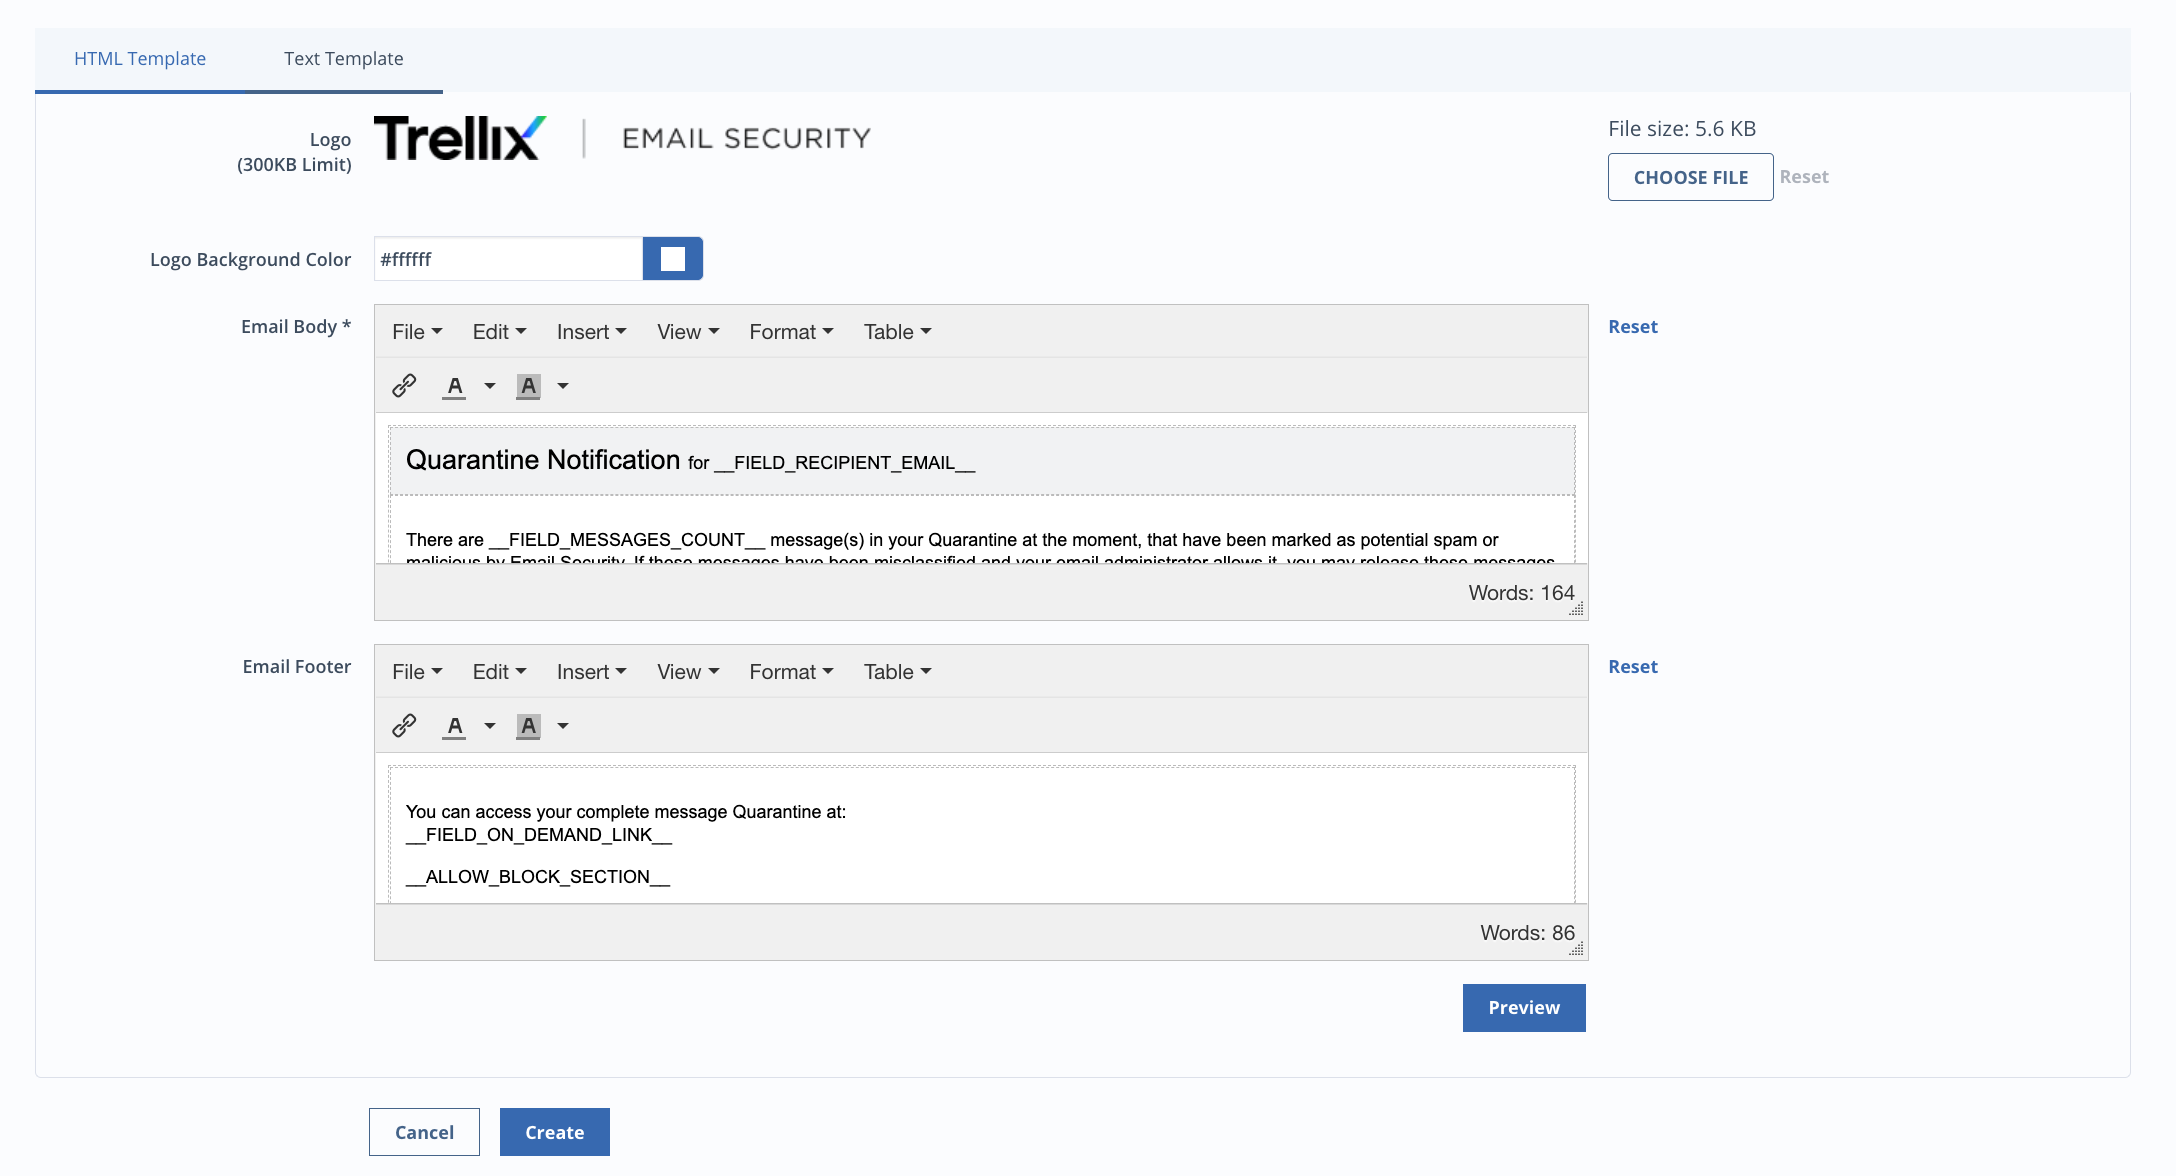
To customize the Text email body and footer:
Click on the Text Template tab.
Make desired changes to the default email body and footer.
Click Preview to review changes.
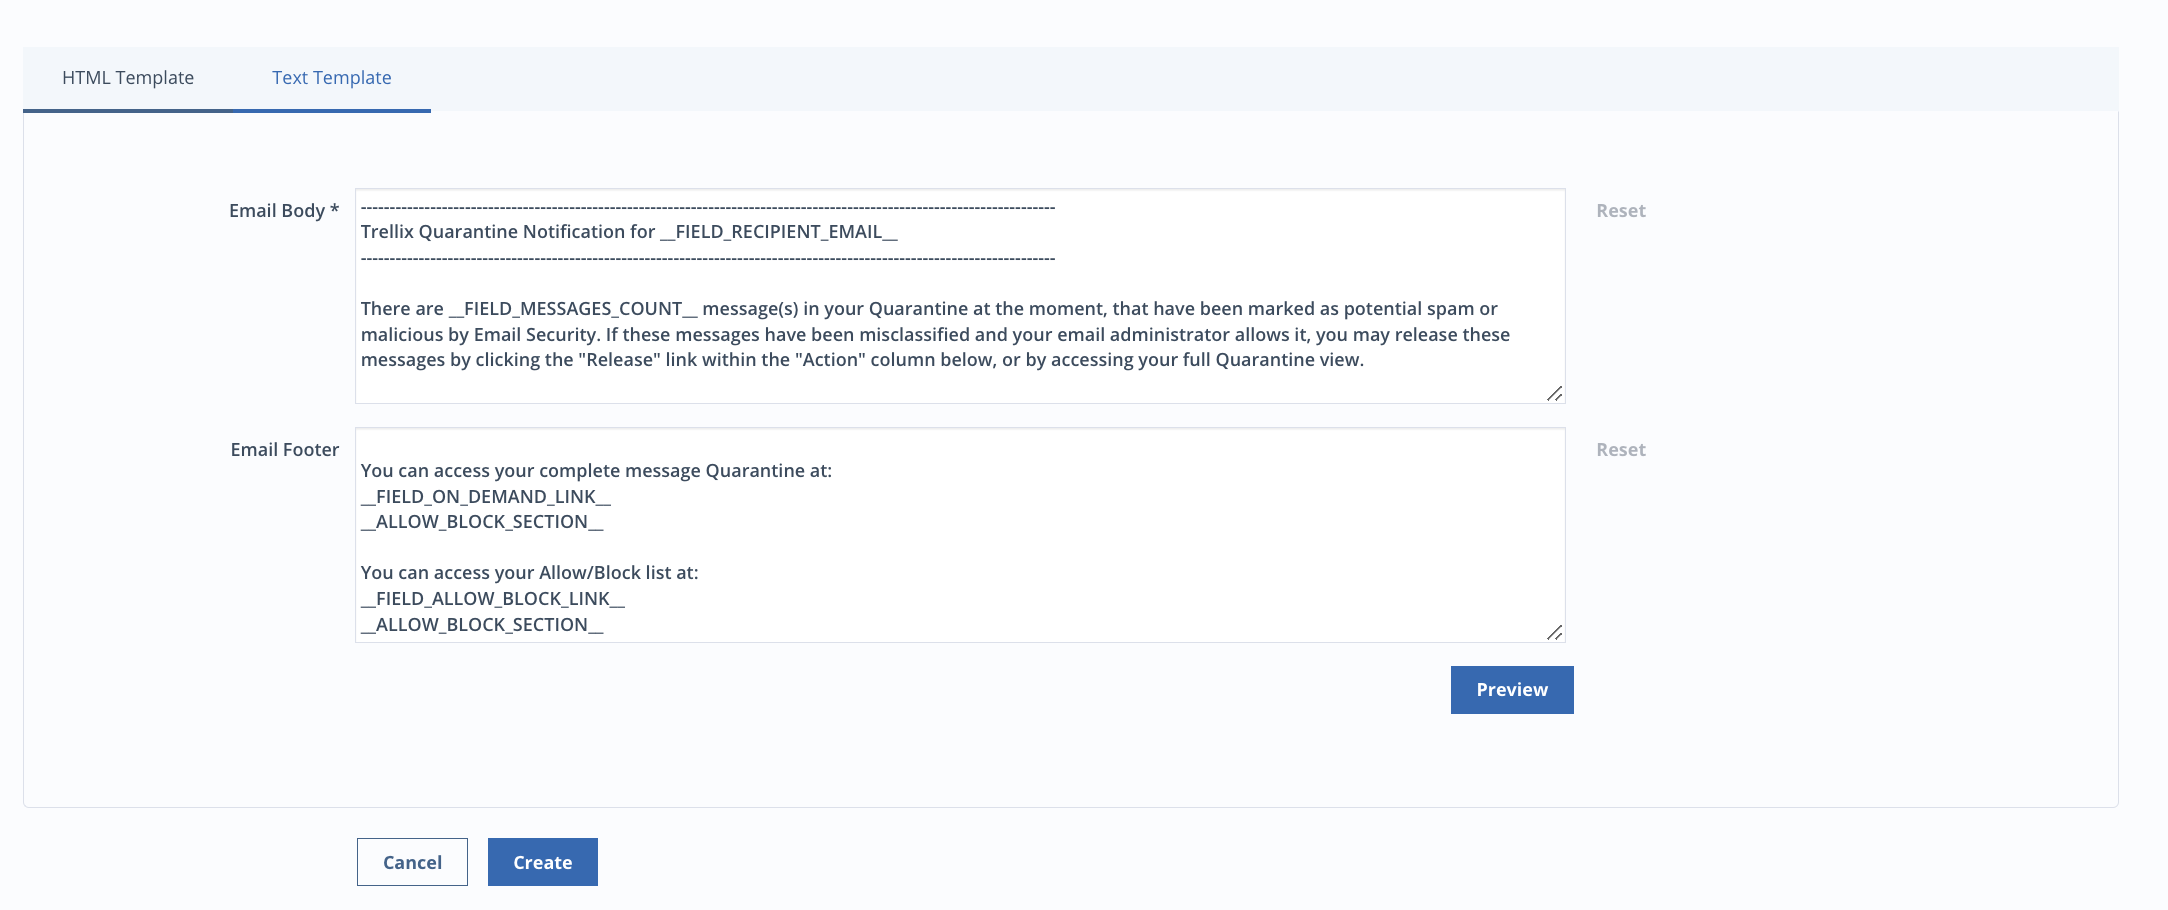
Click Save/Create at the bottom of the Email Digest Templates page after configuring the desired settings.