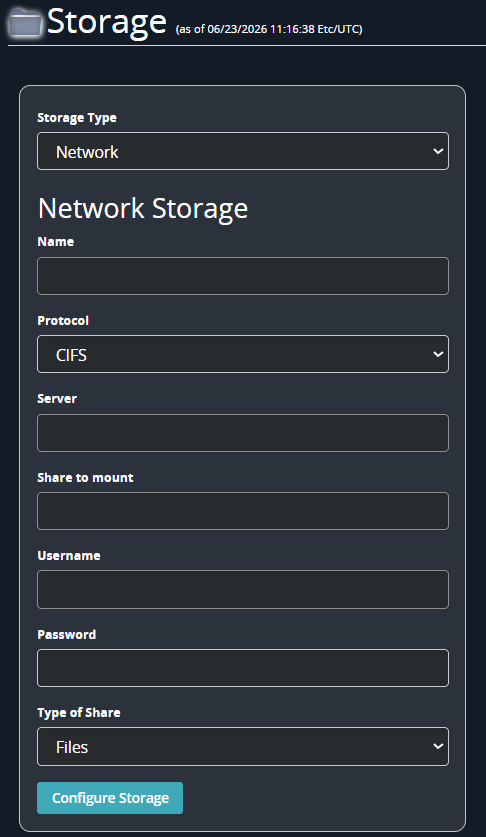
Use the Add Storage section of the Configure Storage page to add storage.
Note
The settings in the Add Storage section vary depending on the remote file access protocol.
You require read, write and delete permissions for storages configured as Quarantine or Good/Unknown/Whitelist, to perform scan operations.
Important
If you are using Distributed File System (DFS) shares, you must also configure the IP address of the Windows Internet Name Service (WINS) server used to resolve link targets, as described in Configuring analysis settings.
Click the Storage tab and then click Add Storage.
In the Add Storage section, complete the fields as described in Storage settings.
Note
Avoid using spaces in storage names. Instead, use hyphens (-) or underscores (_) to ensure compatibility and prevent issues with cross-platform interoperability, especially when accessing storage over network protocols like CIFS and NFS.
Click Configure Storage.
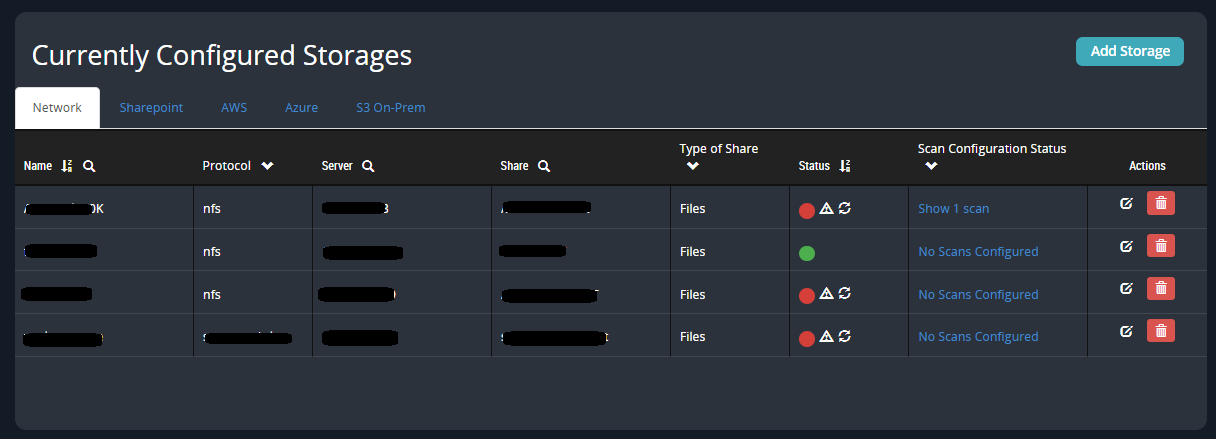
Locate the new storage in the Currently Configured Storage section. The round icon in the Status column is yellow while the storage is being added, and turns green after it is added successfully.
If the icon is red, see Troubleshooting storage errors.