This section describes how to deploy an IVX Open Virtual Appliance (OVA) file as a VM, in a Nutanix environment.
Nutanix Version: pc.2023.4.0.5
NCC Version: 4.6.6.3
LCM Version: 3.1
Log on to Prism Central with administrator privileges using port 9440.
For example,
https://<ip address>:9440/console/#Upload and deploy IVX OVA file in the Nutanix AHV platform:
Select
 → → , then click Upload OVA.
Go to the location where the IVX OVA file is stored on your local folder, then select the IVX OVA file. The message Upload of the file is successfully completed is displayed.
After the upload is complete, the IVX OVA file is listed in the table.
Select the checkbox of the IVX OVA file that you want to deploy.
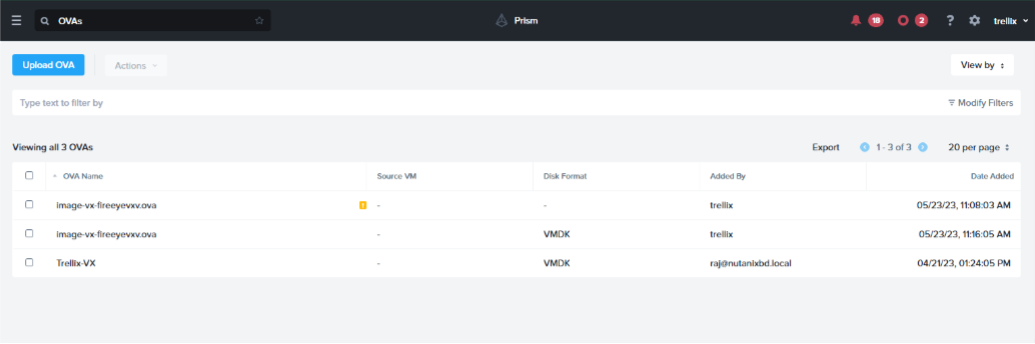
Select Deploy as VM from Actions drop-down.
In the Deploy as VM page, specify the following details of the VM:
Name: The name of the VM to be deployed.
Note
Ensure that each VM has a distinct name that follows the Nutanix VM naming guidelines.
Description: The description for the VM.
VM Properties: Enter the following values:
CPU: 16 vCPU
Cores per CPU: 2 Cores
Memory: 32 GB (Default value) - Do not change
Click .
Specify the Network subnet details in the Resources page and then click .
Review the settings in the Review page and then click Create VM.
Launch the VM:
Select
→ → , then click VMs.Enable virtualization for Nutanix instances using CLI.
Virtualization is not enabled by default. You must enable virtualization for Guest images to function.
Note
Make sure to power off the guest VM on which you want to configure nested virtualization.
Perform the following steps to enable virtualization:
Log in to any Controller VM in the cluster with SSH.
Run the following command to enable the guest VM:
nutanix@CVM~$acli vm.update <VM_name> hardware_virtualization=trueRetrieve the guest VM details using the following command to check whether all the attributes are correctly set for the guest VM:
nutanix@CVM~ $ acli vm.get <VM_name>Review the following log attributes to verify whether the infrastructure to support WSL2 is configured successfully in the guest VM:
hardware_virtualization: True
From the list of VMs, select the deployed VM and click the Actions drop-down, then click Power On to launch the VM.
The VM might take 7-8 mins to launch and display the login page.
Once the login prompt appears in the VM console, enter admin.
At the password prompt, enter admin.
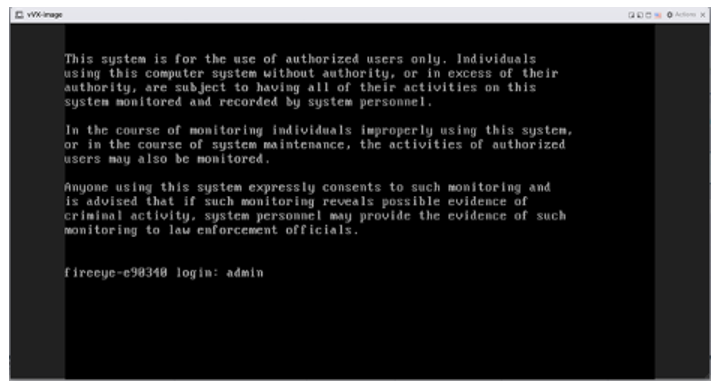
If prompted to change the password, configure a new password using the
username admin password <new password>command. You will be logged out. Log in again with the new password.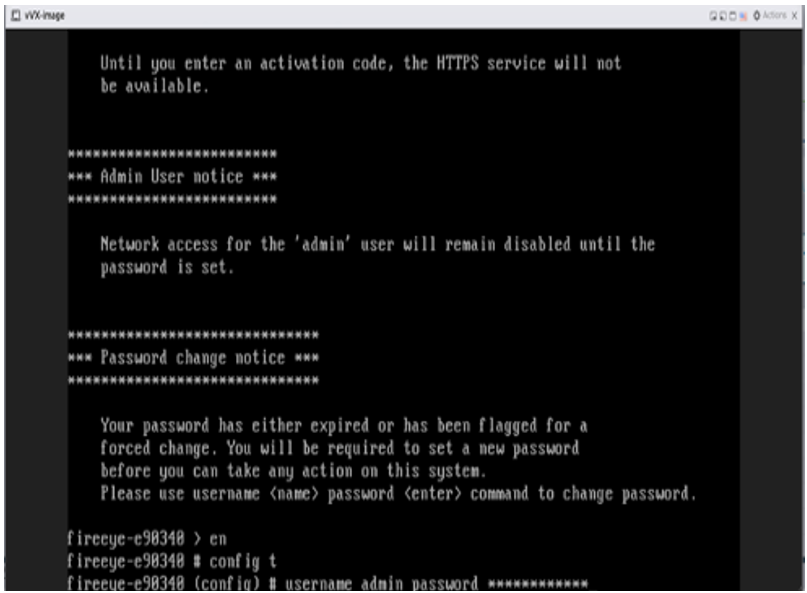
On logging in again, select Yes to accept License Agreement.
Select Yes if prompted to use the wizard for initial configuration.
If you do not receive the above prompt, start the configuration jump-start wizard:
hostname (config) # configuration jump-startAnswer the wizard questions as described in Wizard steps.
Wizard steps
The following tables describe the questions the configuration wizard prompts you to answer. As noted in the table, the wizard skips some steps based on your answers to previous steps.
Note
Press Ctrl+C to exit the configuration wizard. After the management interface is configured, an administrator can use the configuration jump-start CLI command to run the wizard again.
Intelligent Virtual Execution steps
Step | Response |
|---|---|
Admin password? | (Optional) Enter a new administrator password. |
Confirm admin password? | Re-enter the new administrator password. |
Enable remote access for 'admin' user? | Enter yes to enable the administrator to log in to the appliance remotely. Enter no to disable remote access. |
Use DHCP on ether1 interface? | Enter no to manually configure your IP address and network settings. |
Use zeroconf on ether1 interface? | Enter yes to use zero-configuration (zeroconf) networking. Enter no to specify a static IP address and network mask. (If you specify yes, the next step is skipped.) NOTE: Do not use zeroconf on the primary interface. |
Primary IPv4 address and masklen? | Enter the IPv4 address for the management interface in A.B.C.D format and enter the network mask (for example, 1.1.1.2 /24). |
Default gateway? | Enter the gateway IP address for the management interface. |
Primary DNS server? | Enter the IP address of the DNS server. |
Domain name? | Enter the domain for the management interface (for example, it.acme.com). |
Enable fenet service? | Enter yes to enable access to the DTI network. |
Enable fenet license update service? | Enter yes to enable the licensing service to automatically download your licenses from the DTI network and install them. (If licenses are downloaded and installed successfully, the wizard skips the step that prompts for the product license key and the step that prompts for the security-content updates key.) |
Sync appliance time with fenet? | Enter yes to synchronize the appliance time with the DTI server time. If you enabled the licensing service, synchronization prevents a feature from being temporarily unlicensed due to a time gap. The wizard makes three attempts to perform this step before it gives up and moves to the next step. |
Update licenses from fenet? | Enter yes to download and install your licenses. The wizard makes three attempts to perform this step before it gives up and moves to the next step. |
Enable NTP? | Enter yes to enable automatic time synchronization with one or more Network Time Protocol (NTP) servers. |
Enable IPv6 on management interface? | Enter yes to enable IPv6 protocol, which changes network IP routing from IPv4 to IPv6. (This step and the next two steps are skipped if you entered yes in the "Enable Incident Response or Compromise Assessment?" step. This step and the next two steps will be automatically performed if you entered yes in the "Enable FaaS VPN" step.) |
Enable IPv6 autoconfig (SLAAC) on ether1 interface? | Enter yes to enable IPv6 autoconfig on the ether1 (management interface) port. (This step is skipped if you entered no in the "Enable IPv6" step.) |
Enable DHCPv6 on ether1 interface? | Enter yes to use DHCPv6 to configure IPv6 hosts with IP addresses. (This step is skipped if you entered no in the "Use DHCP on ether1 interface" or "Enable IPv6" step.) |
Product license key? | Enter the product license key you obtained from Trellix, or press Enter to install a 15-day evaluation license. (This step and the next step are skipped if you entered yes in the "Enable fenet license update service?" step and if licenses were successfully installed as a result.) |
Security-content updates key? | Enter the security-content license key you obtained from Trellix, or press Enter to skip this step and install the license later. |
Submission: Interface? | Enter the name of the interface. NoteYou can skip this step and assign the submission interface after initial configuration also. If you do not assign a submission interface, ether1 is used as the submission interface by default. If you choose to keep it unchanged, the next two steps will be automatically skipped. |
Submission: IP address and masklen? | Enter the IP address for the submission interface in A.B.C.D format and enter the network mask (for example, 10.1.1.1 /24). |
Submission: Default IPv4 gateway? | Enter the gateway IP address for the submission interface. |
Cluster: Interface? | Enter the name of the interface. NoteYou can skip this step and assign the cluster interface after initial configuration. If you do not assign a cluster interface, ether1 is used as the cluster interface by default. If you choose to keep it unchanged, the next step will be automatically skipped. |
Cluster: IP address and masklen? | Enter the IP address for the submission interface in A.B.C.D format and enter the network mask (for example, 10.1.1.1 /24). |
Send a request to be managed by CMS? | Enter yes if appliance needs to be managed by a Central Management System appliance else enter no. |