This section describes how to install a virtual Network Security appliance.
Important
This procedure uses VMware ESXi version 6.7.0 and 7.0.3. The navigation instructions and user interface may vary based on your version of these products.
Note
This procedure covers the required settings for a Trellix virtual appliance. You can accept the default values for the other settings, or specify values that are appropriate for your setup.
Note
This deployment is based on ESXi Host Client version 7.0.3.
Log in to ESXi Host Client.
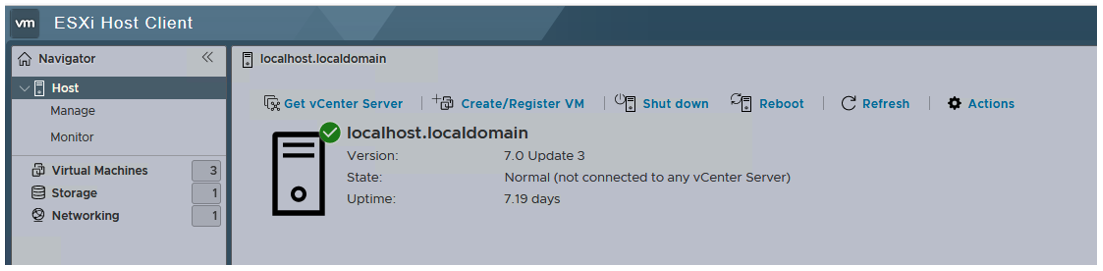
In the Navigator pane, select the host and then select Create/Register VM > Deploy OVF Template to start the wizard.
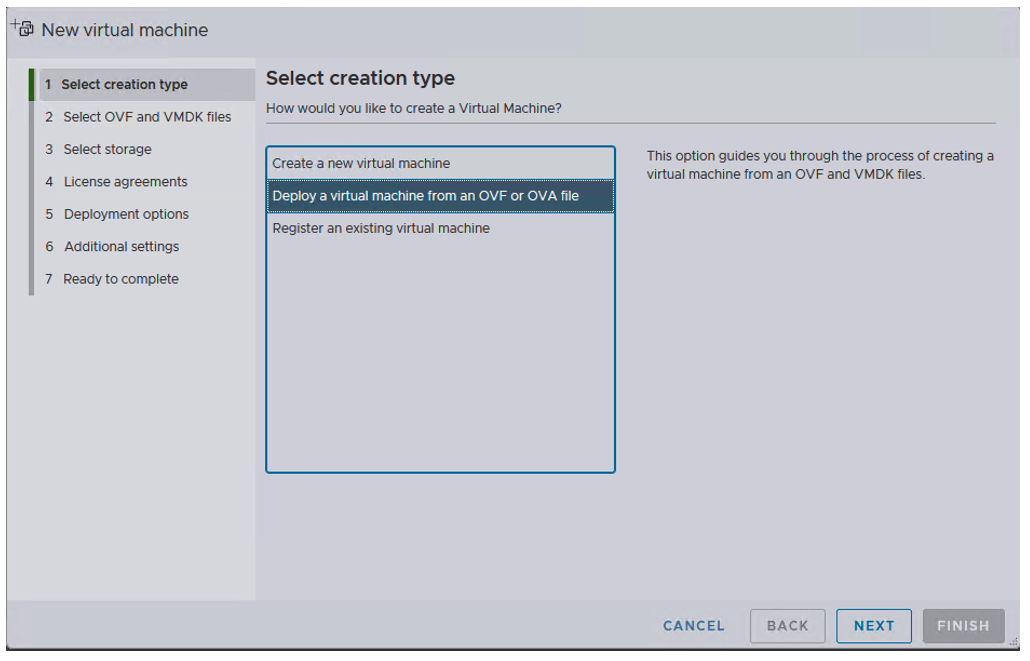
In the New virtual machine window, select Deploy a virtual machine from an OVF or OVA file and then click Next.
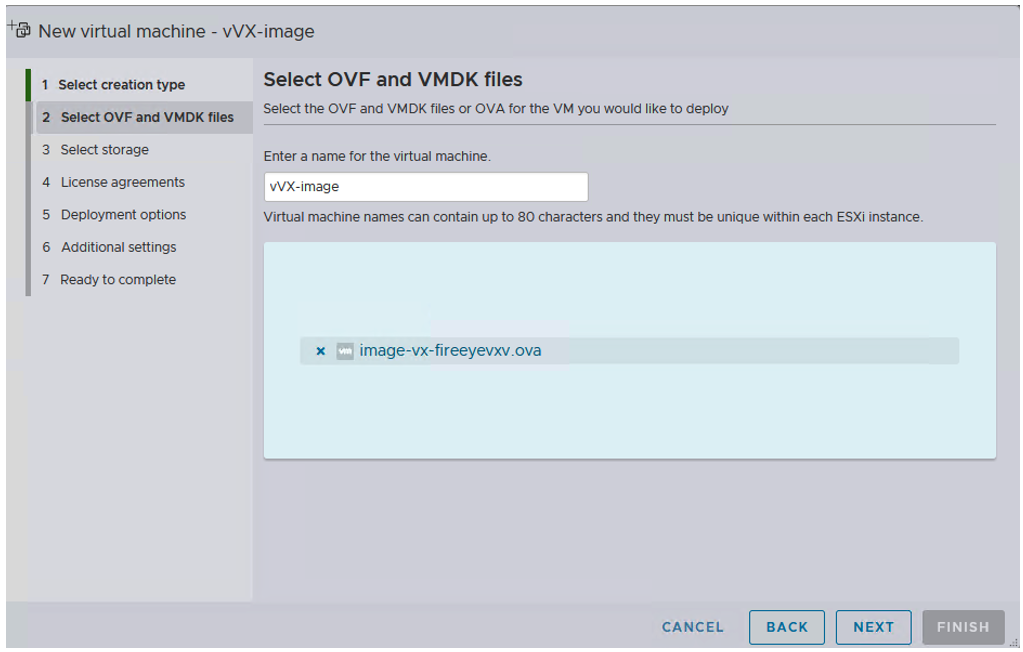
Enter the name of the virtual machine and select the virtual VX OVA file from the downloaded location. Click Next.
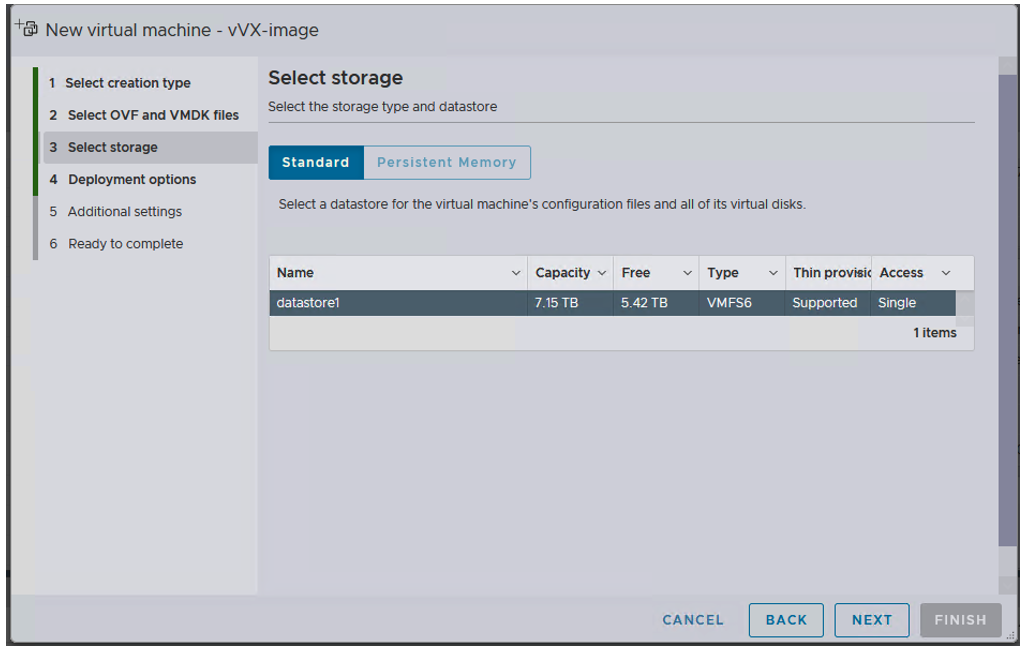
Under Select storage, click Standard and then click Next.
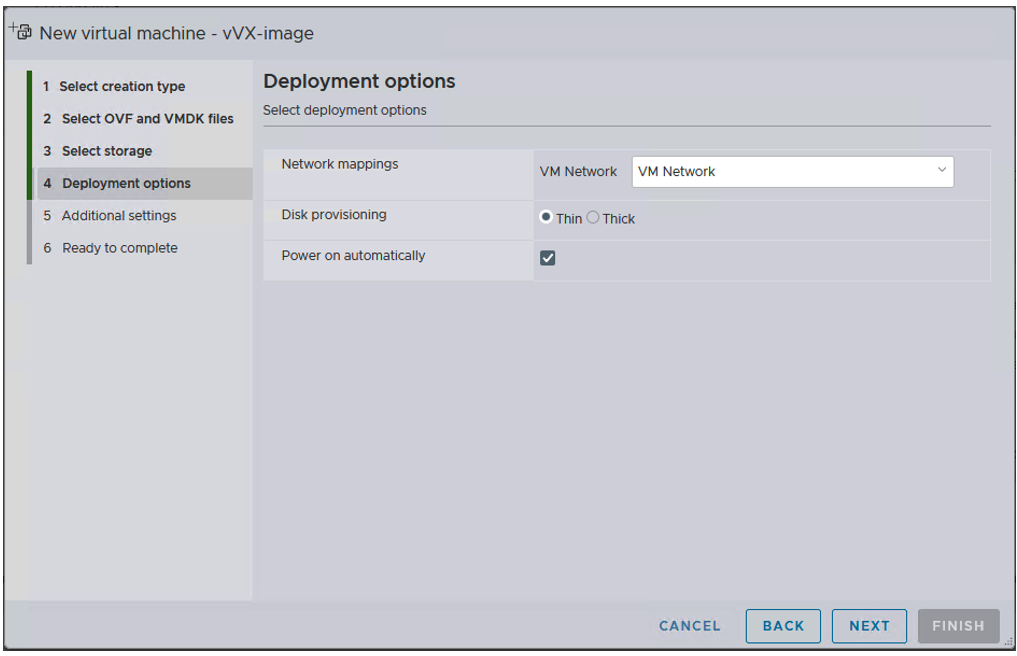
Under Deployment options, perform the following steps:
In Network Mappings, select the required network from the drop down list or use the default VM Network.
In Disk Provisioning, select the option Thin.
In Power on automatically, select the checkbox.
Click Next.
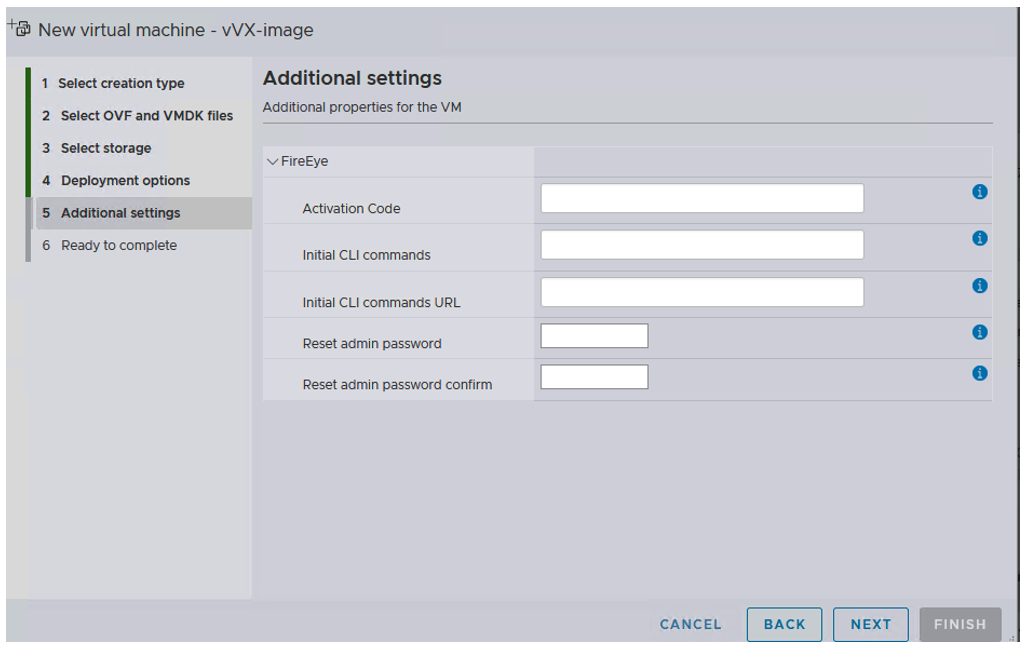
Under Additional settings, perform the following steps:provide the Activation code and can set the admin password or leave all blank and configure in later stage.
Enter the Activation Code.
You can skip Initial CLI commands and Initial CLI commands URL fields. They can be configured later.
Enter a password under Reset admin password. You can configure the password later as well.
Click Next.
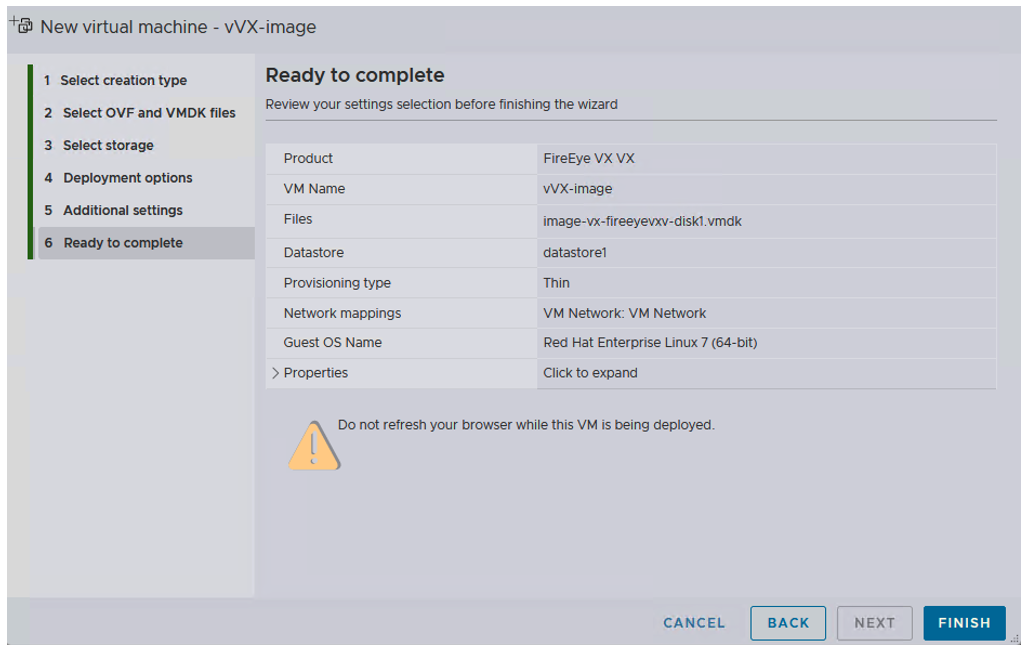
Under Ready to complete, verify your settings and then click Finish to deploy the virtual VX machine.
On the Recent Tasks screen, monitor the status of virtual VX machine.
