Nozomi Guardian Integrates with Network Detection and Response NDR to receive alerts and visualize OT and IoT assets.
Log into the NDR CLI using a terminal window or SSH client:
Using the NDR SSH protocol, log into the appliance with management interface's IP address or hostname.
$ ssh npadmin@<NDR IP address>Enter the password when prompted. The
hostname > promptis displayed after you have logged in.
Enter privileged mode on the NDR CLI.
npadmin@hostname> enableEnter the
npadminpassword, when prompted. The password can be 5 to 24 characters long.[sudo] password for npadmin: <password>Enter configuration mode.
npadmin@hostname# configure systemThe prompt changes to
npadmin@hostname(config)#on the terminal indicating that configuration mode is enabled.Type
nozomiat the terminal and pressEnter.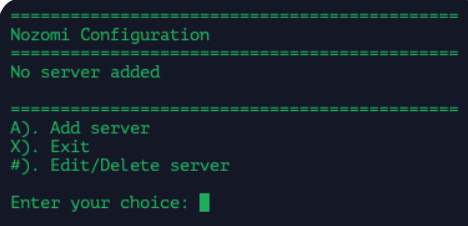
Type
Aand then pressEnterto add a new nozomi server.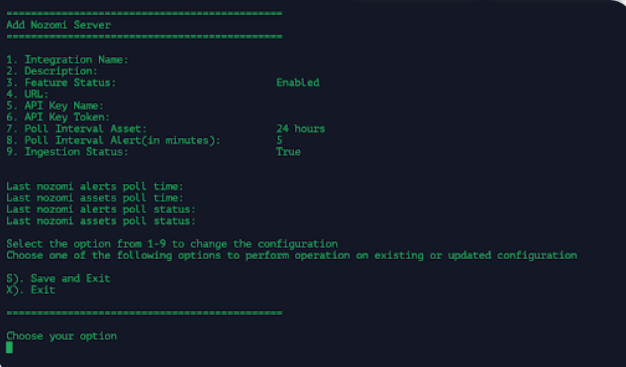
In the Add Server page, provide the details of the nozomi server.
Type
1and pressEnter. Specify a name for the integration.Type
2and pressEnter. Specify a description for the integration.Type
3and pressEnterto toggle the server status to Enable. By default the server status is disabled.Type
4and pressEnter. Specify the URL of the Nozomi server.Type
5and pressEnter. Specify api key name for authentication.Type
6and pressEnter. Specify api key token for authenticating with NDR.Type
7and pressEnter. Specify the frequency at which Nozomi Server has to be polled to collect the latest asset data.Type
8and pressEnter. Specify the frequency at which Nozomi Server has to be polled to collect the latest alerts data.Type
9and pressEnterto enable/disable alerts and asset details polling from Nozomi server.Type
Sand pressEnterto save the configuration. The Nozomi server is added displaying its configuration details.
Type
Tand pressEnterto verify the server connection.To edit the server:
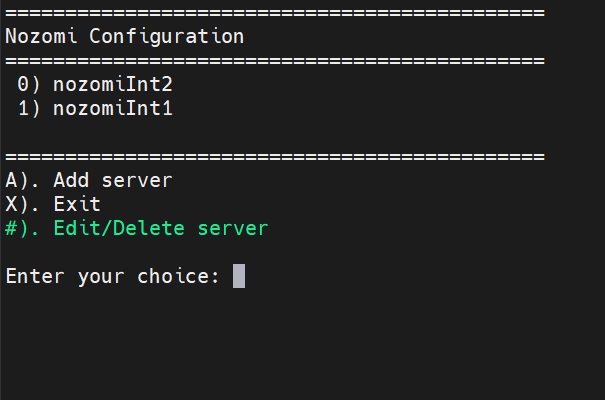
Type the number next to the sever you want to edit and then press
Enter.Type
Eand pressEnterto edit the server configuration details.Perform all steps from step 7 to change the server details.
Type
Sand pressEnterto save the configuration and exit.
To delete the server:
Type the number next to the sever you want to delete and then press
Enter.Type
Dand pressEnterto delete the server.Type
1to confirm on deleting the server.
Type
Xand pressEnterto exit the configuration.