PX SERIES / 2016
Compliance Number: FEI-006
The PX 1020EXT10
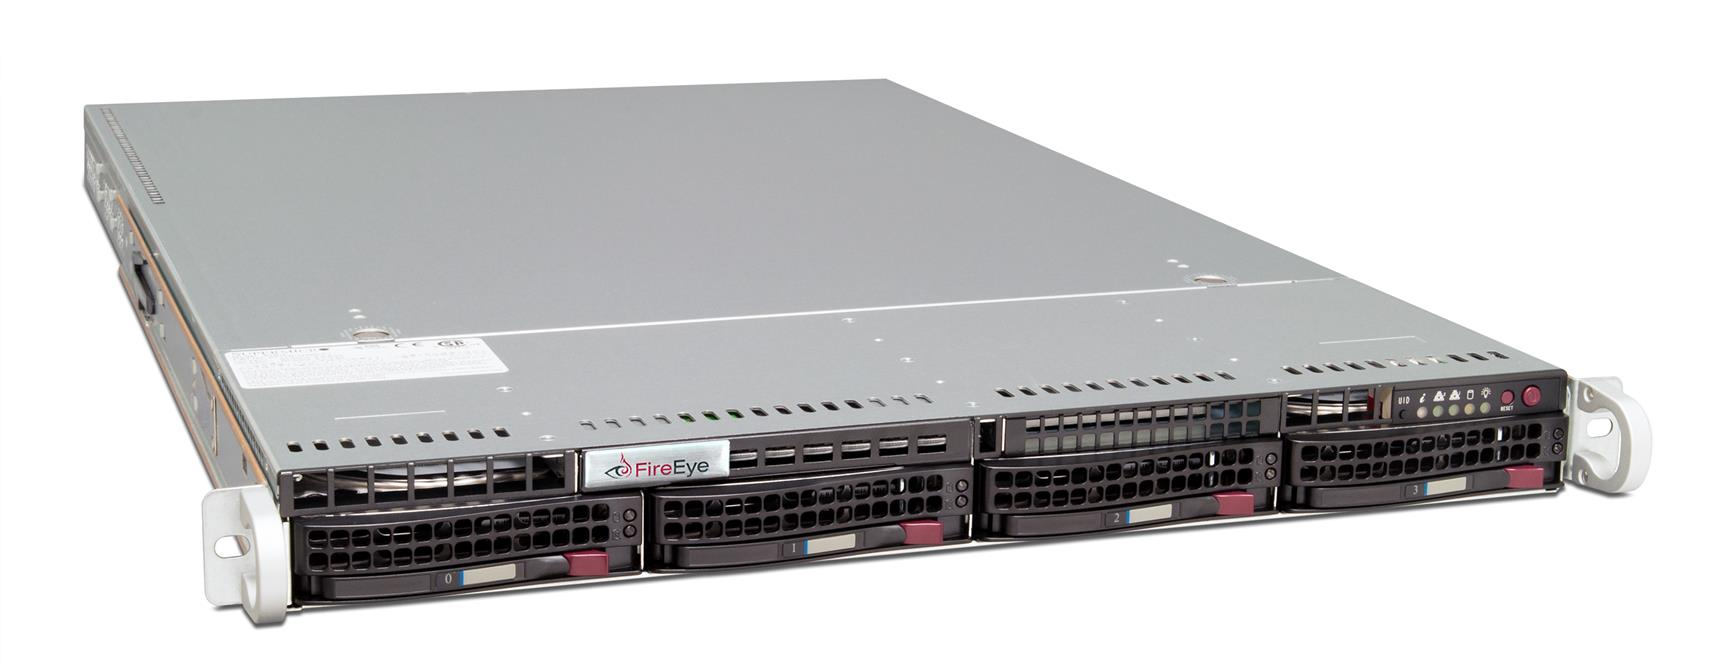
The FireEye PX 1020EXT10 is a powerful forensics tool that continuously captures packets at a high rate of speed without loss. It enables packet search and retrieval in minutes using an intelligent real-time indexing method.
The Front View

1) Disk Drive Carrier | 3) Power Button |
2) Reset Button |
Reset Button: Use the reset button to restart the appliance.
Power Button: Use the power button to turn the appliance on or off. Turning off the power with this button removes the main power but keeps the standby power supplied to the appliance. Therefore, unplug the appliance before servicing.
Disk Drive Carrier: Each carrier house a hot-swappable disk drive.
The Rear View

1) Power Port | 7) Video Port |
2) PS/2 Mouse Port | 8) Eth0 (RJ45) Management 1 Port |
3) PS/2 Keyboard Port | 9) Eth1 (RJ45) Management 2 Port |
4) IPMI/Serial over Ethernet Port | 10) 1PPS Connector |
5) USB Ports | 11) Capture Ports |
6) Serial Console Port |
|
Power Port
Power: Connect your power source to this port to provide power to the appliance. The appliance comes with one redundant power supply unit for use if the primary unit fails.
I/O Ports
Mouse: Connect a mouse to this port to manage the appliance locally.
Keyboard: Connect a keyboard to this port to manage the appliance locally.
Video: Connect a monitor to this port to view the appliance's command-line interface.
USB: The port is USB 2.0 compliant.
Serial Console: To connect a Cyclades-type serial cable, use a DB-9 to RJ45 adapter (for example, ADB0036).
1PPS: Connect a 1 PPS (pulse-per-second) timing signal to this port if your application requires an external timing signal for the PX capture ports.
Management Ports
ether (RJ45): Connect your LAN to the Eth0 port to manage the appliance. The RJ45 connector is a 10/100/1000BASE-T port.
IPMI: Connect for access to out-of-band management functions, including power control, console redirection, and appliance health status. The connector is a 100BASE-T port. IPMI can be configured using the configure system > network command through CaptureOS.
Restrict IPMI access to trusted internal networks. Traffic from IPMI should be restricted to a management VLAN segment with strong network controls.
Capture Ports
SFP+ (10 Gigabit Ethernet ports) modules with LC fiber connectors
SFP (1G Gigabit Ethernet ports) and SFP+ (10 Gigabit Ethernet ports) modules with LC fiber connectors. SFP and SFP+ modules can be used in any combination.
Uncertified transceiver modules are not supported. For a list of supported transceiver modules, please contact your sales engineer.
Installation
This chapter provides information about the site requirements of your installation location.
Site Requirements
This section contains guidelines for the appropriate location of your rack unit and appliance and precautions.
Installation Site Guidelines
Follow these guidelines when you select an installation site:
Leave enough clearance in front of the rack for its door to open completely without obstruction.
Avoid environments that produce heat, electrical noise, and electromagnetic fields.
Only install the appliance in a Restricted Access Location such as a service closet or dedicated equipment room.
Make sure the location is properly ventilated.
Make sure there is sufficient space for air flow.
Rack Precautions
FireEye recommends that you mount the appliance in a standard 19-inch rack. The vertical hole spacing on the rack rails must meet standard ANSI/EIA-310-C requirements, which call for a one-inch (2.54-cm) spacing.
Consider the following before installing your appliance in the rack:
Ensure the leveling jacks on the bottom of the rack are fully extended to the floor with the full weight of the rack resting on them.
In a single-rack installation, stabilizers should be attached to the rack.
In a multiple-rack installation, the racks should be coupled together to increase their stability.
Always make sure the rack is stable before extending a component from the rack.
Only extend one component from the rack at a time--extending two or more simultaneously may cause the rack to become unstable.
Ensure your rack meets the safety requirements of UL 60950-1.
Server Precautions
FireEye recommends reviewing the electrical and general safety precautions that came with each component you intend to install in the rack.
Review the following before installing the appliance in the rack:
Determine the placement of each component in the rack.
Ensure there is a minimum clearance of six inches behind the chassis to allow for easy cable management.
Install the heaviest component at the bottom of the rack first, then move up.
Allow hot-swappable power supply units and disk drives to cool before handling them.
Use a regulating uninterruptible power supply to protect your components from voltage spikes, power surges, and failure during a power outage.
Keep all of the rack's doors and panels closed when you are not servicing the components.
Rack-Mounting Precautions
Consider the following safety precautions when you install the appliance in the rack:
Make sure the appliance is grounded at all times to prevent damage from electrostatic discharge.
Use an electrostatic wrist guard when handling the appliance.
At least two technicians should be involved to install the appliance safely.
FireEye recommends only individuals with rack-mounting experience should install the appliance.
Install the appliance in an environment compatible with the manufacturer's maximum rated ambient temperature (Tmra) for each component in your rack.
Ventilation Requirements
Ventilation and optimal location are essential to the proper operation of the PX Series appliance. Give the unit at least six inches of space around ventilation openings so that adequate ventilation is possible.
The PX Series appliance draws air through the front and expels it out the back. Note the direction of the air intake and exhaust of the other components in the rack to ensure safe ventilation of all components involved.
Cabling Requirements
You must provide any additional cables required to connect your system to the network and other devices. Do not exceed the maximum run length of the additional cables you provide.
Power Requirements
The PX 1020EXT10 uses a 650 W power supply unit with an input rating of 100-240 VAC (±10%), 10-4 A at 50-60 Hz.
Ensure your power source has sufficient electrical overload protection. In North America, connect the rack to a power source with over-current protection that complies with UL 489. In Europe, the over-current protection must comply with IEC standards. FireEye recommends that you use an uninterruptible power supply as your AC source. The power socket should be within 1.5 m (5 ft) of the rear of the appliance.
The power cable needs its own appropriately rated power socket: 110 VAC, 20 A or 240 VAC, 10 A.
US power cables are supplied. Appropriate power cables are available for locations outside the US.
Rack Installation
This section explains how to install your appliance in a standard 19-inch wide rack with the equipment provided. Because various rack units are available, the assembly procedure may differ slightly from the following instructions. Refer to the installation instructions that came with your rack.
Installing the Inner Rails on the Appliance
The inner rails come pre-installed on your PX Model.
Installing the Outer Rails on the Rack
Attach a short bracket to the front side of the right outer rail and a long bracket to the rear side of the right outer rail.
Adjust the length of the right outer rail to the size of the rack.
Attach the right outer rail to the right side of the rack using the screws provided.
Repeats steps 1-3 with the left outer rail.
Mounting the Appliance on the Rack
Align the rear of the inner rails installed on the appliance with the front channels of the outer rails installed on the rack.
Slide the appliance about halfway into the rack.
Press the rail-release notches down on both rails and slide the appliance fully into the rack.
(Optional) Further secure the appliance to the rack by inserting screws through the ears of the appliance and fastening them to the rack.
Attaching Cables to your Appliance
Connect the PX 1020EXT10 to one or more network devices using the appropriate cables specific to the deployment of your choice.
Connect the power cables to the power ports on the back of the appliance.
Connect the appropriate cables for console or terminal access. See "Accessing the Appliance" on page 1 for more information.
Turning On the Appliance
Power on the appliance by pressing the power button next to the handle. The initial system startup will take a little longer than a typical startup because the IPMI controller must fully power up.
Appendix 1: System Specifications
The table below provides the technical specifications of the PX 1020EXT10.
Component | PX 1020EXT10 Specifications |
|---|---|
Form Factor | 1U Rack-Mount |
Weight | 43 lbs (19.45kg) |
Dimensions (W x D x H) | 17.2 x 25.6 x 1.7 inches (43.7 x 65 x 4.3 cm) |
Enclosure | 1 RU, Fits 19-inch Rack |
Management Interfaces | (4) 10/100/1000BASE-T Ports |
Capture Port Configuration | (2) 10 Gbps, SFP+ |
Max Record Speed | 10 Gbps |
Total Onboard Storage | No onboard storage. Fiber HBA to external SAN/NAS storage |
Drive Bays | 4 |
Power Supply | Redundant (1 + 1) |
Regulatory (Power Supply) | USA—UL listed |
Operating Temperature | 10° to 35° C |
Storage Temperature | -40° to 70° C |
Operating Humidity | 8% to 90% non-condensing |
Storage Humidity | 5% to 95% non-condensing |
Compliance Model | FEI-006 |