The primary integration scope is enabling Single Sign-On from the Trellix NDR console to the portal. The integration uses IDP-initiated SAML for authentication.
Generate authentication keys using the CLI
Create the necessary metadata XML file from the Trellix NDR console.
Log in to the Trellix NDR console CLI using a terminal window.
$ ssh npadmin@<Your NDR Console IP address>Enable privileged mode.
npadmin@hostname> enableEnter configuration mode.
npadmin@hostname# configure systemThe prompt changes to indicate active configuration mode.
Open the Configure Deepsurface menu to generate the metadata XML.
npadmin@hostname(config)# attack-path-discoveryOn the Configure Deepsurface page, do the following:
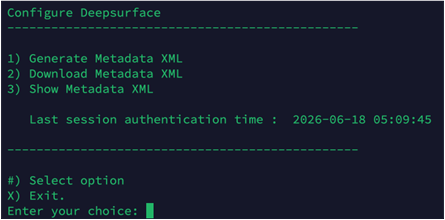
Type
1to generate the metadata XML file.Type
2to download the generated metadata XML file.The file is saved to
/home/npscp/transfer.Type
Xto exit the configuration menu.
Open a secure file transfer client on your local computer.
Connect to the Trellix NDR console using npscp account credentials.
Navigate to the
/home/npscp/transfer directory.Download the generated metadata XML file to your local machine.
Share the metadata XML file with Trellix Support
Email the generated metadata XML file and your customer ID to Trellix Support.
Trellix Support uses the file to provision your dedicated cloud tenant.
Trellix Support confirms the tenant creation and completes the authentication setup.
Once configured, the Trellix APD service processes signed SAML responses against the designated Assertion Consumer Service (ACS) URL.
Note
The ACS URL format is
https://{customer-id}.{region}.trellix-apd.com/v1/sso/saml2/acs. The region is currently fixed to "us".