You can acquire triage collections from hosts using the Endpoint Security (HX) Web UI. Multiple triage collections can be requested simultaneously from a host. In addition, you can select multiple hosts and request triage collections from them.
Note
Malware alerts in Windows environments do not trigger an automatic triage, as other alerts can (depending on the automatic triage acquisition settings).
Select Hosts in the Endpoint Security (HX) Web UI.
Select one or more hosts.
In the Actions menu, select Acquire: Triage.
Click Go.
The Acquire triage from nnn host dialog box appears.
Enter the necessary information. See Acquire triage for nnn Host dialog box.
Click Acquire.
You can also acquire triages from thehost alert details and host details sections of the Hosts page.
Select Hosts in the Endpoint Security (HX) Web UI.
Request host details by clicking on the Expand icon (
 ) associated with a host.
In the Acquire menu, select Triage.
The Acquire triage from nnn host dialog box appears.
Enter the necessary information. See Acquire triage for nnn Host dialog box.
Click Acquire.
You can monitor the status of an acquisition request in the Status column of the Acquisitions page. The status changes from Requested, to Acquiring, and then to Acquired when the acquisition is ready.
For more information about acquired triage data, read Downloading forensic data, Reviewing forensic data in Redline, and Reviewing triage collections in the Triage Viewer.
Acquire Triage for nnn Host dialog box
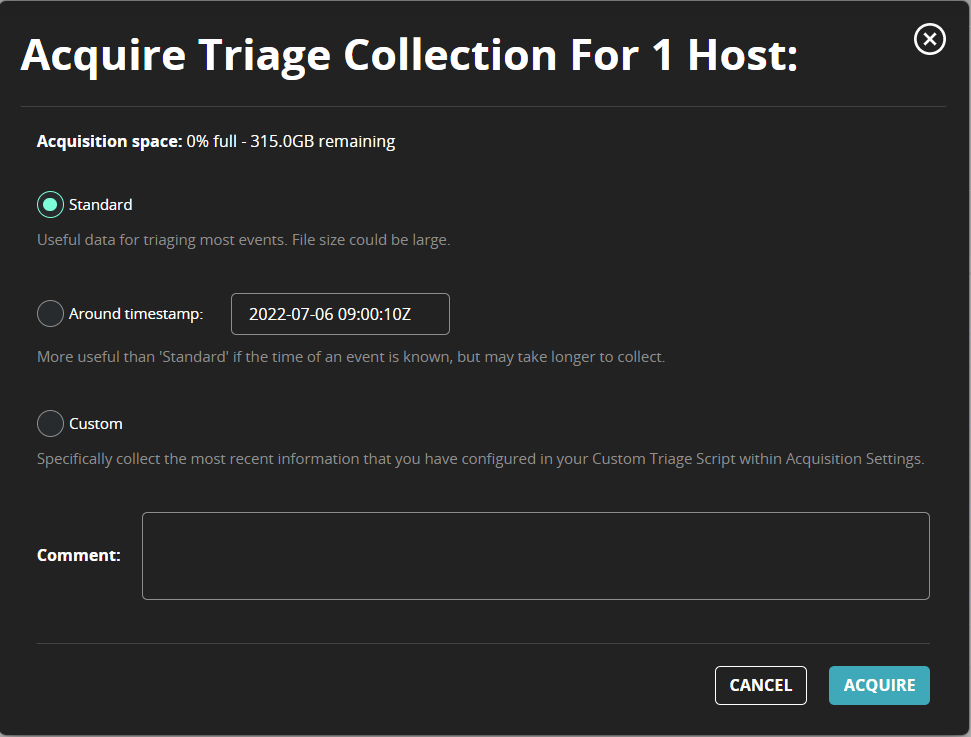
Use the Acquire triage for nnn host dialog box to select a standard or timestamp triage.
If you select Standard, the Endpoint Security (HX) appliance requests information from the host for all data around an event.
If you select Around timestamp, enter the date and time in the following format: yyyy-mm-dd hh:mm:ssZ. Times are expressed in UTC (Coordinated Universal Time), and use the special UTC designator Z.

If you select Custom, the Endpoint Security (HX) appliance requests the data collection according to the preconfigured custom triage script. You can use the Data Acquisitions Scripts menu option in the Endpoint Security (HX) Web UI to modify the preconfigured custom triage script. See Custom triage.
The Endpoint Security (HX) appliance requests information from the host for a set time period surrounding the timestamp. For information about setting the time period around the timestamp, read Configuring triage timestamp settings.
Custom triage
The Endpoint Security (HX) appliance provides a custom triage script that allows you to configure which audit modules are included in a triage. This feature allows you customize the contents of the triage by excluding modules you do not need.
One triage script is already installed. To customize the script, select the preinstalled script in the Data Acquisitions Scripts menu.
Note
You can edit the settings within the script, but you cannot delete the script.
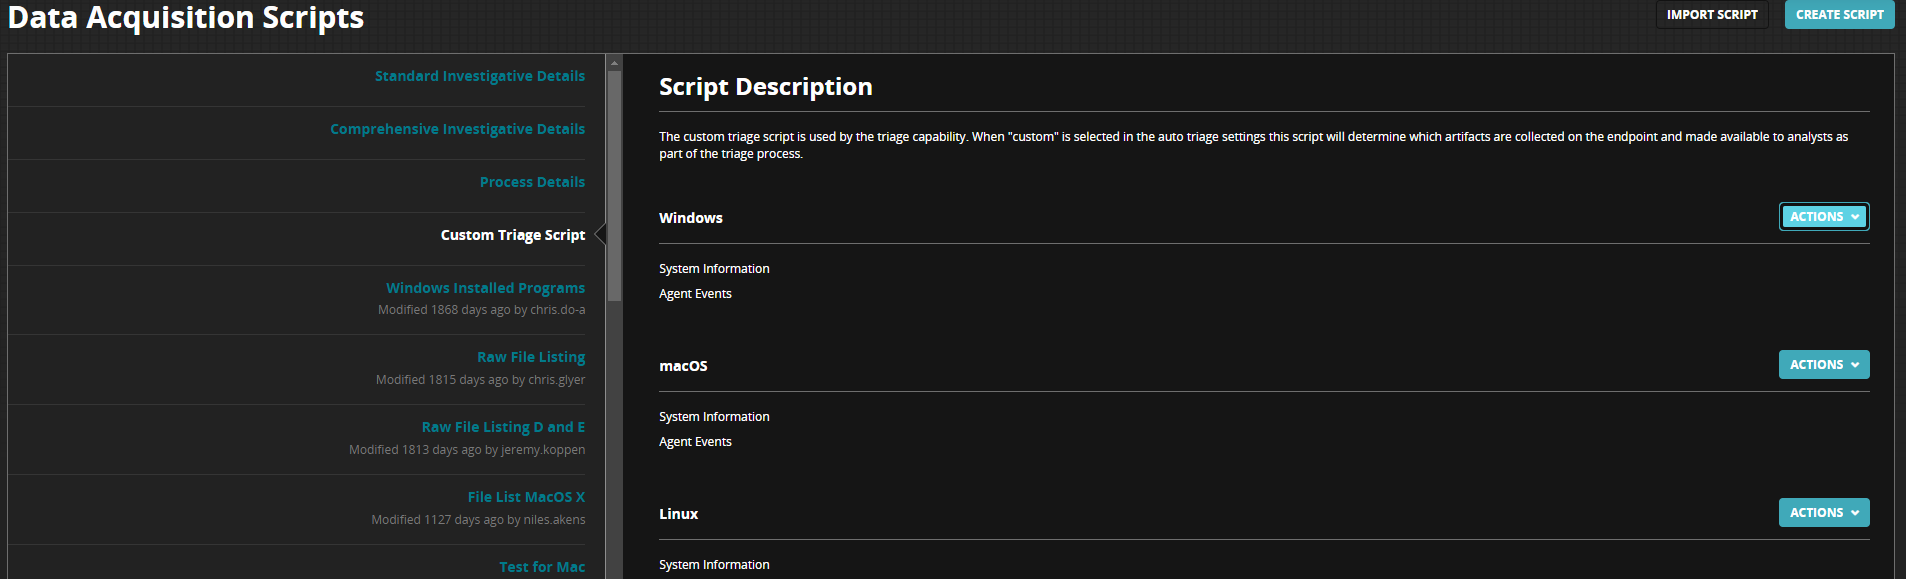
Select Admin in the Endpoint Security (HX) Web UI.
Select Data Acquisitions Scripts.
Select Custom Triage Script.
In the Script Description menu, select Actions for the correct operating system.
Select Edit in the Actions menu to edit the preinstalled script.
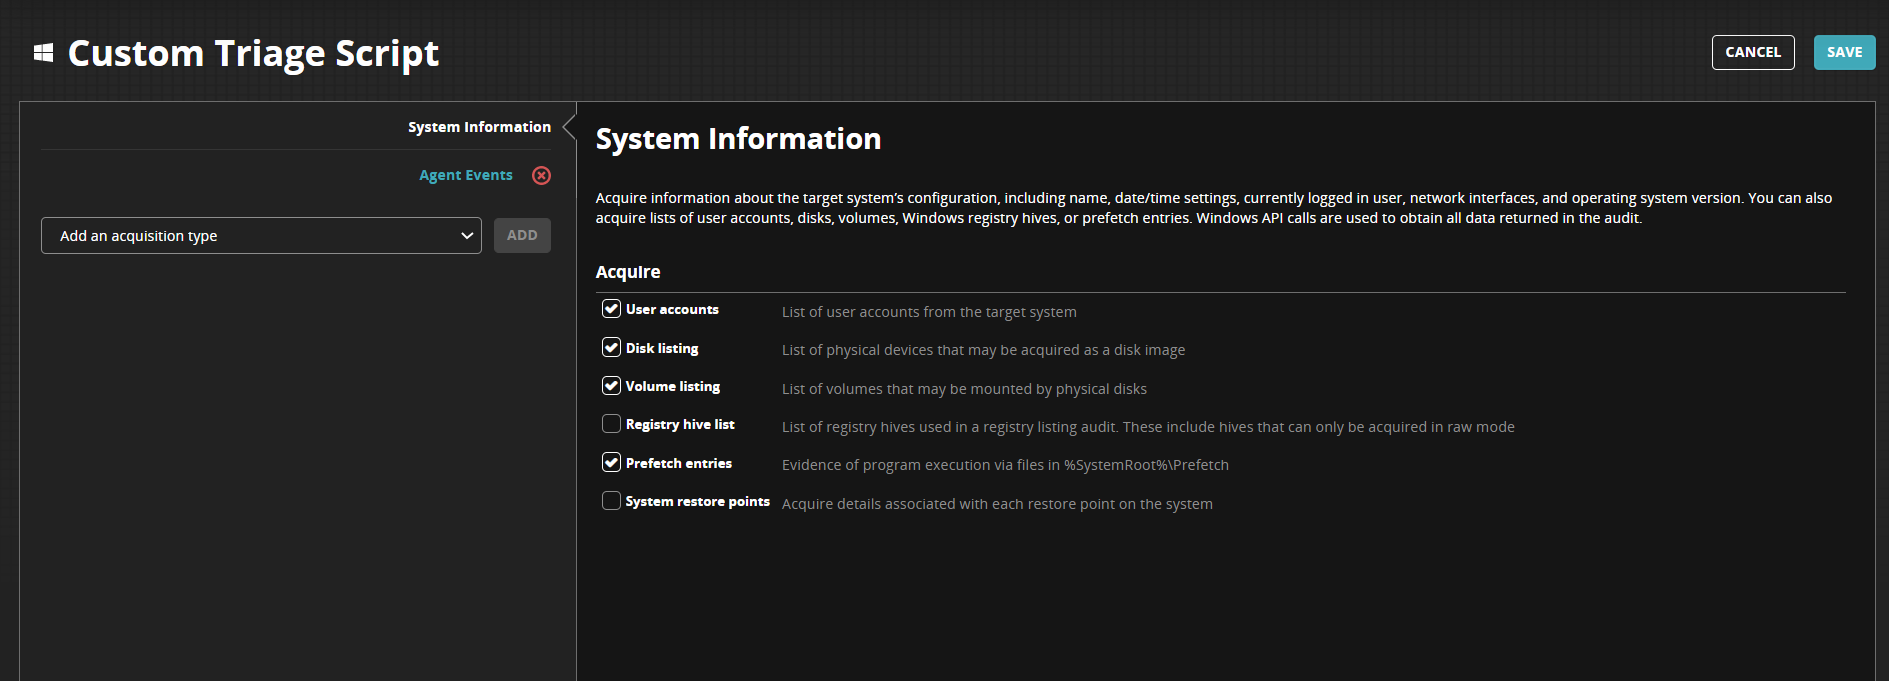
In the System Information menu, you can select the acquisition and specify which audit modules the custom triage script should acquire.
Click Save.
Select Admin in the Endpoint Security (HX) Web UI.
Select Data Acquisition Script.
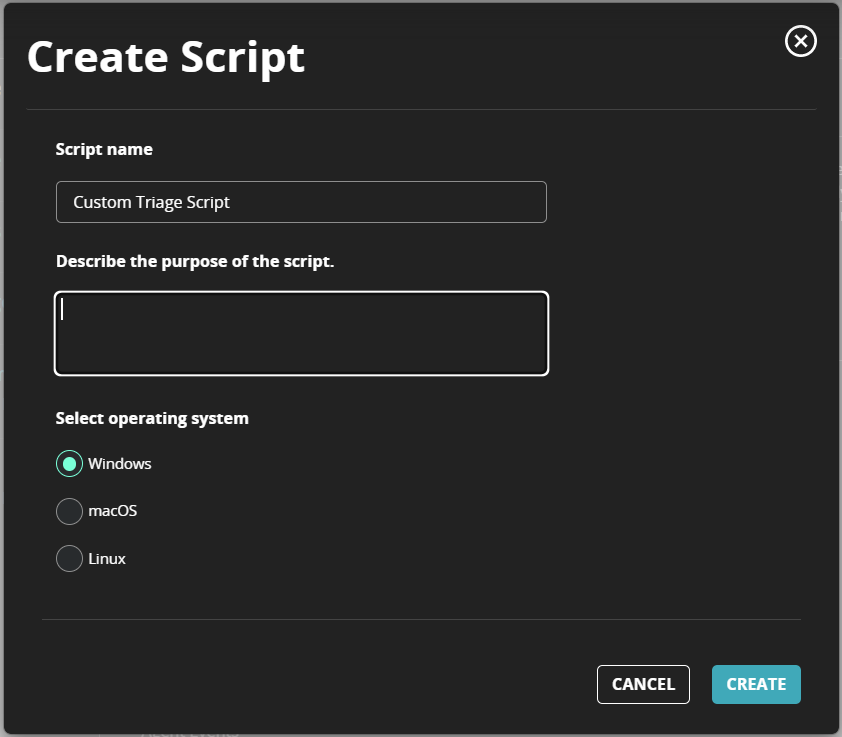
Select Create Script.
Give the script a name and description.
Select the operating system.
In the System Information menu, select the audit modules to acquire in the Custom Triage Script.
Click Create.