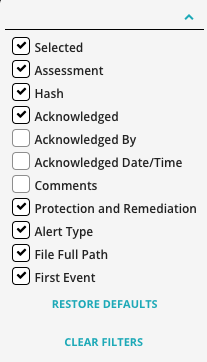
You can use the Column Selector on the Alerts page to customize the alerts table view.
To customize the alerts table:
Click Alerts from the Dashboard menu to access the Alerts page.
Click the Column Selector () icon.
To display a specific column in the table, select the checkbox next to the column name. When you select a column, the alerts table will automatically refresh and display the new column.
Endpoint Detection and Response with Forensics (EDRF) > Detect and handle potential threats with EDRF > Configure EDRF to detect potential threats > Managing alerts, quarantined files, and false positives > Viewing and managing alerts > Managing the alerts table
Endpoint Detection and Response with Forensics (EDRF) > Detect and handle potential threats with EDRF > Configure EDRF to detect potential threats > Managing alerts, quarantined files, and false positives > Viewing and managing alerts > Managing the alerts table
 ) icon.