(This topic is applicable to DLP-CSA-B and DLP-CSA-A.) By connecting the Trellix DLP Capture Storage Array to the Trellix DLP 8800 appliance, you can use the DLP Capture feature.
Install the storage array in a rack.
Caution
Don't connect the power sources as both the appliance and Trellix DLP Capture Storage Array are set to on by default when the power sources are connected. Also, don't turn on the Trellix DLP Capture Storage Array until the appliance is set up. Apply the power only when the hardware installation is complete.
Locate the provided mini-SAS cable.
Connect one end of the mini-SAS cable to the RAID controller port at the back panel of the appliance and the other end to the Trellix DLP Capture Storage Array port.
Trellix DLP Capture Storage Array (DLP-CSA-B) connected to Trellix DLP 8800 appliance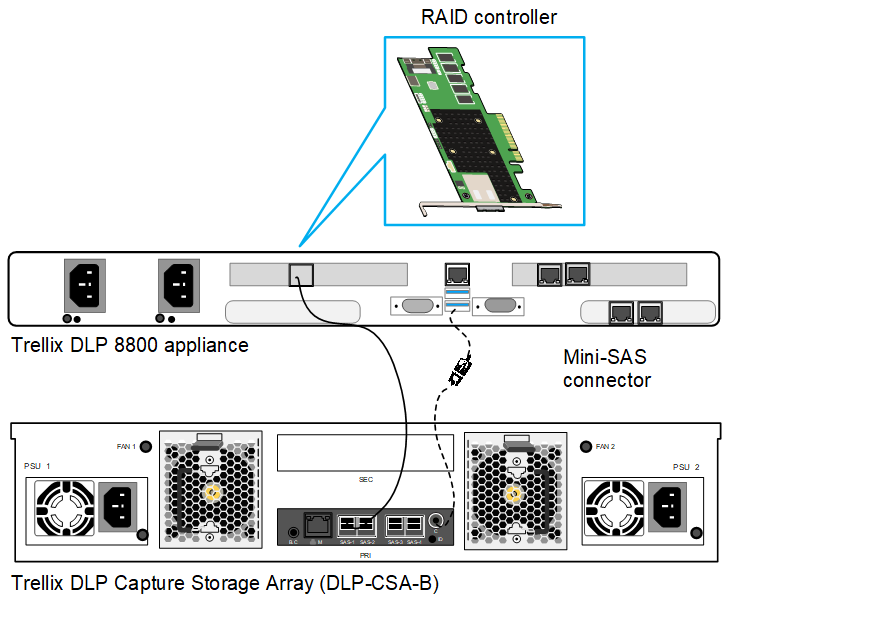 Trellix DLP Capture Storage Array (DLP-CSA-A) connected to Trellix DLP 8800 appliance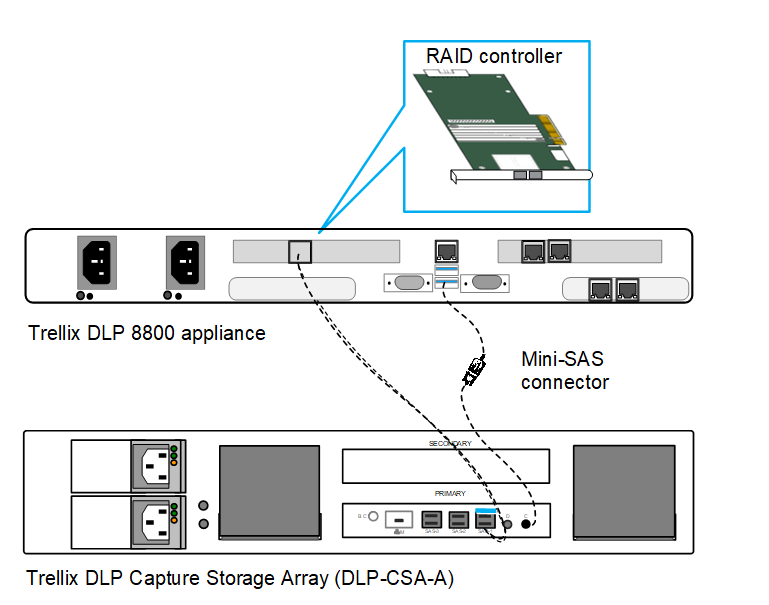
Connect the console serial port to the Trellix DLP 8800 appliance USB port using the assembled 3.5 mm jack cable — DB9 connecter — USB adapter and plug in the USB connecter to connect to the appliance.
Connect the power supply cables of the appliance and Trellix DLP Capture Storage Array to its respective power supply source.
Both the appliance and the storage array have dual hot-swap power supplies and automatically turn on when connected to the power supply.
The Trellix DLP Capture Storage Array is not recognized until the appliance software is reinstalled. Reinstall the appliance software when you connect a capture storage disk to an existing appliance.
Log on to the appliance as administrator.
From the appliance console menu, select Reboot to restart the system.
When you reboot the appliance, you get to see a GRUB menu.
Select Trellix DLP Network Monitor Internal Installation Image (Password required).
Follow the on-screen instructions to reimage the appliance.