To set up the SNMP servers, perform the following subtasks:
Add the SNMP servers
Configure the SNMP servers
On the Web UI, select the Settings tab.
Select Notifications on the side bar.
Click the SNMP tab to display the SNMP Trap Sink Listing area.
Click Add SNMP Trap Sink.
Enter the name of the SNMP server to receive the notifications in the Trap sink name box and click Add New SNMP Trap Sink.
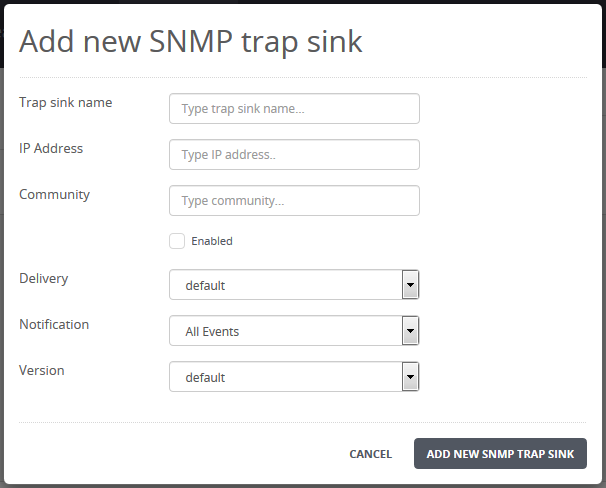
Select the Enabled checkboxes to choose which servers will receive SNMP notifications. Select the topmost checkbox to ensure that all listed servers receive SNMP notifications.
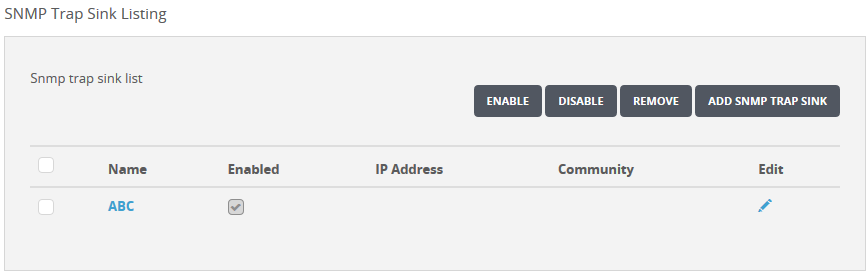
Enter the IP address of the SNMP server in the IP Address box.
To apply the SNMP server listing changes, click Update.
On the Web UI, select the Settings tab.
Select Notifications on the side bar.
Click the SNMP tab to display the SNMP Trap Sink Listing area.
Enter the SNMP community string in the Community box.
Select the SNMP version (1 or 2c) to use for the notification in the Version drop-down list box. Select Default to use the version specified in the Version field in the SNMP Settings area.
Select the delivery frequency in the Delivery drop-down list box:
Default—Use the delivery frequency specified in the Default delivery box in the SNMP Settings area.
Per Event—Send a notification each time a malware object occurs.
Select Malware Object or All Events in the Notification drop-down list box to send SNMP notifications when malware objects are detected.
To apply the SNMP server listing changes, click Update.