Last Updated: December 10, 2024
Introduction
Trellix Security for Microsoft SharePoint (TSMS) protects the data stored on your Microsoft SharePoint server from various threats that could adversely affect the computers, network, or employees.
It scans all files that you upload or download from the SharePoint server. It uses advanced heuristics against viruses, unwanted content, potentially unwanted programs, and banned file types. You can configure the actions to take on the detected and the suspicious items.
Product features
These are the main features of Trellix Security for Microsoft SharePoint.
Protection from viruses — Scans all content for viruses and protects your SharePoint server by intercepting, cleaning, and deleting the viruses that the scanner detects. It uses advanced heuristic methods and identifies unknown viruses or suspected virus-like items and blocks them.
Capability to detect packers — Detects packers that compress and encrypt the original code of an executable file. The scanner also detects potentially unwanted programs (PUPs), that are software programs written by legitimate companies to change the security state or privacy state of a computer.
Integration with ePolicy Orchestrator™ - On‑prem — Integrates with the Trellix ePO - On‑prem server 5.9.x and 5.10.x to provide a centralized method for administering and updating the software across your SharePoint servers. This reduces the time required to administer and update various systems.
Trellix® Global Threat Intelligence — Safeguards your SharePoint server by providing real-time security from the ever-evolving threats, even before a signature or DAT update is available.
When a suspicious file is detected on a managed system with Trellix GTI, it connects to Trellix servers in real time and checks against the database. If the suspicious file is found to be malicious, the managed node is notified and protected. The query and response happens in milliseconds.
See the Trellix Knowledge Base article KB70130 for more information.
Support for incremental on-demand scans — Saves time by scanning only the newly added documents in the SharePoint server without rescanning the entire server.
Support for resumable scans — Scans the documents and folders from the last scanned folder. Trellix Security for Microsoft SharePoint saves the state of the scan and when the same task is started later, the scan resumes from the last scanned folder.
Data Loss Prevention and Compliance — Scans the textual data in documents to ensure that it meets the standards of compliance for confidentiality.
Predefined compliance dictionaries include:
Addition of 60 new DLP and Compliance dictionaries.
Support for industry-specific compliance dictionaries — HIPAA, PCI, SourceCode (such as Java, C++)
Improvements to existing phrase-based detections.
Reduced false positives, due to enhanced capabilities in detecting noncompliant content, based on the Threshold score and with the maximum term count (occurrence).
Define DLP rules in all supported locales. You can also view and edit the dictionaries of other supported locales. The supported locales are English, French, German, Japanese, and Spanish.
Customize policies for content security and Data Loss Prevention (DLP).
Exclusions for on-access scan — Exclude sites and users within the sites from the on-access scan. Administrators can select the website or the users for the website to skip scanning when user uploads the document in the specific website.
Logging for on-demand scan — Gives detailed information on failures for on-demand scan. A log file is generated with detailed summary about the on-demand scan.
Continuity Scan — You can scan the folders and directory up to past 365 days. Scan for the past days can be scheduled using different configurations such as number of days, weeks, or months.
Support for virtual environment — This release is supported in virtual environments such as VMware Workstation 12 and later and VMware ESXi 6.7 and later.
Support for upgrade — Upgrade from McAfee Security for Microsoft SharePoint 3.5 to McAfee Security for Microsoft SharePoint 3.5.1 to McAfee Security for Microsoft SharePoint 3.5.2 to Trellix Security for Microsoft SharePoint 3.5.3 (both standalone and through Trellix ePO - On-prem).
Web-based user interface — Provides a user-friendly web-based user interface.
Restore quarantined items — Restore items quarantined by the on-demand scan, if they are not infected.
Reports — View the reports on various scans from the main dashboard in graphical form.
How it protects the SharePoint server
Trellix Security for Microsoft SharePoint integrates with your SharePoint server and scans all the documents on the SharePoint server. When the user uploads the documents, SharePoint passes the documents to Trellix Security for Microsoft SharePoint.
The anti-virus scanning engine compares the documents with all the known virus signatures stored in the DATs.
The DLP and Compliance engine scans the documents for banned content as specified in the content management policies.
Scanning takes place each time you create, save, or modify data on the SharePoint server. You can also schedule scans to run immediately, at a particular time, or at regular intervals.
Real-time detection
The software checks the documents and files in real time against the repository of up to date DAT files, malware and malicious content. If it finds the files to be malicious, it notifies and protects the managed node. It leverages the Trellix GTI technology to prevent damage and data theft even before a signature or a DAT update is available.
Scheduled detection
You can schedule scans that start manually or at regular intervals. The software checks all the files uploaded against the latest set of virus signatures and content management policies.
Scanning the documents and folders on the SharePoint server
The anti-virus and the content scanning engines scan the documents and provide the result to Trellix Security for Microsoft SharePoint before the content is written on to the Microsoft SharePoint server.
The anti-virus engine compares the documents with all the known signatures stored in the currently installed virus definition files (DATs).
The content scanning engine scans the documents for banned content as specified in the content management policies running within the software. If there are no viruses, banned/unwanted content in the documents, it passes the information back to SharePoint server. In case of a detection, the software takes actions as defined within its configuration settings.
What and when to scan?
The threat from viruses can come from many directions such as infected macros, shared program files, files shared across a network, floppy disks, files downloaded from the internet, and so on. Individual Trellix Security for Microsoft SharePoint anti-virus software products target specific areas of vulnerability.
Trellix Security for Microsoft SharePoint provides a range of options that you can further configure according to the demands of your system. These demands will vary depending on when and how the component parts of your system operate and how they interact with each other and with the outside world.
You can configure or enable various actions that allow you to determine how your Microsoft SharePoint server should deal with different items and what actions it should take on detected or suspicious items.
Dashboard
Dashboard presents information in a way that is easy to interpret. It provides critical information on how well your server is being protected from viruses and unwanted content. It also provides information about the detection statistics; additional components installed in the product; version information of components such as engine and DAT files; product license information and recently scanned items.
Statistical information of the detected items
Provides detailed information on the total items scanned by Trellix Security for Microsoft SharePoint, how many items triggered the detection and are quarantined based on the detection category. The dashboard also provides this statistical information in the form of a graph, for easy interpretation, and monitor the detection rates.
The Statistics are categorized into:
On-Access Settings
Detections
Scanning
Graph
On-Access Settings - Specifies if you want to scan the documents when they are uploaded or downloaded. This setting is linked to the SharePoint Anti virus central administration settings. We recommend that you always enable the On-Access Settings.
Note
Clicking Reset will clear the statistical information of all counters in the Detections section and reset the value to zero. Resetting the statistics will not delete any quarantined items from the Detected Items. These counters are dependent on the database path, so if you change the database path under Settings & Diagnostics → Detected Items → Local Database, the counters will reset to zero.
To modify the dashboard settings such as the refresh rate; maximum items to appear in the Recently Scanned Items; graph scale units; graph and chart settings such as the 3D pie-chart, bar graph, exploded pie-chart, transparency, go to Settings & Diagnostics → User Interface Preferences.
Detections
Displays all statistical information on how many items scanned by Trellix Security for Microsoft SharePoint are clean and how many items triggered a detection. Based on the detection category, the respective counter is incremented.
The reported numbers indicate the number of items that trigger any of the detection methods.
Note
If your Trellix Security for Microsoft SharePoint server is managed by ePO and if you restart the service or click the Reset button, these statistics will vary in ePO reports due to the historical data stored in ePO. For more information on ePOreports, see Integrating Trellix Security for Microsoft SharePoint with ePolicy Orchestrator chapter.
Icons used — Detections section
Icon | Description |
|---|---|
| Provides additional information on the detection category when you place the mouse pointer on the icon. |
| Indicates that the statistics of the respective detection category is shown in the graph. |
| Indicates that the statistics of the respective detection category is not shown in the graph. |


The following table provides you more information on each detection category.
Detection Definitions
Category | Additional information | Description |
|---|---|---|
Clean |
| Legitimate items that do not pose a threat to the user and does not trigger any of the scanners. |
Viruses | A computer program file capable of attaching to disks or other files and replicating itself repeatedly, typically without user knowledge or permission. Some viruses attach to files, so when the infected file executes, the virus also executes. Other viruses sit in a computer’s memory and infect files as the computer opens, modifies, or creates files. Some viruses display symptoms, others damage files and computer systems, but neither is essential in the definition of a virus; a non-damaging virus is still a virus. | |
Viruses detected | The number of the viruses that are detected in an item. | |
Viruses cleaned | The number of the viruses that are cleaned from an item. | |
Potentially Unwanted Programs | Potentially Unwanted Programs (PUP) are software programs written by legitimate companies that could alter the security or privacy policies of a computer on which they have been inadvertently installed. These programs could be downloaded along with a legitimate application that you might require. | |
PUP detected | The number of the PUP's that are detected in an item. | |
PUP blocked | The number of the PUP's that are blocked from an item. | |
Banned File types/Messages | Certain types of file attachments are prone to viruses. | |
Banned file types | The number of the banned file types that are detected in an item. | |
Banned messages | The number of the banned messages that are detected in an item. | |
DLP and Compliance |
| The software provides industry-leading content analysis to provide the tightest control of sensitive content in any form to aid compliance with many state, national, and international regulations. Prevent data leakage with the most extensive Data Loss Prevention (DLP) in the industry that does pattern matching to detect data; policy-based message handling that prevents outbound data loss. |
DLP and Compliance | The number of the DLP and Compliance detections in an item. | |
Unwanted Content | Unwanted Content is any content that the user would not like to be present on the server. The rules can be defined by certain words or phrases which would trigger a corresponding policy and block the document. | |
Packers | A packed executable that decompresses and/or decrypts itself in memory while it is running, so that the file on disk is never similar to the memory image of the file. Packers are specially designed to bypass security software and prevent reverse engineering. | |
Encrypted/Corrupted content | Documents that are categorized as having encrypted or corrupted content. | |
Encrypted content | Some documents can be encrypted, which means that the content of those documents cannot be scanned. | |
Signed content | Whenever information is sent electronically, it can be accidentally or willfully altered. If the document contains a virus, bad content, or is too large, the software might clean or remove some part of the message. The document is still valid, and can be read, but the original digital signature is broken. You cannot rely on the contents of this document because the content might also have been altered in other ways. Signed content policies specify how documents with digital signatures are handled. | |
Corrupted content | The content of some files can become corrupt, which means that the content of the file cannot be scanned. | |
Denial of service | A means of attack against a computer, server or network. The attack is either an intentional or an accidental by-product of instruction code that is either launched from a separate network or Internet-connected system, or directly from the host. The attack is designed to disable or shut down the target, and disrupts the system's ability to respond to legitimate connection requests. A denial-of-service attack overwhelms its target with false connection requests, so that the target ignores legitimate requests. | |
Protected content | The content of some files is protected, which means that the content of these files cannot be scanned. | |
Password protected files | The content of some files is protected by password. Password-protected files cannot be scanned. | |
Incomplete MIME messages | Multipurpose Internet Mail Extensions (MIME) is a communications standard that enables the transfer of non-ASCII formats over protocols, like SMTP, that only support 7-bit ASCII characters. MIME defines different ways of encoding the non-ASCII formats so that they can be represented using characters in the 7-bit ASCII character set. | |
Others | Any other detections that are not classified in the specified detection categories. |
Scanning
Displays information on the total items scanned by Trellix Security for Microsoft SharePoint and the average time taken to scan all items, since the last reset.
Option definitions
Option | Definition |
|---|---|
Average Scan Time (milliseconds) | Specifies the average time taken by Trellix Security for Microsoft SharePoint to scan all the items that reach the SharePoint server. To understand how this is calculated, let's consider this example where:
then, Average scan time = T/N (in milliseconds) |
Total Scanned | Total number of items scanned, since the last time the statistic counters were reset. |
Graph
Displays the statistics of the detections scanned by the software in a graphical format.
Icons used — Graph section
Icon | Description |
|---|---|
| View statistical information of the selected counters as a bar graph. This is useful when you want the statistics of total number of items scanned and the items that triggered a detection during the selected duration. |
| View statistical information of the selected counters as a pie chart. This is useful when you want the percentage of items scanned and the items that triggered a detection during the selected duration. |


Option definitions
Option | Definition |
|---|---|
Graph |
|
Magnify Graph | Specify the magnification percentage of the Detections graph. This helps you view an enlarged graph, which is useful when the default graph in the dashboard is cluttered with more information and becomes unreadable in the current browser window. |
Time range | Specify for which time period you would like to review the statistics. The available options are:
|
Product versions and updates
Provides important information on whether the software is up-to-date with latest DATs and extra drivers. It also provides information about the product license type.
Versions and updates
The Versions & Updates section in the Dashboard has these tabs:
Update Information
Product Information
Licenses
Update information
Provides information about anti-virus DAT and anti-virus engine version, their status and when they were last updated. Trellix Security for Microsoft SharePoint uses the Trellix update website or Trellix ePO - On‑prem to automatically update its anti‑virus DAT, engine and rules on a daily‑basis.
Option definitions — Update Information
Option | Definition |
|---|---|
Last Successful Update | Displays the time when the software was updated successfully. |
Update Now | Click to immediately update the product with latest engine and drivers. This is helpful in a situation when there is a virus out‑break and you cannot wait until the scheduled software update occurs.
|
Update Frequency | Displays the schedule frequency of how often the software is updated. |
Edit Schedule | Click to schedule or edit the product's software update. For more information on how to update the software, see Schedule a software update section. |
Show Status | Click to view the current status of the update task such as the start time, running time, current status and how much the task has progressed.
|
Anti‑Virus Engine | DAT Version | Extra Drivers | Displays the latest anti‑virus engine, DAT version and extra drivers information and when it was updated. |
Viruses that Extra Drivers Detect | Displays items that were detected by ExtraDAT to remove particular viruses. EXTRA.DAT files contain information that is used by the software to detect a new virus. When a major virus is discovered and extra detection is required, an |
 — Indicates that your anti‑virus DAT is up to date.
 — Indicates that the your anti‑virus DAT is out of date.
Schedule a software update
Keep your software up-to-date with the latest anti-virus DAT and anti-virus engine by scheduling an automatic update.
For details about product features, usage, and best practices, click ? or Help.
Click Dashboard → Statistics & Information.
From the Versions & Updates section, click Update Information tab.
From Update Frequency, click Edit Schedule.
The Edit Schedule page appears.From Choose a time tab, specify when you want to schedule an update. The available options are:
Not scheduled — Select this if you have not decided on when to perform the update.
Once — Specify the date and time to schedule an update once.
Hours — Select this to schedule the update based on hours.
Days — Select this to schedule the update based on how often the update must occur in a week.
Weeks — Select this to schedule the update based on how often the update must occur in a month.
Months — Select this to schedule the update based on how often the update must occur in a year.
Note
By default a daily update is scheduled. Trellix recommends that you don't change the default value.
If the server is managed using Trellix ePO - On‑prem, the settings defined in Trellix ePO - On‑prem will take precedence over the local settings.
5. Click Save, then Apply.
You have now successfully scheduled a software update.
Product information
Provides information on the product name, version, service packs and hotfixes.
Option definitions
Option | Definition |
|---|---|
Product Name | Specifies Trellix Security for Microsoft SharePoint as the product name. |
Product Version | Specifies the product version in the format: <Major Version>.<Minor Version>.<build number>.<package number>. For example - 3.5 |
Service Pack | Lists the Service Pack or Patch details (if any). |
Hotfixes | Lists the hotfixes and patch installed. |
Licenses
Provides information on the type of license, expiration date, and days to expire of the installed product and components.
Option definitions
Option | Definition |
|---|---|
Description | Specifies the installed product name. |
Type | Specifies if the installed product is a Licensed or Evaluation version. |
Expires | Appears when you have an Evaluation version of the software installed. Specifies the date and time on when the license expires. |
Days to Expiry | Appears when you have an Evaluation version of the software installed. Specifies the number of days remaining for product expiry.
|
View recently scanned items
Provides a quick view of the recently scanned items from the dashboard.
Note
The items in the Recently Scanned Items section will be cleared, if you restart Trellix Portalshield service from the Services console.
Option definitions
Option | Definition |
|---|---|
Date/Time | Date and time when the most recent scan was executed. |
Filename | Name of the scanned file. |
Detection Name | The name of the detection. For example, the name of a virus. |
Folder | Location of the scanned folder in SharePoint. |
Username | The name of the user who handled the file. |
Direction | The direction of the task. For example, Upload or download. |
Action Taken | What action was taken on scanned items. |
Scanned By | The policy setting used to scan items. For example On-Demand or On-Access. |
Task Name | The name of the task that triggered a detection. For example On-Access scan. |
Policy Name | The name of the policy that triggered a detection. |
Note
The values Username, Direction, Action Taken and Scanned By are available only if you are using SharePoint version 2010 and later.
 — Indicates that the item is clean.
 — Indicates that the item triggered one of the scanners or filters.
Note
Hover the cursor on
On-Demand scan
An on-demand scanner is a security scanner that you start manually at convenient times or regular intervals. It allows you to set various configurations and scan specific folders.
The software enables you to create scheduled on-demand scans. You can create multiple schedules, each running automatically at predetermined intervals or times.
When should you perform an on-demand scan
An on-demand scan is highly recommended if there is an outage in your organization due to malicious activity. This will make sure that the Microsoft SharePoint databases are clean and are not infected during the outage.
Trellix recommends that you perform an on-demand scan task during non-business hours. When an on-demand scan task is scheduled during a non-business hour and it continues during peak work hours, you must reconsider the databases being scanned and create with alternate schedules by altering the data being scanned.
You can schedule an on-demand scan during the weekends to make sure that the SharePoint databases are clean and older files and folders are also scanned by the latest anti-virus signatures.
Why should you perform an on-demand scan
Perform an on demand scan to:
Check a specific file or files that are uploaded or published.
Check that the folders within your SharePoint server are virus-free, possibly following a DAT update, so that new viruses can be detected.
Check that your computer is completely clean after you have detected and cleaned a virus.
Check the files and folders which were on your SharePoint server, before you installed Trellix Security for Microsoft SharePoint.
Check the files and folders which you have not included in on-access scan.
Why should you perform an incremental and resumable scan
After installing Trellix Security for Microsoft SharePoint, run a complete on-demand scan for the first time. Later you can use the incremental scan to scan only the new or modified items on your SharePoint server rather than re-scanning the entire server.
In case of a larger database or server, use resumable scanning. In resumable on-demand scan, if a scan in progress is stopped, Trellix Security for Microsoft SharePoint saves the current state of the scan task. When the same task is started later, scan will resume from the last scanned folder. In the event of a signature (DAT) update while a scan is paused, the software provides an option to restart the scan with the updated DATs.
Best practices for configuring an on-demand policy
Always enable the anti-virus scanner, DLP and Compliance, and file filtering scanners for on-demand policy. For true file type detection in file filtering, enable DLP and Compliance.
Select the High Protection option to maximize the protection level of the anti-virus scanner.
Select the Quarantine option always so that you can retrieve the files from the quarantine database later if required.
If SharePoint database size is in GB, make sure to distribute your SharePoint repository (web applications, site collections, sites, folders) in multiple on demand tasks for better performance.
If Trellix Security for Microsoft SharePoint is installed in a SharePoint Farm setup, distribute your repository on multiple nodes.
For example, in a Farm if you have 4 web applications in your SharePoint server and 4 nodes where the product is installed, you can distribute on demand task in these 4 product nodes.
Trellix Security for Microsoft SharePoint installation 1 can have on-demand task created for web application 1.
Trellix Security for Microsoft SharePoint installation 2 can have on-demand task created for web application 2.
Trellix Security for Microsoft SharePoint installation 3 can have on-demand task created for web application 3.
Trellix Security for Microsoft SharePoint installation 4 can have on-demand task created for web application 4.
Note
In a SharePoint Farm, every Trellix Security for Microsoft SharePoint On Demand displays the whole SharePoint repository.
Make sure to exclude the SharePoint specific file extension while configuring on demand task. By default these file extensions are not included in the on-demand scan.
Viewing On-demand scan tasks
View a list of on-demand scan tasks configured for Trellix Security for Microsoft SharePoint.
View the on-demand scan tasks from Dashboard → On-Demand Scans.
Option definitions
Option | Definition |
|---|---|
Name | Indicates the name of the on-demand scan task. |
Status | Indicates the status of the on-demand scan task. The status can be
|
Last Run | Indicates the date and time, when the on-demand scan was last executed. |
Next Run | Indicates the date and time, when the next on-demand scan is scheduled to run. |
Action | Lists these options for all available on-demand scan tasks:
The Stop option appears only if any on-demand scan task is running. |
Modify | Edit the settings of an on-demand scan task. |
Delete | Deletes the selected on-demand scan task. |
Run Now | Starts the selected on-demand scan task immediately. |
Show Status | Displays the status of an on-demand scan task. The Task Status page appears with these tabs:
|
Stop | Stops an on-demand scan task that is running. |
Refresh | Refresh the page with latest on-demand scan information. |
New Scan | Schedule a new on-demand scan task. For more information about how to create a scan, see Create On-Demand Scan task section. |
Note
If an on-demand scan fails, a log file is generated and stored in
<McAfee PortalShield Installed Directory>\bin\ODReports. The file is named as<Task Name>_<Start Time of Task>.txt.This file has information about the sites which are not scanned and the reasons for this failure. Once the on demand scan is complete, this file has summary of the on demand scan. You can also download this file by clicking on Scan Summary on the Detections tab.
Create an on-demand scan task
Schedule an on-demand scan task to find or remove viruses and banned content in files and folders.
Click Dashboard → On-Demand Scans. The On-Demand Scans page appears.
Click New Scan. The Schedule an on-demand scan page appears.
From Choose a time tab, specify when you want the scan to run. The available options are:
Not scheduled — Select this if you have not decided on when to perform the on-demand scan or disable the schedule for an existing on-demand scan.
Once — Specify the date and time to schedule an on-demand scan once.
Hours — Select this to schedule the task based on hours, if you have to execute the on-demand scan task for more than once in a day. For example, let's consider that the current time is 14:00 hours and you have to create a on-demand scan task that satisfies these conditions:
The on-demand scan must start exactly at 14:30 hours
The on-demand scan must occur twice a day
To achieve this, specify 12 for hours and 30 for minutes.
Days — Select this to schedule the task based on how often the scan must occur in a week. For example, if you want the on-demand scan to occur once in three days, specify 3 under day(s) and select the time when the task should start.
Weeks — Select this to schedule the task based on how often the scan must occur in a month. For example, if you want the on-demand scan to occur bi-weekly, specify 2 under week(s), select the days and time when the task should start.
Months — Select this to schedule the task based on how often the scan must occur in a year. For example, if you want the on-demand scan to occur on every second Saturday of each month, select second from On the drop-down list, Saturday from of drop-down list, then select all the months and time when the task should start.
Click Next. The Choose what to scan page appears. The available options are:
Scan all folders — Select this to scan all the folders in the SharePoint server.
Scan selected folders — Select this to scan only specific folders in the SharePoint server.
Note
Enable Stop task after it has run for <n> hour(s) <n> minute(s), to stop an on-demand scan task if it exceeds the specified hours.
Scan all except selected folders — Select this to scan all except specific folders that are added to the Folders to scan list.
Deselect Scan only document library to scan all lists in your selected folders.
5. Click Next. The Schedule an on-demand scan page appears.
6. On the Excluded file extension(s): tab, Specify any file extensions you want to exclude from your on-demand scan in Specify the file extension(s) separated by ';'.
Note
By default the extensions thmx; aspx; asmx; css; jpg; gif; htm; html; png; master; dwp; webpart; bmp are excluded from the scan. If you want to scan these files, then remove the needed extensions from this list.
7. On the Advanced: tab, specify the scan type.
Select Continuity Scan to scan items that are uploaded or modified in the past one year using these filters. You can specify the duration in days, weeks, and months.
Scan for past days — Select this filter to specify the duration of the scan in days.
Scan for past weeks — Select this filter to specify the duration of the scan in weeks.
1 week is considered as the past 7 days. For example, if you schedule the scan for past 1 week on 2022-01-31 at 12:30:00, the on-demand scan will scan from the 2022-01-24 at 00:00:00.
Scan for past months — Select this filter to specify the duration of the scan in months.
A month is considered as the same date of the previous month.
Note
In case the scan is schedule on the last day of a month the scan will start from the last day of the previous month.
For example, if you schedule the scan for past 1 month on 2022-04 -30 at 12:30:00, the on-demand scan will scan from the date - 2022-03-31 at 00:00:00.
Select Off when you do not want to configure Resumable Scanning or Incremental Scanning.
Select Resumable Scanning to enable the option to resume on-demand scan from where it stopped, then select Restart scan if DAT changed to restart a scan if there is a change in DAT file. For example, if the on-demand scan stops after a specific time, resuming the scan will start the on-demand scan task from the folder where it scanned the last item.
Select Incremental Scanning to scan only the newly added files instead of the whole repository. Select any of the two
options for incremental scanning
Option | Definition |
|---|---|
Scan from last scanned date | Select this to scan the newly added files from the last scanned date.
|
Scan from date specified | Select this to specify a date and time from which the scan has to start. Default value is today's date and time. |
Click Next. The Enter a name: page appears.
Specify a meaningful on-demand scan task name, based on the policy you selected in the previous page. For example, if you are creating an on-demand scan task to do a full scan over the weekend, specify the task name as Weekend Full Scan.
Click Finish, then Apply.
By performing these steps, you have successfully created an on-demand scan task.
Graphical reports
Generate graphical reports to understand the threat-level during a specific time-frame. Provides an explicit view of detected items in the form of a Bar Graph or Pie Chart.
These reports help you and your organization to identify servers facing threats.
Use graphical reports when you want to only view the current threat-level and doesn't have to take any action on the detected items. Graphical Reports allow you to query based on certain filters, where you can view Top 10 reports for various detections.
Graphical Reports are classified into:
Simple — Search options to view Top 10 reports of the day or week.
Advanced — More search options to query on different filters, time-range, and chart options.
View graphical reports using simple search filters
Generate graphical report on detections using simple search filters for the day or week.
For details about product features, usage, and best practices, click ? or Help.
Click Dashboard → Graphical Reports. The Graphical Reports page appears.
Click the Simple tab.
From Time Span drop-down list, select Today or This week to view detections quarantined for the day or for the week.
From Filter drop-down list, select the report that you want to view. The options available are:
Top 10 Viruses — Lists the top 10 virus names ranked by their detection count.
Top 10 Unwanted Programs— Lists the top 10 unwanted programs detected that might be threats.
Top 10 Unwanted Content Detections — Lists the top 10 content detections that might be password protected files or signed content.
Top 10 DLP and Compliance Detections — Lists the top 10 data loss prevention and compliance regulatory violations ranked by the number of detections that triggered the rule.
Top 10 Infected Files — Lists the top 10 filenames ranked by their detection count.
Top 10 Detections — Lists the top 10 detections ranked by their detection count. This graph contains all the categories such as viruses, Unwanted programs, DLP and compliance, and infected files listed above.
Top 10 Virus Senders — Lists the top 10 user names ranked by their virus detection count.
Top 10 Unwanted Content Senders — Lists the top 10 user names ranked by their content detection.
Top 10 Virus Upload Locations — Lists the top 10 folder locations ranked by their virus detection count.
Top 10 Virus Unwanted Content Locations— Lists the top 10 folder locations ranked by their content detection.
Top 10 Virus DLP and Compliance Senders— Lists the top 10 user names ranked by the number of detections that triggered the DLP and Compliance rules.
Top 10 Virus DLP and Compliance Locations— Lists the top 10 folder locations ranked by the number of detections that triggered the DLP and Compliance rules.
Top 10 File Filter Detections— Lists the top 10 file filter detections triggered by the system.
Top 10 File Filter Senders— Lists the top 10 user names ranked by their file filter detections.
Top 10 File Filter Locations— Lists the top 10 folder locations ranked by their file filter detections.
5. Click Search. The search results are shown in the View Results pane.
In Magnify Graph, select the zoom percentage to let you enlarge or reduce the view of the graph in the View Results pane.
View graphical reports using advanced search filters
Generate graphical report on detections using advanced search filters.
For details about product features, usage, and best practices, click ? or Help.
Click Dashboard → Graphical Reports. The Graphical Reports page appears.
Click Advanced tab.
Select at least one filter or up to three filters from the list:
Primary Filters
Filter | Description |
|---|---|
Reason | Search using the detection trigger or using the reason why the item was quarantined. When you select the Reason filter, secondary filters are enabled for further refining your search. For example, you might want to search for all items that was quarantined due to the File Filter rule being triggered as the reason. |
Ticket Number | To search using the ticket number. A ticket number is a 16-digit alpha-numeric entry that is auto-generated by the software for every detection. |
Detection Name | To search by the name of a detected item. |
Scanned by | To search by the type of the scan. For example On-Demand or On-Access. |
Note:
The below listed features are available if you are using Microsoft SharePoint 2010 and later.
lter | Description |
|---|---|
Username | To search by the name of the user whose file triggered the detection. |
Direction | To search by the access mode of the file. For example Upload or Download. |
Folder | To search by the SharePoint folder of the files that were quarantined. |
RMS Protection | Search for files that are listed as RMS Protected. Rights Management Service is Microsoft service by which the users can prevent unauthorized access to documents. If you have RMS server set up to protect your documents, then they will be shown under RMS Protection. |
Note
A secondary filter is available for the Reason, Scanned by and Direction filters. If you do not want specify the secondary filter, ensure that the field is blank so that all detections are queried upon.
Secondary filters for Reason
Filter | Description |
|---|---|
Anti-Virus | Search for items that were detected when a potential virus was found in files. |
DLP and Compliance | Search for items that were detected when a non compliant file was uploaded. |
File Filter | Search for items that were detected when a banned file extension was uploaded. |
Encrypted or Corrupted | Search for items that were detected when encrypted or corrupt content was found in files. |
Potentially Unwanted Program | Search for items that were detected when potentially unwanted program was found in files. |
Packer | Search for items that were detected when packers (small programs, compressed executables files, encrypted code) was found in files. |
Encrypted | Search for items that were detected when encrypted content was found in files. |
Signed | Search for items that were detected when signed content was found in files. |
Corrupted | Search for items that were detected when corrupt content was found in files. |
Denial of Service | Search for items that were detected when denial-of-service threat occurred. |
Protected Content | Search for items that were detected when protected content was found and the content might not be accessed for scrutiny. |
Password Protected | Search for items that were detected when password protected content was found and the content might not be accessed for scrutiny. |
On Scan Failure | Search for items that could not be scanned. |
Secondary filters for Scanned by
Filter | Description |
|---|---|
On-Demand | Search for items that were detected by On-Demand scan. |
On-Access(WSS VS API) | Search for items that were detected by On-Access scan. |
Secondary filters for Direction
Filter | Description |
|---|---|
Upload | Search for items that triggered the detection when items are uploaded to the SharePoint server. |
Download | Search for items that triggered the detection when items are downloaded from the SharePoint server. |
Select All Dates or a Date Range from the drop-down lists.
If you select All Dates, the query returns search results from quarantine database from day it started quarantining any detected items. If you select Date Range, select the Date, Month, Year, Hour, and Minutes from the From and To fields to enable your query to search within a date range.
Select Bar Graph or Pie Chart as required.
If you select Pie Chart, select a filter from the drop-down list to further refine your search:
Query on
Filter
Description
Filename
Sort by a quarantined filename.
Detection Name
Sort by the name of a detected item.
Reason
Sort by the detection trigger or using the reason why the item was quarantined.
Rule Name
Sort by the name of the rule that triggered the detection.
Policy Name
Sort by the policy name that triggered the detection.
Scanned by
Sort by the name of the scan.
Username
Sort by the name of the user whose files triggered the detection.
Direction
Sort by the direction of the file.
Folder
Sort by the folder of the files that were quarantined
In Maximum Results, specify the number of search results you want to view. You can view a maximum of 99 search results and this field is available only if you select pie chart.
Click Search. The search results are shown in the View Results pane. In Magnify Graph, select the zoom percentage to let you enlarge or reduce the view of the graph in the View Results pane The search results are shown in the View Results pane.
You have now generated graphical reports of detections.
Detected items
View information about all items containing potential threats that are detected and quarantined by Trellix Security for Microsoft SharePoint. You can use various search filters to refine the search and find quarantined items that are of interest to you, view the results and take necessary action on the quarantined items.
Primary search filters
Search filters enable you to define the search criteria and provide more efficient and effective searches from the quarantine database.
These search filters appear in the View Results section of the detected item category.
Note
Use Columns to display in the View Results section, to select the search filters that you want to view.
Detected items — Primary search filters
Search filter | Definition |
|---|---|
Filename | Search by the name of the detected file in the quarantined item. To view the File Name used, go to Policy Manager → Shared Resource → DLP and Compliance Dictionaries → File Filtering Rules. |
Action taken | Search for an item based on the action that was taken on it. For example Prevent Upload/Download of the Item or Allow through. |
Username | Search for an item by the user whose actions triggered the detection. |
Folder | Search by the folder where quarantined items are stored. |
Direction | Search by the direction of the file. For example Upload or Download. |
RMS Protection | Search for files which are RMS Protected. Rights Management Service is Microsoft service which prevents unauthorized access to documents. If you have RMS server set up to protect your documents, then they will be shown under RMS Protection. |
Detection Name | Search for a detected item based on its name. |
Ticket Number | Search for an item based on the ticket number, which is a unique alphanumeric identifier assigned to a specific detection. It helps identify the associated detection. |
Scanned By | Search by the name of the scan. For example On-Demand or On-Access (WSS VS API). |
Policy Name | Search for an item by a policy name such as a Primary policy or secondary policy that detected the item. |
Reason | Search for an item based on the reason why it was detected. The reasons are
|
Additional search options
Provides information on additional search options to narrow-down the detected items search results.
Option definitions
Option | Definition |
|---|---|
All Dates | Select if you want to search for items on all dates.
|
Date Range | Search for an item within a defined date range according to your requirements. Here you can specify the date, month, year and time against the parameters From and To. You can also use the calendar icon to specify a date range.
|
Search | Click to view a list of quarantined items matching your search criteria that appear in the View Results section. |
Clear Filter | Click to return to default search settings. |
Search detected items
Use search filters to find specific quarantined items that are of interest to you and take corresponding action.
For details about product features, usage, and best practices, click ? or Help.
From the product's user interface, click Detected Items.
From the left-pane, click the desired detection category such as Viruses, Potentially Unwanted Programs, Banned File types/Messages, DLP and Compliance, Unwanted Content or All Items.
From the Search pane, select the desired search filters from the drop-down lists (if required). The available search options are:
Search options
Search feature | Description |
|---|---|
Primary search filter | Select if you want to refine your search criteria based on a specific filter such as Policy Name, Action Taken, Sender and so on.
|
Date Range | Select if you want to refine your search to all dates or to a specific time frame.
|
Click Search.
By performing this task, you have successfully searched for detected items matching your search criteria, that now appear in the View Results section.
Note
To specify a limit on how many quarantined items need to appear in the View Results, modify the Maximum query size (records) value from Settings & Diagnostics → Detected Items → Local Database.
Actions that you can take on quarantined items
You can take these actions on the quarantined items.
Types of action
Action | Definition |
|---|---|
Download | Downloads a quarantined item for research or analysis. Select one applicable record from the View Results pane and click Download.
|
Restore | Restores a quarantined item, select one applicable record from the View Results pane and click Restore.
|
Export to CSV File | Exports and saves information about all quarantined items returned by the search in a .csv format. If there are thousands of quarantined items in the database, instead of navigating through multiple pages, you can use this option to download these records to a file in CSV format and later generate custom reports in Microsoft Excel. From the View Results pane, click Export to CSV File to Open or Save the search results to the specific folder or location.
|
Columns to display | Select additional column headers to be listed in the View Results pane. This option has a list of all filters available in the Search pane, and other options. |
Select All | Select all quarantined items that appear on that page of the View Results section. For example, if you have 100 quarantined items and set the items to view per page as 10, then only 10 items that appear in the View Results section are selected. |
Select None | Deselect all quarantined items that appear on the View Results section. |
Delete | Delete the quarantined items that you selected in that page of the View Results section for the selected category.
|
Delete All | Delete all quarantined items from the database for the selected category. |
Views per page | Specify the maximum number of quarantined items that you want to view per page. The options are:
|

Each item in the View Results pane has an icon.
| An item that is quarantined and can be downloaded. |
| An item that is only logged and cannot be downloaded. |


Policy Manager
You can configure or manage different policies and corresponding actions in the product.
A policy is typically described as a principle or rule to guide decisions and achieve rational outcomes. Policies are adopted within an organization to help objective decision making.
In Trellix Security for Microsoft SharePoint, a policy specifies the settings that are used and the actions to take when a detection is triggered. You can create multiple policies and define specific settings and actions to the particular policies. For example, you can create multiple secondary policies for the On-Access menu option and have a different setting and action set for each policy.
Note
Use the Shared Resource menu option under Policy Manager, to modify or create rules for scanner, filter, and alert settings from one common location. Use Shared Resource to save time in creating and applying the policies.
Policy manager menu options
View the menu options available under Policy Manager.
From the product's user interface, click Policy Manager. These menu options appear on the navigation pane.
Option | Description |
|---|---|
On-Access | Contains policies for files and documents every time they are uploaded or downloaded, to determine if it contains a virus or other threats. |
On-Demand | Contains policies that are activated at set intervals or on demand, to find a virus or other threats. |
Shared Resource | One common location to edit settings for scanners, filters, alerts, DLP and Compliance dictionaries, and time slots. |
Policy categories to handle threats
View available policy categories and apply an existing default policy (known as a Primary policy) to your entire organization.
The software helps you mitigate electronic threats with special set of rules and settings called policies, that you can create to suit your organization needs.
When you install the software, for the first time on your server, a default Primary policy is available for these menu options:
On-Access
On-Demand
You can customize policies under on-access or on-demand to precisely handle specific threats that could affect your SharePoint server.
Policy manager views
View and sort secondary policies based on inheritance or priority.
The types of Policy Manager views are:
Inheritance View
Advanced View
Inheritance view
Displays the priority and status of the Primary policy and all secondary policies. The software acts on an item, based on the settings configured for the secondary policy with highest priority. When the rules of a secondary policy are not satisfied, the secondary policy with the next priority is considered. Settings configured in the Primary policy are applied, when rules in none of the secondary policies are satisfied.
When you select Inheritance View, the secondary policies appear based on the inheritance of the policy.
In this view, you can:
View the policy and its priority
View the inherited secondary policy and its parent policy
Enable or disable secondary policies
Delete secondary policies
Advanced view
Display all policies in ascending order, based on the priority and provides an option to change the priority of a secondary policy .
In this view, you can:
View the policies sorted on priority
Modify the priority of a policy
Note
Use these icons to modify the priority of a policy:
— Increase the priority of a secondary policy .
— Decrease the priority of a secondary policy .
Enable or disable secondary policies
Delete secondary policies
Edit the policy name, description, and parent policy by clicking Details
Primary policy and secondary policy
A policy setting inside a hierarchical structure is ordinarily passed from parent to children, and from children to grandchildren, and so forth. This concept is termed as inheritance. The default parent policy is referred as Primary policy and child policy is referred as Secondary policy .
Primary policy
Default parent policy available for all policy categories that defines how items are scanned for viruses, how files are filtered, and various other settings.
Note
You cannot delete the Primary policy, as it acts as a baseline to create secondary policies.
Secondary policy
A policy which inherits settings and actions from another policy is known as secondary policy .
Secondary policies are required in situations where you need exceptions to the Primary policy to suit any geographical areas, functions, domains, or departments within your organization.
Action taken on an item is based on the settings configured for the secondary policy with highest priority. When the rules of a secondary policy with highest priority are not satisfied, the software moves on to the secondary policy with the next priority. Settings configured in the Primary policy are applied only when rules in none of the secondary policies are satisfied.
If you select Inherit settings from parent policy in the scanner or filter settings page, an inherited policy (secondary policy ) uses the same setting as the parent policy. However, if there is a detection, you can take a different action. Any changes to the settings in the parent or Primary policy is reflected in these secondary policies.
Note
Restoring the software to default setting removes the existing secondary policies. Make sure to back up the policies and settings using Export from Settings & Diagnostics → Import and Export Configuration → Configuration tab, before restoring the product to factory settings.
Create secondary policies
Create other policies based on the Primary policy or a parent policy to suit specific needs of any part of your organization. Create secondary policies for any exceptional situations that are not covered by the Primary policy.
This is useful when you do not want to apply rules from the Primary policy for certain types of files in your organization. You can create exceptions and allow the software to perform specific scan.
For details about product features, usage, and best practices, click ? or Help.
From the product's user interface click Policy Manager, select a menu item for which you want to create a secondary policy.
Click Create Secondary policy.
The Create a secondary policy page appears.
Under Initial configuration → Identification → Secondary policy name, specify a name that identifies the policy and what it does.
Type a Description for the policy (optional).
Select the Parent policy for the secondary policy from where to inherit the settings.
Click Next.
Under Trigger Rules → Specify policy rules, click New Rule to create a new rule.
Specify a policy rule page appears.
From Specify a policy rule, you can select:
<select a rule template> — To specify a policy rule based on the file name. You can create new rules, based on these options:
The file name is file name
The file name is not file name
Copy rules from another policy — To copy the rules from another policy.
Specify the conditions when the policy should trigger for the user. You can select:
Any of the rules apply— Specify if any of the rules created is applied to the policy.
All rules apply— Specify if all the rules created are applied to the policy.
None of the rules apply — Specify if none of the rules created are applied to the policy.
Click Add.
Note
To delete a rule, select a rule and click on Delete.
Click Next.
From Scanner and Filters, you can select:
Inherit all settings from the parent policy — To inherit all properties of the parent policy.
Initialize selected settings with values copied from another policy — To select specific scanners and filters from the available policies. You can select and deselect any of the scanners and filters.
Click Finish.
You have now created a secondary policy.
Core scanners and filters
Determine the types of scanners and filters that can be applied when creating policies.
Core scanners
View and configure settings for these scanners from Policy Manager → On-Access.
Scanner | Definition |
|---|---|
Anti-Virus Scanner | Configure settings to detect threats such as viruses, trojans, worms, packers, spyware, adware, and more. |
DLP and Compliance Scanner | Create or configure DLP and Compliance Rules to meet your organization's confidential and compliance policies with the addition of 60 new DLP and Compliance Dictionaries. |
File Filtering | Create new file filtering rules to meet the organization needs. Configure these settings to detect files based on file name, file category, or file size. |
Filters
Specify actions to take when there is a detection, based on your organization needs.
Filter | Definition |
|---|---|
Corrupt Content | Configure settings to act on items that are detected as corrupt content. |
Protected Content | Configure settings to act on items that are detected as protected content. |
Encrypted Content | Configure settings to act on items that are detected as encrypted content. |
Signed Content | Configure settings to act on items that are detected as signed content. |
Password-Protected Files | Configure settings to act on items that contain password protected files. |
Scanner Control | Create or configure core scanner settings to act on items based on the nesting level, expanded file size, and scanning time. |
List all scanners and filters for a selected policy
View status of the available scanners and filters for the selected policy category.
For details about product features, usage, and best practices, click ? or Help.
From the product's user interface, click Policy Manager and policy category menu item.
The policy page for the selected menu item appears.
Click Primary policy or the required secondary policy.
The corresponding policy page appears.
In the policies page, you can use these tabs:
List All Scanners — To view which scanner or filter is enabled for the policy.
View Settings — To view settings of the scanner or filter and the actions specified.
Specify Rules — To specify policy rules that apply to specific type of items or files.
Note
You can specify policy rules only to secondary policies.
From the List All Scanners tab, you can use:
Policy configuration
Option | Definition |
|---|---|
Policy | To select the policy, you want to configure. |
Add Scanner/Filter | To configure the policy so that it applies only at specific times. For example, you can create new anti-virus setting with different rules, which is applicable only on weekends. |
Core Scanners | To configure the policy for each of these scanners:
|
Filters | To configure the policy for each of these filters:
|
Inherits | This specifies if the core scanners and filters are inherited from the primary policy.
|

Add a scanner or filter
Add a scanner or filter to create settings for exceptional scenarios in your organization.
Adding a scanner or filter is useful, when you want an additional scanner or filter:
With different options and rules
To enable them only during a specific time slot
For details about product features, usage, and best practices, click ? or Help.
From Policy Manager, select a policy category.
Click Primary policy or any secondary policy.
From the List All Scanners tab, click Add Scanner/Filter.
From Specify the category drop-down list, select the required scanner or filter.
From When to use this instance section, select an existing time slot or create a new one.
Select existing time slot— Specify a time slot which already exists.
Create a new time slot — Create a new time slot. Specify the options:
Option
Definition
Time slot name
Specify the name of the time slot such as weekends, weekdays.
Select day and time
Select the desired day of the week.
All day
Select to specify the entire day.
Selected hours
Select to specify the start and end time.
Click Save.
Click Apply.
Note
Edit the options and rules to suit your organization needs.
Create policy rules
Build new rules and specify conditions for a policy.
For details about product features, usage, and best practices, click ? or Help.
From Policy Manager, select a policy category.
Click Primary policy or a secondary policy.
Click the Specify Rules tab.
Click New Rule.
From Specify a policy rule, you can select:
<select a rule template> — To specify a policy rule based on the file name. You can create new rules, based on these options:
The file name is file name
The file name is not file name
Copy rules from another policy — To copy the rules from another policy.
Click Add.
To delete a rule, select a rule and click Delete.
Specify the conditions when the policy should trigger. You can select:
Any of the rules apply — Specify if any of the rules created is applied to the policy.
All rules apply — Specify if all the rules created are applied to the policy.
None of the rules apply — Specify if none of the rules created are applied to the policy.
Click Apply to save the rule.
Actions you can take on detections
For each scanner and filter settings in a policy, you can specify a primary and secondary action to take on a detection. You can specify what happens to an item, when it triggers a detection.
When a policy rule is triggered based on the scanner or filter settings, the software acts on the detection based on the primary and secondary action configured.
When configuring actions, at least one primary action must be selected. You can also select a number of secondary actions. For example, if the primary action is preventing upload/download of an item that triggers a detection, the secondary action might be logging the detection and quarantining it.
The available primary actions depend on the type of policy category and scanner or filter settings you configure.
Note
Click Reset, to restore the actions to default settings for the policy category and scanner.
Primary actions
Action | Definition |
|---|---|
Attempt to clean any detected virus or trojan | To clean an item from a virus or trojan detected by the Anti-Virus Scanner. |
Replace item with an alert | To replace an item that triggered the detection with an alert. |
Remove embedded item | To replace an attachment that triggered the detection in a document. |
Prevent Upload/Download of the Item | To prevent upload or download of an item that triggered a detection. |
Allow through | To allow the item to reach the next phase. |
Secondary actions
Action | Definition |
|---|---|
Log to Detected Items | To record the detection in a log. |
Quarantine | To store a copy of the item that triggered the detection in the quarantine database. To view all quarantined items, go to Detected Items → All Items or the specific detection category. |
Shared resource
One common location to edit settings for scanners, filters, alerts, DLP and Compliance dictionaries, and time slots. When setting up policies, you might want the same resource (scanner and filter settings) applied to more than one policy. In such scenarios, use Shared Resource.
From the product's user interface, click Policy Manager → Shared Resource. You can use these tabs:
Scanners & Alerts — To edit or create new scanner and filter settings.
DLP and Compliance Dictionaries — To edit or create new DLP and Compliance Rules and File Filtering Rules.
Time Slots — To edit or create new time slots such as weekdays or weekends.
Note
Any changes made to these settings are applied automatically to all policies using these configurations.
Configure scanner settings
Create or modify scanner settings to suit your organization's requirement.
For details about product features, usage, and best practices, click ? or Help.
From the product's user interface, click Policy Manager → Shared Resource.
The Shared Resources page appears.
Click Scanners & Alerts tab.
From the Category drop-down list under Scanners section, select the scanner you want to configure. The scanner type appears with the settings name, policies used by, and action to configure. You can use:
Option definitions
Option | Definition |
|---|---|
Category | To select the required scanner that you want to configure. |
Create New | To create new settings for a scanner based on your requirement. Required in a situation where you need exceptions for certain scanner settings and apply it in a policy. |
Edit | To edit settings for the selected scanner. |
Delete | To delete the scanner settings.
|

4. Once you configure the scanner settings, click Save, then Apply.
Configure alert settings
Create or modify alert settings for the selected scanner to suit your organization's requirement.
Note
Alert settings are applicable only for on-demand policies.
For details about product features, usage, and best practices, click ? or Help.
From the product's user interface, click Policy Manager → Shared Resource.
The Shared Resources page appears.
Click Scanners & Alerts tab.
From the Category drop-down list under Alerts section, select the alert you want to configure for a scanner. The scanner type appears with the settings name, policies used by, and action to configure. You can use:
Option definitions
Option | Definition |
|---|---|
Category | To select the required scanner that you want to configure. |
Create New | To create new settings for a scanner based on your requirement. Required in a situation where you need exceptions for certain scanner settings and apply it in a policy. |
View | To view the default alert settings for a scanner. |
Edit | To edit settings for the selected scanner. |
Delete | To delete the scanner settings.
|
4. Once you configure the scanner settings, click Save, then Apply.
You have now successfully configured the settings for an alert, based on your organization's requirement.
Create a new alert
Create a new alert message for actions taken by a scanner or filter.
For details about product features, usage, and best practices, click ? or Help.
From the product's user interface, click Policy Manager → Shared Resource.
The Shared Resources page appears.
Click Scanners & Alerts tab.
From the Category drop-down list under Alerts section, select the alert you want to configure for a scanner.
Click Create New.
The Alert Editor page appears.
Type a meaningful Alert name.
Select the required Style, Font and Size from the respective drop-down lists.
Note
These options are available only if you select HTML content (WYSIWYG) from the Show drop-down menu.
Select the values you want to include in your alert message from Tokens drop-down list.
DETECTIONS — The list of detections in the item.
ATTACHMENTNAME — The name of the item being scanned.
ACTIONNAME — The actions taken on the detected item.
AVDATVERSION — The DAT version used by the anti-virus engine
AVENGINEVERSION — The version of the anti-virus engine.
TICKETNUMBER — The 16-digit alpha-numeric entry which is auto-generated by the software for every detection.
Use any of these tools to customize your alert:

Toolbar options
Options | Description |
|---|---|
Bold | To make the selected text bold. |
Italic | To make the selected text italic. |
Underline | To underline the selected text. |
Align Left | To left align the selected paragraph. |
Center | To center the selected paragraph. |
Align Right | To right align the selected paragraph. |
Justify | To adjust the selected paragraph so that the lines within the paragraph fill a given width, with straight left and right edges. |
Ordered List | To make the selected text into a numbered list. |
Unordered List | To make the selected text into a bulleted list. |
Outdent | To move the selected text a set distance to the right. |
Indent | To move the selected text a set distance to the left. |
Text Color | To change the color of the selected text. |
Background Color | To change the background color of the selected text. |
Horizontal Rule | To insert a horizontal line. |
Insert Link | To insert a hyperlink where the cursor is currently positioned. In URL, type the URL. In Text, type the name of the hyperlink as you want it to appear in the alert message. If you want the link to open a new window, select Open link in new window, then click Insert Link. |
Insert Image | To insert an image where the cursor is currently positioned. In Image URL, type the location of the image. In Alternative text, type the text you want to use in place of the image when images are suppressed or the alert message is displayed in a text-only browser. If you want to give the image a title, type the title name in Use this text as the image title. Click Insert Image. |
Insert Table | To insert a table at the current cursor position. Type the values in Rows, Columns, Table width, Border thickness, Cell padding, and Cell spacing to configure the table, then click Insert Table. |
From the Show drop-down menu, specify how the alert message should be displayed within the user interface. You can select:
HTML content (WYSIWYG) — To hide the underlying HTML code and display only the content of the alert message.
HTML content (source) — To display the alert message with the HTML code as it appears before compilation.
Plain-text content — To display the content as plain text.
Click Save to return to the policy page.
Note
Click Reset to undo all changes you have made since you last saved the alert message.
Configure DLP and Compliance rules
Create or modify DLP and Compliance rules and dictionaries, to suit your organization's requirement.
For details about product features, usage, and best practices, click ? or Help.
From the product's user interface, click Policy Manager → Shared Resource.
The Shared Resources page appears.
Click DLP and Compliance Dictionaries tab.
From the Select a Language drop-down list under DLP and Compliance Rules section, select the language.
Tip
You can also view and edit all supported locale dictionaries. (The supported locales are French, German, Japanese, and Spanish.)
4. From the Category drop-down list under DLP and Compliance Rules section, select the category you want to view or configure. The rules group appears with the name, policies used by, and action to configure. You can use:
Option definitions
Option | Definition |
|---|---|
Category | To select the required scanner that you want to configure. This release has 60 more DLP and Compliance dictionaries ensuring that content is in accordance with your organization’s confidentiality and compliance policies. Predefined Compliance Dictionaries include:
These dictionaries are categorized as:
|
New Category | To create a new DLP and Compliance Rules dictionary.
|
Create New | To create new rules group for the selected category, based on your requirement. Required in a situation where you need specific rules to trigger a detection and apply it in a policy. |
Edit | To edit settings for the selected DLP and Compliance rule. |
Delete | To delete the DLP and Compliance rule.
|
Note
For example, select Credit Card Number or any dictionary that suits your needs, from the Category drop-down list and see the enhanced Rules Group option available.
To create a new rules group, click Create New for DLP and Compliance Rules for a selected category.
Type the Rule Name and Description for the rule.
Select Add this rule to this category's rules group to add the new rule to the rules group for the selected category.
Under Word or Phrase, specify the words or phrases to look for, in The rule will trigger when the following word or phrase is found. Then select one of the following options:
Regular Expression — If enabled, the rule is triggered for specified text that is a regular expression (regex). Regex is a precise and concise method for matching strings of text, such as words, characters, or patterns of characters.
For example, the sequence of characters "tree" appearing consecutively in any context, such as trees, street, or backstreet.
Note
Regex is disabled for some phrases.
Use Wildcard — If enabled, the rule is triggered for the specified word or phrase that contain wildcard characters. (Wildcard characters are often used in place of one or more characters when you do not know what the real character is or you do not want to type the entire name).
Starts with — If enabled, the rule is triggered for specified text that forms the beginning of the word or phrase.
Ends with — If enabled, the rule is triggered for specified text that forms the last part of the word or phrase.
Case Sensitive — If enabled, the rule is triggered if the case of the specified text matches the word or phrase.
Note
To detect a word or phrase with exact match, select both Starts with and Ends with option.
Select Specify additional contextual words or phrases, which is a secondary action when the primary word or phrase is detected. Specify any additional word or phrase that can accompany the primary word or phrase that triggers a detection.
Select from Trigger if ALL of the phrases are present, Trigger if ANY of the phrases are present or Trigger if NONE of the phrases are present from the drop-down menu.
Select within a block of to specify the number of Characters from a block to be scanned.
Click Add Contextual word to type additional words or phrases.
Specify the word or phrase in Specify words or phrases, select one of the conditions (same options as in Step 7), then click Add.
Under File Format, select Everything to enable all file categories and its subcategories. You can select multiple categories and file types within the selected categories to be matched. Selecting All in the subcategory selector overrides any other selections that might have already been made.
If you have not selected Everything, then click Clear selections to deselect any of the selected file type options.
Click Save to return to Shared Resources page.
Click Apply to save the settings.
You have now successfully configured the DLP and Compliance rules and dictionaries, to suit your organization's requirement.
Configure file filtering rules
You can use file filtering rules to monitor and restrict the movement of files. You can filter files according to their file name, category type, and size.
For details about product features, usage, and best practices, click ? or Help.
From the product's user interface, click Policy Manager → Shared Resource.
The Shared Resources page appears.
Click DLP and Compliance Dictionaries tab.
From File Filtering Rules, click Create New.
The File Filtering Rule page appears.
Type a unique Rule name. Give the rule a meaningful name, so that you can easily identify it and what it does. For example, FilesOver5MB or Block MPP files.
In the File Filtering Rule page, you can use:
Option definitions — Filename filtering
Option | Definition |
|---|---|
Enable file name filtering | To enable file filtering according to the file names. |
Take action when the file name matches | Specify the name of the files that triggers this rule. You can use wildcard characters (* or ?) to match multiple file names. For example, if you want to filter any Microsoft PowerPoint files, type *.ppt. |
Add | To add the file name specified under Take action when the file name matches, to the file name filtering list. |
Edit | To edit or change an existing file filtering rule. |
Delete | To remove the file name from the filtering list.
|
Option definitions — File category filtering
Option | Definition |
|---|---|
Enable file category filtering | To enable file filtering according to their file type. |
Take action when the file category is | Specify the type of files that affects this rule.
|
File categories | Select a file type category. An asterisk symbol (*) appears next to the file type, to indicate that the selected file type is filtered. |
Subcategories | Select the subcategory you want to filter. Some of the subcategories can have further secondary subcategories. |
 Note:
Note:4 | Introduction
Option | Definition |
|---|---|
To select all subcategories, click All. | |
Extend this rule to unrecognized file categories | To apply this rule to any other file categories and subcategories that are not mentioned in the categories and subcategories list. |
Option definitions — File size filtering
Option | Definition |
|---|---|
Enable file size filtering | To filter files according to their file size. |
Take action when the file size is | Specify a value in the adjacent text box and drop-down list, then select:
|
Click Save to return to the Shared Resources page.
Click Apply to create the file filtering rule.
You have now successfully created a file filtering rule.
Configure time slots
Set up different time slots or configure existing time slots that can be applied to policies, based on your organization's requirement.
Time Slots enable you to specify the time during which certain rules must be triggered. For example, you might want to restrict large file upload or download during office hours.
There might be situations where you require more time slots, based on different users, their geographical locations, or working hours. You can create more time slots based on business hours, non-business hours, weekly maintenance, and so on.
By default, the software has these time slots:
All the time
Weekdays
Weekends
Working hours
Note
You cannot delete or edit the default time slot All the time, as the Primary policy uses it.
For details about product features, usage, and best practices, click ? or Help.
From the product's user interface, click Policy Manager → Shared Resource.
The Shared Resources page appears.
Click Time Slots tab.
Click Create New.
The Time Slot page appears.
Type a unique Time slot name such as Business hours or System Maintenance (Weekly).
Under Select day and time, select the required days.
Select All day or Selected hours.
Specify the Start and End time from the drop-down list, if you choose Selected hours.
Click Save to return to the Shared Resources page.
Click Apply to save the settings.
You have now successfully configured or created a time slot, to suit your organization's requirement.
Manage core scanner settings for a policy
Create or edit scanner options, then specify an appropriate action to take on the detected item when a policy is triggered.
The available core scanners are:
Anti-Virus Scanner
DLP and Compliance Scanner
File Filtering
For details about product features, usage, and best practices, click ? or Help.
Configure anti-virus scanner settings
Configure Anti-Virus Scanner settings in a policy to identify, thwart, eliminate computer viruses and other malware.
For details about product features, usage, and best practices, click ? or Help.
From Policy Manager, select a submenu item that has the anti-virus scanner.
The policy page for the submenu item appears.
Click Primary policy or any secondary policy you want to configure, then click List All Scanners tab.
Click Anti-Virus Scanner.
In Activation, select Enable to activate the anti-virus scanner settings for the selected submenu item.
Note
If you are configuring settings for a secondary policy , select Use configuration from parent policy to inherit settings from the parent policy.
From the Options section, you can use:
Option definitions
Option | Definition |
|---|---|
High Protection | To scan all files, archive files, unknown viruses, unknown macro viruses, potentially unwanted programs, and scan all files for macros. |
Medium Protection | To scan all files, archive files, unknown viruses, unknown macro viruses, and potentially unwanted programs. |
Low Protection | To scan only default file types, archive files, and potentially unwanted programs. |
<create new set of options> | To create your customized anti-virus scanner settings. |
Edit | To edit the existing level of protection. |
6. If you select to edit or modify the scanner settings, in Instance name, type a unique name for the anti-virus scanner setting instance. This field is mandatory.
7. In Basic Options tab under Specify which files to scan, select one of these options:
Option definitions — Basic Options
Option | Definition |
|---|---|
Scan all files | Scan all files regardless of their type. |
Default file types | Scan only the default file types. |
Default file types | Scan only the defined file types. Type a three letter file extension. Longer file extensions are included through pattern matching so that "cla" will match ".class" files. Click Add. All lower case extensions are converted to upper case extensions.
|
8. Select more scanner options available in Scanner options. You can select:
Option definitions — Scanner options
4 | Introduction
Option | Definition |
|---|---|
Scan archive files (ZIP, ARJ, RAR...) | Scan inside archive files such as .ZIP files. |
Find unknown file viruses | To use heuristic techniques to search for unknown viruses. |
Find unknown macro viruses | To find unknown viruses in macros. |
Enable Trellix Global Threat Intelligence file reputation | This enables the threat intelligence gathered by Trellix Advanced Research Center that would prevent damage and data theft before a signature update is available. Select the Sensitivity level. The options available are
|
| |
Scan all files for macros | To scan all files for macros. |
Find all macros and treat as infected | To find macros in files and treat them as infected items. |
Remove all macros from document files | To remove all macros from the document files. |
On the Advanced tab under Custom malware categories, specify the items to be treated as malware. There are two ways to select malware types:
Select the malware types from the list of checkboxes.
Select Specific detection names, type a malware category, then click Add.
Note
When typing a malware category name, you can use wildcards for pattern matching.
Select the Do not perform custom malware check if the object has already been cleaned option, if the cleaned items must not be subjected to the custom malware check.
In Clean options, specify what happens to files that are reduced to zero bytes after being cleaned. Select any one of these options:
Keep zero byte file — To keep files that have been cleaned and is of zero bytes.
Remove zero byte file — To remove any file that has zero bytes after being cleaned.
Treat as a failure to clean — To treat zero-byte files as if they cannot be cleaned, and apply the failure to clean action.
In Packers tab, select:
Enable detection — To enable or disable the detection of packers.
Exclude specified names — To specify which packers can be excluded from being scanned.
Include only specified names — To specify which packers you want the software to detect.
Add — To add packer names to a list. You can use wildcards to match names.
Delete — To remove packer names you have added. This link is activated if you click Add.
In PUPs tab, select:
Enable detection — To enable or disable the detection of potentially unwanted programs. Click the disclaimer link and read the disclaimer before configuring potentially unwanted programs detection.
Select the program types to detect — To specify whether each type of potentially unwanted programs in the list to be detected or ignored.
Exclude specified names — To specify which potentially unwanted programs can be excluded from being scanned. For example, if you have enabled spyware detection, you can create a list of spyware programs that you want the software to ignore.
Include only specified names — To specify which potentially unwanted programs you want the software to detect. For example, if you enable spyware detection and specify that only named spyware programs should be detected, all other spyware programs are ignored.
Add — To add potentially unwanted programs names to a list. You can use wildcards to match names.
Delete — To delete potentially unwanted programs names that you have added. This link is activated if you click Add.
Click Save to return to the policy page.
In Actions to take, click Edit. In these following tabs, specify the anti-virus scanner actions that must be taken if a virus (or virus-like behavior) is detected.
Click Save to apply the settings and return to the policy settings page.
Click Apply to configure these settings to a policy.
Configure file filtering settings
Configure settings in a policy to detect files based on their name, type, or size and take necessary actions.
For details about product features, usage, and best practices, click ? or Help.
From Policy Manager, select a submenu item that has the File Filtering scanner.
The policy page for the submenu item appears.
Click Primary policy or any secondary policy you want to configure, then click List All Scanners tab.
Click File Filtering.
In Activation, select Enable to activate the file filtering scanner settings for the selected submenu item.
Note
If you are configuring settings for a secondary policy , select Use configuration from parent policy to inherit settings from the parent policy.
In Alert Selection, click:
Create— To create a new alert message when the document on SharePoint server is replaced due to a rule being triggered. See the Create a new alert section for more instructions.
View/Hide — To display or hide the preview of the alert message. If the preview is hidden, clicking this link displays it. If the preview is displayed, clicking this link hides it.
Note
You can create alerts only for on-demand policies.
In File filtering rules and associated actions, from the Available rules drop-down menu, select an available rule. If you want to create new file filtering rules, select <Create new rule...>. See the Configure file filtering rules section for more instructions on how to create new file filtering rules.
Click Change to specify actions that must be taken when an item triggers the scanner.
Click Delete, to remove an existing rule from the policy.
Click Apply to configure these settings to a policy.
Configure DLP and Compliance scanner settings
Configure DLP and Compliance Scanner settings in a policy to identify noncompliant data in documents or other items and take necessary actions.
For details about product features, usage, and best practices, click ? or Help.
From Policy Manager, select a submenu item that has the DLP and Compliance scanner.
The policy page for the submenu item appears.
Click Primary policy or any secondary policy you want to configure, then click List All Scanners tab.
Click DLP and Compliance Scanner.
In Activation, select Enable to activate the DLP and compliance scanner settings for the selected submenu item.
Note
By default, all scanner setting options are disabled for DLP and Compliance Scanner for secondary policies.
If you are configuring settings for a secondary policy , select Use configuration from parent policy to inherit settings from the parent policy.
In Options, you can use:
Include document and database formats — To scan documents and database formats, for noncompliant content.
Scan the text of all attachments — To scan the text of all attachments.
Create— To create a new alert message when the content of an item is replaced due to a rule being triggered. See the Create a new alert section for more instructions.
View/Hide — To display or hide the preview of the alert message. If the preview is hidden, clicking this link displays it. If the preview is displayed, clicking this link hides it.
In DLP and Compliance rules and associated actions, click Add rule.
The DLP and Compliance Rules page appears.
In Specify actions for rule, select a rule group from the Select rule group drop-down menu that triggers an action, if one or more of its rules are broken. Each phrase can have a Score set for a category, under DLP and Compliance Scanner Phrase.
For some rule groups, you might need to specify these options:
Threshold score — To specify the maximum threshold score upon which the scanner triggers.
Max Term Count — To specify the maximum number of times this rule group can be triggered. Exceeding this count triggers the scanner to take the specified action.
The equation for current Threshold score = Score x Term Count (instance). A rule is triggered when the value equals or exceeds the Threshold score.
To understand how Threshold score and Max Term Count helps in triggering a rule, let us consider an example on Pascal Language dictionary. Consider that you have set the Score for the DLP and Compliance Scanner Phrase "PAnsiChar" to 5.
Under Select rule group, if you have selected Pascal Language dictionary, and set the value for:
Threshold score = 15
Max Term Count = 4
If "PAnsiChar" is found twice in the code, the current threshold score becomes 10. Hence the rule will NOT be triggered.
If "PAnsiChar" is found five times in the code, the current threshold score will still be calculated as Score x Max Term Count which is 5 * 4 = 20. This value is greater than the defined threshold score. Hence the rule will be triggered.
Consider that you have modified the Score for "PAnsiChar" to 8. If the phrase "PAnsiChar" is found thrice in the code, the current threshold score becomes 24. Now the rule will be triggered as it exceeded the specified Threshold score.
If there are multiple rules, the Threshold score is the combined value of all the rules for a dictionary.
Note
A rule will be triggered only when the value equals or exceeds the Threshold score and is not triggered even if the instance of phrase exceeds the Max Term Count value in a document.
From If detected, take the following action:, select the DLP and compliance scanner actions that must be taken if some content in an item is detected as noncompliant.
Click Save to apply the settings and return to the policy settings page.
Click Apply to configure these settings to a policy.
Manage filter settings for a policy
Enable or disable filter options, then specify an appropriate action to take on the detected item when a policy is triggered.
The available filters are:
Corrupt Content
Protected Content
Encrypted Content
Signed Content
Password-Protected Files
Scanner Control
For details about product features, usage, and best practices, click ? or Help.
Configure corrupt content settings
Configure settings in a policy to identify items with corrupt content and take necessary actions.
The content of some documents can become corrupt and cannot be scanned. Corrupt content policies specify how these items with corrupt content are handled when detected.
For details about product features, usage, and best practices, click ? or Help.
From Policy Manager, select a submenu item that has the filter.
The policy page for the submenu item appears.
Click Primary policy or any secondary policy you want to configure, then click List All Scanners tab.
Click Corrupt Content.
For a secondary policy, click Use configuration from parent policy to inherit all settings from the parent policy.
In Actions, click Edit to specify the filter actions that must be taken when corrupt content is detected.
Note
Click on Reset to restore the values in Corrupt content Actions to default values.
Click Save to return to the policy page.
Click Apply to configure these settings to a policy.
Configure protected content settings
Configure settings in a policy to identify items with protected content and take necessary actions.
Protected content policies specify how items with protected content are handled when detected.
For details about product features, usage, and best practices, click ? or Help.
From Policy Manager, select a submenu item that has the filter.
The policy page for the submenu item appears.
Click Primary policy or any secondary policy you want to configure, then click List All Scanners tab.
Click Protected Content.
For a secondary policy, click Use configuration from parent policy to inherit all settings from the parent policy.
In Actions, click Edit to specify the filter actions that must be taken when protected content is detected.
Note
Click on Reset to restore the values in Protected content Actions to default values.
Click Save to return to the policy page.
Click Apply to configure these settings to a policy.
Click Encrypted Content.
For a secondary policy, click Use configuration from parent policy to inherit all settings from the parent policy.
Note
The encrypted content settings are enabled by default.
In Actions, click Edit to specify the filter actions that must be taken when encrypted content is detected.
Note
Click on Reset to restore the values in Encrypted content Actions to default values.
Click Save to return to the policy page.
Click Apply to configure these settings to a policy.
Configure signed content settings
Configure settings in a policy to identify items with signed content and take necessary actions.
Signed content policies specify how items with signed content are handled when detected.
For details about product features, usage, and best practices, click ? or Help.
From Policy Manager, select a submenu item that has the filter.
The policy page for the submenu item appears.
Click Primary policy or any secondary policy you want to configure, then click List All Scanners tab.
Click Signed Content.
For a secondary policy, click Use configuration from parent policy to inherit all settings from the parent policy.
In Actions, click Edit to specify the filter actions that must be taken when signed content is detected.
Note
Click on Reset to restore the values in Signed content Actions to default values.
Click Save to return to the policy page.
Click Apply to configure these settings to a policy.
Configure password-protected files settings
Configure settings in a policy to identify items with are password-protected and take necessary actions.
Password-protected files cannot be accessed without a password and cannot be scanned. Password-protected policies specify how these items are handled when detected.
For details about product features, usage, and best practices, click ? or Help.
From Policy Manager, select a submenu item that has the filter.
The policy page for the submenu item appears.
Click Primary policy or any secondary policy you want to configure, then click List All Scanners tab.
Click Password-Protected Content.
For a secondary policy, click Use configuration from parent policy to inherit all settings from the parent policy.
In Actions, click Edit to specify the filter actions that are taken.
Note
Click on Reset to restore the values in Password-Protected content Actions to default values.
Click Save to return to the policy page.
Click Apply to configure these settings to a policy.
Configure scanner control settings
Configure settings in a policy that defines the nesting level, expanded file size, and maximum scan time that is allowed, when items are scanned.
For details about product features, usage, and best practices, click ? or Help.
From Policy Manager, select a submenu item that has the scanner.
The policy page for the submenu item appears.
Click Primary policy or any secondary policy you want to configure, then click List All Scanners tab.
Click Scanner Control.
For a secondary policy, click Use configuration from parent policy to inherit all settings from the parent policy.
In Options, click <create new set of options>.
In Instance name, type a unique name for the scanner control filter setting instance. This field is mandatory.
In Maximum nesting level, specify the level to which the scanner should scan, when an attachment contains compressed files, and other compressed files within. You can specify a value from 2–100, where the default value is 100.
In Maximum expanded file size (MB), specify the maximum size allowed for a file when it is expanded for scanning. You can specify a value from 1–2047, where the default value is 500.
Maximum scan time (minutes) is the maximum time allowed to scan any file. This value is taken from SharePoint Anti-Virus settings.
Click Save to return to the policy page.
In Alert selection, you can select which alert to use when a scanner control option is triggered. You can use:
Create — To create a new alert message for this policy.
View/Hide — To display or hide the alert text. If the text is hidden, clicking this link displays it. If the text is displayed, clicking this link hides it.
In Actions, click Edit to specify the actions to take, if the value exceeds the specified settings for maximum nesting level, maximum expanded file size and maximum scanning time.
Click Save to return to the policy page.
Click Apply to configure these settings to a policy.
Settings and diagnostics
Configure the feature enablement and disablement, feature configuration, feature administration and logs for the software based on your organization's security policy.
To modify or view the product settings, from the product's user interface, click Settings & Diagnostics. This table briefly explains when to configure these settings:
Settings & diagnostics
Use... | To... |
|---|---|
Detected Items | Configure and manage local quarantine database activities such as purge and optimization. It also has options to specify item size, query size and item age. |
User Interface Preferences | Define settings in the Dashboard such as the refresh rate, report settings, unit scale of graphics, reporting interval, graph and chart settings. |
Diagnostics | Define settings for debug, error reporting, event and product logs, including information on how big the logs are and where they are stored. Diagnostics settings include:
|
Product Log | View the Product Log and filter the output by date, type or description. |
Import and Export Configuration | Set up your current product server with the same configurations as one already built, restore default settings, or create SiteLists to point to DAT download locations. |
DAT Settings | Specify the maximum number of detection definition files to maintain instead of all DAT's. |
User Settings | Define what to do with an item when the scanner fails to scan an item in on-access scan. The options are:
It also has options to specify SharePoint scanner interval, scanner count, quarantine size and also add application pools. |
Note
If you modify any of these settings, make sure you click Apply to save the changes. The background color behind Apply, changes to:
Yellow — If you have changed the existing setting or the change is still not applied.
Green — If you have not changed the existing setting or the change is applied.
Configure local quarantine database for detected items
Specify repository settings to store the quarantined items detected by the software.
For details about product features, usage, and best practices, click ? or Help.
From the product's user interface, click Settings & Diagnostics → Detected Items.
The Detected Items page appears.
From the Local Database section, you can use:
Option definitions
Option | Definition |
|---|---|
Specify location of database | To change the database location for storing the quarantined items detected by the software. The default database location is the <Install Folder>. |
Database location | To specify the database location path where items detected by the software can be stored. You can select:
|
Maximum item size (MB) | To specify the maximum size of a quarantined item that can be stored in the database. You can specify a value from 1 to 100, where the default value is 100.
|
Maximum query size (records) | To specify the maximum number of records or quarantined items you can query from the Detected Items page. You can specify a value |
5 | Introduction
Option | Definition |
|---|---|
from 1 to 20000, where the default value is 1000. | |
Maximum item age (days) | To specify the maximum number of days an item will be stored in the local quarantine database, before being marked for deletion. You can specify a value from 1 to 365, where the default value is 14. |
Purge of old items frequency | To specify how frequently old items that are marked for deletion are deleted from the product database. The default value is set to Daily.
|
Optimization frequency | To recover the disk space taken up by deleted database records. Based on the value set under Maximum item age (days), old records will be deleted if you have scheduled a purge task. To optimize and shrink the database, schedule an optimization task. The default value is set to Not scheduled.
|
Edit Schedule | To modify the schedule of the purge or optimization task. Click Save after modifying the schedule. |
3. Click Apply to save the settings.
You have now successfully configured your product server to start quarantining detected items on to the local database.
User interface preference settings
Define settings in the Dashboard such as the refresh rate, report settings, unit scale of graphics, reporting interval, graph and chart settings.
Configure dashboard settings
Configure settings in the Dashboard such as the statistics, unit scale of graph, items to view in the Recently Scanned Items, and status reporting interval.
For details about product features, usage, and best practices, click ? or Help.
From the product's user interface, click Settings & Diagnostics → User Interface Preferences.
The User Interface Preferences page appears.
Click Dashboard Settings tab. You can use:
Option definitions
Option | Definition |
|---|---|
Automatic refresh | To specify whether the information shown on the Dashboard → Statistics counter should be refreshed automatically. Note: Always enable this to see the updated statistics on dashboard. |
Refresh rate (seconds) | To specify the duration (in seconds) at which the information on the dashboard should be refreshed. You can specify a value from 30 to 3600, where the default value is 60. |
Maximum recently scanned items | To specify the maximum number of items to appear in the Dashboard → Reports → Recently |
3D | To specify whether you want the dashboard graph to be displayed as a three-dimensional (3D) graph. |
Draw transparent | To specify whether the bars in a three-dimensional bar graph should appear solid or transparent. A solid bar hides part of any bar behind it. A transparent bar allows you to look through it and see other transparent bars behind |
3. Click Apply to save the settings.
Diagnostics settings
Determine the causes of symptoms and the errors encountered while using Trellix Security for Microsoft SharePoint.
In the Settings & Diagnostics → Diagnostics page, you can use:
Debug Logging — To configure debug logging settings such as specifying the debug log level, maximum file size limit of the log file, and the file location.
Error Reporting Service — To configure settings to determine whether to catch exceptions such as crashes.
Event Logging — To configure settings to capture product or event related logs based on information, warnings or errors.
Product Log — To configure settings for the product log file (productlog.bin). Changes made to this setting will be reflected on the Settings & Diagnostics → Product Log page.
Configure debug log settings
Configure settings to specify the debug log level, maximum file size limit of the log file, and the log file location. Use these settings when you want to troubleshoot an issue with the product and provide the logs to Trellix Technical Support for further analysis.
Important
Configure Debug Log settings for troubleshooting purposes and only for a limited duration. Once you capture sufficient logs for troubleshooting, set the value for Level to None. Using debug logging indiscriminately could fill up the hard disk space and affect the overall performance of the server. Enable it for a limited duration as advised by an authorized personnel (Trellix Technical Support Engineer).
For details about product features, usage, and best practices, click ? or Help.
From the product's user interface, click Settings & Diagnostics → Diagnostics.
The Diagnostics page appears.
In the Debug Logging tab, you can use:
Option definitions
Option | Definition |
|---|---|
Level | To enable or disable debug logging and specify the level of information that should be captured in the debug log file. You can select:
|
Enable size limit | If you want to specify a maximum file size limit for each debug log file. |
Specify maximum file size | To specify how large the debug log files can be. You can specify a value from 1 KB to 2000 MB.
|
Enable debug logging | If you want to modify the default debug file logging location. |
Specify file location | To specify the debug log file location path where events triggered by the product can be stored. You can select:
Note: To store the debug log files to a custom location or sub-folder, specify the sub-folder name or path in the field next to the drop-down list. |
 Note:
Note:Important
Make sure that the folder that collects the debug logs is provided "Write" permissions for the NETWORK SERVICE account.
Click Apply to save the settings.
You have now successfully configured the debug log settings, that you can use for troubleshooting.
Configure error reporting settings
Configure settings to report product related errors or exceptions to Trellix.
For details about product features, usage, and best practices, click ? or Help.
From the product's user interface, click Settings & Diagnostics → Diagnostics.
The Diagnostics page appears.Click the Error Reporting Service tab. You can use:
Option definitions
Option | Definition |
Enable | To enable or disable the error reporting service. |
Catch exceptions | To capture information about events causing exceptions. |
Report exceptions to user | To specify whether exceptions should be reported to the administrator. |
3. Click Apply to save the settings.
Configure event log settings
Configure settings to log the product events in the Product Log and Windows Event Viewer.
An event is a possible action that you perform, which is monitored by the software. Event Logging provides information useful for diagnostics and auditing. The different classes of events are:
Error
Information
Warning
This allows you to more easily obtain information on problems that occur.
For details about product features, usage, and best practices, click ? or Help.
From the product's user interface, click Settings & Diagnostics → Diagnostics.
The Diagnostics page appears.
Click Event Logging tab. You can use:
Option definitions
Option | Definition |
|---|---|
Product Log | To log the product events in the Product Log. These events can be viewed from Settings & Diagnostics → Product Log → View Results section. |
Event Log | To log the product events under Windows Event Viewer. To find the product related events in the Windows Event Viewer. Windows Event Viewer:
|
Write information events | To log events that are categorized as Information. |
Write warning events | To log events that are categorized as Warning. |
Write error events | To log events that are categorized as Error. |
Click Apply to save the settings.
Configure product log settings
Configure the product settings by specifying the required parameters to generate product logs.
For details about product features, usage, and best practices, click ? or Help.
From the product's user interface, click Settings & Diagnostics → Diagnostics.
The Diagnostics page appears.
Click the Product Log tab. You can use:
Option definitions
Option | Definition |
|---|---|
Location | If you want to configure a location to store the product log. Select Enable to specify a custom location. |
Specify database location | To specify the product log file location path where product log events can be stored. You can select: |
|
|
Filename | If you want to specify a different file name to store the product log. Select Enable to specify a custom file name. |
Specify database filename | To specify a custom file name for the product log. The default file name is
|
Size Limit | If you want to specify a different size limit for the product log file. Select Enable database size limit to specify a custom file size. |
Specify maximum database size | To specify how large the product log file can be. You can specify a value from 1 KB to 2000 MB.
|
Limit age of entries | If you want the product log entries to be deleted after a set period of time. |
Specify maximum age of entry (days) | To specify how many days an entry should remain in the product log file before it is deleted. You can specify a value from 1 to 365. |
Query Timeout | If you want to limit the amount of time allowed for answering a product log query. Select Enable to specify the duration. |
Specify query timeout (seconds) | To specify the maximum number of seconds allowed, when responding to a product log query. You can specify a value from 1 to 3600. |
Click Apply to save the settings.
You have now successfully configured settings for the Product Log page.
View product logs
View the product's health using log entries about event levels such as information, warnings, and errors. For example, you can view information on when a task initiated or ended, product service errors and so on.
You can use the available search filters to find log entries that are of interest to you.
Note
To modify settings related to the product log query page, go to Settings & Diagnostics → Diagnostics → Product Log.
For details about product features, usage, and best practices, click ? or Help.
From the product's user interface, click Settings & Diagnostics → Product Log. The Product Log page appears.
From the Product Log section, you can use:
Option definitions
Option | Definition |
|---|---|
ID | To specify the number which identifies a specific product log entry. |
Level | To select Information, Warning or Error from the drop-down list, depending on the type of log you want to view. |
Description | To specify a relevant description. For example, if you want to view logs based on service start or stop, type: *service* |
All Dates | To include events from all dates which is based on the entry in the product log file. |
Date Range | To search for an event within a defined date range according to your requirements. Here you can specify the date, month, year and time against the parameters From and To. You can also use the calendar icon to specify a date range. |
Clear Filter | To return to the default search settings. |
Export to CSV File | To export and save information about all events returned by the search in a .csv format. If there are thousands of events in the log, instead of navigating through multiple pages, you can use this option to download these events to a file in CSV format and later generate custom reports in Microsoft Excel.
|
Columns to display | To select or deselect column headers to be listed in the View Results pane. |
Views Per Page | To specify the maximum number of logs you want to view per page. The options are:
|

3. Click Search.
Note
The maximum number of records that can be stored in the product log is based on the log file size.
A list of events matching your search criteria are displayed in the View Results section.
Import and export configuration settings
Configure settings to export existing product configuration (settings and policies) for import and use on another Trellix Security for Microsoft SharePoint server. Also import sitelists to specify the location from where automatic updates are downloaded.
From the product's user interface, click Settings & Diagnostics → Import and Export Configuration. In the Import and Export Configurations page, you can use these tabs:
Configuration — To export, import or restore product settings.
Configuration tab — Option definitions
Option | Definition |
|---|---|
Export | To copy the software configuration (settings and policies) of this server and save it to a location from where it can be imported by other Trellix Security for Microsoft SharePoint servers. The default software configuration file is |
Restore Default | To reset the settings for your product to maximum performance. If you have customized the product, restore default will reset all the settings to the default settings. |
Browse | To locate the configuration file ( |
Import | To apply the settings of another Trellix Security for Microsoft SharePoint server to this server.
|
SiteList — To import sitelists that specify the location from where automatic updates are downloaded.
SiteList tab — Option definitions
Option | Definition |
|---|---|
Browse | To locate the sitelist file (SiteList.xml) that you want to use. |
Import | To apply the sitelist configuration settings specified in the file, to download DAT updates. |
Import product configuration from another server
Apply the product configuration settings from another server to this server.
Note
You must import settings across the same product version. For example, you must not import settings from Trellix Security for Microsoft SharePoint 2.5 server to a 3.0 product server.
For details about product features, usage, and best practices, click ? or Help.
From the product's user interface, click Settings & Diagnostics → Import and Export Configuration.
The Import and Export Configurations page appears.
Click the Configuration tab.
From the Import Configuration section, click Browse to locate the configuration file. The default name of the configuration file is McAfeeConfigXML.cfg.
Click Import.
A dialog box appears with the message The operation completed successfully.
Click OK.
You have now successfully imported configuration settings from another product server to this server.
Export your product configuration
Export the configuration of a the product server and save it to a location, where it can be imported by other Trellix Security for Microsoft SharePoint servers.
From the product's user interface, click Settings & Diagnostics → Import and Export Configuration.
The Import and Export Configurations page appears.
Click the Configuration tab.
Click Export.
Specify a location where to save the configuration file. The default name of the configuration file is McAfeeConfigXML.cfg.
Click Save.
You have now successfully exported your existing product settings and policies to a configuration file, that can be imported by other Trellix Security for Microsoft SharePoint servers.
Import a sitelist
Import a sitelist that specifies the location, from where automatic updates are downloaded.
A sitelist specifies from where automatic updates are downloaded. By default, the software uses SiteList Editor that points to a Trellix URL for automatic updates.
If your product server is managed by Trellix ePO, the sitelist from ePO is used to perform automatic updates. If you are not using ePO to manage your product server, create a sitelist that points your Trellix Security for Microsoft SharePoint server to a local repository.
For details about product features, usage, and best practices, click [IMAGE PLACEHOLDER: question mark icon] or Help.
Click Settings & Diagnostics → Import and Export Configuration. The Import and Export Configurations page appears.
Click the SiteList tab.
From the Import SiteList section, click Browse to locate the sitelist file
SiteList.xml. This file contains information about the repository settings such as repository name, server URL, and so on.
[IMAGE PLACEHOLDER: note icon] Note
You can find the SiteList.xml file under C:\ProgramData\McAfee\Common Framework\ directory. The SiteList Editor application under Start → All Programs → Trellix → Trellix Security for Microsoft SharePoint uses this file to display the repository settings in the application.
Click Import.
A dialog box appears with the message The operation completed successfully.
5. Click OK.
You have now successfully imported the sitelist that points to a new repository location, to download product updates.
Configure DAT settings
Specify the number of old DATs that can be retained in your system.
DAT files are the detection definition files, also referred to as signature files, that identify the code anti-virus and/or anti-spyware software detects to repair viruses, trojan horses and Potentially Unwanted Programs (PUPs).
For details about product features, usage, and best practices, click ? or Help.
From the product's user interface, click Settings & Diagnostics → DAT Settings.
The DAT Settings page appears.
Use Maximum number of old DATs to specify the maximum number of DAT generations that shall be preserved in the system during regular updates, excluding the DAT that comes with the product release.
Note
The software retains the latest DATs with old DATs under
<Install Folder>\bin\DATsdirectory.
Whenever a new DAT update occurs, the software verifies the number of available DATs. If the available DATs count exceeds the DAT retention value, the oldest DAT will be deleted. You can specify a value from 3 to 10, where the default value is 10.
Click Apply to save the settings.
Configure user settings
Configure settings for an on-access scan here. When a user uploads or downloads files, on-access scanning is triggered and the software checks for threats.
For details about product features, usage, and best practices, click ? or Help.
From the product's user interface, click Settings & Diagnostics → User Settings.
From On-Access Settings, you can specify these options.
Option definitions
Option | Definition |
|---|---|
On Scan Failure | Specify if you want to allow the items through or prevent upload, if scanning fails.
|
Retrieve SharePoint AV Settings Every (minutes) | Specify the time (in minutes) to retrieve the anti-virus settings from the SharePoint server.
|
Maximum Quarantine Size | Specify the maximum size of the quarantined item in MB or KB (1-2400 KB or 2-100 MB). The default value is 3125 KB. |
Maximum Scanner Count | Specify the maximum number of scanner counts (1-10). The default value is 10. Scanner count specifies the number of threads at a time that the software takes up for processing. |
Add ApplicationPool(s) to be Recycled | Specify an application pool that you want to add to the product. Application pools separate processes that share the same configuration or application boundaries. They isolate web applications for better security, reliability, and performance. When Trellix Security for Microsoft SharePoint is installed, it creates an application pool TSMSAppPool so that it does not affect the SharePoint server. If you have any custom application pools for your organization and you want to add them to the product server, you can add them with this option. |
Add | Specify an application pool in Add ApplicationPool(s) to be Recycled and click Add.
|
Existing ApplicationPool(s) to be Recycled: | Shows the list of application pools configured for this SharePoint server. |
Remove | Select an application pool from the Existing ApplicationPool(s) to be Recycled: and click Remove to exclude application pools that are no longer required.
|
Exclude Scan Settings | Exclude sites and users within the sites from the on-access scan. Administrators can select the website or the users in the website to skip scanning when user uploads items in the specific website. Exclude sites from on-access scan - If you add a site to Excluded List, the on access scanning will not be done, when any users add items for that site. Exclude users with in a site from on-access scan - If you select a user from the list for a particular site and add it to Excluded List, the on access scanning will not be done for that user when he tries to add items to that site. The on-access scanning will be done for all other users when they try to upload items. |
User Name | Specify the name of the user.
|
Search | Click to search for an user. The users in the sites are highlighted.
|
Refresh | Click to get the updated list of sites and users from Microsoft SharePoint. |
Available Lists | Lists all available sites and users. You can click users or sites from the list here and add them to the excluded list. |
Excluded List | Lists all users and the sites that are excluded from the on-access scan. You can remove the users and sites from the excluded list from here. |
List Sites | Lists all sites in your workspace. |
List Users | Lists all the users within the site. |
Web URL path | Specify complete URL path of the website.
|
Click Apply to save the settings.
You have now successfully configured the on-access settings for your product.
Program Maintenance
Perform the maintenance tasks such as repair, purge, or remove Trellix Security for Microsoft SharePoint.
Repair the installation
You can resolve the installation errors in the program by fixing corrupt or missing files, shortcuts and registry entries.
Note
You can also repair the installation from the folder containing the install files, by clicking
setup.exe. Repairing an installation will revert to the default configuration settings.
Click Start → Settings → Control Panel.
Double-click Add/Remove Programs. The Add/Remove Program window appears.
Select Trellix Security for Microsoft SharePoint from the list and click Change. The installation wizard appears followed by the Application Maintenance dialog box with the Repair option selected by default.
Click Next. The Database Account dialog box appears.
Modify the Account Information as required.
Note
If the user credentials cannot be resolved by the server, a warning dialog box appears prompting you to check your credentials.
Verify if you have entered correct credentials. Click OK, then click Next to override the warning and proceed with the repair process with unresolved account information.
Note
A repair installation will reset the DAT and engine files to the version originally installed by the product. It is recommended to run an update after installation.
The Ready to repair the Application dialog box appears.
Click Next. The Updating System window appears. After Trellix Security for Microsoft SharePoint is updated, a confirmation message is displayed.
Select or deselect the following options as required and click Finish.
Launch User Interface — To launch the graphical user interface of the product.
Update Now — To download the latest product updates and to ensure you are running the most current security to combat the ever-evolving threats.
Purge and optimize
Remove old items marked for deletion from the database and use optimization task to recover disk space being taken up by deleted database records.
From the product's user interface, click Settings & Diagnostics → Detected Items.
The Detected Items page appears.
From the Local Database section, you can use:
Purge of old items frequency — To specify how frequently old items that are marked for deletion are deleted from the database. The default value is set to Daily.
Optimization frequency — To recover the disk space taken up by deleted database records. Based on the value set under Maximum item age (days), old records will be deleted if you have scheduled a purge task. To optimize the database, schedule an optimization task.
Click Edit Schedule to modify the schedule. You can choose a time based on the options.
Not scheduled — Select this if you have not decided on when to perform the purge or optimization.
Once — Specify the date and time to schedule the purge or optimization once.
Hours — Select this to schedule the purge or optimization based on hours.
Days — Select this to schedule the purge or optimization based on how often it must occur in a week.
Weeks — Select this to schedule the purge or optimization based on how often it must occur in a month.
Months — Select this to schedule purge or optimization based on how often it must occur in a year.
Note
Always schedule an optimization task a few hours after you perform the purge task.
Note
These tasks should be performed on a regular basis to maintain adequate free space in the database.
Restore default configuration
Restore the product to its default configuration.
From the product's user interface, click Settings & Diagnostics → Import and Export Configuration. The Import and Export Configurations page appears.
From the Configuration tab, click Restore Default.
Note
Restoring the default settings removes all policy settings and secondary policies configured. It is recommended that you take a backup of existing settings, to restore the settings later.
A dialog box appears asking you to confirm the settings.
Click OK.
A dialog box appears confirming that the default configuration settings are applied.
You have now successfully restored your Trellix Security for Microsoft SharePoint server to default configuration settings for maximum performance.
Uninstall the software
Remove or uninstall the software from the server.
Note
You can also remove the software from the folder containing the install files by double-clicking
setup.exe.
Click Start → Settings → Control Panel.
Double-click Add/Remove Programs. The Add/Remove Program window appears.
Click Trellix Security for Microsoft SharePoint from the list, then click Uninstall.
Tip
Alternatively, you can double-click Trellix Security for Microsoft SharePoint from the list.
Click Yes. A progress bar appears displaying the status.
After uninstalling, the product name is removed from the Add/Remove Programs list.
Integrating with Trellix ePO - On-prem
You can integrate the TSMS with Trellix ePO - On-prem by checking the packages and extensions.
Trellix ePO - On-prem provides a scalable platform for centralized policy management and enforcement on your Trellix security products and the systems where they reside. It also provides comprehensive reporting and product deployment capabilities, all through a single point of control.
For instructions about setting up and using Trellix ePO - On-prem, see the product guide for your version of the software.
Manage Policies
Trellix Security for Microsoft SharePoint policies provide options to configure the policies, feature enablement and disablement, feature configuration, feature administration, and logs.
These policy settings are nearly identical to those you can access from the Policy Manager and Settings and Diagnostics tab in the product's user interface.
You can find policies on the Policy Catalog page under the Trellix Security for Microsoft SharePoint product.
Scanner Settings— Modify settings for on-access or on-demand policies.
Settings and Diagnostics— Modify settings related to feature enablement and disablement, feature configuration, feature administration, and logs.
Modify the policies with your preferences, then assign them to groups of managed Microsoft SharePoint systems or to a single system. For generic information about policies, see the product guide for your version of the ePolicy Orchestrator software.
For details about product features, usage, and best practices, click ? or Help.
Create or modify policies
Create or modify Trellix Security for Microsoft SharePoint policies from the Policy Catalog.
You can also create or modify these policies from the System Tree, while assigning policies to selected systems. See the product guide for your version of the Trellix ePO - On-prem software for more information.
For details about product features, usage, and best practices, click ? or Help.
Log on to the Trellix ePO - On-prem server as an administrator.
From the Policy Catalog, select Trellix Security for Microsoft SharePoint 3.5.3 as the product, then select the required policy as the category.
Perform this step as required:
To create a policy | To modify a policy |
Click New Policy, type a name for the policy, then click OK. | Click the policy that you want to modify. |
4. Change the policy settings as needed, then click Save.
The policy settings are updated and the new policy (when created) appears in the Policy Catalog.
Assign policies
After you create or change the product policies, assign each policy to the Microsoft SharePoint systems managed by Trellix ePO - On‑prem.
For details about product features, usage, and best practices, click ? or Help.
Log on to the Trellix ePO - On‑prem server as an administrator.
In the System Tree, select a group or systems, then click the Assigned Policies tab.
Select Trellix Security for Microsoft SharePoint 3.5.3 from the products list, locate the required policy, then click Edit Assignment next to the policy.
(Optional) Select a policy, then click Edit Policy to change the policy settings. Click New Policy to create a new policy based on the selected category.
Note
You can also modify or create a policy from the Policy Catalog.
5. Select the policy to assign, select appropriate inheritance options, then click Save.
The policy enforcement occurs in the next agent-server communication. Click Wake Up Agents to enforce policies immediately.
Create and schedule tasks
Create client tasks on your Microsoft SharePoint systems to schedule automated actions.
For details about product features, usage, and best practices, click ? or Help.
Schedule automatic updates
Schedule automatic updates to keep your software up to date with the latest anti-virus definitions (DATs) and anti-virus scanning engine.
For details about product features, usage, and best practices, click ? or Help.
Log on to the Trellix ePO - On-prem server as an administrator.
Select Menu → Systems → System Tree, then select the required group or systems.
Click the Assigned Client Tasks tab, then click Actions → New Client Task Assignment.
In Product, select Trellix Security for Microsoft SharePoint 3.5.3. In Task Type, select AutoUpdate Task.
Click Create New Task. The Client Task Catalog screen appears.
Type a name and description for the task, then click Save. The task is listed under Task Name.
Schedule the task as required, then click Next to view a summary of the task.
Review the summary of the task, then click Save.
In the System Tree page, select the systems or groups where you assigned the task, then click Wake Up Agents.
In the Wake Up Trellix Agent screen, select Force complete policy and task update, then click OK.
Schedule on-demand scan
Schedule an on-demand scan to scan your Microsoft SharePoint servers to find a threat, vulnerability, or other potentially unwanted code.
For details about product features, usage, and best practices, click ? or Help.
Log on to the Trellix ePO - On-prem server as an administrator.
Select Menu → Systems → System Tree, then select the required group or systems.
Click the Assigned Client Tasks tab, then click Actions → New Client Task Assignment. The Client Task Assignment Builder screen appears.
In Product, select Trellix Security for Microsoft SharePoint 3.5.3. In Task Type, select OnDemand Scan.
Click Create New Task. The Client Task Catalog screen appears.
Type a name for the task, and description, then click Save. The task is listed in the Task Name.
In Choose what to scan, type the web application name and the target folder path and click >> to move the folder to
folders to scan.
Example:
Web Application Name — SharePoint - 80
Target Folder Path — http://hostname/default/foldername
Select the folders to scan and configure the settings for the scan by specifying any file extensions you want to exclude and resumable or incremental scanning.
Schedule the task as required, then click Next and click Save.
In the System Tree page, select the systems or groups where you assigned the task, then click Wake Up Agents.
In the Wake Up Trellix Agent screen, select Force complete policy and task update, then click OK.
Schedule an optimization task
Schedule an optimization task to recover disk space taken up by deleted database records.
For details about product features, usage, and best practices, click ? or Help.
Log on to the Trellix ePO - On-prem server as an administrator.
Select Menu → Systems → System Tree, then select the required group or systems.
Click the Assigned Client Tasks tab, then click Actions → New Client Task Assignment. The Client Task Assignment Builder screen appears.
In Product, select Trellix Security for Microsoft SharePoint 3.5.3. In Task Type, select Optimization task.
Click Create New Task. The Client Task Catalog screen appears.
Type a name for the task, and description, then click Save. The task is listed in the Task Name.
Schedule the task as required, then click Next to view a summary of the task.
Review the summary of the task, then click Save.
In the System Tree page, select the systems or groups where you assigned the task, then click Wake Up Agents.
In the Wake Up Trellix Agent screen, select Force complete policy and task update, then click OK.
Schedule purge old DATs task
Schedule a purge old DATs task to delete old DATs.
For details about product features, usage, and best practices, click ? or Help.
Log on to the Trellix ePO - On-prem server as an administrator.
Select Menu → Systems → System Tree, then select the required group or systems.
Click the Assigned Client Tasks tab, then click Actions → New Client Task Assignment. The Client Task Assignment Builder screen appears.
In Product, select Trellix Security for Microsoft SharePoint 3.5.3. In Task Type, select PurgeOldDATs Task.
Click Create New Task. The Client Task Catalog screen appears.
Type a name for the task, and description, then click Save. The task is listed in the Task Name.
Schedule the task as required, then click Next to view a summary of the task.
Review the summary of the task, then click Save.
In the System Tree page, select the systems or groups where you assigned the task, then click Wake Up Agents.
In the Wake Up Trellix Agent screen, select Force complete policy and task update, then click OK.
Schedule purge task
Schedule a purge task to delete old items from the database.
For details about product features, usage, and best practices, click ? or Help.
Log on to the Trellix ePO - On-prem server as an administrator.
Select Menu → Systems → System Tree, then select the required group or systems.
Click the Assigned Client Tasks tab, then click Actions → New Client Task Assignment. The Client Task Assignment Builder screen appears.
In Product, select Trellix Security for Microsoft SharePoint 3.5.3. In Task Type, select Purge Task.
Click Create New Task. The Client Task Catalog screen appears.
Type a name for the task, and description, then click Save. The task is listed in the Task Name.
Schedule the task as required, then click Next to view a summary of the task.
Review the summary of the task, then click Save.
In the System Tree page, select the systems or groups where you assigned the task, then click Wake Up Agents.
In the Wake Up Trellix Agent screen, select Force complete policy and task update, then click OK.
Restore quarantined items
Create a client task to restore quarantined items from the client systems through Trellix ePO - On-prem.
Get the ticket id from Threat Event Log for the item you want to restore. The ticket id is listed in the Threat Target File Path. For example, if the Threat Target File Path is av_sample.txt (0628-54fd-eb8e-0007); the ticket id is 0628-54fd-eb8e-0007.
For details about product features, usage, and best practices, click ? or Help.
Log on to the Trellix ePO - On-prem server as an administrator.
Select Menu → Systems → System Tree, then select the required group or systems.
Click the Assigned Client Tasks tab, then click Actions → New Client Task Assignment. The Client Task Assignment Builder screen appears.
In Product, select Trellix Security for Microsoft SharePoint 3.5.3. In Task Type, select RestoreItems Task.
Click Create New Task. The Client Task Catalog screen appears.
Type a name for the task, and description. Specify the ticket ids of items you want to restore here, then click Save. The task is listed in the Task Name.
Note
You can restore 8 items at a time by specifying 8 ticket ids.
Schedule the task as required, then click Next to view a summary of the task.
Review the summary of the task, then click Save.
In the System Tree page, select the systems or groups where you assigned the task, then click Wake Up Agents.
In the Wake Up Trellix Agent screen, select Force complete policy and task update, then click OK.
Queries and reports
Run the predefined Trellix Security for Microsoft SharePoint queries to generate your reports, or modify them to generate custom reports.
Predefined queries
These predefined queries are added to the group MSMS35REPORTS.
Query | Retrieves information about |
|---|---|
TSMS: DLP and Compliance History | Historical data for the DLP and Compliance threat category of all managed product servers. |
TSMS: Banned File types/Messages History | Historical data for the banned file types and messages threat category of all managed product servers. |
TSMS: Banned File types/Messages Today | The number of banned file types and messages for the current day. |
TSMS : Number of Documents and Average Processing Time Today | The number of documents scanned on each managed product server for the current day and their average scan time. |
TSMS: Percentage of PUPs Detected Today | The percentage of potentially unwanted programs infected items detected on each server for the current day. |
TSMS: Percentage of Viruses Detected Today | The percentage of virus infected items detected on each server for the current day. |
TSMS: PUPs Deleted Today | The potentially unwanted programs infected documents deleted for the current day. |
TSMS: PUPs Deleted History | All potentially unwanted programs infected documents deleted. |
TSMS: PUPs Detection History | All potentially unwanted programs infected documents detected. |
TSMS: PUPs Detection Today | The potentially unwanted programs infected documents detected on the current day. |
TSMS: Top 10 Banned File types/Messages | The top 10 banned file types or messages by the number of detections. |
TSMS: Top 10 Banned File types/Messages Senders | The top 10 banned file types or messages by the number of senders. |
TSMS: Top 10 Banned File types/Messages Uploads | The top 10 banned file types or messages by the number of uploads. |
TSMS: Top 10 DLP and Compliance Senders | The top 10 DLP and Compliance senders by the number of detections. |
TSMS: Top 10 DLP and Compliance Detection | The top 10 DLP and Compliance detection by the number of detections. |
TSMS: Top 10 Infected SharePoint Servers | The top 10 SharePoint servers by number of infected items detected. |
TSMS: Top 10 Locations with DLP and Compliance Uploads | The top 10 SharePoint servers locations which have DLP and Compliance upload issues. |
TSMS: Top 10 Locations with Unwanted Content Uploads | The top 10 potentially unwanted content by their number of detections. |
TSMS: Top 10 Locations with Virus Uploads | The top 10 SharePoint server locations which have maximum virus uploads. |
TSMS: Top 10 PUPs Detection | The top 10 potentially unwanted content detected by their server locations. |
TSMS: Top 10 Unwanted Content Detection | The top 10 potentially unwanted content detected in items. |
TSMS: Unwanted Content Detections History | The number of unwanted content detected. |
TSMS: Top 10 Unwanted Content Senders | The top 10 SharePoint servers that have unwanted content in them. |
TSMS: Top 10 Virus Senders | The top 10 SharePoint servers that have the maximum number of virus infected documents. |
TSMS: Top 10 Virus Detection | The top 10 documents or items that have the maximum viruses. |
TSMS: Virus Detections History | The number of virus infected items detected. |
TSMS: Virus Detections Today | The number of virus infected items detected for the current day. |
TSMS: Viruses Cleaned/Replaced Today | The number of virus infected items cleaned on current day. |
TSMS: Viruses Detected in the last one week | The number of virus infected items detected as on the last week. |
Run a default query
Run the predefined Trellix Security for Microsoft SharePoint queries to generate reports based on the product's data.
For details about product features, usage, and best practices, click ? or Help.
Log on to Trellix ePO - On-prem as an administrator.
Select Menu → Queries & Reports. From Shared Groups in the Groups pane, select MSMS35REPORTS.
Select a query from the Queries list, then click Run. In the query result page, click any item in the results to drill down further.
Note
To generate custom reports, duplicate a predefined query, then change it as you need. For detailed instructions on working with queries, see the product guide for your version of Trellix ePO - On-prem software.
Viewing event details in Threat Event Log
You can view Trellix Security for Microsoft SharePoint event details in Trellix ePO - On-prem Threat Event Log.
Select Menu → Reporting → Threat Event Log to view the details.
Select an entry to get detailed information. The items detected by Trellix Security for Microsoft SharePoint have Detecting Product Name as TSMS.
The details about files that are excluded or skipped in any scan are specified in Threat Target File Path. For example, Excluded files:3584,Skipped files:1154472,Skipped folders:0.
When ever an item is detected, an event is generated in Trellix ePO - On-prem, which contains ticket id in the Threat Target File Path. This ticket id can be used to restore the quarantined items. For example, if the Threat Target File Path is av_sample.txt (0628-54fd-eb8e-0007); the ticket id is 0628-54fd-eb8e-0007. You can use the ticket id to restore the quarantined items. See Restore quarantined items for details.
After restoring the item from the quarantined database, an event 6061: Trellix Security for Microsoft SharePoint Restore Item (Low) is generated, which has the status of the restore task; for example, Restore Success or Restore Failure. You can see the status here in Action taken.
The last modified user of the item and the author of the item are listed in Threat Target User Name. For example, System Account|Author:System Account. For detailed information about the event details in Threat Event Log, see the product guide for your version of Trellix ePO - On-prem.
Filter events
Specify which Trellix Security for Microsoft SharePoint events generated from the client systems, are forwarded to the server.
By default, all product events are enabled. Filter events based on the bandwidth used in your environment, and event-based queries required.
For more details about event filtering, see the product guide for your version of the Trellix ePO - On-prem software.
For details about product features, usage, and best practices, click ? or Help.
Log on to the Trellix ePO - On-prem server as an administrator.
Select Menu → Configuration → Server Settings, select Event filtering, then click Edit at the bottom of the page.
Select All events to the server to forward all events to the Trellix ePO - On-prem server, or select Only selected events to the server and select the product-specific client events that you want to forward.
The product events are prefixed with Trellix Security for Microsoft SharePoint such as these:
6054: Trellix Security for Microsoft SharePoint Encrypted content detected (Low)
6055: Trellix Security for Microsoft SharePoint Corrupted content detected (Low)
6056: Trellix Security for Microsoft SharePoint Denial of service triggered (Medium)
6057: Trellix Security for Microsoft SharePoint Protected content triggered (Low)
6058: Trellix Security for Microsoft SharePoint Password protected content detected (Low)
6059: Trellix Security for Microsoft SharePoint Blocked mime type detected (Low)
6060: Trellix Security for Microsoft SharePoint MSMS statistics and average scan time (Info)
6061: Trellix Security for Microsoft SharePoint Restore events
6062: Trellix Security for Microsoft SharePoint Scan failure
Click Save.
The selected events are forwarded at the next agent-server communication.
Creating a customized domain user account with the least SQL permissions
If your organization's policy restricts you from using administrator credentials or if you do not want to use them for other reasons, you can create a customized normal domain user account with the least SQL permissions.
Active directory
Create new domain user account in Active Directory. (For example: TSMSDBAccnt).
Assign the account with privileges equivalent to the members of the Users group.
Product installer prompts to type the account credentials while configuring the database access account for remote SQL connection.
SQL server
SQL server administrator rights are required to make group updates. Make these changes under SQL server security:
Add the custom user account (for example: TSMSDBAccnt) to be used for Trellix Security for Microsoft SharePoint database access account. Provide the public permissions to the user.
Under user mapping, select:
All SharePoint content databases corresponding to web applications.
Content database corresponding to your administrator web application.
SharePoint configuration database.
Grant these permissions.
Assign the following securables with Execute rights for SharePoint configuration database (The exact list might be slightly different)
Securables | |
|---|---|
proc_getObjectsByBaseClass | proc_getSiteMap |
proc_getSiteSubset | proc_getObjectsByClass |
proc_getSiteMapById | proc_getSiteNames |
proc_getSiteCount |
For each web content database and administrator content database, assign the following securables with execute rights. (The exact list may be slightly different based on the environment and applications deployed in SharePoint farm. Please monitor the event viewer regularly to fine tune this list).
Securables | |
|---|---|
proc_AddDocument | proc_GetLinkInfoSingleDoc |
proc_AL | proc_ListAllWebsOfSite |
proc_AddListItem | proc_ListUrls |
proc_DeleteUrl | proc_SecUpdateUserActiveStatus |
proc_DirtyDependents | proc_SecGetSiteGroupByTitle |
proc_FetchDocForHttpGet | proc_SecGetUserPermissionOnGroup |
proc_FetchDocForUpdate | proc_UpdateVirusInfo |
proc_GetSiteFlags | proc_GetListMetaDataAndEventReceivers |
proc_GetTpWebMetaDataAndListMetaData | proc_GetListFields |
proc_GetUrlDocId | proc_UpdateDirtyDocument |
proc_GetDocsMetaInfo | proc_UpdateListItem |
proc_GetParentWebUrl | proc_SecGetIndividualUrlSecurityCheckEventReceivers |
proc_GenerateNextId | UserData ( Under Views Section) |
proc_GetWebMetainfo |
For each web content database and administrator content database, assign the execute rights on the fn_GetFullUrl object (Step: Go to Programmability | Functions | Scalar-Valued Functions for each db). No requirement for local administrator group membership.
SharePoint server
No requirement for local administrator group membership by the domain user account (For example: TSMSDBAccnt) used by Trellix Security for Microsoft SharePoint.
No requirement for interactive login.
No requirement for Site Collection administrator.
Create a new Permission Policy Level (For example: TSMS-Permissions) and grant the following permissions. These permissions are the minimal set for Trellix Security for Microsoft SharePoint to work with the SharePoint Object model and iterate over the SharePoint store to do scan and clean. (SharePoint Farm administrator rights are required to make this change).
Under Site collection Permissions grant Site Collection Auditor permission. Site collection auditors have Full Read access for the entire site collection including reading permissions and configuration data. Trellix Security for Microsoft SharePoint requires this as it monitors the SharePoint anti-virus settings to determine whether real-time scan is enabled or disabled.
In List permissions section, grant these permissions:
Manage List — Required for replacing/deleting infected content added as an attachment under items in Discussions.
Override Check Out — Required to forcefully check in a document detected as infected and perform the action as per policy.
Add Items — Required for replacing the infected file with a file containing replacement alert message.
Edit Items — Required for updating the checked out documents while forcefully checking in with a check in comment.
Delete Items — Required for removing an infected list item (document).
View Items — Required for the target picker while defining a scan target.
Under Site Permissions, grant View Pages - View pages in a website permission. Without this, Trellix Security for Microsoft SharePoint is unable to iterate over the site in on-demand scan tasks.
Save the newly created permission policy level.
5. For each Web application created in the SharePoint Farm:
Update the Web application policy for the respective web application to add the product database access account (For example: TSMSDBAccnt) with Permission Policy Level created earlier (For example: TSMS-Permissions).
Update the Web application policy to cover any web applications that are added in future.
Note
This will not cover the Central Admin application - which will not be scanned unless Option1 above is chosen. Alternatively, we can add the product database access account (For example: TSMSDBAccnt) as a secondary site collection administrator account on the Central Admin web application alone.
6. Manual steps may be possible for scripting. Local administrator rights or GPOs are required to make these group updates. Update the IIS and SharePoint user groups ( IIS_WPG (for IIS 6) and IIS_IUSRS (IIS7) or WSS_WPG ) on each SharePoint Server by adding the Trellix Security for Microsoft SharePoint database access account (For example: TSMSDBAccnt).
SiteList Editor
SiteList specifies the location from where you can download automatic updates (including DAT file and scanning engines).
Access SiteList Editor
From the Start menu, click Programs → Trellix → Trellix Security for Microsoft SharePoint → Trellix Auto Update SiteList Editor.
Edit Auto Update Repository List
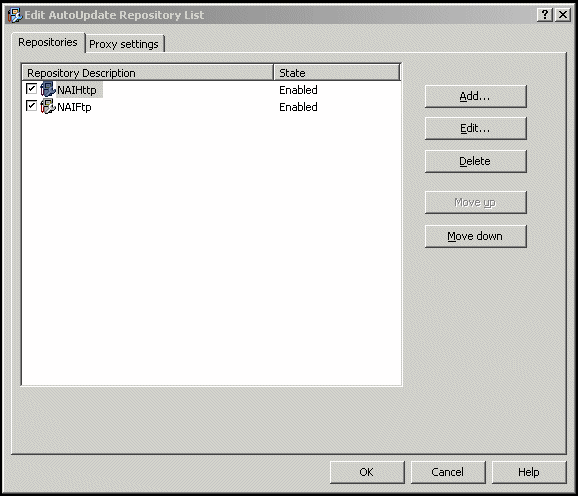
You can use these tabs:
Repositories — To configure repository settings from where the software can download automatic updates.
By default, Trellix Security for Microsoft SharePoint uses a sitelist that points to a Trellix site for automatic updates, but you can also create alternative sitelists that point to a different location. For example, you might have copied the automatic updates to a local repository and created a sitelist that points your software systems to that local repository.
Proxy settings — To configure the proxy server settings, so that the software can connect to the Internet using this server, to download automatic updates.
Note
Settings applied in the SiteList Editor are saved in the
SiteList.xmlfile underC:\ProgramData\McAfee\Common Framework\directory.
Configure sitelist proxy settings
Configure these settings if your organization uses a proxy server to connect to the Internet, for the software to download the product updates.
If your organization uses proxy servers for connecting to the Internet, you can select the Proxy settings option.
Click Start → Programs → Trellix → Trellix Security for Microsoft SharePoint → Trellix Auto Update SiteList Editor.
The Edit Auto Update Repository List dialog box appears.
Click the Proxy settings tab.
Proxy settings
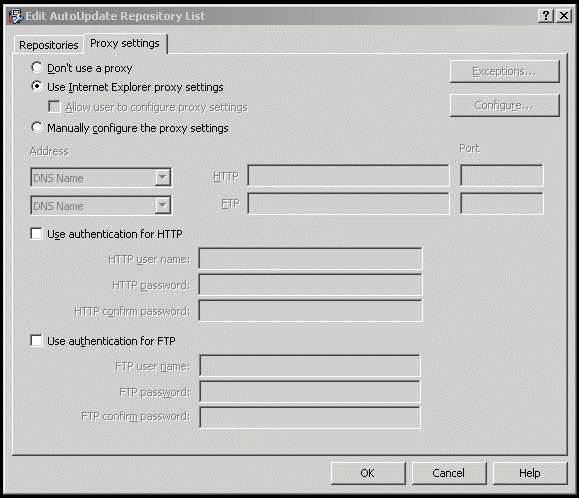
Select the Use Internet Explorer proxy settings or Manually configure the proxy settings option as required.
Type the IP address and port number of the HTTP or FTP server.
You can use the following options:
Use Authentication — To enable user authentication to access the proxy server.
Username — To specify a user name for authentication to access the proxy server.
Password — To specify a password.
Confirm Password — To reconfirm the specified password.
Exceptions — To bypass a proxy server for specific domains. Click Exceptions, then select Specify Exceptions and type the domains that need to be bypassed.
6. Click OK.
Configure sitelist repository settings
The SiteList specifies from where automatic updates are downloaded.
By default, Trellix Security for Microsoft SharePoint uses a sitelist that points to a Trellix site for automatic updates, but you can use a sitelist that points to a different location. For example, you might have copied the automatic updates to a local repository and created a sitelist that points your Trellix Security for Microsoft SharePoint systems to that local repository.
Click Start → Programs → Trellix → Security for Microsoft SharePoint → SiteList Editor. The Edit AutoUpdate Repository List dialog box appears.
From the Repositories tab, click Add. The Repository Settings dialog box appears.
Repository Settings
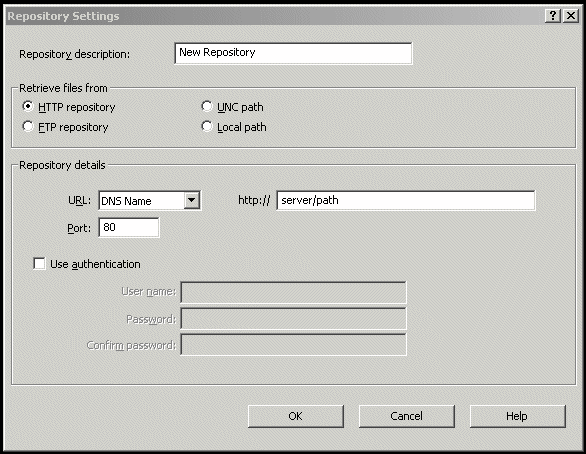
Select from the following options:
Repository Description — To give a brief description of the repository.
Retrieve files from — To specify from which type of repository to retrieve the files. The available options are HTTP repository, FTP repository, UNC Path, and Local Path.
URL — To specify the URL of the repository.
Port — To specify the port number of the repository.
Use Authentication — To enable user authentication to access the repository.
Specify a user name and password for authentication of the repository and confirm the password by typing it again.
Click OK to add the new repository to the Repository Description list.
Click OK to close the Edit AutoUpdate Repository List dialog box.
Using access control
You can allow or deny access to the Trellix Security for Microsoft SharePoint user interface for specific users or groups.
From the Start menu, click Programs → Trellix → Trellix Security for Microsoft SharePoint → Access Control.
From Group or user names, select the user you want to allow or deny access to the product's user interface and click OK.
Note
The software automatically adds Farm Administrator, Internet Information Services, and Windows SharePoint Services User Groups to this list during installation.
Access control is used internally by the software for inter process communication. So do not remove Farm administrator, Internet Information Services, and Windows SharePoint Services user groups from this list.