F I R E E Y E T E C H N I C A L D O C U M E N T A T I O N

SECURITY ORCHESTRATOR
USER GUIDE
RELEASE 6.1
SECURITY ORCHESTRATOR / 2021
FireEye and the FireEye logo are registered trademarks of FireEye, Inc. in the United States and other countries. All other trademarks are the property of their respective owners.
FireEye assumes no responsibility for any inaccuracies in this document. FireEye reserves the right to change, modify, transfer, or otherwise revise this publication without notice.
Copyright © 2021 FireEye, Inc. All rights reserved.
Security Orchestrator User Guide
Software Release 6.1.0
Revision 1
FireEye Contact Information:
Website: www.fireeye.com
Technical Support: https://csportal.fireeye.com
Phone (US):
1.408.321.6300
1.877.FIREEYE
Contents
Contents
CHAPTER 1: Getting Started .............................................................................. 7
Overview .............................................................................................................. 8
Accessing the Web UI .................................................................................. 9
Browser Compatibility ................................................................................. 9
Terms You Should Know ..........................................................................10
CHAPTER 2: Managing Content ..............................................................12
Plug-ins ......................................................................................................13
Viewing Installed Plug-Ins ..................................................................... 13
Viewing Plug-in Commands .................................................................... 14
Invalid Plug-Ins ........................................................................................14
Packages ..................................................................................................15
Creating Local Packages .......................................................................15
Exporting Local Packages ....................................................................16
Importing Content Packages .............................................................17
Deleting Packages ..................................................................................17
CHAPTER 3: Configuring Security Orchestrator ............................. 20
Devices ....................................................................................................21
Creating Devices .....................................................................................22
Enabling Devices .....................................................................................23
Testing Device Connectivity ..............................................................23
Modifying a Device .................................................................................24
Changing the Plug-In Version for a Device .....................................25
Plug-In Version Numbering ..................................................................25
Changing a Plug-In Version After a Major Version Change .............25
Changing the Plug-In Version for One Device .................................26
© 2021 FireEye 3
Contents
Adapters ....................................................................................................27
Creating an Adapter ....................................................................28
Configuring an HTTP Server Adapter ........................................28
Configuring an Interval Adapter ..............................................29
Configuring a Socket Adapter ..................................................30
Enabling Adapters .......................................................................31
Adapter Status ..................................................................................32
Adapter Warnings ......................................................................32
Playbooks .......................................................................................33
Building a Playbook ..................................................................35
Using the Playbook Workflow Builder ..................................36
Start Events ..............................................................................38
Tasks ......................................................................................44
Sequence Flows ...................................................................68
Gateways .............................................................................72
End Events ............................................................................73
Viewing Playbooks ...................................................................74
Testing a Playbook ..................................................................74
Create and Modify a Playbook ................................................75
Publishing Playbooks ..............................................................77
Managing Playbook Access Permissions ...............................78
Tables ..........................................................................................80
Creating a Table ......................................................................80
Configuring Table Structure ..................................................81
Configuring Table Content ....................................................81
Importing CSV Files into a Tables ....................................82
Exporting Tables as CSV Files ..........................................83
Duplicating Tables ..................................................................83
Enabling Tables ..........................................................................84
Forms ..........................................................................................85
Creating a Form .....................................................................85
Configuring Forms ..................................................................86
Contents
Publishing and Enabling Forms ..........................................................87
Scripts and Templates ..............................................................88
JavaScript Scripts ...............................................................88
Creating a Global JavaScript Script ..............................................88
Testing a Script ...............................................................91
Publishing Scripts .............................................................91
Mustache Template Scripts ........................................................91
Template Examples ..............................................................92
Creating a Global Template Script ..............................................93
Creating a Custom Template ....................................................93
Modifying a Custom Template ...................................................96
Types ........................................................................97
Creating Custom Parameter Types ................................................97
System Parameter Types .........................................................97
Packaged Types ...............................................................100
Tags .........................................................................108
Adding Tags ................................................................108
Managing Tags .................................................................108
CHAPTER 4: Navigating Security Orchestrator Runtime ..........................110
Viewing the Security Orchestrator Dashboard ....................................111
Cases ....................................................................113
Inspecting and Managing Case Details ..........................................114
Running Playbooks from the Cases Page .......................................114
All Activity .................................................................115
Running Playbooks from the All Activity Page ................................116
System Status ..............................................................117
CHAPTER 6: Sample Playbooks and Exercises .................................119
Lesson 1: A Basic Playbook ...................................................120
Selecting the Plug-In .........................................................120
Device ..................................................................121
© 2021 FireEye 5
Contents
The Sample Playbook ...............................................................122
Add Start Events, Tasks, and End Events .......................................122
Run Playbook 1 ..................................................................125
Lesson 2: Adapters, Lookup Tables, and Invoking Another Playbook ..............128
Adapters ........................................................................128
Run Playbook 2 .................................................................130
Lesson 3: Gateways, Forms, and Scripts ....................................132
Gateways ...................................................................132
Forms ......................................................................133
Scripts ....................................................................134
Lesson 4: Prompting Users for Input and Updating Cases ........................136
Asking Questions ..............................................................136
Update Case ................................................................137
Putting It All Together ......................................................137
Exercise 1 ...................................................................137
Exercise 2 ...................................................................138
Technical Support .............................................................139
Documentation .............................................................139
6© 2021 FireEye
Security Orchestrator User Guide
CHAPTER 1: Getting Started
- Overview on the next page
- Accessing the Web UI on page 9
- Terms You Should Know on page 10
Security Orchestrator User Guide
CHAPTER 1: Getting Started
Overview
The SOC team faces many security incidents daily that need speedy and accurate response. FireEye Security Orchestrator (SO) is an application in Helix that enables you to automate and orchestrate the processes that are repeatedly used during threat analysis and investigation, such as data enrichment, remediation action, or kickstarting an orchestration workflow in third-party systems. Security Orchestrator integrates FireEye and third-party products. Security Orchestrator can efficiently automate and enhance your response to alerts. . For example, when an alert is ingested from Endpoint Security, you can initiate the execution of a customized set of response actions called a playbook.
Playbooks complete automated tasks or request human intervention to complete manual tasks, expediting the alert investigation process. The steps of a playbook follow a visual path of execution that can be viewed in the Security Orchestrator Web UI.
Security Orchestrator lets you create, initiate, customize, and monitor Playbooks to best benefit the needs of your organization. Playbooks are built in the playbook workflow builder of the Security Orchestrator Web UI. You can configure multiple tools to enhance your security operations. For more information, see Configuring Security Orchestrator.
This section includes the following to help you become familiar with Security Orchestrator:
- Accessing the Web UI on the facing page
- Browser Compatibility on the facing page
- Terms You Should Know on page 10
8
© 2021 FireEye
Accessing the Web UI
The Security Orchestrator application can be accessed using any supported Web browser;
Prerequisites
Before you access Security Orchestrator, you need:
- A fully configured Helix instance.
- The IP address or hostname for your Helix instance, configured by the system administrator during deployment. For more information, see the Security Orchestrator System Administration Guide.
- A supported Web browser. For more information about supported browsers, see Browser Compatibility below.
To access Security Orchestrator during log in:
- Open a Web browser and enter
https://<virtualappliance>in the address line, where <virtualappliance> is the IP address or hostname configured during initial setup of the SO on‑premise instance. - Enter your credentials.
The Security Orchestrator dashboard appears.
Browser Compatibility
The following browsers are compatible with Security Orchestrator:
- Google Chrome
- Mozilla Firefox
© 2021 FireEye
Security Orchestrator User GuideTerms You Should Know
Terms You Should Know
The following table describes Security Orchestrator concepts frequently used in this guide. Terms are listed in alphabetical order.
|
Term |
Definition |
|---|---|
|
Adapter |
An adapter is a type of device that can initiate playbooks. An adapter can execute a device command at regular intervals (polling) or it can listen on a network socket and execute a command in response to incoming data. |
|
Case |
A case is created when a playbook is executed. Cases are related to each other if they are triggered by a single event. All plug-in data that is gathered through the execution of the playbook is linked to the case. |
|
Command |
A device or adapter performs commands that are defined specifically for it. Commands are called "actions" when being displayed in a case. Commands automate manual tasks within a playbook. |
|
Playbook |
A playbook, or a course of action (COA), is a series of actions interlinked with decision points and gateways, similar to a flowchart. A playbook follows the guidelines of the Business Process Modeling Notation (BPMN) nomenclature. Playbooks can be associated with an adapter and can include multiple devices. Any playbook can call other playbooks. |
|
Device |
A device is an instance of a plug-in that performs commands. A device is usually defined for and associated with an external, controllable object like a firewall or a cloud-based service. Multiple commands can be defined for a device. |
|
Event |
An event represents data that is ingested by an adapter. The event is data that must be evaluated by a playbook to determine if any action should be taken. |
© 2021 FireEye10
Security Orchestrator User GuideCHAPTER 1: Getting Started
| Term | Definition |
|---|---|
| Package |
A package is a bundle of resources that can be used in Security Orchestrator, such as playbooks, devices, plug-ins, scripts, and templates. Packages can be either content packages or local packages. Content packages are imported to Security Orchestrator and local packages are created using resources already in Security Orchestrator. Local packages can be exported and shared. |
| Parameter |
A parameter is a key data element that is pre-defined as part of the plug-in command definition. A parameter is tagged and made available within a playbook so only relevant data is available throughout the entire playbook, which simplifies the process. |
| Form |
A summary form is a set of data fields that can be used to display important incident data in a case. |
| Table |
A table is a custom data structure that you can create to store and retrieve data during playbook processing. |
Security Orchestrator User Guide
CHAPTER 2: Managing Content
The Manage Content page lets you view, manage, and install packages and plug-ins. To access the Manage Content page, select Manage Content in the left-hand menu. You see an alphabetically ordered view of all plug-ins, content packages, and local packages installed. The order in which content appears and the visual presentation of content can be customized. In the All view, content is organized into plug-ins, content packages, and local packages. Each area of content is shown in alphabetical order by default, but the order can be rearranged using the Sort by drop-down menu under the New Package button.
Click any plug-in or package to view its details, including package content and activity.
The two main types of content are plug-ins and packages. This section contains the following:
© 2021 FireEye
12
Plug-ins
Security Orchestrator plug-ins are software components that integrate Security Orchestrator with third-party and FireEye systems, appliances, and services. Plug-ins allow Security Orchestrator to receive data through adapters and automate playbooks. Plug-ins provide commands that you can run on external systems and use to exchange data.
You can execute several tasks using plug-ins, including blocking and containing threats, receiving threat intelligence from cloud-based services, and creating tickets in external tracking systems.
This section describes how to view plug-ins you install in Security Orchestrator. For information on installing plug-ins and their dependencies, see "Plug-In Installation" in the Security Orchestrator System Administration Guide.
- Viewing Installed Plug-Ins below
- Viewing Plug-in Commands on the facing page
- Invalid Plug-Ins on the facing page

NOTE: To use a plug-in command in Security Orchestrator, you must create and configure a device for the plug-in. For instructions, see Creating Devices on page 22.
Viewing Installed Plug-Ins
Installed plug-ins can be viewed in the Plugins page.
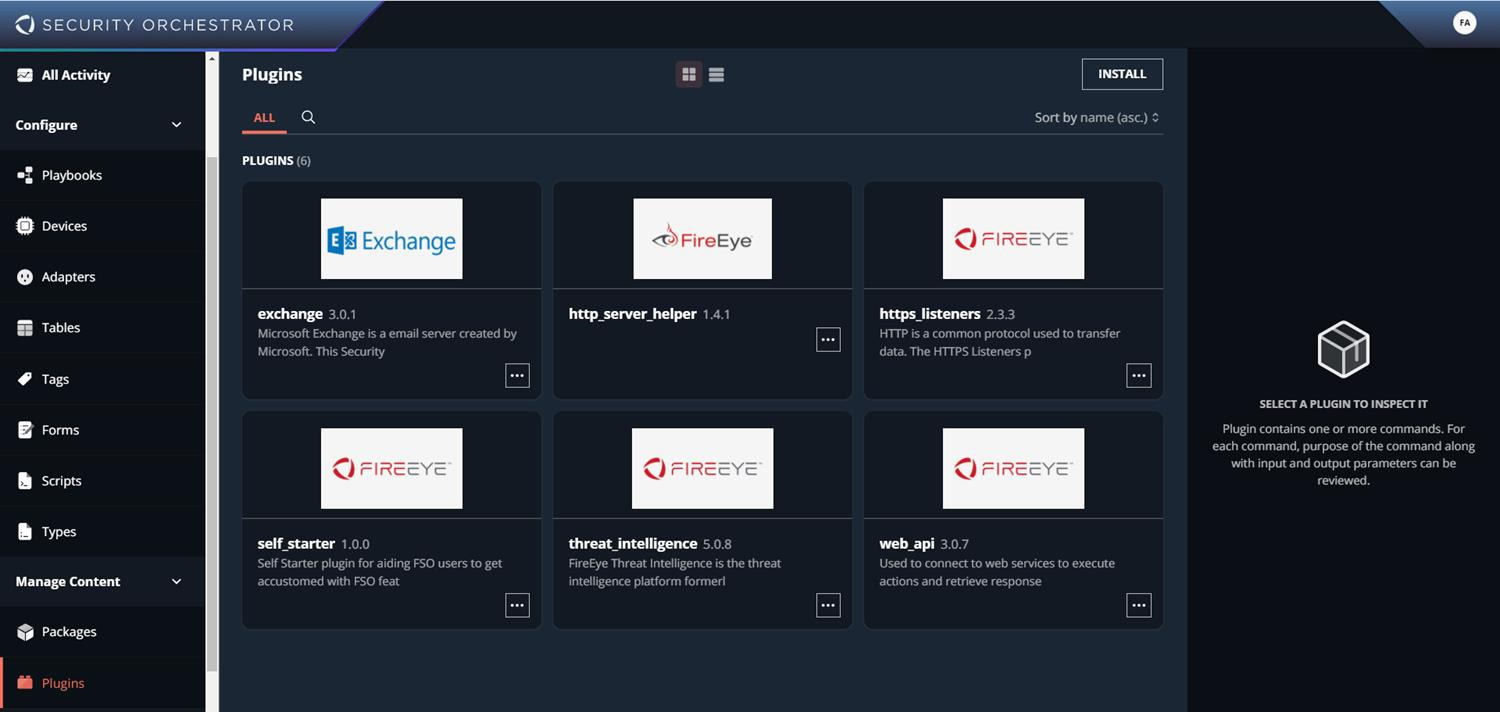
To view the details and recent activity associated with each individual plug-in:
- Click on the plug-in.
Release 6.1 Plug-ins
If you click on the plug-in, the plug-in's details appear in a panel to the right. If you hover your cursor over a plug-in and click Open, a new page opens. The page displays a list of plug-in contents in a list and the plug-in's details in a panel to the right.
The details panel shows the plug-in's name, description, vendor, tags, version number, and packaged content, such as commands. For more information, see Viewing Plug-in Commands below. The activity panel shows the history of the plug-in, including when it was created and last updated.
Viewing Plug-in Commands
You can view the commands provided by the plug-in and the parameters for each command. Some command parameters have default values specified by the plug-in developer.
To view plug-in commands and command parameters:
- In the left-hand navigation menu, click Plugins.
- Select any plug-in from the list.
- On the right, the Details panel displays the commands and types of the selected plug-in.
Invalid Plug-Ins
In the Plugins page, a red warning icon appears next to invalid plug-ins. A plug-in may be invalid because it is not properly installed, its supporting third-party modules are not installed, or it is incompatible with Security Orchestrator.

NOTE: If you see a plug-in warning, contact your administrator to resolve the issue.
© 2021 FireEye
14
Packages
Packages are bundles of resources that can be imported or exported using Security Orchestrator. Content packages are imported bundles of Security Orchestrator resources, including playbooks, devices, plug-ins, scripts, and templates. Users can import content packages from other Security Orchestrator instances or from the FireEye Market. An example of this is when you download the SO Content Bundle from the FireEye Market. The .zip file is downloaded to your local machine and available for import through your Security Orchestrator application.
Content packages that you create in your local Security Orchestrator application are called local packages. Local packages can be exported and shared with other Helix users.
You can create, import, and export packages through the Security Orchestrator UI for multiple installations and uses.
Content packages and local packages can be accessed and configured through the Packages page of the Security Orchestrator application. Only packages that are currently installed are visible to users. Older versions of a content package are replaced when a newer version is downloaded.
Packages can be sorted by name (both alphabetical and reverse alphabetical order) and by the date when they were last updated.
This section contains the following:
- Creating Local Packages below
- Importing Content Packages on page 17
- Exporting Local Packages on the facing page
- Deleting Packages on page 17
Creating Local Packages
A local package is a bundle of SO resources compiled in your local SO application. You can create your own local packages to use or export to other Security Orchestrator environments.
To create your own package:
- Click on the Packages tab in the SO UI.
- Click Local Packages in the navigation bar.
- Select New Package. A configuration window appears.
Release 6.1
Packages
-
Enter the package name, description (optional), and vendor information. Click Create. Your newly created local package is empty by default.
-
Click Open. To add content to your package, select Add Resources to Package.
-
A window of available resources appears. You can filter through and choose from existing playbooks, devices, plug-ins, tables, forms, scripts, and templates. Click on an icon to display a particular type of resource, or enter text to filter resources by name.
-
Click on the
+button next to a resource to add it to the package. You can add multiple resources at a time to a package. The added resource(s) will appear on the right-hand side of the window. -
Click Add.
-
To finish creating your local package, select Publish Changes in the top right corner.

Security Orchestrator alerts you if there are missing dependencies before you publish the changes to your local package. Click Add to Package next to a missing dependency to add it to your local package.
Exporting Local Packages
Security Orchestrator lets you share selected resources with other users or administrators by exporting them as a local package. Exporting a local package allows you to share plug-ins, devices, scripts, and templates without creating and exporting a snapshot of the Security Orchestrator server.
To export a local package:
-
Create a local package in the Packages page of Security Orchestrator. See Creating Local Packages on the previous page for instructions on building a local package for export.
-
In the Packages page, click on Local Packages to view all the packages created through your Security Orchestrator Web UI. Click Open under the package you want to export.
-
To the right of the package name, click on the version number drop-down menu.
-
Click on the download icon to save the package to your local drive as a custom
.packagefile.
The package is exported and you can send it to other Helix users.
[IMAGE PLACEHOLDER: blue circular export icon with a package or arrow]
Exported packages can be sent as attachments through common communication channels, such as email message.
© 2021 FireEye
Security Orchestrator User Guide
CHAPTER 2: Managing Content
Importing Content Packages
Security Orchestrator lets you import and install content packages shared with you by other Security Orchestrator users or administrators.
To import a content package:
- In your Security Orchestrator web environment, click on the Packages tab in the left-hand Configure sub-menu.
- In the top-right corner, click Install.
- In the Install Package window, select Choose file. Navigate through your local files and select the content package you want to import.
NOTE: You can also drag a content package from your file explorer to the Install Package window.

- The file name and size of the content package you select will appear in the pop-up window along with the file size. Click Install to finish importing the content package.
- A window appears, confirming the installation of the content package and displaying a list of the imported items in that package. Click Done to confirm the installation.
- The newly imported content package appears in the Packages page along with existing plug-ins, content packages, and local packages.
CAUTION: The Security Orchestrator configuration file
web.confis not part of the package. If you made changes to this file, you must re-enter them manually after loading the snapshot. If the time to live configuration (engine.table_content.min_time_to_livevalue) was changed inweb.confbefore the snapshot was made, you must re-enter the new value manually after installing the package. If this value is not updated, Security Orchestrator may not function properly.

Deleting Packages
You can delete both content and local packages in the Packages page. If you use any content from a content package in Security Orchestrator, but delete that package, certain Security Orchestrator elements may not function properly. For example, if you use a packaged script in a playbook script task, but delete the content package, the script task will be invalid.
To delete a package:
- Open the Content Packages or Local Packages tab of the Packages page.
- Click the ellipses button next to the Open button in any package.
Release 6.1
Packages
3. Click Delete in the drop-down menu.
© 2021 FireEye
18
Security Orchestrator User Guide
CHAPTER 2: Managing Content
19
© 2021 FireEye
Security Orchestrator User Guide
CHAPTER 3: Configuring Security Orchestrator
Before you begin creating and executing playbooks to orchestrate your security operations processes, you must configure several key elements. The customizable elements in Security Orchestrator, including playbooks, are located in the Configure drop-down menu of the Security Orchestrator navigation menu:
- Devices on the next page
- Adapters on page 27
- Playbooks on page 33
- Tables on page 80
- Forms on page 85
- Scripts and Templates on page 88
- Types on page 97
- Tags on page 108
© 2021 FireEye
20
Devices
A device is an Security Orchestrator entity that provides a usable instance of a plug-in and its commands. You can use a device in adapters and playbooks to exchange data with upstream and downstream systems and services. Before you can use a plug-in's commands, you must create, configure, and enable a device for the plug-in.
You should create a Security Orchestrator device for each upstream and downstream system and service that you plan to integrate and for each plug-in you plan to use. You create each device to use a specific plug-in and communicate with a specific system or service by configuring the device's plug-in parameters.
You may need to create multiple devices for a plug-in if you have multiple systems or services of the same type that you need to integrate with Security Orchestrator. For example, if you have more than one firewall device from the same vendor or multiple sets of credentials or API keys for accessing a cloud-based service, you can create a device for each firewall device and cloud-based service.
When configuring a device, you can also create custom device parameters and device templates. Custom device parameters can be used as input parameter values for device commands and templates. Device templates are text templates that can contain static and dynamic text content and be used as string input parameters for any of the device's commands.
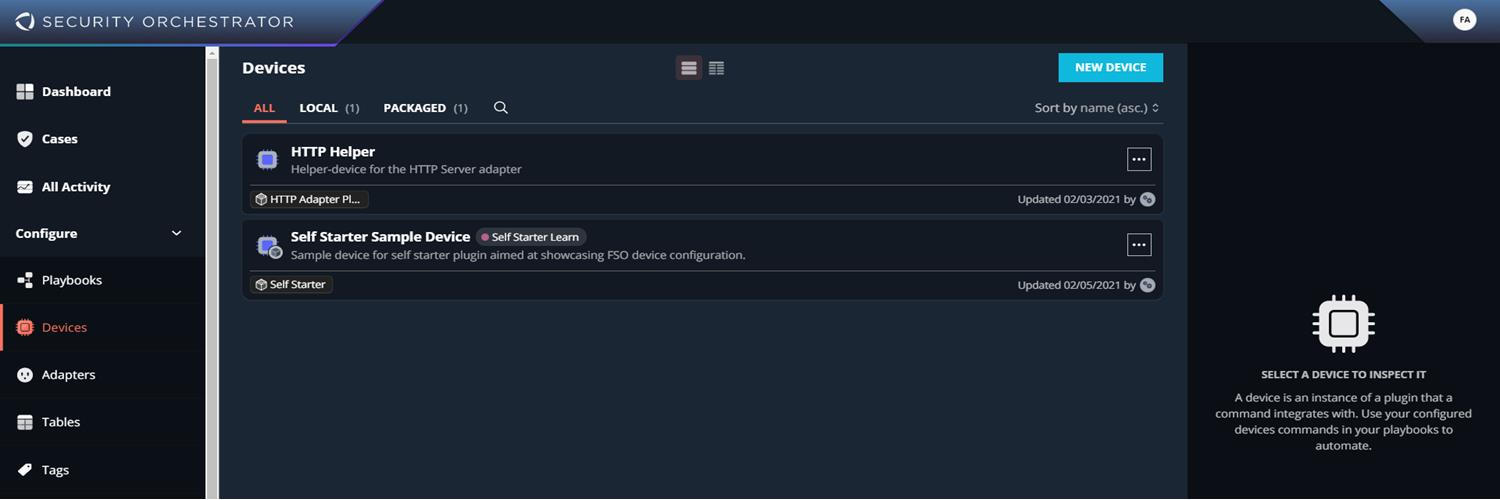
This section describes how to create, configure, and manage devices in Security Orchestrator. To prepare a device for use in an adapter or playbook, complete the following tasks:
© 2021 FireEye
21
Security Orchestrator User Guide CHAPTER 3: Configuring Security Orchestrator
-
Create and configure a device.
-
(Optional) Add custom parameters to the device.
-
(Optional) Add templates to the device.
-
Enable the device.
-
If device tasks or adapters that use the device are not functioning, check for device warnings.
-
Test the device's connectivity.
Creating Devices
When you create a device, you specify the plug-in to be used by the device and then the device parameters. Device parameters are the plug-in parameters to be used for the device. The parameters shown for a device are specific to the plug-in chosen. You must enter a value for all parameters unless a parameter is marked Optional. Some parameters have default values configured on the Plug-Ins page or provided by the plug-in developer. You can use the default value or replace it with a custom value.
To create a new device:
In the left-hand Configure menu, click Devices.
Click New Device.
Enter a name for the device.
(Optional) Enter a description of the device.
Select a plug-in from the Plug-in drop-down menu.
Click Create.
To modify device details:
In the Devices page, select the device you want to modify. The Details and Activity panel appears to the right of the list of devices. You can modify the following details:
Enter a new name in the Name field.
Enter a new description in the Description field.
In the Username field, enter the username for the FireEye appliance or virtual appliance you want to integrate with Security Orchestrator.
In the Password field, click Encrypted Value, then click Set or Change. Enter the password for the FireEye appliance or virtual appliance you want to integrate with Security Orchestrator.
Release 6.1Devices
- Slide the toggle to the right to enable the device. You cannot enable a device if it has not been published.
- Open the Add Tag drop-down menu and select a tag or create a new tag for the playbook.
Click Save.
Enabling Devices
For a device's commands to run in an adapter or playbook, the device must be enabled. You can enable a device or check its status in the Devices page.
To enable a device:
- In the menu, click Devices.
- In the list, find the device you want to enable.
- In the Enabled column, slide the button to the right to turn the Enabled option On.

NOTE: You can also enable or disable a device in the Details panel. To open the Details panel, select a device in the list and then click Details on the right. Slide the Enabled button to the right to enable the device, or slide the button to the left to disable it, and then click Save.
Testing Device Connectivity
You can test the connection to the device. The connectivity test attempts to parse the URL of the device, resolve the domain, ping the host, and check for available ports.
To test the connection to a device:
- In the menu, click Devices.
- Click the blue T icon in the bottom-right corner..
- Enter the URL of the device, in URL format or in the format <host>:<port> or <IP-address>:<port>.
- If you need to connect through a proxy, enter the proxy URL, the user name with which to connect (if required), and the password (if required).
- Click Test.
The test window displays the progress of the test. Click the Output tab to display the test results.
© 2021 FireEye23
Modifying a Device
After a device is created, follow these steps to modify the device's name, description, and parameters. You must enter a value for all parameters unless a parameter is marked Optional. Some parameters have default values configured in the Plug-Ins page or provided by the plug-in developer. You can use the default value or replace it with a custom value.
To modify a device's name and description:
- In the navigation menu, click Devices.
- In the list, select the device you want to modify.
- On the right, click Details.
- Modify the Name and Description as desired.
- Click Save.
To modify device parameters:
- In the menu, click Devices.
- In the list, select the device you want to modify.
- Click a parameter's entry box to enter a parameter value:
- In the pop-up menu, select one of the following options:
- Custom Value to enter a parameter value.
- Plugin Default to select the default parameter value provided by the plug-in developer or configured on the Plug-Ins page (if available).
- Leave Empty to clear an existing parameter value.
- Click the background to close the pop-up menu.
- In the pop-up menu, select one of the following options:
To get more information about a parameter, including the required data type, click the Help button next to the parameter name.
All parameter values are required unless marked Optional.

If a device requires sensitive parameters, such as a password or API keys, the text you enter is masked, and the data is encrypted and securely stored in the Security Orchestrator internal password vault. A padlock icon is shown in entry boxes that contain sensitive data that will be encrypted.
4. Click Save.
If a red warning icon appears next to the device, it means required parameter values are missing in the device configuration.
Release 6.1Devices
Changing the Plug-In Version for a Device
Multiple versions of a plug-in can be installed and available at the same time. You can change the plug-in version used by a device. Changing a device's plug-in version affects all adapters and playbooks that use the device's commands.
You can change the plug-in version to incorporate minor plug-in bug fixes and enhancements. However, if the new version of a plug-in has significant changes to its commands or parameters, you should create new devices for the plug-in.
Plug-In Version Numbering
To determine how a change in plug-in versions may affect your existing devices, adapters, and playbooks, review the following version numbering scheme.
Plug-in developers use the version numbering scheme Major.Minor.Patch, where:
- An increment in the Major number indicates that upgrading to the version will break device or command parameter configurations. A change to a plug-in's name or vendor name is also a major change. Major version changes are incompatible with previous versions. After the administrator installs the new plug-in version, follow the steps in Changing a Plug-In Version After a Major Version Change below to use the new version.
- An increment in the Minor number indicates that upgrading to the version will not require reconfiguration. An example of a minor change is the addition of a new command or new optional device parameter. Minor version changes are backwards compatible. After the administrator installs the new plug-in version, follow the steps in Changing the Plug-In Version for One Device on the next page or Changing the Plug-In Version for All Devices to use the new version.
- An increment in the Patch number indicates that no commands or parameter configurations have changed. Only internal bug fixes and functionality updates were made. Patch version changes are backwards compatible. After the
© 2021 FireEye 25
Security Orchestrator User GuideCHAPTER 3: Configuring Security Orchestrator
To change the plug-in version used by devices after a major version change:
-
Clone all playbooks that rely on the device that use the plug-in, so you have the current playbooks as a reference when reconfiguring playbooks. (This is helpful because custom input values in playbooks are not carried over to commands when a major version change has occurred.)
-
Create a new device that uses the new plug-in version.
-
Configure adapters to use the new device.
-
Configure device tasks (in the cloned playbooks) to use the new device.
-
Publish, enable, and validate the updated playbooks.
You can delete the original playbooks after verifying that the new playbooks function properly.
Changing the Plug-In Version for One Device
If a plug-in has a major version change, follow the instructions in Changing a Plug-In Version After a Major Version Change on the previous page to use the new plug-in version.
If multiple devices use the same plug-in version and you need to change the plug-in version for all of them, you should change the plug-in version from the Plug-Ins page. For instructions, see Changing the Plug-In Version for All Devices.
To change the plug-in version used by one device:
-
In the menu, click Devices.
-
In the list, select the device for which you want to change the plug-in version. The current plug-in version is shown in the Plug-In column.
-
Click Change Version.
If only one version of the plug-in is installed, the Change Version button is not shown.
-
In the Target Version box, select the plug-in version you want to use for the device.
-
Click Change.
The device begins using the new plug-in version.
-
Verify that the device, adapters, and playbooks that use the plug-in are still configured and functioning properly. To do this, look for validation warnings on the Devices, Adapters, and Playbook pages.
Adapters
An adapter communicates with upstream systems to receive data and generate events in Security Orchestrator. Adapters use plug-in commands from configured devices to receive data from an upstream system. Events generated by adapters can trigger playbook if they match the conditions for an adapter trigger start event. For more information on adapter triggers, see Start Events on page 38.
FireEye recommends that you create an adapter for each data source that you want to generate events and trigger playbooks. There are three types of adapters:
- HTTP Server adapters receive data from POST requests to the SO Web server, allowing remote systems to push data as needed. HTTP Server adapters generate event data in JSON format. See Configuring an HTTP Server Adapter on the next page for more information.
- Interval adapters run a device command at a specified time interval to poll remote data sources, such as databases, ticketing systems, and email servers. See Configuring an Interval Adapter on page 29 for more information.
- Socket adapters listen for connections from a remote system on a specified port number and network address. See Configuring a Socket Adapter for more information.
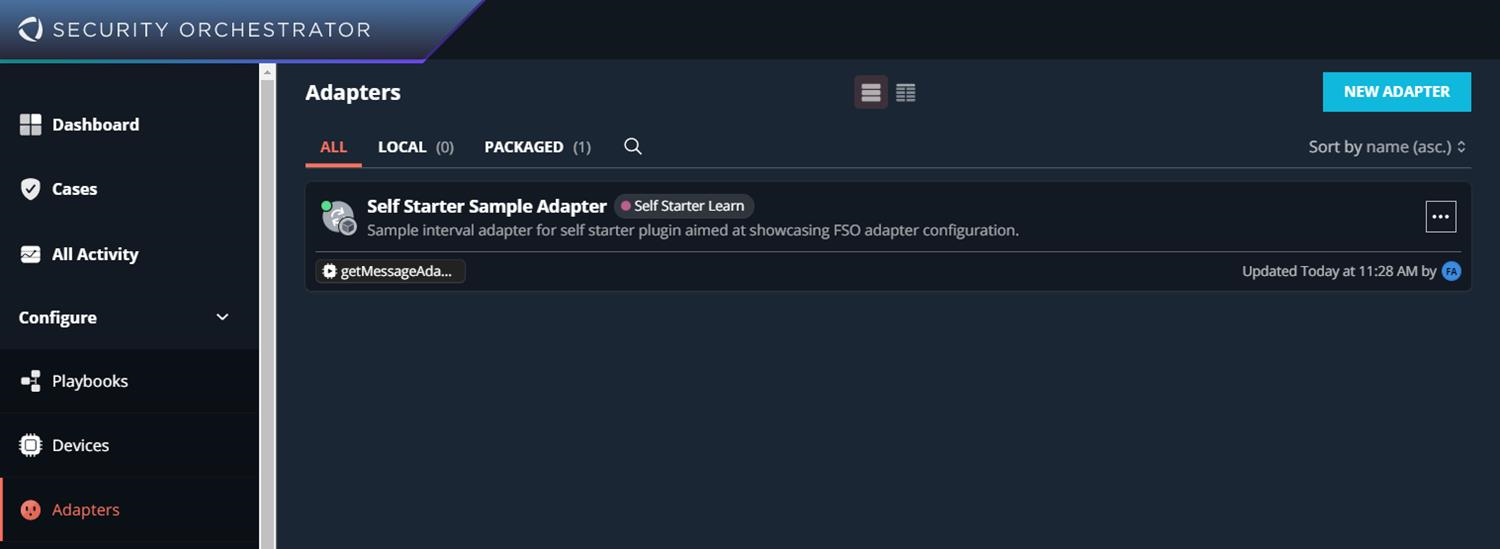
To access the Adapters page:
- In the Security Orchestrator navigation menu, click Configure. A drop-down menu appears.
- Select Adapters.
© 2021 FireEye
27
Security Orchestrator User Guide
CHAPTER 3: Configuring Security Orchestrator
This section includes the following information:
- Creating an Adapter below
- Configuring an HTTP Server Adapter below
- Configuring an Interval Adapter on the facing page
- Configuring a Socket Adapter on page 30
- Enabling Adapters
- Adapter Status
- Adapter Warnings
Creating an Adapter
You can create an adapter in the Adapters page of Security Orchestrator.
To create a new adapter:
- In the Adapters page, click New Adapter in the top right corner.
- In the pop-up window, enter a name and description (optional) for your adapter.
- Click Create.
Your adapter is unconfigured, invalid, and disabled by default. The adapter's priority level is set to Medium by default. See Configuring an HTTP Server Adapter below, Configuring an Interval Adapter on the facing page, Configuring a Socket Adapter on page 30, and Enabling Adapters on page 31 for more information.
Configuring an HTTP Server Adapter
What you need:
- The type of protocol the adapter will use (HTTP or HTTPS).
- The port number the adapter will listen on.
- The network interface bind address the adapter will listen on.
- (Optional) The protocol basic authentication credentials.
To configure an HTTP Server adapter:
- In the Adapters page, select an HTTP Server adapter. The Details and Activity panel opens to the right.
- (Optional) Add tags to identify the adapter.
28
© 2021 FireEye
Release 6.1 — Adapters
-
(Optional) Select the priority level for events and cases generated by the adapter. The priority levels are:
- Low: 2
- Medium: 5
- High: 8
- Critical: 10
-
In APPLICATIONS, click +ADD.
- Select Security Orchestrator from the drop-down menu.
-
In SETTINGS:
- Under Protocol, select the protocol type used by the adapter (HTTP or HTTPS).
- Under Port, enter the port number the adapter will listen on. The value must be an integer. c. Under Bind address, enter the network interface bind address the adapter will listen on. The bind address must be in IPv4 format. To bind all network interfaces, enter 0.0.0.0.
- (Optional) Under Username, enter a user name for HTTP server authentication. If specified, the user name must be provided with requests to the HTTP server adapter. If no user is specified, any user is accepted.
- (Optional) Under Password, enter the password for the user entered above.
-
Click Save.
Configuring an Interval Adapter
What you need:
- A plug-in and corresponding device installed and configured in the Security Orchestrator WebUI.
- The device command and command parameter values used to receive data.

NOTE: All command parameter values are required unless marked Optional. Some parameters have default values. You can select the default value or enter a custom value.
To configure an Interval adapter:
- In the Adapters page, select an Interval adapter. The Details and Activity panel opens to the right.
- (Optional) Add tags to identify the adapter.
Security Orchestrator User GuideCHAPTER 3: Configuring Security Orchestrator
-
(Optional) Select the priority level for events and cases generated by the adapter. The priority levels are:
- Low: 1 to 2
- Medium: 3 to 5
- High: 6 to 8
- Critical: 9 to 10
-
In APPLICATIONS, click +ADD.
- Select Security Orchestrator from the drop-down menu.
-
In SETTINGS:
- Under Interval, enter how often (in seconds) the adapter will execute the device command. The value must be an integer.
- Under Timeout, enter the maximum number of seconds the command can run before timing out. The default value is 60 seconds.
-
In ACTION:
- Select a device command from the All Actions or Device Commands list.
- Enter values for all command parameters.
-
Click Save.
Configuring a Socket Adapter
What you need:
- The type of transport protocol the adapter will use (TCP or UDP).
- The port number the adapter will listen on.
- The network interface bind address the adapter will listen on.
- A plug-in and corresponding device installed and configured in the Security Orchestrator WebUI.
- The device command and command parameter values used to receive data.

NOTE: All command parameter values are required unless marked Optional. Some parameters have default values. You can select the default value or enter a custom value.
To configure an Interval adapter:
- In the Adapters page, select a socket adapter. The Details and Activity panel opens to the right.
30
© 2021 FireEye
-
(Optional) Add tags to identify the adapter.
-
(Optional) Select the priority level for events and cases generated by the adapter. The priority levels are:
Low: 1 to 2
Medium: 3 to 5
High: 6 to 8
Critical: 9 to 10
-
In APPLICATIONS, click +ADD.
Select Security Orchestrator from the drop-down menu.
-
In SETTINGS:
Under Transport type, select TCP or UDP as the transport protocol.
Under Port, enter the port number the adapter will listen on. The value must be an integer.
Under Bind address, enter the network interface bind address the adapter will listen on. The bind address must be in IPv4 format. To bind all network interfaces, enter 0.0.0.0.
Under Timeout, enter the maximum number of seconds the command can run before timing out. The default value is 60 seconds.
Under Discard timeout, select whether to discard adapter data if the command times out. By default, adapter data is not discarded if a device command times out.
-
In ACTION:
Select a device command from the All Actions or Device Commands list.
Enter values for all command parameters.
-
Click Save.
Enabling Adapters
For an adapter to receive data and generate events, the adapter must be enabled. You can enable an adapter or check its status in the Adapters page.
To enable an adapter:
Select an adapter in the Adapters page. The Details and Activity panel appears to the right.
Slide the Enabled toggle to the right.
Click Save.
© 2021 FireEye
FireEye recommends you check the health status of the adapter before you enable it. You can enable an adapter even if it is misconfigured. An invalid adapter will not properly communicate with devices to receive data and generate events. For more information on adapter health, see Adapter Status below and Adapter Warnings below.
Adapter Status
You can determine an adapter's health status in the Adapters page. A status indicator appears next to the adapter name as a colored dot over the adapter icon.
- A gray dot indicates the adapter is disabled and stopped (not receiving data).
- A red dot indicates the adapter is enabled but not functioning due to configuration issues or issues with the associated device. See Adapter Warnings below.
- A green dot indicates the adapter is enabled and functioning properly.
NOTE:You can also view adapter status in the System > Status page.

Adapter Warnings
Security Orchestrator helps you quickly identify incorrectly configured adapters and other adapter issues by displaying warnings on the Adapters page.
Adapter Configuration Issues
A red warning icon below an adapter if the adapter's configuration has missing or invalid parameter values. To correct adapter configuration issues, enter all required adapter and command parameters.
Security Orchestrator User Guide
Playbooks
Playbooks
A playbook is a sequence of executable steps taken to orchestrate your security operations. A playbook's workflow is represented visually by a diagram, similar to a flow chart. The visual representation of a playbook is called the Playbook Task Builder, which lets you configure the workflow.
You can customize a playbook's workflow using several configurable elements:
| Playbook Workflow Element | Description |
|---|---|
| Start Event |
The specified data source that triggers a playbook's workflow. A workflow can have only one start event. Start events are included by default when you create a playbook and they cannot be deleted from a playbook. Start events are configured as manual triggers by default but can be configured to act as adapter triggers. Start events cannot have incoming sequence flows. A playbook's workflow cannot process data unless the start event is configured. See Start Events on page 38 for more information. |
| Task |
An activity that you or Security Orchestrator performs. A workflow can have multiple tasks that perform various functions. See Tasks on page 44 for more information. |
| Sequence Flow |
Connects one playbook workflow element to another and defines the order in which actions are performed. A sequence flow can connect only two elements; one acts as a source and the other as a target. See Sequence Flows on page 68. |
| Gateway |
Connects one playbook workflow element to another. See Gateways on page 72 for more information. |
| End Events |
An end point for workflow processing. A playbook workflow can have multiple end events that represent the termination of multiple conditional pathways. However, end events are not required in workflows. See End Events on page 73 for more information. |
Security Orchestrator User Guide
CHAPTER 3: Configuring Security Orchestrator
This section contains the following:
- Building a Playbook on the facing page
- Using the Playbook Workflow Builder on page 36
- Viewing Playbooks on page 74
- Testing a Playbook on page 74
- Create and Modify a Playbook on page 75
- Publishing Playbooks on page 77
- Managing Playbook Access Permissions on page 78
34
© 2021 FireEye
Release 6.1
Playbooks
Building a Playbook
To perform playbook management tasks, you need full configuration permissions access (view, edit, and add permissions) to the playbook and any required components, such as plug-ins, devices, adapters, tables, forms, or tags that you plan to manage. Before configuring a playbook, you should analyze your existing security processes and incident response procedures to determine what tasks you want to automate. This helps you identify which playbooks you will use and the devices and adapters you need to configure.
Follow these steps to create and configure a playbook.
| Step | Details |
|---|---|
| Step 1: | Configure the device's plug-ins that will be used in the playbook. See Devices on page 21 for more information. |
| Step 2: | Configure an adapter to receive events. See Adapters on page 27 for more information. |
| (Optional) Step 3: | Configure forms to display information in cases. See Forms on page 85 for more information. |
| (Optional) Step 4: | Configure tables to store data from the playbook. See Tables on page 80 for more information. |
| Step 5: | Create the playbook. See Create and Modify a Playbook on page 75 for more information. |
| Step 6: | Configure the playbook start event as a manual or adapter trigger. See Start Events on page 38 for more information. |
| Step 7: | Configure playbook tasks. See Tasks on page 44 for more information. |
| Step 8: | Configure sequence flows and gateways. See Sequence Flows on page 68 and Gateways on page 72 for more information. |
| Step 9: | Publish, enable, and verify the playbook. See Publishing Playbooks on page 77 for more information. |
© 2021 FireEye
35
Security Orchestrator User Guide
CHAPTER 3: Configuring Security Orchestrator
Using the Playbook Workflow Builder
The playbook workflow builder lets you add, customize, and delete playbook workflow elements, including start events, tasks, sequence flows, gateways, and end events.
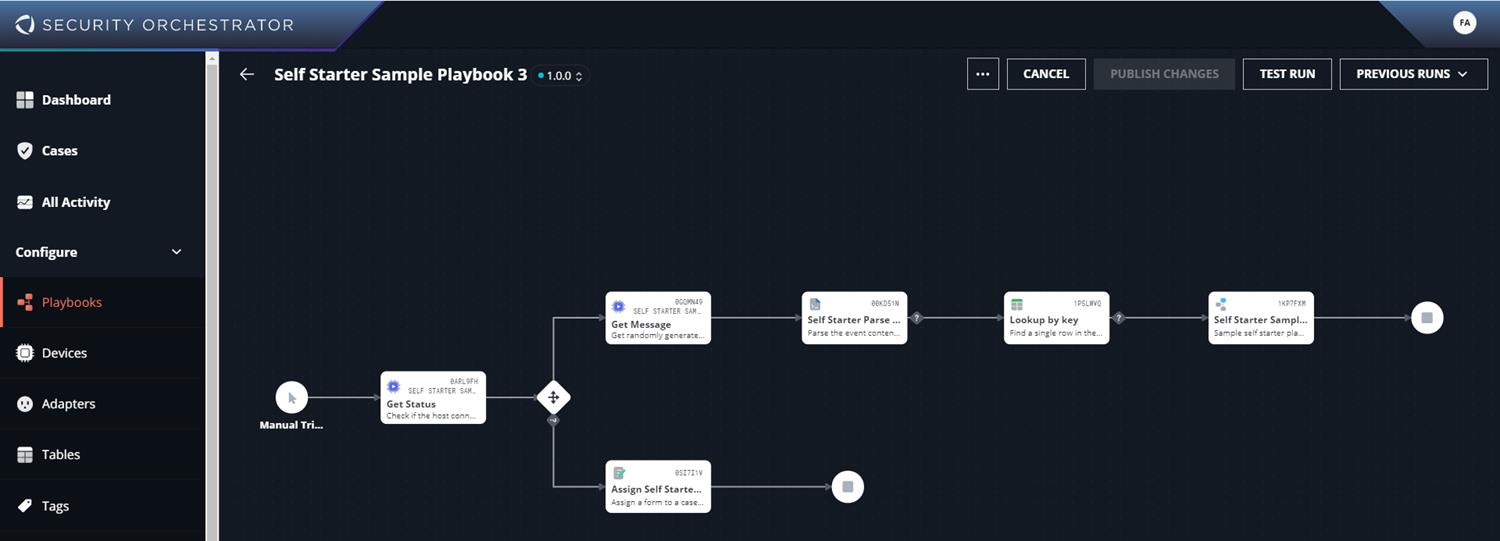
To access the Playbook Workflow Builder:
- In the Security Orchestrator navigation menu, select Configure.
- Select Playbooks.
- Select a playbook.
- In the Details and Activity Panel, click Open.
Every playbook has an unconfigured start event when you first open the Playbook Workflow Builder. You must publish your playbook to save changes you make. See Publishing Playbooks on page 77 for more information.
You can perform the following basic tasks when working in the playbook workflow builder:
| Task | Instructions |
|---|---|
| Add a task. |
|
| Add a sequence flow. |
|
36
© 2021 FireEye
|
Task |
Instructions |
|---|---|
|
Add a gateway. |
|
|
Add an end event. |
|
|
Delete a workflow element. |
|
|
Configure a workflow element. |
|
|
Move a workflow element. |
Drag the workflow element to a new location. |
|
Change the source or target of a sequence flow line. |
Drag one end of the sequence flow line to another workflow element. |
|
Switch workflow views. |
If multiple published versions of a workflow exist, click the version number next to the Playbook name and select which version you want to view. |
|
Delete a draft workflow. |
While viewing a draft version of a workflow that was published previously, click Revert to delete the changes in the draft version and revert to the last published version. |

NOTE: While working in the playbook workflow builder, you can zoom in and out on the workflow by clicking the plus (+) and minus (-) icons in the lower right corner.
© 2021 FireEye
37
Security Orchestrator User Guide
CHAPTER 3: Configuring Security Orchestrator
Start Events
A start event is the trigger for your playbook's workflow. A playbook can be triggered automatically or manually.
Playbooks automatically run if they are configured with an adapter-triggered start event. An adapter trigger uses event data ingested from a configured adapter to begin playbook execution. A single adapter can be used in multiple playbooks' start events. Adapter triggers can be configured to trigger only if an event's data matches specific conditions. Adapter triggers can use any adapter in the Security Orchestrator Web UI, including disabled adapters. However, adapter-triggered playbooks will only be triggered if the adapter selected in the start event is enabled.
Playbooks with manually triggered start events require manual intervention to begin workflow execution. Manually triggered playbooks can also be run from the Cases or All Activity pages of Security Orchestrator if the required input parameters are configured correctly.
This section includes the following:
- Configuring an Adapter Trigger below
- Adding Conditions to an Adapter Trigger on the facing page
- Working with Condition Groups on page 42
- Configuring a Manual Trigger on page 42
Configuring an Adapter Trigger
Playbooks have manual triggers by default. You must change the start event from a manual trigger to an adapter trigger.
To configure a start event as an adapter trigger:
- In the playbook workflow builder, do one of the following:
- Double click the start event.
- Hover your cursor over the start event and click the circular edit button that appears.
The trigger configuration pop-up window appears.
- In the top-right of the configuration pop-up window, click the circular edit button. A list of available triggers appears.
- Select an adapter to trigger the playbook. The Output configuration tab appears. For information about adapters, see Adapters on page 27.
38
© 2021 FireEye
Release 6.1Playbooks
-
Configure the adapter's output parameters. The raw alert, alert source url, and generated id output parameters are made available in the playbook by default. Each output parameter is not highlighted in the execution summary or case summary by default. Under the Output tab, configure the adapter's output parameters:
-
Click the sliding button next to the output parameter name to make the parameter available or unavailable in playbook workflow elements.
-
To display a value from a complex output parameter in the Execution Summary section in case pages, click the Show in execution summary button
 .
. -
To display an output parameter in the Case Summary section in case pages, click the Show in case summary button
 .
.
-
-
(Optional) Click the Condition tab to configure the start event's conditions. Adapter triggers do not have defined conditions by default. You can add multiple conditions to your adapter trigger. Conditions can be nested as groups. For detailed steps about how to add and configure a condition, see Adding Conditions to an Adapter Trigger below.
-
Click on the drop-down menu and select whether the start event will trigger if all conditions are true, at least one condition is true, or exactly one of two conditions is true.
-
Select a type for the value. A custom type can be defined.
-
Select a condition for the value.
-
Define the value. A custom value can be defined.
-
-
Click Save.
Adding Conditions to an Adapter Trigger
You can configure conditions that must be met for the playbook to process events from an adapter. For example, you could create a condition that will only trigger the playbook workflow if a case is assigned to someone with a specific IAM role.
To add conditions to an adapter trigger:
-
In the playbook workflow builder, do one of the following:
Double click a start event configured as an adapter trigger.
Hover your cursor over the start event and click the circular edit button that appears.
The adapter trigger configuration pop-up window appears.
-
Click the Condition tab.
-
Click the operations drop-down list and select one of the following to evaluate the group of conditions:
© 2021 FireEye 39
Security Orchestrator User GuideCHAPTER 3: Configuring Security Orchestrator
AND (all conditions are true)
OR (at least one condition is true)
XOR (exactly one of two conditions is true)
Click +Add Condition. A list of empty, configurable values appears.
Click the top Select a value.... A list of available parameters appears. You can select a pre-defined type or enter a custom value.
Select Adapter Event to use an event data value from the adapter selected in the start event. For example, you can select Adapter Event > Alert > Created at to set a certain time as the condition for triggering playbook workflow.
Select Case Information to use a detail from a case opened from an adapter event. For example, you can select Case Information > Priority to set a certain case priority level as the condition for triggering playbook workflow.
Select Templates to use a custom template.
Select Custom Value to enter a custom value.
40© 2021 FireEye
Release 6.1
Playbooks
6. In the next box, select an operator for evaluating the value. You can choose one of the following operators:
| Operator | Description |
|---|---|
| != | Not equal to |
| < | Less than |
| <= | Less than or equal to |
| <> | Not equal to |
| == | Equal to |
| > | Greater than |
| >= | Greater than or equal to |
| and | Both values are conditions to be met |
| contains | The value contains another value |
| exists | The value exists |
| in | Is equal to any of several values in a defined list |
| is | Is equal to |
| is not | Is not |
| not contains | Excludes another defined value |
| not exists | The value does not exist |
| not in | Is not equal to any of several values in a defined list |
| or | Either value defined can match |
| xor | Another value is evaluated only if the defined value exists |
7. (Optional) To add another condition to the group, click Add Condition and enter the condition.
8. Click Save.
For information on configuring nested conditions into groups, see Working with Condition Groups on the next page.
© 2021 FireEye 41
Security Orchestrator User Guide
CHAPTER 3: Configuring Security Orchestrator
Working with Condition Groups
You can create more complex conditional expressions by nesting conditions into groups and adding multiple groups.
You can perform the following tasks when adding conditions to adapter-triggered start events.
| Task | Instructions |
|---|---|
| 1. Add a condition. |
|
| 2. Add another condition. | Click Add Condition. Repeat step 1. |
| 3. Nest a condition and create a condition group. |
Hover over a condition with your cursor and click the Nest Group button to the left of the trash can button. Click Save. |
Click the trash can next to a nested condition group to delete it.
Configuring a Manual Trigger
To configure a start event as a manual trigger:
-
In the playbook workflow builder, do one of the following:
- Double click the start event.
- Hover your cursor over the start event and click the circular edit button that appears.
The trigger configuration pop-up window appears.
-
(Optional) To add an input parameter that will be accepted by the playbook start event, click + Add Parameter. A list of configurable fields for the input parameter appears:
- In the Name field, enter a name for the input parameter. If no name is given, a randomized number is generated by the system and assigned to the input parameter.
- In the Description field, enter an optional description of the parameter.
© 2021 FireEye
42
-
In the Type drop-down list, select the data type of the input parameter.
-
To provide a default value to be used for the input parameter when a value is not passed by the recommended or pivot action, enter a value in the Default Value field.
-
To allow a list of values as input for the parameter, slide the Is List toggle to the right.
-
To make the input parameter optional, slide the Optional toggle to the right. If a parameter is required, it must be provided to run a recommended or pivot action.
-
To display the input parameter in the Summary section on case pages, slide the Include in Summary toggle to the right.
-
Click Save.
You can edit input parameters by clicking the edit pencil icon to the right of the parameter name in the manual trigger configuration window. To delete an input parameter, click the delete icon to the right of the parameter name in the manual trigger configuration window.
3. Click Save.

NOTE: You must publish and enable a manually triggered playbook before you can select it as a recommended playbook in another workflow and before an analyst working on a case can run it as a pivot action.
© 2021 FireEye
43
Tasks
A task is an activity performed by the system or a user as part of a playbook workflow. A playbook workflow can have multiple tasks that perform various functions.
In the playbook workflow builder, a task appears as a rectangle with rounded corners. A newly added task is invalid. Invalid tasks are grayed out and include the error message "Invalid task". After the task is configured, the task rectangle contains an icon that identifies the task type, a unique ID generated for the task, the task action name, and the task description.
Task Types
The following types of tasks are available in Security Orchestrator. For detailed descriptions and examples, see the section for each task type.
Task Type | Icon | Description |
|---|---|---|
Device Command |
| Runs a command from a device that is configured to use a specific plug-in. |
Native Command |
| Runs a Security Orchestrator native command of either List or String type. |
Script |
| Manipulates strings and lists with a standard library of functions, or runs your custom JavaScript function. |
Playbook |
| Gives you the option to run a manually triggered playbook. |
Table |
| Stores, retrieves, and manipulates data in Security Orchestrator tables. |
Form |
| Lets you enter important case information into a customized summary form. |
Update Case |
| Assigns a case to a user or user group or updates a case name, priority, or status. |
Ask Question |
| Asks you questions and collects the responses as part of the case. |


This section contains the following:
- Configuring Device Command Tasks on page 46
- Configuring Native Command Tasks on page 48
- Configuring Script Tasks on page 50
Release 6.1
Playbooks
- Configuring Playbook Tasks on page 54
- Configuring Table Tasks on page 56
- Configuring Form Tasks on page 59
- Configuring Update Case Tasks on page 61
- Configuring Ask Question Tasks on page 63
|
© 2021 FireEye |
45 |
Security Orchestrator User GuidePlaybooks
Configuring Device Command Tasks
A device command task runs a device command using a device that you created for a specific plug-in.
Before you configure a device task, complete the following tasks:
- Identify the plug-in and plug-in command you want to use. See Viewing Installed Plug-Ins and Viewing Plug-in Commands for more information.
- Create a device in Security Orchestrator for the plug-in, if one does not exist.
- Add a task to a playbook workflow where you want to run the device task. For more information, see Using the Playbook Workflow Builder on page 36.
You must configure the input and output parameter values for a device command when configuring a device command task. The input parameters customize command execution while the output parameters determine what is returned by the command. You can also specify if the device command's output parameters appear in the execution or case summary associated with the playbook.
To configure a device command task:
| Task | Instructions |
|---|---|
|
Step 1: Select a task. |
In the playbook workflow builder, double-click a task. The task configuration pop-up window appears. |
|
Step 2: Select a device command. |
|

© 2021 FireEye
Security Orchestrator User Guide
CHAPTER 3: Configuring Security Orchestrator
| Task | Instructions |
|---|---|
|
Step 3: Configure input parameter values for the device command. |
|
|
Step 4: Configure output parameter values for the device command. |
|
|
Step 5: Publish your changes. |
Click Publish Changes in the top right corner of the playbook workflow builder. For more information about publishing playbook changes, see Publishing Playbooks on page 77. |
 TIP: To view an individual input parameter's description and requirements, hover your cursor over the i button next to an input parameter name.
 button to the right of a parameter name.
 button to the right of a parameter name.
Security Orchestrator User Guide
Playbooks
Configuring Native Command Tasks
A native command task runs a string or list-type command packaged in Security Orchestrator.
Before you configure a native command task:
- Add a task to a playbook workflow where you want to run the native command task. For more information, see Using the Playbook Workflow Builder on page 36.
You must configure the input and output parameter values for a device command when configuring a native command task. The input parameters customize command execution while the output parameters determine what is returned by the command. You can also specify if the device command's output parameters appear in the execution or case summary associated with the playbook.
To configure a native command task:
|
Task |
Instructions |
|---|---|
|
Step 1: |
In the playbook workflow builder, double-click a task. The task configuration pop-up window appears. |
|
Step 2: |
|
|
Step 3: |
|


© 2021 FireEye
48
Security Orchestrator User Guide
CHAPTER 3: Configuring Security Orchestrator
| Task | Instructions |
|---|---|
|
Step 4: Configure output parameter values for the native command. |
|
|
Step 5: Publish your changes. |
Click Publish Changes in the top right corner of the playbook workflow builder. For more information about publishing playbook changes, see Publishing Playbooks on page 77. |


49
© 2021 FireEye
Security Orchestrator User Guide
Playbooks
Configuring Script Tasks
A script task manipulates complex playbook data and returns more useful outputs that are easier to work with in other playbook tasks. You can configure a script task as a custom script task or a global script task. Custom scripts are JavaScript functions you write from scratch inside the playbook workflow builder. Global scripts are scripts available in the Scripts page of Security Orchestrator. The list of global scripts includes both packaged Security Orchestrator scripts and local scripts you create in the Scripts page. The library of packaged Security Orchestrator scripts provides basic, commonly used data manipulation functions. For more information, see Scripts and Templates on page 88.
IMPORTANT: Before you use a global script in a script task, check the Scripts page to see if the script has any tags. If a packaged script is tagged Inital config ONLY, you must configure important elements of the script before you use can properly use it in a playbook. If a playbook contains a global script task with an unconfigured script, playbook execution will fail. For more information about tagged, packaged content, see Tags on page 108.
For more advanced manipulation not provided by the standard scripts, you can use your own JavaScript in a script task. For more information, see JavaScript Scripts on page 88.
To configure a custom script task:
| Task | Instructions |
|---|---|
|
Step 1: |
In the playbook workflow builder, double-click a task. The task configuration pop-up window appears. |
|
Step 2: |
|
 ) from the menu of task types. The two task types are listed.
| © 2021 FireEye | 50 |
|
Task |
Instructions |
|---|---|
|
Step 3: Declare input and output parameters and enter the JavaScript function. |
At the top of the configuration menu is a script editor. You can scroll inside the script editor to or click the expand button to view all script contents.
|
|
Step 4: Configure input parameter values for the custom script. |
|
|
Task |
Instructions |
|---|---|
|
Step 5: Configure output parameter values for the custom script. |
|
|
Step 6: (Optional) Modify a custom script that has been published. |
|


To configure a global script task:
|
Task |
Instructions |
|---|---|
|
Step 1: Select a task. |
In the playbook workflow builder, double-click a task. The task configuration pop-up window appears. |
|
Step 2: Open the global script task configuration menu. |
|

|
Task |
Instructions |
|---|---|
|
Step 3: Configure input parameter values for the custom script. |
|
|
Step 4: Configure output parameter values for the custom script. |
|
|
Step 5: (Optional) Modify a global script that has been published. |
|

Security Orchestrator User GuidePlaybooks
Configuring Playbook Tasks
A playbook task gives you the option to run a manually triggered playbook in the Recommended Actions of a case page. When a playbook task runs during playbook execution, the process generated by the playbook becomes a case, if it is not already a case.
Before you configure a playbook task:
- Create, publish, and enable the manually triggered playbook that you want to recommend. For details about creating a manually triggered playbook, see Configuring a Manual Trigger on page 42.
- Add a task to a playbook workflow where you want to run the playbook task. For instructions on adding tasks to your playbook, see Using the Playbook Workflow Builder on page 36.
To configure a playbook task:
| Task | Instructions |
|---|---|
| Step 1: Select a task. | In the playbook workflow builder, double-click a task. The task configuration pop-up window appears. |
| Step 2: Select a manually triggered playbook. |
|
| Step 3: Configure input parameters. |
If the message "nothing to configure" appears, skip to the next step.
TIP: |


© 2021 FireEye54
|
Task |
Instructions |
|---|---|
|
Step 4: |
|
|
Step 5: |
Click Publish Changes in the top right corner of the playbook workflow builder. For more information about publishing playbook changes, see Publishing Playbooks on page 77. |
 ) button to the right of a parameter name.
 ) button to the right of a parameter name.
Security Orchestrator User GuidePlaybooks
Configuring Table Tasks
A table task stores, retrieves, or manipulates data in a table you create in Security Orchestrator. Table tasks can perform the following commands:
| Table Command | Description |
|---|---|
| Clear All Content | Clear all table content. |
| Create/Replace* | Insert a table row or replace an existing table row. The command is configured to insert a new row by default. |
| Create/Replace many | Insert or replace multiple rows from a table at once. |
| Delete by key* | Delete a row from the table that matches fields from the primary key. Table must include a primary key. |
| Delete Many* | Delete multiple rows matching fields from the primary key. Table must include a primary key. |
| Get all values for column | Get all distinct values for a table column. |
| Get values for column where* | Get values for a table column if defined criteria is met. Table must include a primary key. |
| Lookup by key* | Look up a single value within a table row using the primary key. Table must include a primary key. |
| Match by Value* | Look up multiple table records (rows) using search criteria. Table must include a primary key. |
| Update column by key* | Update a single value within a table row using selected fields from the primary key. Table must include a primary key. |
NOTE: Table commands marked with a * require input and output parameter configuration.
Before configuring a table task, you must complete the following tasks:
Security Orchestrator User Guide
CHAPTER 3: Configuring Security Orchestrator
- Create, publish, and enable the table you want to use in the task.
- Add a task to a playbook workflow where you want to run the table task. For instructions, see Using the Playbook Workflow Builder on page 36.
To configure a table task:
|
Task |
Instructions |
|---|---|
|
Step 1: Select a task. |
In the playbook workflow builder, double-click a task. The task configuration pop-up window appears. |
|
Step 2: Select a table. |
|
|
Step 3: Select a table command. |
|
|
Step 4: Configure input parameter values for the table command. |
If required, enter parameter values and configure options. Each table command has unique input parameters.
|


57
© 2021 FireEye
Release 6.1Playbooks
| Task | Instructions |
|---|---|
| Step 5 : Configure output parameter values for the table command. |
|
| Step 6: Publish your changes. |
Click Publish Changes in the top right corner of the playbook workflow builder. For more information about publishing playbook changes, see Publishing Playbooks on page 77. |


© 2021 FireEye58
Security Orchestrator User GuidePlaybooks
Configuring Form Tasks
Form tasks introduce a customized summary form into playbook workflow for you to enter information relevant to the case. Case data you input into a form is displayed in the Case Summary page associated with a playbook. The data you enter into a form is intended to support analysts working on cases by summarizing relevant details. Form tasks do not return data you enter for further processing in the playbook workflow. Forms contain empty fields for displaying important case data, but you can pre-enter data when you configure a form task. If you pre-enter data into forms during form task configuration, you can change that information later during workflow execution.
Form tasks also define the incident type of cases generated by the playbook. The first summary form task processed in the playbook workflow sets the incident type for the case. If a summary form task is not processed in the workflow, the incident type is undefined.
You can include multiple form tasks in a playbook workflow. You can also reuse the same form in different playbook workflows. However, if you include the same form multiple times in a playbook workflow, only one instance of the form is shown in cases generated by the playbook.

When an assign summary form task runs during playbook execution, the process generated by the playbook becomes a case, if it is not already a case.
Before you configure a form task, do the following:
- Create, publish, and enable the form you want to use in the task. For more information, see Forms on page 85.
- Add a task to a playbook workflow where you want to run the summary form task. For instructions, see Using the Playbook Workflow Builder on page 36.
To configure a form task:
| Task | Instructions |
|---|---|
| Step 1: Select a task. | In the playbook workflow builder, double-click a task. The task configuration pop-up window appears. |
| Step 2: Select a form. |
|
 from the menu of task types. Enabled forms appear in a list.
© 2021 FireEye
59
Security Orchestrator User Guide
CHAPTER 3: Configuring Security Orchestrator
|
Task |
Instructions |
|---|---|
|
Step 3: (Optional) |
|
|
Step 4: Publish your changes. |
Click Publish Changes in the top right corner of the playbook workflow builder. For more information about publishing playbook changes, see Publishing Playbooks on page 77. |
60
© 2021 FireEye
Security Orchestrator User Guide
Playbooks
Configuring Update Case Tasks
You can update one or more case attributes by adding an update case task to a playbook workflow. For example, you may want to change a case's name or priority as a workflow progresses and new information is discovered that raises or lowers the severity of the incident. If playbook processing has not already generated a case, the execution of an update case task will create a case.
Update case tasks can be configured to do one of two action types, Assign Case or Update Case actions. You cannot configure an Assign Case action in the same update case task as an Update Case action. You can update the following case attributes:
|
Case |
Description |
|---|---|
|
Assignee |
The user or user group assigned to the case. This attribute can be configured in a task as an Assign Case action. By default, newly opened cases are unassigned. You can assign the case opened by the playbook to any user or user group with the appropriate permissions. |
|
Priority |
The priority level of the case opened by the playbook. This attribute can be configured in a task as an Update Case action. By default, case priority is set by the adapter that triggers a playbook. For information on defining case priority while configuring an adapter, see Creating an Adapter on page 28. Case priority level can be set to Low, Medium, High, or Critical. |
|
Name |
The name of the case opened by the playbook. This attribute can be configured in a task as an Update Case action. By default, case names are the same as the name of playbook that generates the case. Case names can be set to dynamic values that include data from the playbook workflow, including case information, start event, user questions, templates, or a custom value. |
|
Status |
The status of the case opened by the playbook. This attribute can be configured in a task as an Update Case action. By default, case status is set to Open. You can set the status to Open or Closed. |
To configure an update case task:
© 2021 FireEye
61
Security Orchestrator User Guide
CHAPTER 3: Configuring Security Orchestrator
|
Task |
Instructions |
|---|---|
|
Step 1: Select a task. |
In the playbook workflow builder, double-click a task. The task configuration pop-up window appears. |
|
Step 2: Select a kind of update case action. |
|
|
Step 3: Configure case attribute(s). |
|
|
Step 4: Publish your changes. |
Click Publish Changes in the top right corner of the playbook workflow builder. For more information about publishing playbook changes, see Publishing Playbooks on page 77. |

Configuring Ask Question Tasks
An ask question task displays one or more questions to analysts working on a case generated by the playbook workflow and returns analyst responses. When an ask questions task runs during playbook execution, the process generated by the playbook becomes a case, if it is not already a case. When adding a question, you also configure the format of the question response. A response can be in one of the following formats:
- Checkbox field - Slide a toggle to respond.
- Single-line field - Enter text into a single-line field to respond.
- Numeric field - Enter a numeric value into a single-line field to respond.
- Multi-line field - Enter text into a multi-line field to respond.
- Dropdown field - Select one option from a drop-down menu to respond.
- Multi-dropdown field - Select one or multiple options from a drop-down menu to respond.
- Radio selection field - Select one option from a list of options to respond.
- Buttons - Select any button(s) from a list of options to respond.
Responses are available in the playbook workflow to be used as input to other tasks and conditional expressions. Responses may be used to audit external tasks that occur as part of the incident response procedure or to decide how to proceed in the workflow.
To configure an ask question task:
- In the playbook workflow builder, double-click a task. The task configuration pop-up window appears.
- Select Ask Question ( ? ) from the menu of task types.
- Select Ask Question to open the Ask Question configuration window. Click Save.
© 2021 FireEye
63
Security Orchestrator User Guide
CHAPTER 3: Configuring Security Orchestrator
4. Click Add Question and select a response format from the drop-down list.
64
© 2021 FireEye
5. Configure the question response format:
|
Response |
Configuration |
|---|---|
| Checkbox field |
|
| Single-line field |
|
| Numeric field |
|
| Multi-line field |
|
| Drop-down field |
By default, the name/label for a response option and the value for the response option are the same. To manually enter a name/label separately from the choice value, slide the toggle under Choices to the right. If you select to manually enter choice values, another entry field appears for each choice value. Enter the name/label in the top field and the choice value in the bottom field. |
© 2021 FireEye
Security Orchestrator User GuideCHAPTER 3: Configuring Security Orchestrator
|
Response |
Configuration |
|---|---|
|
Multi-dropdown field |
|
|
Radio selection field |
|

Release 6.1Playbooks
|
Response Format | Configuration |
|---|---|
| Buttons |
|

6. Click Save in the Ask Question configuration window.
7. Click Publish Changes in the top right corner of the playbook workflow builder.
© 2021 FireEye67
Security Orchestrator User GuideCHAPTER 3: Configuring Security Orchestrator
Sequence Flows
Sequence flows, or paths, connect other playbook workflow elements, including start events, tasks, gateways, and end events. A sequence flow defines the order in which actions are performed and connects exactly two elements, a source and a target. A sequence flow is represented by a solid line with an arrow at the end that points to the target element.
NOTE: Sequence flows cannot connect to other sequence flows.

A single sequence flow is created automatically when you add any non-start event workflow element. You can change the path and visual arrangement of a sequence flow at any time. For more information about configuring sequence flows, see Configuring Sequence Flows below.
You can also add conditions to an existing sequence flow so the target element is processed only if the conditions evaluate to true. A conditional sequence flow is represented by a line that begins with a question mark inside a diamond ( ). For more information about configuring conditional sequence flows, see Configuring Conditional Sequence Flows on the facing page.
This section contains the following:
- Configuring Sequence Flows below
- Configuring Conditional Sequence Flows on the facing page
Configuring Sequence Flows
If you have more than two workflow elements added to your playbook, you can point an existing sequence flow to another target element to reconfigure the order in which the playbook processes tasks. Sequence flows update automatically when you click and drag a task to a new location in the workflow, but you can also modify the arrangement of a sequence flow to better structure the appearance of a playbook. Sequence flows can overlap with one another. For example, if several paths cross over one another in the playbook workflow builder and make the workflow difficult to understand, you can rearrange tasks or sequence flows to clearly present the path of playbook execution.
To point a sequence flow to a new target element:
- In the playbook workflow builder, click the arrowhead of a sequence flow and drag it to edge of a playbook workflow element.
NOTE: If you click and drag from anywhere that is not the arrowhead of a sequence flow, you will only rearrange the path of the sequence flow.
To rearrange the path of a sequence flow:
Release 6.1Playbooks
-
In the playbook workflow builder, click anywhere in a sequence flow that is not the arrowhead and drag it to any location in the workflow builder.

NOTE: If you drag a non-arrowhead point of the sequence flow to the edge of a playbook workflow element, it will only appear connected to that element. Rearranging the path of a sequence flow cannot change the target element.
Configuring Conditional Sequence Flows
When configuring a conditional sequence flow, you build conditional statements that evaluate data available in the workflow, including data from start events and tasks that execute before the sequence flow. Make sure that you configure adapter-triggered start events and tasks so output values are available in the playbook, if you plan to use the output values in conditional sequence flows.
For information on adding, moving, and deleting sequence flows, see Using the Playbook Workflow Builder on page 36.
To configure a conditional sequence flow:
In the playbook workflow builder, select a sequence flow.
Click Edit Condition. A configuration pop-up window appears.
Click + Add Condition.
-
Click in the top Select a value... field and select of the following logical operations to evaluate the condition group:
AND (all conditions are true)
OR (at least one condition is true)
XOR (exactly one of two conditions is true)
5. In the next field, select an operator for evaluating the value:
|
Operator |
Description |
|---|---|
| != | Not equal to |
| < | Less than |
| <= | Less than or equal to |
| <> | Not equal to |
| == | Equal to |
| > | Greater than |
| >= | Greater than or equal to |
| and | Both values are conditions to be met |
| contains | The value contains another value |
| exists | The value exists |
| in | Is equal to any of several values in a defined list |
| is | Is equal to |
| is not | Is not |
| not contains | Excludes another defined value |
| not exists | The value does not exist |
| not in | Is not equal to any of several values in a defined list |
| or | Either value defined can match |
| xor | Another value is evaluated only if the defined value exists |
6. Click in the next box, and select a value to evaluate in the condition:
- Select Adapter Event to use an event data value from the adapter selected in the start event. For example, you can select Adapter Event > Alert > Created at to set a certain time as the condition for triggering playbook workflow.
- Select Case Information to use a detail from a case opened from an adapter event. For example, you can select Case Information > Priority to set a certain case priority level as the condition for triggering playbook workflow.
- Select Templates to use a custom template.
- Select Custom Value to enter a custom value.
Release 6.1Playbooks
-
(Optional) To add another condition to the group, click + Add Condition.
-
Click Save.
For information on configuring nested conditions into groups, see Working with Condition Groups on page 42.
Security Orchestrator User Guide
CHAPTER 3: Configuring Security Orchestrator
Gateways
A gateway is a directional playbook workflow element that can be used to branch or merge other workflow elements. Gateways in Security Orchestrator are inclusive gateways, which means that any, all, or no paths connected to the gateway may be taken. Gateways do not perform activities or evaluate logic. Gateway behavior is determined by the incoming and outgoing sequence flows and their conditions. All unconditioned sequence flows pointing into or out of a gateway are executed.
In the playbook workflow builder, gateways appear as a diamond with rounded corners and the gateway icon ( ) in the center. For instructions
This section contains the following:
- Configuring Gateways below
Configuring Gateways
You can click and drag a gateway to anywhere in the playbook workflow builder. Sequence flows connected to a gateway adjust automatically when you move the gateway. If you delete a gateway from a playbook workflow builder, all sequence flows connected to it are also deleted. Playbook workflow elements connected to a gateway through sequence flows are not deleted when you delete a gateway.
Release 6.1
Playbooks
End Events
An end event is the end of a playbook's workflow. End events are terminal and cannot have outgoing sequence flows. A workflow can have multiple end events that represent the ends of multiple conditional pathways. However, playbooks are not required to have end events.
This section includes the following:
- Configuring End Events
Configuring End Events
You can add an end event after any task or gateway. You can also connect a sequence flow to an end event. Multiple tasks, gateways, and sequence flows can connect to the same end event.
To add an end event:
- In the playbook workflow builder, click on a task or gateway.
- Click on the + button and select Add End Event.
- Click Publish Changes in the top-right corner of the playbook workflow builder.
You can also add output parameters to your end event:
- Double-click an end event.
- Click + Add Parameter. The Output Parameter configuration menu opens.
- Add a name and description (optional).
- Select a type.
- (Optional) Enter a default value for the parameter.
- Click Save in the Output Parameter menu.
- Click Save in the End Event configuration window.
- Click Publish Changes in the top-right corner of the playbook workflow builder.
© 2021 FireEye
73
Security Orchestrator User Guide
CHAPTER 3: Configuring Security Orchestrator
Viewing Playbooks
You can view all playbooks in the Playbooks page of the Security Orchestrator Web UI. Local and packaged playbooks can be viewed separately or all together. A local playbook is a playbook created in your Security Orchestrator instance. A packaged playbook is a playbook included as part of Security Orchestrator deployments.
To access the Playbooks page:
-
In the Security Orchestrator navigation menu, click Configure. A drop-down menu appears.
-
Click Playbooks.
Testing a Playbook
Beginning in Security Orchestrator release 6.1, you can run a playbook while you are developing it in the playbook workflow builder. This allows you to test your changes and fix errors in the playbook.
To test-run a playbook:
-
In the Security Orchestrator navigation menu, select Configure > Playbooks and select the playbook.
-
In the Details and Activity Panel, click Open.
-
Click the Test Run button in the top-right corner.
74
© 2021 FireEye
Release 6.1
Playbooks
Create and Modify a Playbook
You can create a playbook and modify its details from the Playbooks page in Security Orchestrator. When creating a playbook, you provide a name and description for the playbook. You can also set access permissions for the playbook.
To create a new playbook:
- In the left-hand Configure menu, click Playbooks.
- Click New Playbook.
- Enter a name for the playbook. FireEye recommends entering a unique name to differentiate the playbook when it appears in the initial case name shown in Case pages.
- (Optional) Enter a description of the playbook.
- Click Create.

NOTE: By default, new playbooks are unpublished and disabled (not operational). You must publish and enable a playbook for it to begin processing events.
To modify the playbook details:
In the Playbooks page, select the playbook you want to modify. The Details and Activity panel appears to the right of the list of playbooks. You can modify the following details:
- Enter a new name in the Name field.
- Enter a new description in the Description field.
- Slide the toggle to the right to enable the playbook. You cannot enable a playbook if it has not been published. For information, see Publishing Playbooks on page 77.
- Open the Add Tag drop-down menu and select a tag or create a new tag for the playbook.
- Click the settings button to open the Manage Permissions pop-up window. For more information, see Managing Playbook Access Permissions on page 78.
- Click the version drop-down menu to view the different versions of the playbook. If a playbook has not been configured or published, the version will appear as "Unpublished".
Click Save.
NOTE: Modifying playbook details do not create a new version of the playbook. Only changes made to the playbook workflow update the playbook version number.
© 2021 FireEye
75
Security Orchestrator User Guide
CHAPTER 3: Configuring Security Orchestrator
Publishing Playbooks
For a playbook workflow to process events and generate cases, you must publish the playbook, then enable it. When you publish changes to a playbook, the system generates a version number and assigns it to the playbook. When you publish changes to a playbook that is already published and enabled, the published playbook is immediately replaced with the new version and changes take effect immediately. New events and cases are processed using the updated playbook.
To publish a new playbook:
-
Configure at least one playbook element in the Playbook Task Builder.
-
Click Publish Changes in the top-right corner.
-
Click Confirm to publish your changes.
The first version of your playbook is created. Next, you must enable your playbook.
For more information, see Create and Modify a Playbook on page 75
Earlier versions of published playbooks are archived to support events and cases that have already been processed or are in the middle of being processed by those earlier versions. You can view earlier versions of a playbook from the Details and Activity panel or the Playbook Task Builder. Earlier versions of playbooks cannot be edited.
To publish new changes to a playbook:
-
Edit at least one playbook element in the Playbook Task Builder.
-
Click Publish Changes in the top-right corner.
-
Click Confirm to publish your changes.
A new version of your playbook is created. If your playbook is not already enabled, you must enable it. For more information, see Create and Modify a Playbook on page 75
Release 6.1Playbooks
Managing Playbook Access Permissions
If you have administrative permissions groups can view, edit, add, or execute playbooks in Security Orchestrator. Access permissions are organized into configuration, execution, and cases and processes permissions. Access permissions must be configured separately for each playbook.
Configuration permissions determine which FireEye IAM groups can view, edit, or publish (add) edits to a playbook. Execution permissions determine which FireEye IAM groups can trigger the start event of a manually-triggered playbook (can execute). Cases and processes permissions determine which FireEye IAM groups can view, edit, or create (add) cases or processes based on a playbook.
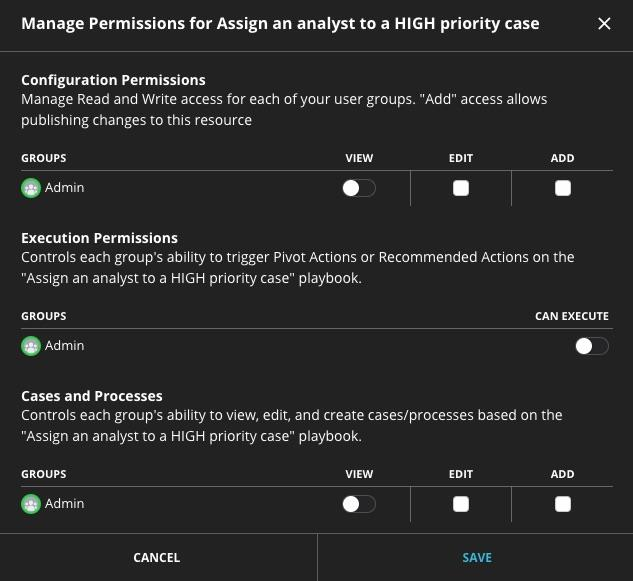
To access the Manage Permissions pop-up window, click on the edit permissions button ( ) in the Details and Activity panel of a playbook. Click Save to save your playbook's access permissions.
To manage configuration permissions:
- Slide the View toggle to the right to enable a group's permission to view the playbook's workflow.
- Select Edit to enable a group's permission to view and edit the playbook's workflow.
© 2021 FireEye77
Security Orchestrator User GuideCHAPTER 3: Configuring Security Orchestrator
-
Select Add to enable a group's permission to view and edit the playbook and publish edits to the playbook's workflow.
To manage execution permissions:
-
Slide the Can Execute toggle to the right to enable a group's permission to trigger the playbook through a pivot action or recommended action in Security Orchestrator.
To manage cases and processes permissions:
-
Slide the View toggle to the right to enable a group's permission to view cases and processes created by the playbook.
-
Select Edit to enable a group's permission to edit cases and processes created by the playbook.
-
Select Add to enable a group's permission to create a case or process from activity generated by the playbook.

NOTE: Unlike configuration permissions, cases and processes permissions are enabled individually. For example, granting a group "Add" configuration permissions will also grant them "View" and "Edit" permissions, but granting a group "Add" cases and processes permissions will not also grant them "View" and "Edit" permissions.
Tables
Security Orchestrator tables can be used to store and retrieve data during playbook processing. For example, you may want to create a table of known safe domains discovered during playbook processing so you can use the table as a whitelist in other playbooks. To add, modify, and read data in a table during playbook processing, use table tasks in your playbook workflows. You can also add and modify table data manually on the Tables page.
To use a table in a playbook workflow, you must first create and configure the table, including the table's columns (fields) and their data types. For more information on how to use a table inside a playbook, see Configuring Table Tasks on page 56.
This chapter contains the following sections:
- Creating a Table below
- Configuring Table Content on the next page
- Configuring Table Content on the next page
- Importing CSV Files into a Tables on page 82
- Exporting Tables as CSV Files on page 83
- Duplicating Tables on page 83
- Enabling Tables on page 84
Creating a Table
You can create a table in the Tables page of Security Orchestrator. You can also create a table by duplicating an existing table. For more information, see CROSS REFERENCE.
To create a new table:
- In the Tables page, click New Table in the top right corner.
- In the pop-up window, enter a name and description (optional) for your adapter.
- Click Create.
Security Orchestrator User GuideCHAPTER 3: Configuring Security Orchestrator
Your table is not configured, invalid, and disabled by default. The adapter's priority level is set to Medium by default. See Configuring Table Structure below, Configuring Table Content below, and Enabling Tables on page 84 for more information.
Configuring Table Structure
By default, a newly created table has no columns configured. You add table columns in the Tables page of Security Orchestrator.
To configure the structure of your table:
-
In the Tables page, open a table.
-
Click + New Column in the top-right corner. The New Column window appears.
-
Configure the table column.
Enter the column name.
(Optional) Enter the column description.
(Optional) Slide the Primary Key toggle to the right to designate the column as the primary key. By default, no column is designated as the primary key.
Open the Type drop-down menu and select what data format the column will accept.
(Optional) Enter the default value for the column's contents.
(Optional) Slide the Optional toggle to the right to make the column optional. The column is required by default.
(Optional) Slide the Searchable toggle to the right to make the column's contents searchable. The column is not searchable by default.
-
Click Save.
You can add as many columns as needed. To re-configure, open a table and open the Edit Table page.
Configuring Table Content
You can manually enter and manage content in a table using the Tables page. Security Orchestrator also lets you easily truncate and clear table contents.
What you need:
A table with configured columns. See Configuring Table Structure above for more information.
80
© 2021 FireEye
Release 6.1 Tables
To add content to a table:
In the Tables page, open a configured table.
Click +New Row. The New Row configuration window appears.
Enter the appropriate data to each required field.
Click Create.
To edit content inside a table:
In the Tables page, open a configured table with contents.
Hover your cursor over any row inside the table and click the pencil-shaped Edit icon. The Edit Row configuration window appears.
Edit any or all fields.
Click Save.
To truncate table contents:
In the Tables page, open a configured table with contents.
Click Truncate. The Truncate Table window appears.
Define how table content will be truncated, or reduced.

NOTE: You can keep the most recent specified number of rows or keep each row newer than a specified date and time. For example, you can truncate all but the 15 most recent rows of content. Similarly, you can truncate all rows configured prior to 2020-01-01T01:00:01-05:00.
Click Truncate.
To clear table contents:
In the Tables page, open a configured table with contents.
Click Clear All.
Click Yes. All table contents are erased.

IMPORTANT: Use caution when clearing table contents. You cannot revert the Clear All action.
Importing CSV Files into a Tables
You can import CSV content into your Security Orchestrator tables.
What you need:
- A table with configured columns. See Configuring Table Structure on page 81 for more information.
To import a CSV file into a table:
- In the Tables page, open any table.
- Click Import CSV.
- Select a CSV file in your file explorer.
- Select an import mode. The import mode determines how content inside the CSV file imports into your existing table structure. You can choose from three import modes:
- Skip when matching key found.
- Overwrite when matching key found.
- Replace existing content.
- Click Upload.
- Click Save.
Exporting Tables as CSV Files
You can export the contents of your table as a CSV file.
To export a table as a CSV file:
- In the Tables page, open any table.
- Click Export CSV.
- In the Export Table Content window, select Export.
The CSV file is saved to the downloads folder on your local machine.
Duplicating Tables
You can choose to duplicate the structure and contents of a table or duplicate the table structure only.
To duplicate a table:
- In the Tables page, click the
 button to the right of the table's name.
 - Select Duplicate in the drop-down menu.
- (Optional) Change the table name and description.
82
© 2021 FireEye
Release 6.1Tables
-
(Optional) Omit table contents in the duplicate table. By default, table data is copied with table structure.
Slide the Copy Data toggle to the left.
-
Click Clone. The new table appears in the Tables page.
Enabling Tables
To correctly use a table inside Table Task in a playbook workflow, the table must be enabled in the Tables page. You can add a disabled table to a Table Task, but an error will display and the playbook workflow will not process.
For more information on Table Tasks, see Configuring Table Tasks on page 56.
To enable a table in the Tables page:
-
Click the
 button to the right of a table's name. Click Enable.
 -
Select a table and enable the table in the Details and Activity panel.
© 2021 FireEye
83
Security Orchestrator User GuideForms
Forms
Security Orchestrator forms can be used to display important incident data in a case. The data in a form is intended to support analysts working on cases by summarizing relevant details in a form task. See Configuring Form Tasks on page 59 for more information on using a form in a playbook workflow.
You can create forms to fit any case scenario and determine the ways an analyst must enter data into a form. You can prefill forms with data available during playbook execution, and analysts working on a case can add and change data as needed. Data entered in forms by analysts is not accessible in the playbook workflow for processing.
To access the Forms page:
- In the Security Orchestrator navigation menu, click Configure. A drop-down menu appears.
- Click Forms.
This section includes the following information:
- Creating a Form below
- Configuring Forms on the next page
- Publishing and Enabling Forms on page 87
- Duplicating Forms
Creating a Form
You can create a form from scratch in the Forms page of Security Orchestrator. You can also create a form by duplicating an existing form. For more information, see Duplicating Forms.
To create a new form:
- In the Forms page, click New Form in the top right corner.
- In the pop-up window, enter a name and description (optional) for your form.
© 2021 FireEye84
Security Orchestrator User GuideCHAPTER 3: Configuring Security Orchestrator
3. Click Create. Your form is empty, unpublished, and disabled by default. See Configuring Forms below and Publishing and Enabling Forms on the facing page for more information.
Configuring Forms
You can add form elements to create a customized form for any given scenario. Form elements determine how an analyst working on a case will input information into the form during playbook execution. For example, you can create a form that includes only multiple choice form elements, or you can create a form that includes each different form element at least once. You can use the following seven form elements in your form:
|
Form Element |
Description |
|---|---|
|
Single-line text input |
The analyst must input data in a single line. |
|
Multi-line text input |
The analyst can input data in a single line or multiple lines. |
|
Numeric text input |
The analyst must input numerical data in a single line. |
|
Yes/No toggle |
The analyst must slide a toggle to respond in the affirmative or negative. |
|
Dropdown menu |
The analyst can select a single item from a drop-down menu of options. |
|
Multiple Choice |
The analyst can select a single item from a menu of multiple options. |
|
Multi-select dropdown |
The analyst can select multiple items from a drop-down menu of options. |
To configure a form:
- In the Forms page, select a form.
- In the Details and Activity panel, click Open. The form configuration page appears.
- Click any form element from the left-hand list to add that element to your form.
- Hover your cursor over an added form element and click the X button to remove it from your form.
- Add a name, description (optional), and choice values to each form element.

TIP: The more descriptive a name and description are, the more it will help the analyst who uses the form.
Release 6.1
Forms
3. To save your changes, in the top-right corner, click Publish Changes. For more information about publishing changes to your form, see Publishing and Enabling Forms below.
If your form is not enabled, you cannot use it in a form task. See Publishing and Enabling Forms below and
Publishing and Enabling Forms
You must enable your form and publish changes to it to use it inside a playbook's workflow. Forms are unpublished and disabled by default.
To publish a form:
After you make changes to a form in the Form Configuration Page, click Publish Changes in the top-right corner.
To enable a form:
- Select a form in the Forms page. The Details and Activity panel appears to the right.
- Slide the Enabled toggle to the right.
- Click Save.
© 2021 FireEye
86
Security Orchestrator User Guide
Scripts and Templates
Scripts and Templates
You can add your own JavaScript and Mustache template scripts and use them in Security Orchestrator playbooks. You can add the global scripts and templates on the Scripts page that can be used in any playbook, or you can enter custom scripts and templates directly into playbook tasks for one-time use.
For information about scripts and templates, see the following sections:
- JavaScript Scripts below
- Mustache Template Scripts on page 91
JavaScript Scripts
You can add your own JavaScript functions to Security Orchestrator for use within playbooks. You can use JavaScript functions to manipulate complex data and return output that is easier to process in playbook tasks.
You can enter JavaScript functions on the Scripts page that can be used within any playbook. JavaScript functions entered on the Scripts page are called global scripts. You can also enter a JavaScript function directly within a playbook script task. JavaScript functions entered within a playbook script task are called custom scripts and cannot be used within other playbooks.
For information about creating and using JavaScript scripts, see the following sections:
- Creating a Global JavaScript Script below
- Publishing Scripts on page 91
NOTE: Security Orchestrator also provides a standard script library with commonly used data manipulation functions.

Creating a Global JavaScript Script
You can enter JavaScript functions on the Scripts page that can be used in any playbook. JavaScript functions entered on the Scripts page are called global scripts.
© 2021 FireEye
87
Security Orchestrator User GuideCHAPTER 3: Configuring Security Orchestrator
When creating a script, you use a script editor, as shown in the following example:

NOTE: By default, new scripts are unpublished. After you create a new script, publish the script so it can be used in playbooks. See Publishing Scripts on page 91.
For instructions on using global JavaScript scripts in a playbook, see Creating a Global JavaScript Script on the previous page.
To create a global JS script:
| Task | Instructions |
|---|---|
|
Step 1: Go to the Scripts page. |
In the menu, click Scripts. |
|
Step 2: Name the global script, and open the script editor. |
|
|
Step 3: Declare input and output parameters and enter the JavaScript function. |
|
88
© 2021 FireEye
|
Task |
Instructions |
|---|---|
|
Step 4: Configure script input parameter properties. |
Configure properties, including data type and format, for each input parameter declared in the script editor:
|
|
Step 5: Configure script output parameter properties. |
Configure properties, including data type and format, for each output parameter declared in the script editor:
|
Security Orchestrator User Guide
CHAPTER 3: Configuring Security Orchestrator
Testing a Script
Beginning in Security Orchestrator release 6.1, you can test a script you have created or modified.
To test a script:
- In the menu, click Scripts.
- In the list, point to the script name and then click Open.
- Enter any changes you want to make.
- Click Test Run in the rop-right corner.
Publishing Scripts
Before you can use a script in a playbook workflow, you must publish it.
To publish a script:
- In the menu, click Scripts.
- In the list, point to the script name and then click Open.
- Click Publish Changes.
- Click Confirm.
Mustache Template Scripts
Mustache template scripts, also referred to as templates, allow you to create and use a text template as a string input value in a playbook task. Templates can include static and dynamic text content. For example, you could create a template for the body of an automated email message sent by an SMTP Client device command. The email body template might contain static boilerplate text, as well as dynamic text, such as the recipient's name or details about the case.
There are three types of templates you can create in Security Orchestrator, global, custom, and device:
- Global templates can be created on the Scripts page and used in any playbook.
- Custom templates can be created as needed within playbooks for most string values.
- Device templates are device specific and part of the device configuration. You can use a device template only with the specific device for which it was created.
For an email body template, you could create the template as a device template associated with an SMTP device (from the Devices page) or as a custom template (when building the playbook).
For information about creating and using templates, see the following sections:
90
© 2021 FireEye
Release 6.1
Scripts and Templates
- Template Examples below
- Creating a Global Template Script on the next page
- Creating a Custom Template on the next page
- Creating a Custom Template on the next page
- Modifying a Custom Template on page 96
- Creating a Device Template
Template Examples
You can create templates that contain static and dynamic content with the Mustache template system. For more information about Mustache, see the following examples and the Mustache documentation.
Single Values
To add a dynamic value to a template that will be mapped to a single value (simple) parameter, enter a variable name enclosed in double braces, such as:
{{variable name}}
URL escaping is a default behavior in Mustache when a variable is enclosed in double braces. Enclose a variable in triple braces to avoid URL escaping.
The following example shows a global template that contains three single value variables:
A variable name enclosed in double braces does not represent and does not need to match the name of any plug-in output parameter or device parameter. A variable is not linked to a specific parameter until you select the template in a playbook task and specify the parameter that maps to the variable within the context of the playbook. When the playbook workflow executes, the template variables are replaced by the parameter values.
Lists
To insert a variable that represents a list (complex) parameter, use the following syntax to print each value in the parameter list on a separate line:
{{#variable}}{{.}}
{{/variable}}To insert an individual value from a parameter list, use the following syntax, where n represents the nth value in the list, starting with zero:
{{variable.n}}To insert the length of the list parameter, use the following syntax:
{{variable.length}}© 2021 FireEye
91
Security Orchestrator User Guide
CHAPTER 3: Configuring Security Orchestrator
The following example shows a template that contains two list variables, domains and urls. The length of the domains list is printed in parentheses above the full list of domains, followed by the first three URLs from the urls list:
Creating a Global Template Script
You can enter a Mustache template on the Scripts page that can be used in any playbook as a string input value in a task. Templates entered on the Scripts page are called global templates.
When creating a global template, you use a template editor, as shown in the following example:

NOTE: By default, new templates are unpublished. After you create a new template, publish the template so it can be used in playbooks. See Publishing Scripts on page 91.
To create a global Mustache template:
Task | Instructions |
|---|---|
|
Step 1: Go to the Scripts page. |
In the menu, click Scripts. |
|
Step 2: Name the global template, and open the template editor. |
|
|
Step 3: Enter the body of the template. |
For examples, see Template Examples on the previous page. |
Creating a Custom Template
In a playbook workflow, you can create a custom template and use it as a string input value for the following types of tasks:
Release 6.1
Scripts and Templates
- Device
- Update case
- Table
- Assign summary form
For information on adding and configuring tasks, see Tasks on page 44.
To create and use a custom template in a playbook:
| Task | Instructions |
|---|---|
|
Step 1: Select a task. |
|
|
Step 2: Find the string input value for which you want to use a custom template. |
To determine if an input value is a String type, click the Help button next to the entry box. |
|
Step 3: Add a custom template. |
|
|
Step 4: Enter the body of the custom template. |
Double braces enable URL escaping. To prevent URL escaping, use triple braces to enclose variable names. For examples, see Template Examples on page 92. |
© 2021 FireEye
93
Security Orchestrator User Guide
CHAPTER 3: Configuring Security Orchestrator
| Task | Instructions |
|---|---|
|
Step 5: If the template body contains a variable (enclosed in double braces), map the variable to a parameter. |
Under Parameters, map each variable defined in the Body to a parameter available in the playbook workflow.
|
94
© 2021 FireEye
Release 6.1
Scripts and Templates
Modifying a Custom Template
To modify an existing custom template:
-
In the playbook workflow builder, click a task that uses a custom template. The configuration panel opens on the right.
-
Click the template icon next to the input parameter using a custom template.
-
In the Template panel, modify the template body and parameter mappings as needed. For instructions, see Creating a Custom Template on page 93.
-
Click Done in the Template panel to save the template.
-
Click Save in the task panel to save the task.
© 2021 FireEye
95
Security Orchestrator User GuideTypes
Types
Security Orchestrator parameters contains custom, packaged, and system types.
- Custom types are complex types that you can create on the Parameter Types page. For more information, see Creating Custom Parameter Types below.
- Packaged types are complex types defined by plug-ins installed in your Security Orchestrator deployment. For more information, see Viewing Plug-In Commands.
- System types are simple and complex types included by default in Security Orchestrator. For more information, see System Parameter Types below.
Creating Custom Parameter Types
You can create your own types for use in Security Orchestrator entities.
To add a new custom type:
- In the Parameters page, click New Custom Type.
- Enter the name and description (optional) of the type.
- Click Create.
- (Optional) Add tags to the type.
- Under Fields, click + Add Field.
- Configure the field settings and click Save.
- In the Details tab, click Save.
System Parameter Types
In addition to the custom types you create and the packaged types defined in installed plug-ins, the following system types are available in Security Orchestrator.
| Type | Description |
|---|---|
| Adapter | System adapter information |
| AlertId | The alert identification number. |
© 2021 FireEye96
|
Type |
Description |
|---|---|
| AlertName | The name of the alert. |
| AntivirusName | |
| Base64 | |
| Bool | |
| Case | System case information |
| Case.Assignment | System case assignment information |
| CSV | |
| CVE | |
| Date | Date, following YYYY-MM-DD format |
| DateTime | Date and time, in milliseconds (float number; microseconds precision) since the UNIX epoch (January 1 1970; UTC) or as a string formatted according to ISO 8601 (extended). |
| DeviceSeverity | |
| DeviceType | |
| Domain Name | Fully qualified domain name (FDQN) |
| Email message ? | |
| EmailAddressWithName | An email address and the sender's name |
| Event | System event information |
| File | System file |
| FileHash | |
| FileHashMD5 | MD5 File Hash |
| FileHashSHA1 | SHA1 file hash |
| FileHashSHA256 | SHA256 file hash |
| FileHashSHA512 | SHA512 file hash |
| FileHashSSDeep | ssdeep file hash |
| FileName |
|
Type |
Description |
|---|---|
|
Float | |
|
FullName | |
|
GroupId | |
|
GroupName | |
|
Hexadecimal |
Hexadecimal string |
|
HostName |
Host name |
|
Integer |
Integer |
|
IPAddress |
IP address |
|
IPv4 |
IP version 4 address |
|
IPv6 |
IP version 6 address |
|
JSON |
JavaScript object notation contents |
|
LocalFile |
Temporary isolated file managed by Security Orchestrator |
|
Location |
Geographical location |
|
MACAddress |
MAC address |
|
Organization |
Organization name |
|
PhoneNumber |
Phone number |
|
ProcessName | |
|
Range |
Numeric range |
|
Regex |
A regular expression, based on Peri Compatible Regular Expressions (PCRE) |
|
Severity |
Severity of the case |
|
Status |
Status of the case |
|
String |
A custom string |
|
TicketId | |
|
TicketStatus | |
|
Time |
Time, following ISO 8601 standards |
Security Orchestrator User Guide
CHAPTER 3: Configuring Security Orchestrator
|
Type |
Description |
|---|---|
|
TimeDuration |
Time duration, in milliseconds (float number; microseconds precision) or as a string formatted according to ISO 8601 |
|
Type |
Security Orchestrator type |
|
URI |
Uniform resource indicator |
|
URL |
Universe resource location |
|
URL_REF |
A URL and the text used to display it as a hyperlink |
|
User |
An Security Orchestrator user |
|
XML | |
|
YARA |
Packaged Types
The following types are included in Security Orchestrator:
|
Type |
|---|
| active_directory.ADComputer |
| active_directory.ADUser |
| endpoint_security.Acquisition |
| endpoint_security.Acquisition.Alert |
| endpoint_security.Acquisition.BulkAcquisition |
| endpoint_security.Acquisition.Condition |
| endpoint_security.Acquisition.CreateActor |
| endpoint_security.Acquisition.Host |
| endpoint_security.Acquisition.HostSet |
| endpoint_security.Acquisition.Indicator |
| endpoint_security.Acquisition.RequestActor |
| endpoint_security.Acquisition.Script |
| endpoint_security.Acquisition.Stats |
|
Type |
|---|
|
endpoint_security.Acquisition.Stats.RunningState |
|
endpoint_security.Acquisition.Stats.RunTime |
|
endpoint_security.Acquisition.Stats.TaskSize |
|
endpoint_security.Acquisition.UpdateActor |
|
endpoint_security.AgentInfo |
|
endpoint_security.AgentInfo.OS |
|
endpoint_security.EnterpriseSearch |
|
endpoint_security.EnterpriseSearch.Host |
|
endpoint_security.EnterpriseSearch.Results |
|
endpoint_security.EnterpriseSearch.Results.Data |
|
endpoint_security.HostContainmentStatus |
|
endpoint_security.HostInformation |
|
endpoint_security.HostInformation.BiosInfo |
|
endpoint_security.HostInformation.LastAlert |
|
endpoint_security.HostInformation.NetworkArray |
|
endpoint_security.HostInformation.NetworkArray.NetworkInfo |
|
endpoint_security.HostInformation.NetworkArray.NetworkInfo.Iparray |
|
endpoint_security.HostInformation.NetworkArray.NetworkInfo.Iparray.Ipinfo |
|
endpoint_security.HostInformation.NetworkArray.NetworkInfo.IpGatewayArray |
|
endpoint_security.HostInformation.OperatingSystem |
|
endpoint_security.HostInformation.ProcConfigInfo |
|
endpoint_security.HostInformation.Stats |
|
endpoint_security.HostInformation.SysInfo |
|
endpoint_security.HxAlert |
|
endpoint_security.HxAlert.Agent |
|
endpoint_security.HxAlert.AlertIndicator |
© 2021 FireEye 100
Security Orchestrator User GuideCHAPTER 3: Configuring Security Orchestrator
| Type |
|---|
| endpoint_security.HxAlert.Condition |
| endpoint_security.HxAlert.EventValues |
| endpoint_security.HxAlert.EventValues.AnalysisDetails |
| endpoint_security.HxAlert.EventValues.AnalysisDetails.Action |
| endpoint_security.HxAlert.EventValues.AnalysisDetails.Action.ProcessInfo |
| endpoint_security.HxAlert.EventValues.AnalysisDetails.Analysis |
| endpoint_security.HxAlert.EventValues.AnalysisDetails.AnalysisResult |
| endpoint_security.HxAlert.EventValues.AnalysisDetails.ApiCall |
| endpoint_security.HxAlert.EventValues.AnalysisDetails.ApiCall.Processinfo |
| endpoint_security.HxAlert.EventValues.AnalysisDetails.ExploitCode |
| endpoint_security.HxAlert.EventValues.AnalysisDetails.ExploitCode.Processinfo |
| endpoint_security.HxAlert.EventValues.AnalysisDetails.ExploitedProcess |
| endpoint_security.HxAlert.EventValues.AnalysisDetails.ExploitedProcess.Processinfo |
| endpoint_security.HxAlert.EventValues.AnalysisDetails.File |
| endpoint_security.HxAlert.EventValues.AnalysisDetails.File.Processinfo |
| endpoint_security.HxAlert.EventValues.AnalysisDetails.Folder |
| endpoint_security.HxAlert.EventValues.AnalysisDetails.Folder.Processinfo |
| endpoint_security.HxAlert.EventValues.AnalysisDetails.GenericProcessLaunch |
| endpoint_security.HxAlert.EventValues.AnalysisDetails.GenericProcessLaunch.LaunchDetails |
| endpoint_security.HxAlert.EventValues.AnalysisDetails.GenericProcessLaunch.LaunchDetails.Processinfo |
| endpoint_security.HxAlert.EventValues.AnalysisDetails.OfficeVbaMacroDetection |
101© 2021 FireEye
Release 6.1
Types
|
Type |
|---|
|
endpoint_security.HxAlert.EventValues.AnalysisDetails.OfficeVbaMacroDetection.ProcessInfo |
|
endpoint_security.HxAlert.EventValues.AnalysisDetails.OS |
|
endpoint_security.HxAlert.EventValues.AnalysisDetails.OsCorrelation |
|
endpoint_security.HxAlert.EventValues.AnalysisDetails.Process |
|
endpoint_security.HxAlert.EventValues.AnalysisDetails.RegKey |
|
endpoint_security.HxAlert.EventValues.AnalysisDetails.RegKey.ProcessInfo |
|
endpoint_security.HxAlert.EventValues.Detections |
|
endpoint_security.HxAlert.EventValues.Detections.Detection |
|
endpoint_security.HxAlert.EventValues.Detections.Detection.Action |
|
endpoint_security.HxAlert.EventValues.Detections.Detection.Action.ActionedObject |
|
endpoint_security.HxAlert.EventValues.Detections.Detection.Action.ActionedObject.FileObject |
|
endpoint_security.HxAlert.EventValues.Detections.Detection.Engine |
|
endpoint_security.HxAlert.EventValues.Detections.Detection.InfectedObject.FileObject |
|
endpoint_security.HxAlert.EventValues.Detections.Detection.Infection |
|
endpoint_security.HxAlert.EventValues.Documents |
|
endpoint_security.HxAlert.EventValues.OsDetails |
|
endpoint_security.HxAlert.EventValues.ScannedObject |
|
endpoint_security.HxAlert.EventValues.ScannedObject.FileEvent |
|
endpoint_security.HxAlert.EventValues.ScannedObject.FileEvent.ActorProcess |
|
endpoint_security.HxAlert.EventValues.ScannedObject.FileEvent.ActorProcess.User |
|
endpoint_security.HxAlert.EventValues.ScanStatistics |
|
endpoint_security.HxAlert.EventValues.SystemData |
|
endpoint_security.HxAlert.MatchedSourceAlerts |
|
Type |
|
endpoint_security.HxAlert.MatchedSourceAlerts.Meta |
|
endpoint_security.Indicator |
|
endpoint_security.Indicator.Category |
|
endpoint_security.Indicator.CreateActor |
|
endpoint_security.Indicator.Meta |
|
endpoint_security.Indicator.Stats |
|
endpoint_security.Indicator.UpdateActor |
|
endpoint_security.QuarantinedFile |
|
endpoint_security.QuarantinedFile.Alert |
|
endpoint_security.QuarantinedFile.Host |
|
fireeye_context_api.ContextResults |
|
fireeye_context_api.ContextResults.Email |
|
fireeye_context_api.ContextResults.FileHashes |
|
fireeye_context_api.ContextResults.FileHashes.KillChainPhases |
|
fireeye_context_api.ContextResults.FileHashes.SightingSummary |
|
fireeye_context_api.ContextResults.FileHashes.SightingSummary.Segmentations |
|
fireeye_context_api.ContextResults.FileHashes.SightingSummary.Segmentations.Subsegments |
|
fireeye_context_api.ContextResults.Fqdns |
|
fireeye_context_api.ContextResults.Fqdns.AttributedAssociations |
|
fireeye_context_api.ContextResults.Fqdns.AttributedAssociations.MalwareFamilies |
|
fireeye_context_api.ContextResults.Fqdns.AttributedAssociations.MalwareFamilies.Aliases |
|
fireeye_context_api.ContextResults.Fqdns.AttributedAssociations.MalwareFamilies.Name |
|
fireeye_context_api.ContextResults.Fqdns.ExternalReferences |
|
fireeye_context_api.ContextResults.IpAddresses |
Release 6.1 Types
| Type |
|---|
| fireeye_context_api.ContextResults.IpAddresses.ExternalReferences |
| fireeye_context_api.ContextResults.SignatureIds |
| fireeye_context_api.ContextResults.SignatureIds.SightingSummary |
| fireeye_context_api.ContextResults.SignatureIds.SightingSummary.Segmentations |
| fireeye_context_api.ContextResults.SignatureIds.SightingSummary.Segmentations.Subsegments |
| fireeye_context_api.ContextResults.Signatures |
| fireeye_context_api.ContextResults.Signatures.SightingSummary |
| fireeye_context_api.ContextResults.Signatures.SightingSummary.Segmentations |
| fireeye_context_api.ContextResults.Signatures.SightingSummary.Segmentations.Subsegments |
| fireeye_context_api.ContextResults.Urls |
| fireeye_context_api.ContextResults.Urls.ThirdPartyContext |
| fireeye_context_api.ContextResults.Urls.ThirdPartyContext.AvResults |
| fireeye_context_api.ContextResults.Urls.ThreatDetails |
| fireeye_context_api.ContextResults.Urls.ThreatDetails.AvClassifications |
| fireeye_data_explorer.AlertResponse |
| fireeye_data_explorer.AlertResponse.Actions |
| fireeye_data_explorer.AlertResponse.Throttle |
| fireeye_data_explorer.GetDatabaseResponse |
| fireeye_etp.ETPAlert |
| fireeye_etp.ETPAlert.Attributes |
| fireeye_etp.ETPAlert.Attributes.Alert |
| fireeye_etp.ETPAlert.Attributes.Alert.Explanation |
| fireeye_etp.ETPAlert.Attributes.Alert.Explanation.CncServices |
| fireeye_etp.ETPAlert.Attributes.Alert.Explanation.MalwareDetected |
© 2021 FireEye
104
Security Orchestrator User Guide
CHAPTER 3: Configuring Security Orchestrator
|
Type |
|---|
|
fireeye_etp.ETPAlert.Attributes.Alert.Explanation.MalwareDetected.Malware |
|
fireeye_etp.ETPAlert.Attributes.Ati |
|
fireeye_etp.ETPAlert.Attributes.Email |
|
fireeye_etp.ETPAlert.Attributes.Email.Headers |
|
fireeye_etp.ETPAlert.Attributes.Email.Smtp |
|
fireeye_etp.ETPAlert.Attributes.Email.Timestamp |
|
fireeye_etp.ETPAlert.Attributes.Meta |
|
helix.Alert |
|
helix.Alert.AlertNote |
|
helix.Alert.AlertTypeDetails |
|
helix.Alert.AlertTypeDetails.Detail |
|
helix.Alert.AlertTypeDetails.Summary |
|
helix.Alert.Distinguishers |
|
helix.Alert.User |
|
helix.Case |
|
helix.Case.CaseNote |
|
helix.Event |
|
helix.Event.Agentdetails |
|
helix.Event.Agentdetails.BiosInfo |
|
helix.Event.DetectRulematches |
|
helix.Event.Indicator |
|
helix.Event.Metadata |
|
helix.GroupBy |
|
helix.GroupBy.Buckets |
|
helix.User |
|
virus_total.DomainScanResult |
105
© 2021 FireEye
Release 6.1Types
|
Type |
|---|
virus_total.DomainScanResult.DetectedUrls |
virus_total.DomainScanResult.WebutationDomainInfo |
virus_total.DomainScanResult.WotDomainInfo |
virus_total.FileScanResult |
virus_total.FileScanResult.VendorsScans |
virus_total.IPScanResult |
virus_total.IPScanResult.DetectedDownloadSamples |
virus_total.IPScanResult.DetectedUrls |
virus_total.URLScanResult |
virus_total.URLScanResult.VendorScans |
virus_total.VTLookUp |
virus_total.VTLookUp.DomainScanReport |
virus_total.VTLookUp.FileScanReport |
virus_total.VTLookUp.IPScanReport |
virus_total.VTLookUp.URLScanReport |
© 2021 FireEye106
Tags
Tags, or labels, are used in Security Orchestrator to visually organize content. Tags can be added to playbooks, devices, adapters, tables, forms, scripts, types, and plug-ins. You can create new tags or use the tags packaged with Security Orchestrator.
This section includes the following:
- Adding Tags below
- Managing Tags below
Adding Tags
You can create your own tags and add them to playbooks, devices, adapters, tables, forms, scripts, types, or library content. You add tags in the Details tab of the Details and Activity panel that appears when you select any of the listed entities. You can also create tags in the Tags page of Security Orchestrator. When you create a tag and add it to one entity, it becomes usable across all of Security Orchestrator.
Managing Tags
The Managing Tags window lets you add, edit, or delete tags, but you cannot choose what color is associated with a tag.
To manage tags inside Security Orchestrator entities:
- In the Details tab of a Details and Activity panel, click Add Tag.
- Click the edit button (
 ). The Manage Tags window pops up.
 - (Optional) To add a new tag, click + New Tag.
- Enter the tag's name and click Save.
- (Optional) To exit an existing tag, click the pencil icon next to the tag's name.
- Enter the tag's new name and click Save.
- (Optional) To delete a tag, click the trash icon next to the tag's name.
- Click Yes to remove the tag.
- Click the X button to exit the Manage Tags window.
Security Orchestrator User Guide
CHAPTER 3: Configuring Security Orchestrator
108
© 2021 FireEye
Security Orchestrator User Guide
CHAPTER 4: Navigating Security Orchestrator Runtime
- Viewing the Security Orchestrator Dashboard on the next page
- Cases on page 113
- All Activity on page 115
- System Status on page 117
| © 2021 FireEye | 110 |
Security Orchestrator User Guide
Viewing the Security Orchestrator Dashboard
Viewing the Security Orchestrator Dashboard
The Dashboard is the first thing you see when you open Security Orchestrator. The Dashboard displays key metrics about Security Orchestrator playbooks, commands, and adapters using widgets. You can select to view data from the past month, week, day, or hour.
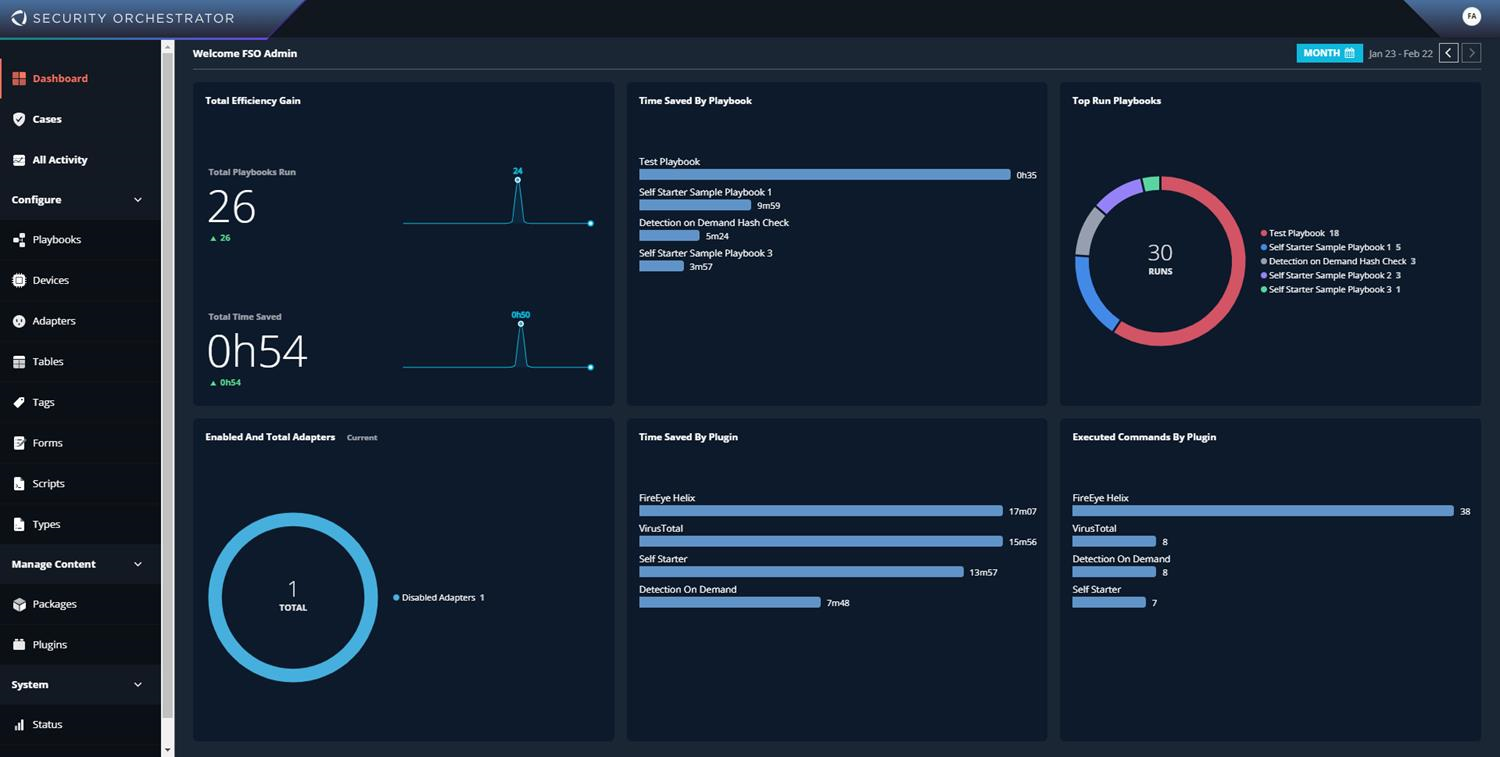
To access the Dashboard from anywhere in Security Orchestrator:
- Select Dashboard in the Security Orchestrator navigation menu.
| Dashboard Widget | Description |
|---|---|
| Total Efficiency Gain | Two graphs displaying the total number of playbooks run and the total time saved by those playbooks. Also shows whether the current statistics are an increase or decrease in performance from a previous window of time. |
| Time Saved By Playbook | A graph displaying the three most time-saving playbooks and how much human work hours were saved by each in the selected window of time. |
© 2021 FireEye
111
Security Orchestrator User GuideCHAPTER 4: Navigating Security Orchestrator Runtime
|
Dashboard Widget | Description |
|---|---|
|
Top Run Playbooks | A graph displaying the five most run playbooks in your Security Orchestrator instance, how many times each playbook was run in the selected window of time, and the total number of playbooks run. |
|
Enabled And Total Adapters | A graph displaying the number of enabled adapters, disabled adapters, and total number of adapters. |
|
Time Saved By Plugin | A graph displaying the human time effort saved by plug-ins, measured in minutes and seconds. |
|
Executed Commands by Plugin | A graph displaying the number of commands executed by each plug-in listed in the Time Saved By Plugin widget. |
Security Orchestrator User GuideCases
Cases
The Cases page lets you inspect and manage cases. To access the Cases page, select Cases in the navigation menu on the left. To view details for a case, hover over a case in the Cases page and click the Inspect button. You can filter for specific cases based on priority, status, summary form, playbook, or assignee. You can also view a linear graph of all cases opened within the past month, week, day, or hour.
An executed playbook does not always automatically open a case. You can manually escalate a playbook's activity into a case.
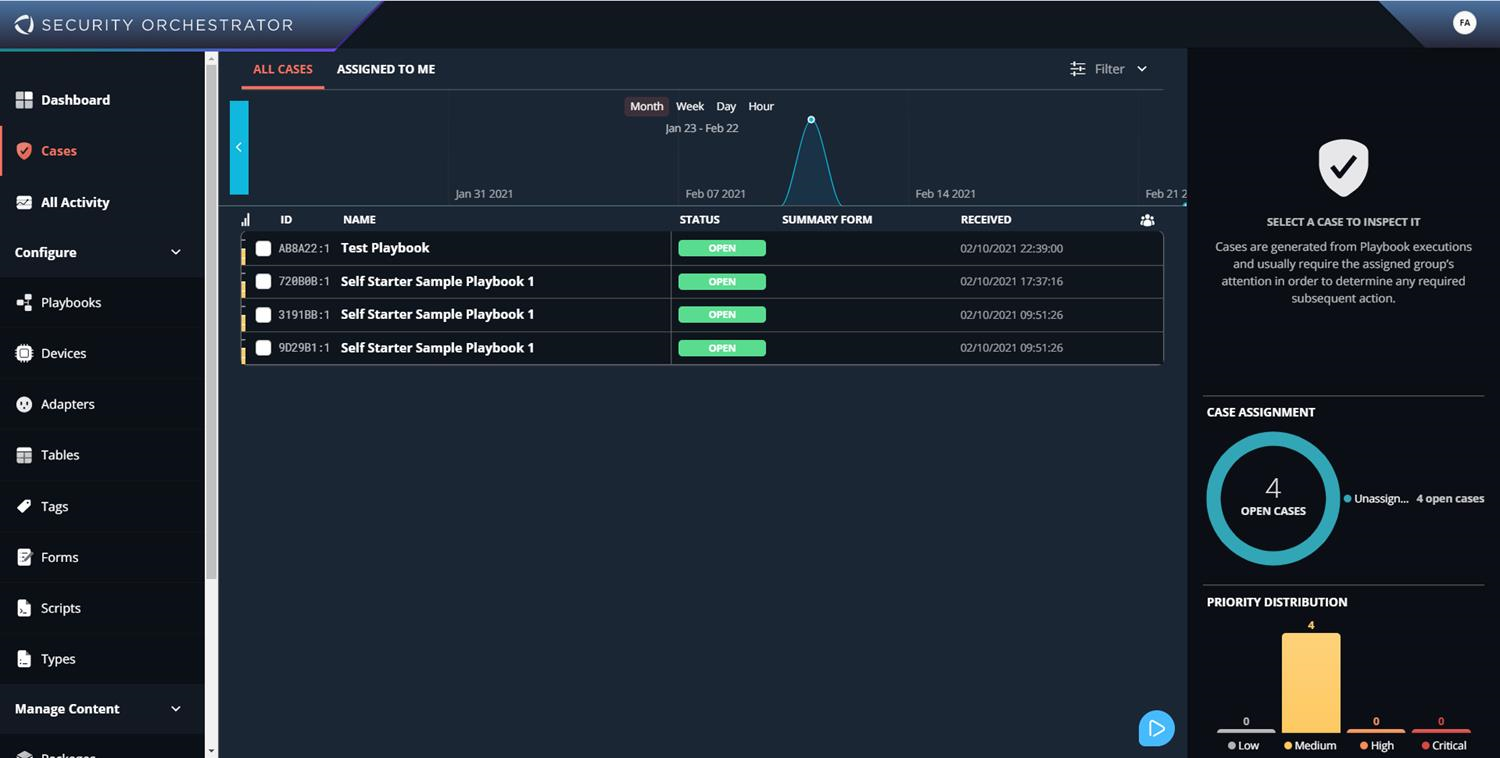
To escalate playbook activity to a case:
- In the All Activity page, select an executed playbook. A panel of playbook details and activity opens to the right.
- In bottom of the details and activity panel, select Escalate to Case. The case is opened and automatically assigned a priority level.
This section includes the following:
- Inspecting and Managing Case Details on the next page
- Running Playbooks from the Cases Page on the next page
Security Orchestrator User GuideCHAPTER 4: Navigating Security Orchestrator Runtime
Inspecting and Managing Case Details
You can view and manage some details, including Priority, Summary Form, Status, and Assignee, from the Cases page. When a case is first opened, it is assigned a Medium-level priority, but not assigned to any Security Orchestrator user.
To manage case details:
-
In the Cases page, select a case. The Details and Activity panel appears to the right.
To change case priority, select the label next to Priority and select a priority level in the drop-down menu.
To change case status, select the label next to Status and select Open or Closed.
To change who is assigned to the case, click Choose... next to Assigned to.
-
Close the Details and Activity panel when you finish making changes to the case details. Changes are automatically saved.
NOTE: To view changes made to the case, open the Activity tab of the Details and Activity panel.

Running Playbooks from the Cases Page
You can run manually-triggered playbooks from the Cases page of Security Orchestrator. Only published and enabled playbooks can be triggered. For more information, see Publishing Playbooks on page 77. Playbooks run from the Cases page do not automatically open cases, but appear in the All Activity page until you escalate activity into a case.
To run a playbook from the Cases page:
-
Click the Run Action button in the lower-right corner.

A list of published and enabled manually-triggered playbooks appears.
Select a playbook.
(Optional) Enter values for the appropriate input parameters.
Click Run.
After you run a playbook, Security Orchestrator provides a status message on whether or not the playbook ran successfully. A successfully run playbook can still include execution errors. Check the playbook status in All Activity to verify whether it encountered issues during execution.
114© 2021 FireEye
Security Orchestrator User Guide
All Activity
All Activity
The All Activity page lets you view and manage processes, or activity, generated by playbooks. You can filter for specific cases based on priority, status, summary form, playbook, or assignee. You can also view a linear graph of all activity within the past month, week, day, or hour.
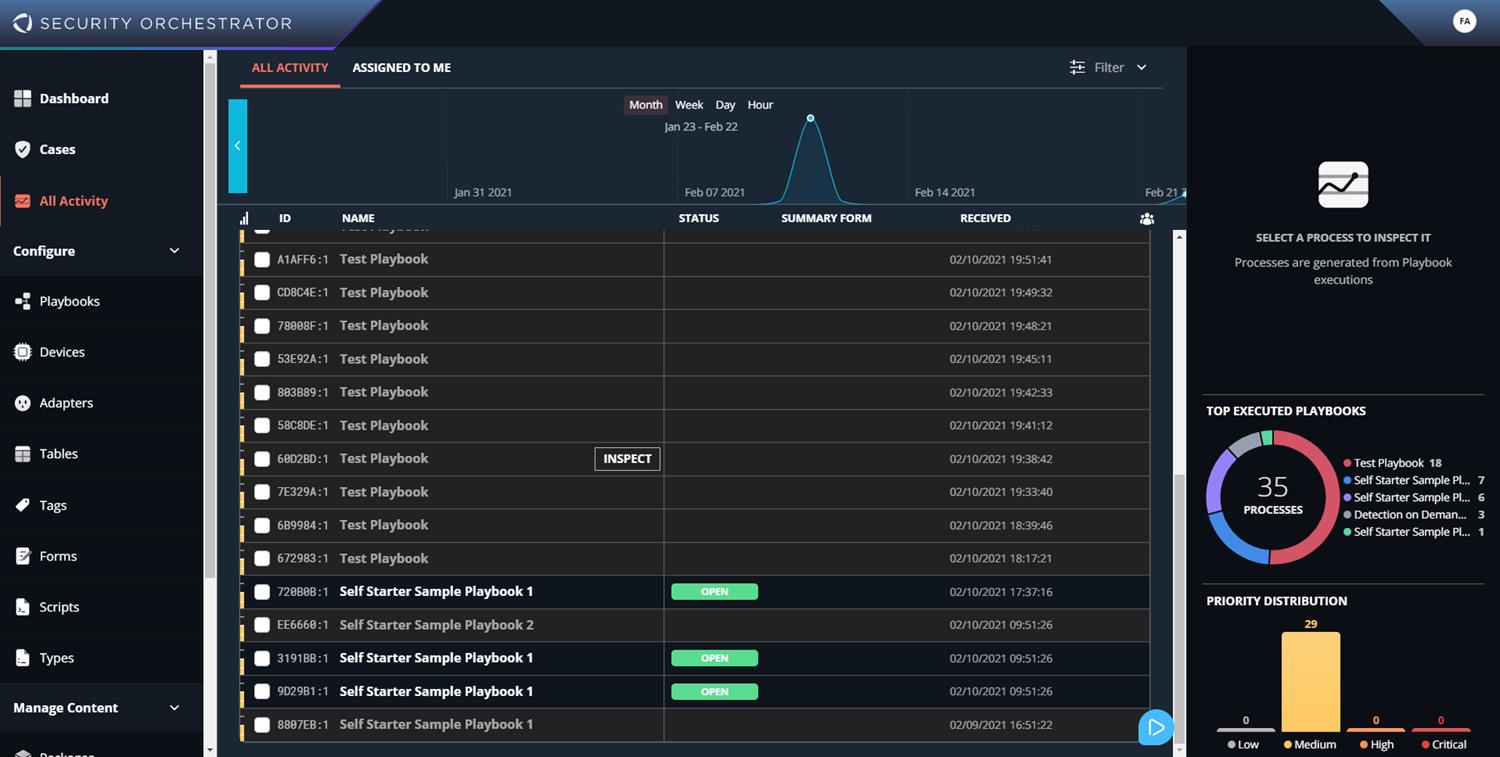
To view playbook execution details, select a process or case in the list and then click Inspect Process. To escalate a process to a case, select a process and then click Escalate to Case.

In the All Activity page, processes that are not cases have a gray background and no status. Cases have a status of open or closed.
To access the All Activity page:
- Click All Activity in the Security Orchestrator navigation menu.
You can perform the following actions from the All Activity page:
- Convert a process into a case. For more information about cases, see Cases on page 113.
- Run pivot actions, or manually triggered playbooks. For more information, see Running Playbooks from the All Activity Page on the next page.
© 2021 FireEye
115
Security Orchestrator User GuideCHAPTER 4: Navigating Security Orchestrator Runtime
Running Playbooks from the All Activity Page
You can run manually-triggered playbooks from the All Activity page of Security Orchestrator.
To run a playbook from the All Activity page:
-
Click the Run Action button in the lower-right corner.

A list of published and enabled manually-triggered playbooks appears.
-
Select a playbook.
-
(Optional) Enter values for the appropriate input parameters.
-
Click Run.
After you run a playbook, Security Orchestrator provides a status message on whether or not the playbook ran successfully. A successfully run playbook can still include execution errors. Check the playbook status in All Activity to verify whether it encountered issues during execution.
Release 6.1
System Status
System Status
You can monitor the health status of your Security Orchestrator application in the System Status page of the Web UI. To view the System Status page, click System in the Security Orchestrator side menu, then click Status.
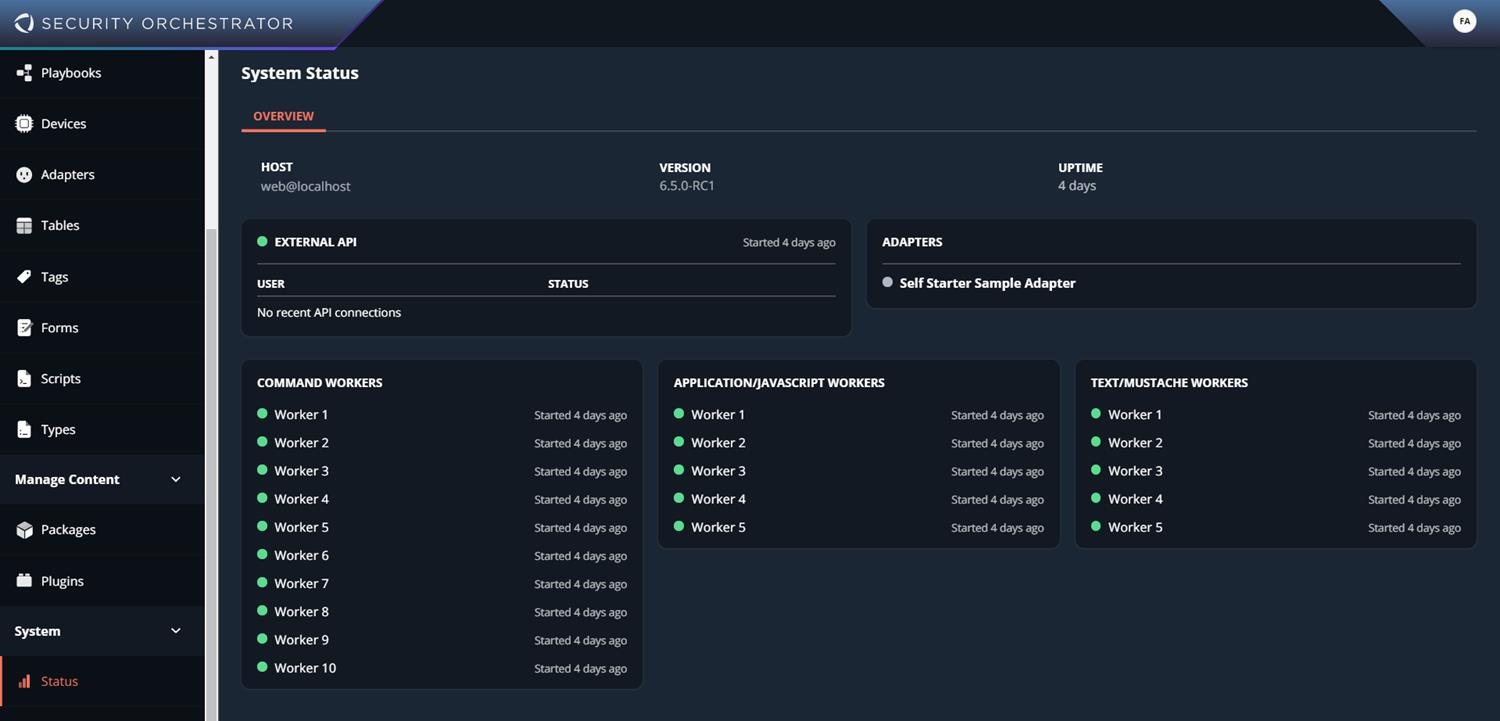
The host, application version number, and uptime of your Security Orchestrator instance are displayed at the top of the System Status page. The System Status page also includes the health status of any external API connections, adapters, command workers, application/javascript workers, and text/mustache workers. A green circle appears to the left of each component enabled in your Security Orchestrator instance. Workers are used to process data in playbooks.
Security Orchestrator User Guide
118
© 2021 FireEye
Security Orchestrator User Guide
CHAPTER 6: Sample Playbooks and Exercises
This optional section walks you through the steps to create a playbook in Security Orchestrator. If you are new to playbooks or simply unfamiliar with Security Orchestrator, this section will help you get started. Four lessons using sample playbooks and exercises explain the building blocks and allow you to create your own playbooks. Each lesson refers to detailed instructions in other sections of this user guide.
The sample playbooks are included in the fireeye.self_starter_learn_package-1.0.0 package. You can find each playbook in the Playbooks page.
These lessons use the Security Orchestrator knowledge bot. The knowledge bot requires communication to be allowed between the browser you use to access Security Orchestrator and the servers used by the bot. For details, see the section "Enable Inline Help and Tutorials" in the Security Orchestrator System Administration Guide.
- Lesson 1: A Basic Playbook on the next page
- Lesson 2: Adapters, Lookup Tables, and Invoking Another Playbook on page 128
- Lesson 3: Gateways, Forms, and Scripts on page 132
- Lesson 4: Prompting Users for Input and Updating Cases on page 136
© 2021 FireEye
119
Security Orchestrator User GuideCHAPTER 6: Sample Playbooks and Exercises
Lesson 1: A Basic Playbook
Lesson 1 explains how to start creating a playbook. This lesson uses Self Starter Sample Playbook 1, which is part of the the fireeye.self_starter_learn_package-1.0.0 package. Check the Playbooks page to make sure this playbook is available in your Security Orchestrator instance.
Selecting the Plug-In
The first building block for any playbook is the plugin. You can read more about plugins in Plug-ins on page 13. Use the Plugins menu to access plugins.
-
In the left navigation bar, click Plugins.
The Plugins page displays all installed plugins.
-
Select the self-starter plugin.
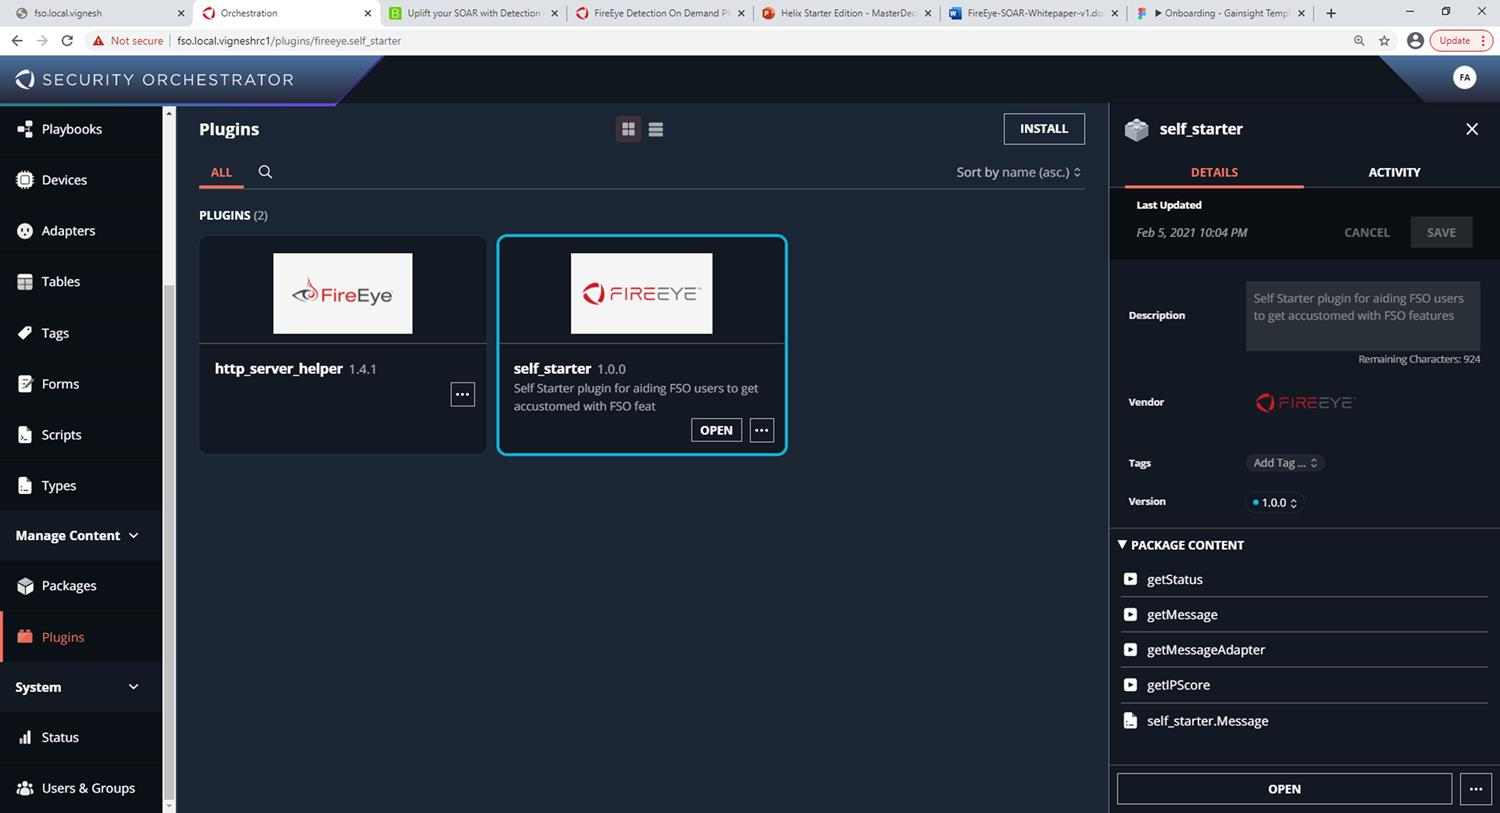
-
Click Open on the plugin tile or in the Detail pane. A new page displays the contents of the plugin on the left and the details on the right.
The Details pane on the right shows more information, including the list commands that the plugin supports. This plugin provides methods for checking host status, getting messages, and performing actions on IPs. The device commands supported are getStatus, getMessage, getMessageAdapter, and getIPScore.
You can use this plugin for the rest of the lesson.
120
© 2021 FireEye
Exercise
Install a new plugin from FireEye Marketplace. You will need a login to use the marketplace. The plugin content bundle is a download. Some plugins require system-dependent libraries to be installed. Check the plugin documentation available in the plugin content bundle file. For instructions, see the section "Plug-In Installation" in the Security Orchestrator System Administration Guide.
Device
The next step in building a playbook is to create an instance of a device for the plugin. You can use the sample device or create your own. To create a new device and learn more about devices, see Devices on page 21.
-
In the left navigation bar, click Devices.
The Devices page displays all installed plugins.
-
Select the Self Starter Sample Device.
The Details pane on the right shows the device configuration and parameters. Custom parameters can be used to pass any user-defined values. In this example, the Host parameter can be configured.
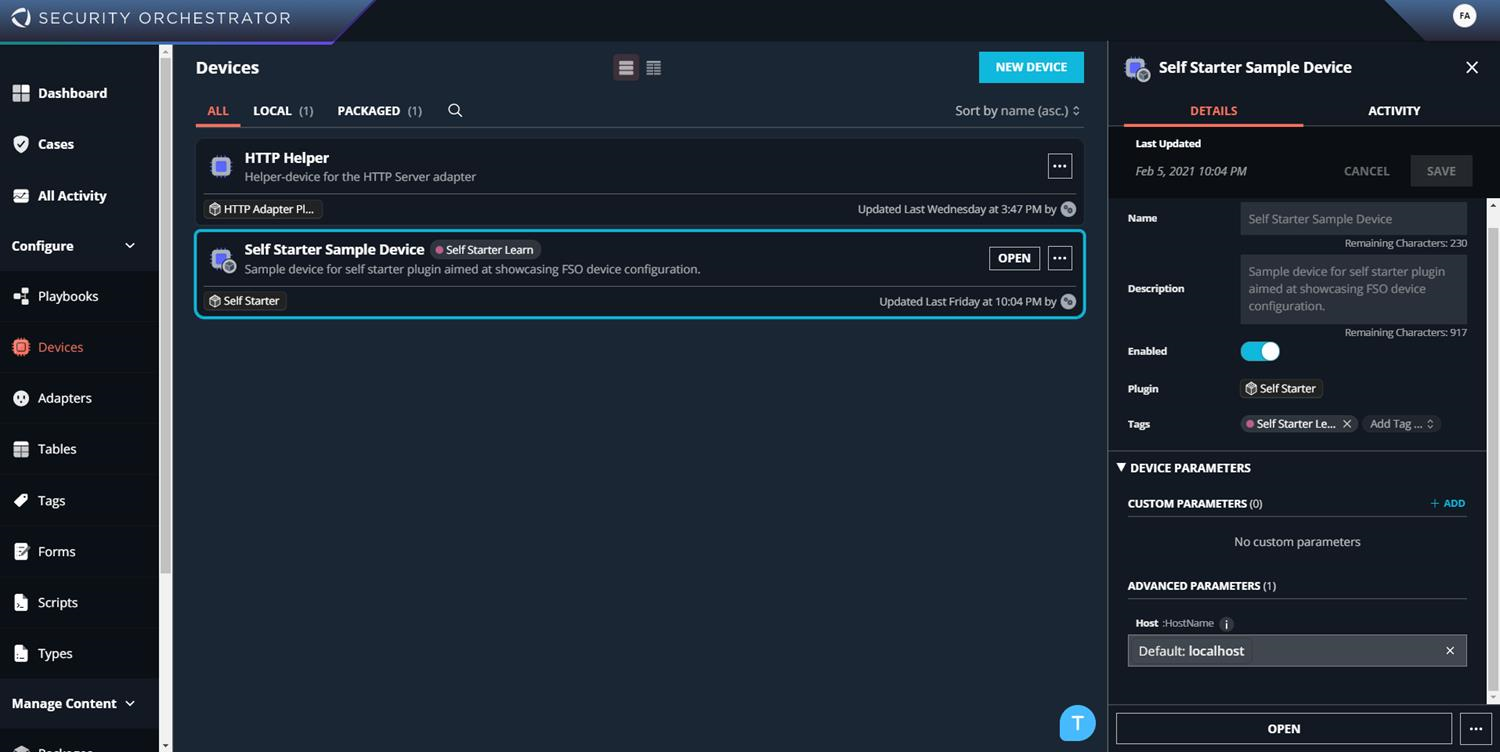
-
Click Open to view the details of commands the device supports.
-
To test device connectivity, click the T icon at the lower-right corner of the Devices page.
Exercise
Create a new device for the self_starter plugin, test its connectivity, and provide a test host from your environment.
Security Orchestrator User Guide
CHAPTER 6: Sample Playbooks and Exercises
The Sample Playbook
The sample playbook for this lesson is Self Starter Sample Playbook 1. This playbook generates a random score and risk rating for the provided IP address and creates an entry in a table if score is greater than 50. This playbook uses device commands, obtains user input, and stores data in a table.
You can read more about playbooks in Playbooks on page 33.
Add Start Events, Tasks, and End Events
Open the sample playbook in the playbook workflow builder:
-
In the left navigation bar, click Playbooks.
-
Click the Open button next to the sample playbook.
This playbook has four tasks. To view the details of each task, double-click it.
Task 1: This task is the start event. The Manual Trigger task runs the playbook manually.
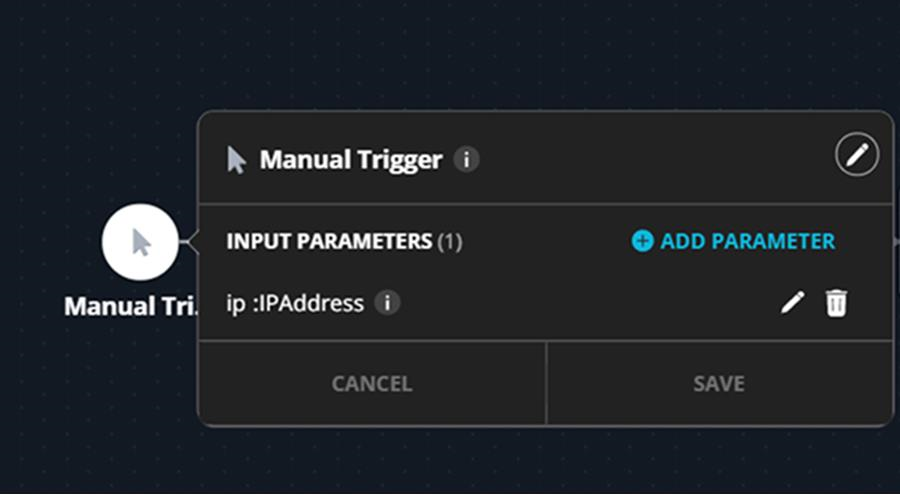
The task accepts an input parameter, ip, of the type IPAddress. When this playbook is run, the user is prompted to provide a value for ip. This is the starting event of the playbook. See Start Events on page 38 for more details.
Task 2: The playbook reads the IP score by calling the device command getIPScore on the Self Starter Sample Device.
122
© 2021 FireEye
Release 6.1
Lesson 1: A Basic Playbook
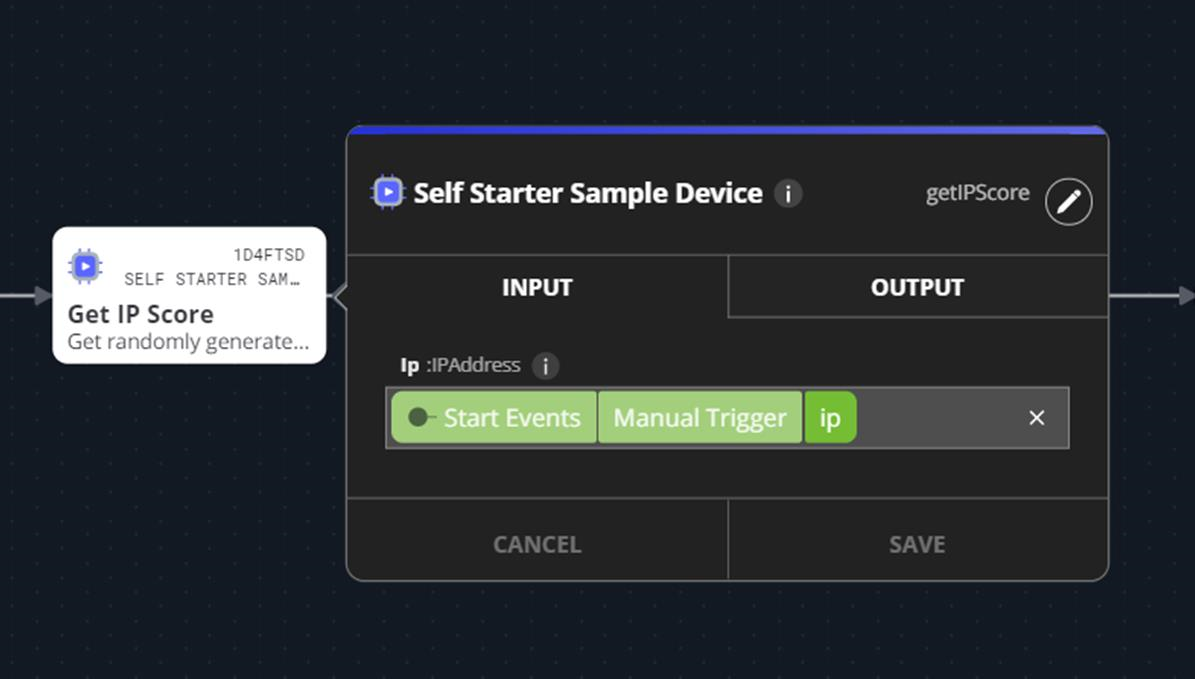
The device command getIPScore uses the input parameter ip, which the user entered as a value in task 1.
The output of getIPScore command is displayed in the Output tab of the same window. The values available are Success, Score, and Risk Rating. The task includes all three values by default. You can include or exclude values using the toggle in the Available column.
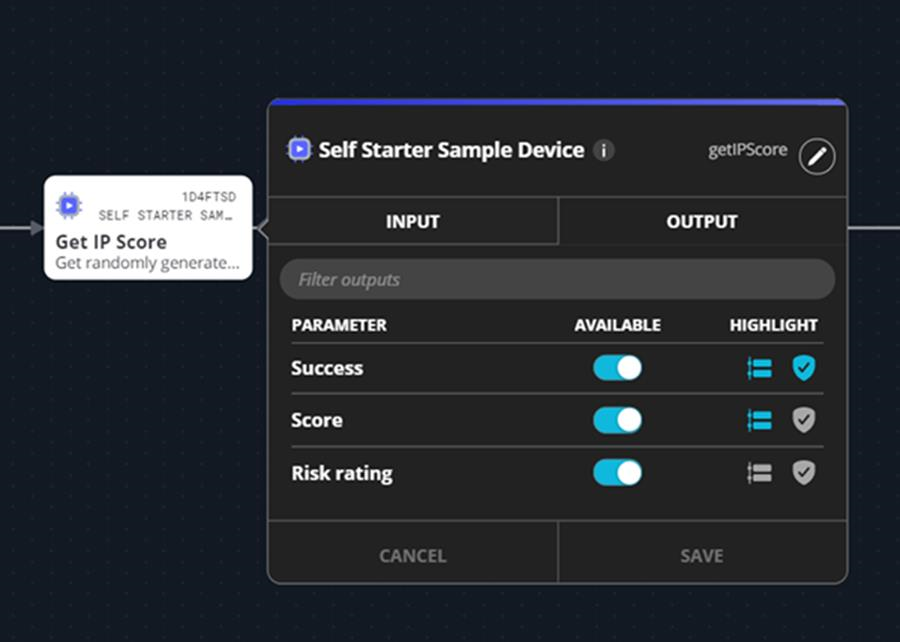
To select a different command, click the pencil icon in the top-right corner. All available commands are displayed. Select a command to see the the next action, such as prompting for an input value.
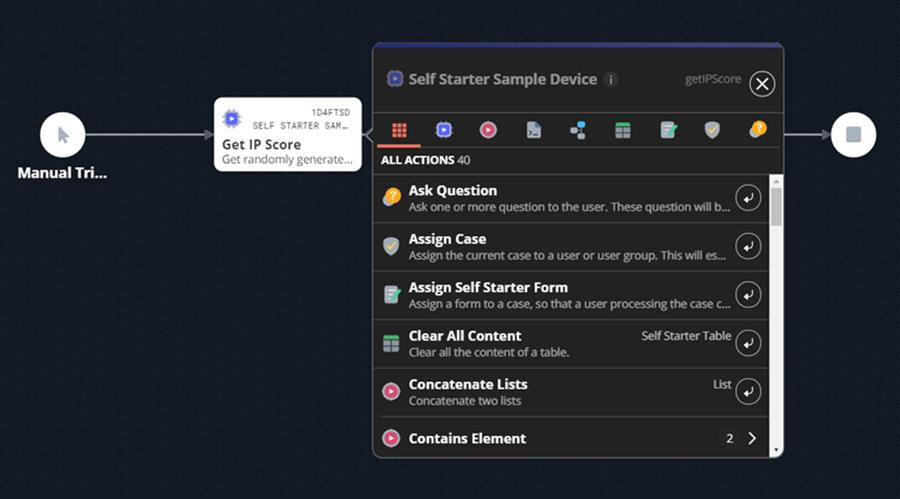
Select the blue icon in the menu bar within the window. This displays the list of devices available to be used in this playbook. (The other icons represent Native Commands,
© 2021 FireEye
123
Security Orchestrator User Guide
CHAPTER 6: Sample Playbooks and Exercises
Scripts, Tables, Forms, and so on, which are described in detail in Tasks on page 44.)
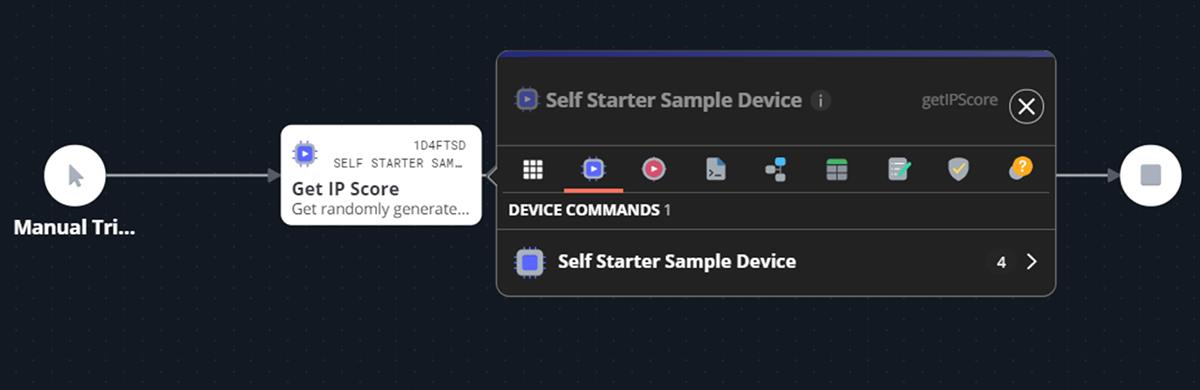
Select the device Self Starter Sample Device to view the list of device commands that are available.
Each link between tasks is a sequence flow. Select the sequence flow between task 2 and task 3 and click Edit Conditions.
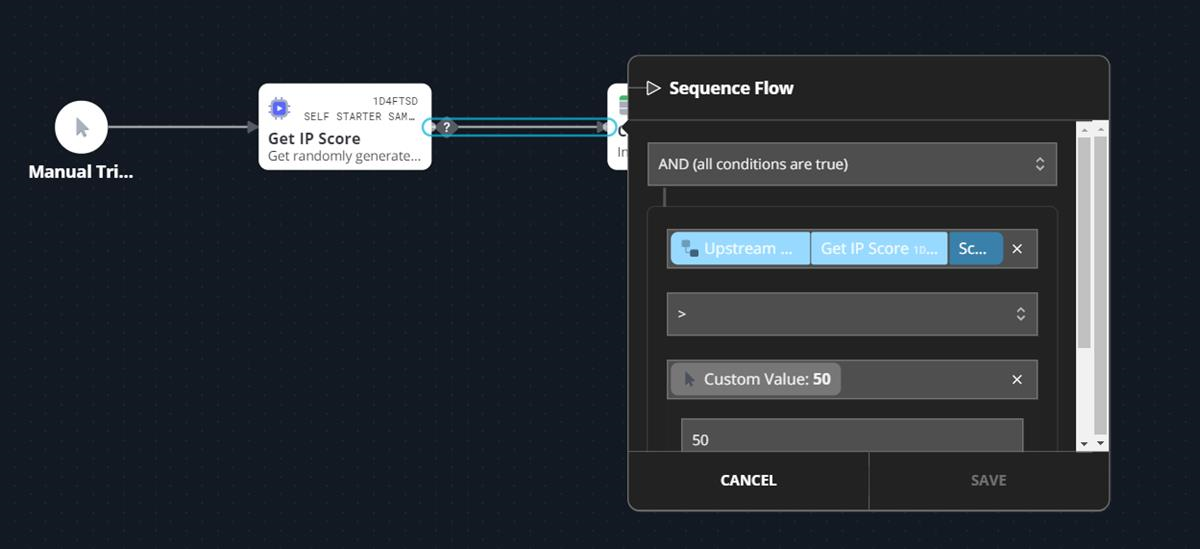
A condition is defined in this sequence flow that checks whether the Score value passed from the previous task is greater than 50. The execution is passed to the next task only if this condition is met. (See Sequence Flows on page 68 for more details.)
Task 3: If the condition in the previous task is met, the playbook adds an entry to the table Self Starter Table. To view the table, click Tables in the left navigation bar. In the Tables window, find the Self Starter table and click Open.
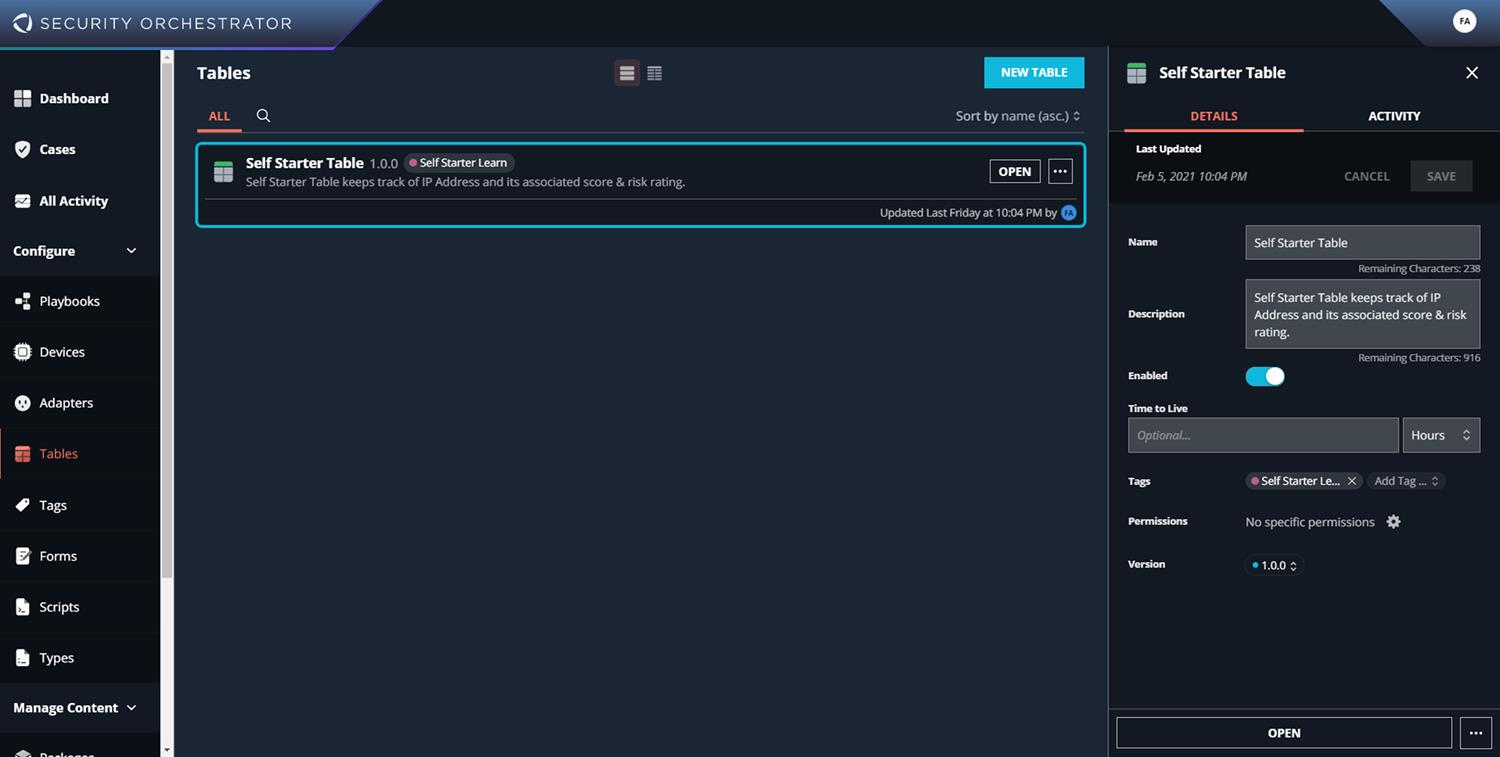
124
© 2021 FireEye
Release 6.1
Lesson 1: A Basic Playbook
The table has three columns: ip, score, and risk_rating. The value for ip is read from Start Events. The values for score and risk_rating are from Upstream Tasks, which is task 2 in this case. (See Tables on page 80 for more details.)
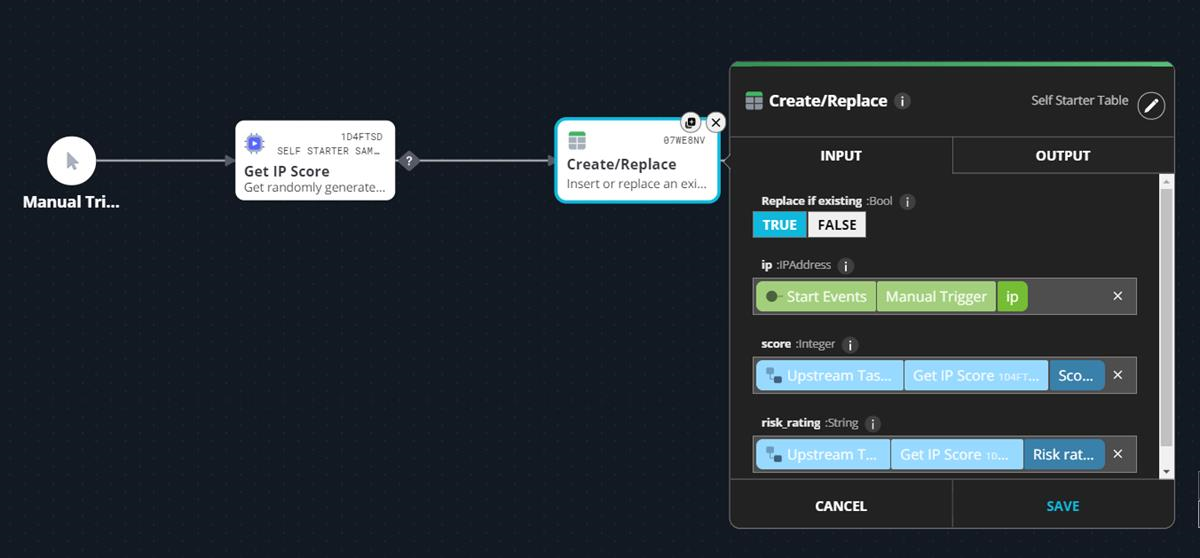
Task 4: This is an end event task, which completes the execution of the playbook. See End Events on page 73
Run Playbook 1
You can run a playbook from the playbook workflow builder, the All Activity page, or the Playbooks page. This example uses the Playbooks page.
- Select Self Starter Sample Playbook 1 on the Playbooks page.
- In the bottom-right corner, click the Run Action button (gray circle) to launch the playbook.
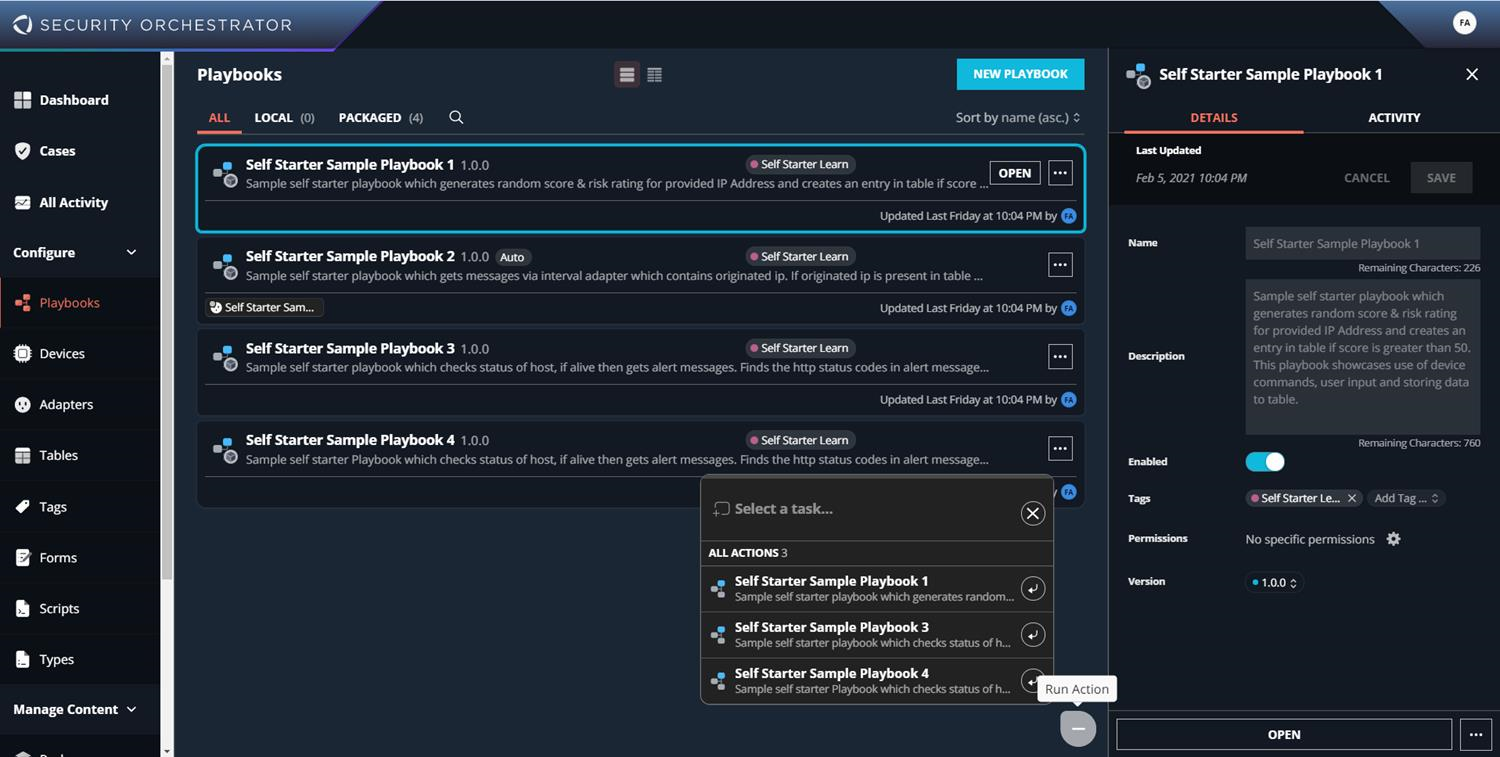
You are prompted to enter a value for ip. Remember that this playbook's start event was a manual trigger that prompted for user input.
© 2021 FireEye
125
Security Orchestrator User GuideCHAPTER 6: Sample Playbooks and Exercises
3. In the dialog box, select Custom Value and enter a valid IP address. Then click Run.
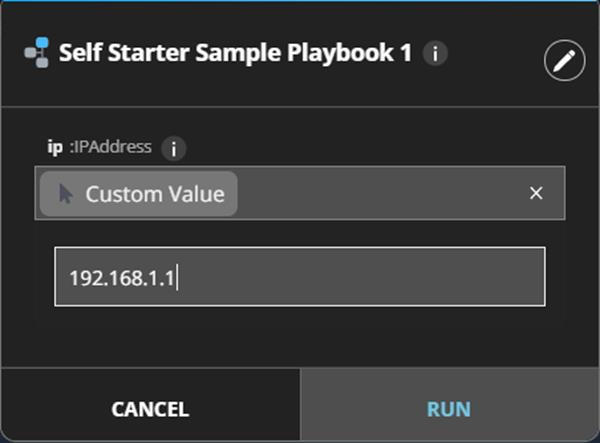
The prompt displays the status of the playbook.
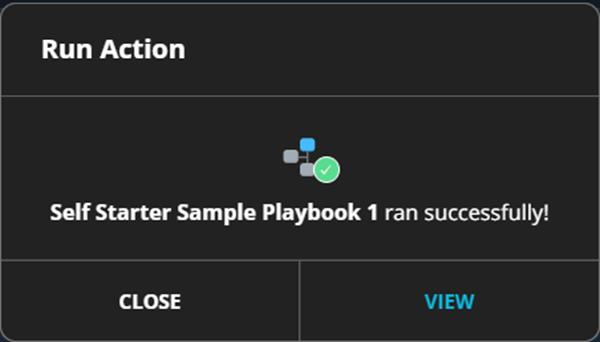
4. Click View to see the details of the playbook's execution.
The output of the playbook is displayed in list view. Use the icons at the top of the window to toggle between list view and graph view. Click the magnifying glass in list view or the task in graph view to see details of the task, including input, output, and trace information. Trace provides the task’s system log output for debugging.
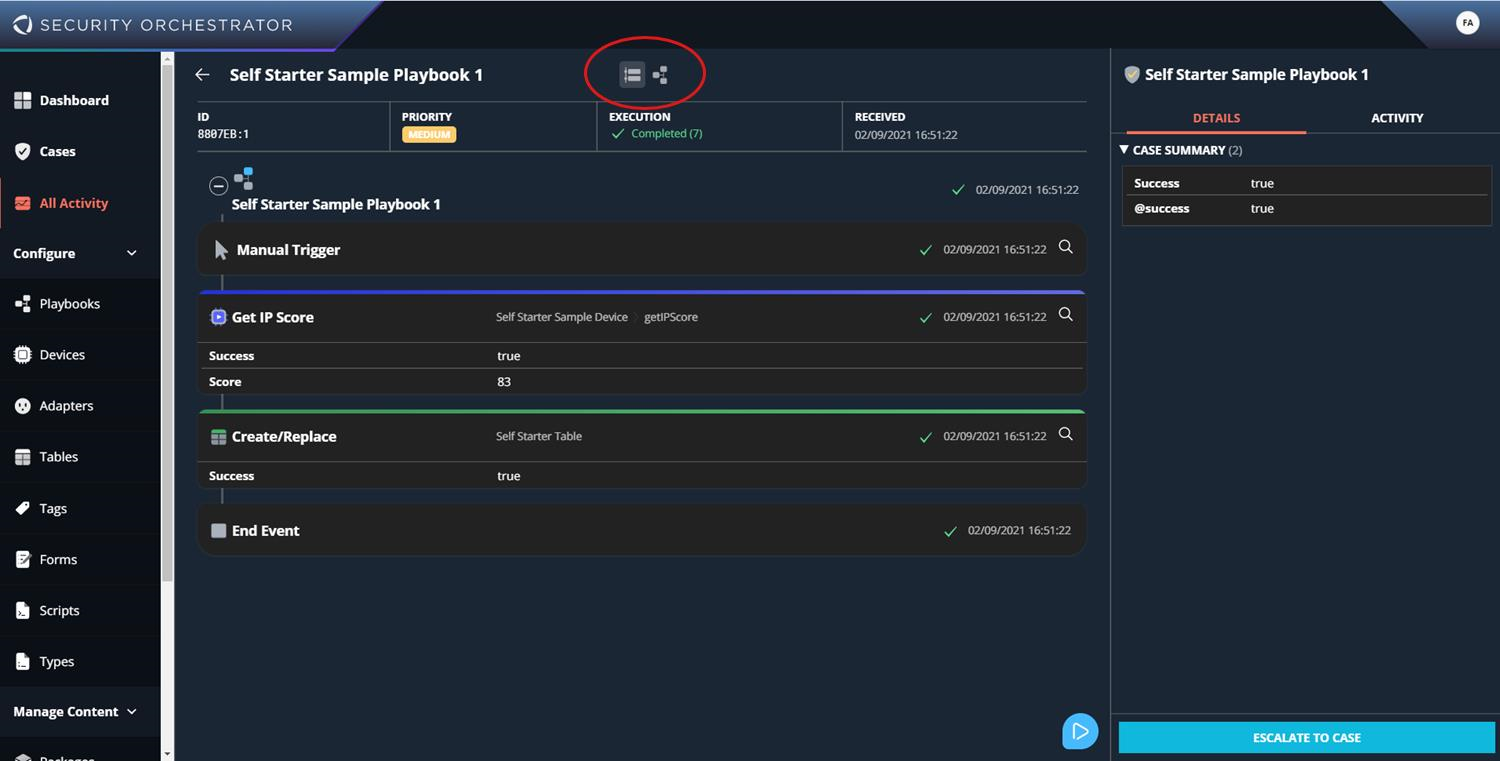
126
© 2021 FireEye
Release 6.1
Lesson 1: A Basic Playbook
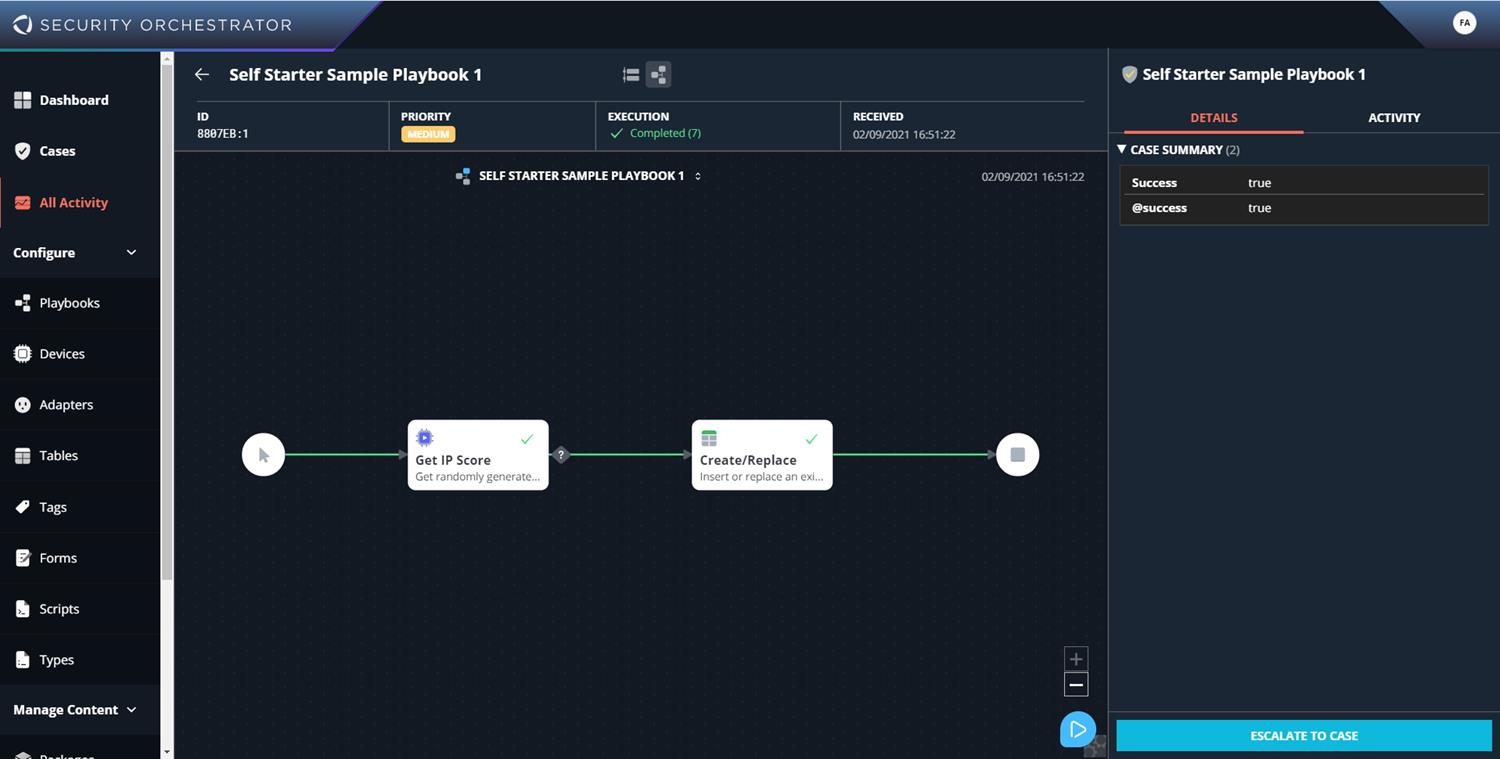
Exercise
Create a new playbook similar to Playbook 1 that does the following:
- Gets an IP address as input.
- Gets the IP score of the IP address from the new device. (The device is a stubbed system that produces random values when the device command is run.)
- If the risk score is more than 60 and less than 80, stores the score in a new table. See Tables on page 80 for more details.
Security Orchestrator User Guide
CHAPTER 6: Sample Playbooks and Exercises
Lesson 2: Adapters, Lookup Tables, and Invoking Another Playbook
Lesson 2 works with a playbook that is triggered by an adapter, obtains values from a lookup table, and invokes another playbook. This lesson uses Self Starter Sample Playbook 2, which is part of the the fireeye.self_starter_learn_package-1.0.0 package. Check the Playbooks page to make sure this playbook is available in your Security Orchestrator instance.
Playbook 2 retrieves messages via an adapter that contain an originating IP address. If the IP address is not already present in the lookup table, the IP address score is regenerated. If the IP address is present, the score is not regenerated.
Adapters
Adapters enable playbooks to be triggered automatically. Adapters use plugin commands to receive data from a device. The self_starter plugin supports the device command getMessageAdapter, which provides a stubbed adapter that generates random messages. You can read more about adapters in Adapters on page 27.
Click Adapters in the left navigation bar to open the Adapters page. The Self Starter Sample Adapter is displayed.
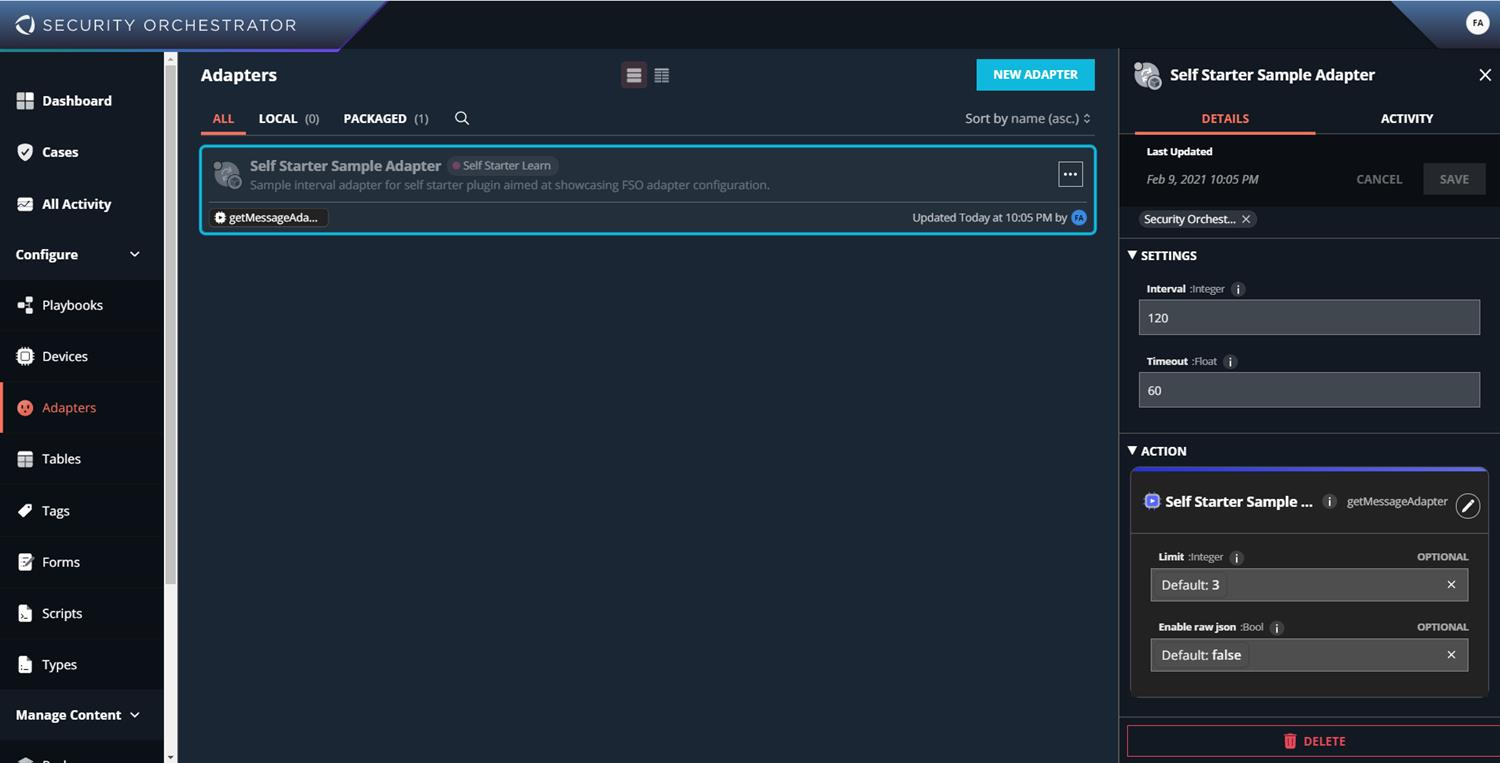
This adapter has two settings: Interval and Timeout. Interval denotes how often, in seconds, the associated command will be executed. This adapter also has two more configuration parameters: Limit and Enable Raw JSON. The limit sets the number of messages polled for every configured interval of time.
128
© 2021 FireEye
Release 6.1
Lesson 2: Adapters, Lookup Tables, and Invoking Another Playbook
The adapter automatically starts the Self Starter Sample Playbook 2. Click Playbooks in the left navigation bar and open the Self Starter Sample Playbook 2 on the Playbooks page. This playbook has three tasks. To view the details of each task, double-click it.

Exercise
Install a new plugin from FireEye Marketplace. Check whether it has an adapter command. If it does, create a new adapter instance for the device command.
Task 1: This task is the start event. The adapter automatically triggers the playbook. Double-click the first task to view the details.
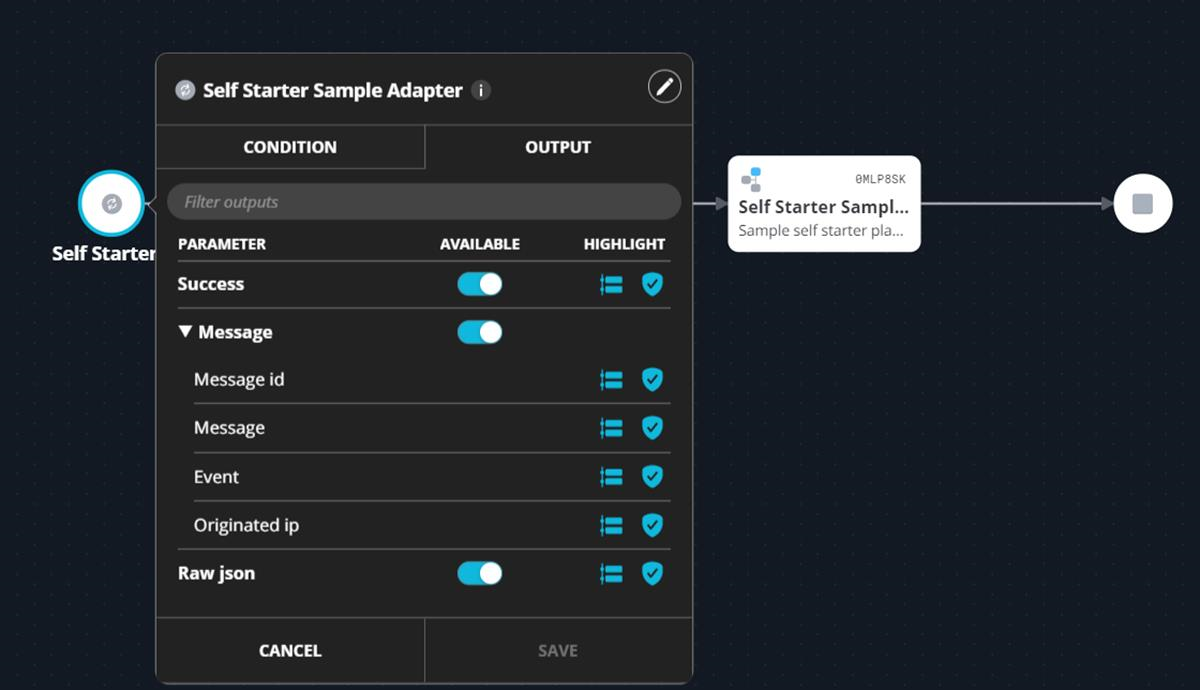
The adapter is executed at the configured interval of 120 seconds. Three instances are executed in parallel, as configured by the limit parameter, each time the adapter is executed. The adapter produces three output parameters: Success, Message, and Raw JSON. Message contains Message ID, Message, Event, and Origin IP. The read message is passed to the next task.
Task 2: This task looks up the origin IP from the message received from the previous task. If the value is present, it sends the output to the next task.
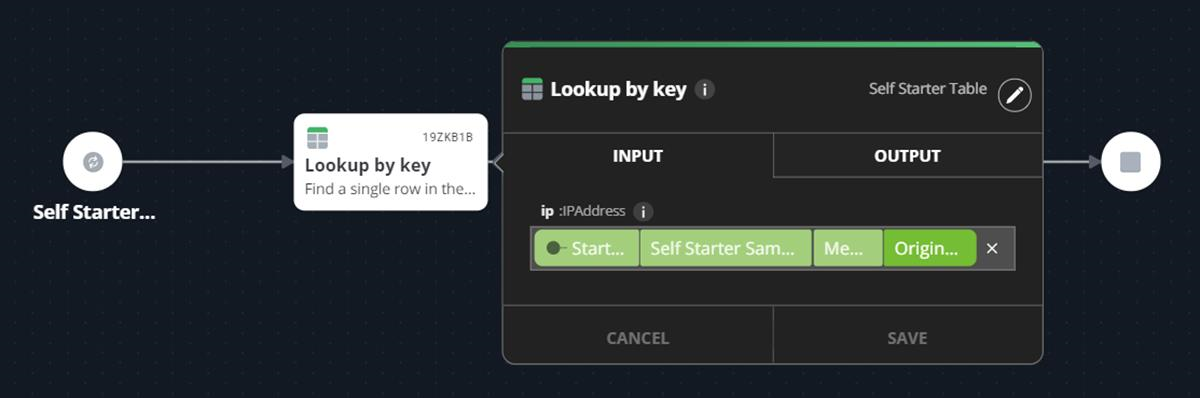
© 2021 FireEye
Security Orchestrator User GuideCHAPTER 6: Sample Playbooks and Exercises
Task 3: This task invokes another playbook within the current playbook. Select the playbook from the list in the command selection window. You can invoke only manually triggered playbooks from another playbook.
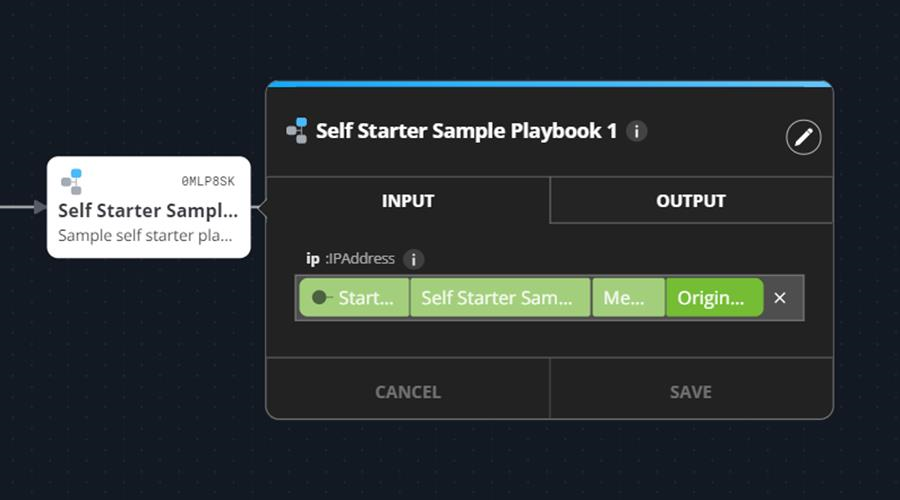
Run Playbook 2
Because the start event for this playbook is an automatic trigger from the adapter, you will not see an option to run the playbook as in the previous lesson's playbook. The way to start this playbook is to enable the adapter from the Adapters page. Select the adapter and toggle the Enabled button on the Adapters details page on the right.
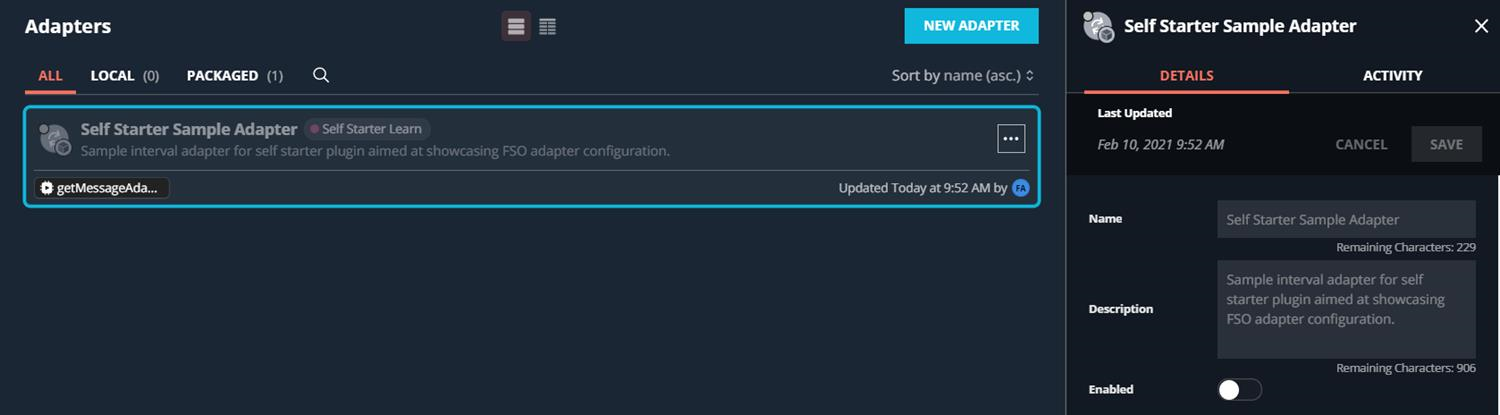
Once the adapter is enabled, for every configured time interval the adapter will execute the command it is associated with. In this example, the command is getMessageAdapter, which returns a randomly generated message. Every 120 seconds, 3 messages are retrieved, For each message, a new running instance of the playbook is created. Each instance can individually be debugged using the INSPECT option.
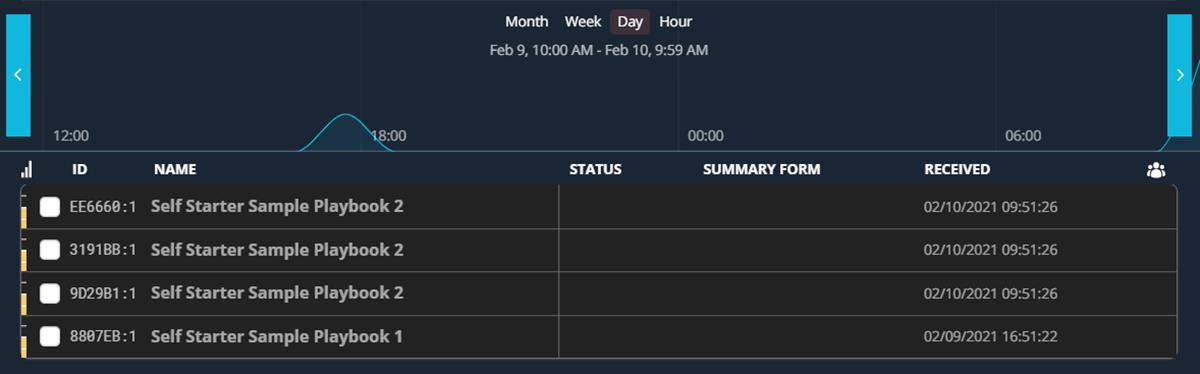
IMPORTANT: Make sure to disable the Self Starter Sample Adapter after trying it. Otherwise, the adapter will run continuously and fill up the All Activity page.

130
© 2021 FireEye
Release 6.1
Lesson 2: Adapters, Lookup Tables, and Invoking Another Playbook
Exercise
Create a new playbook similar to Playbook 2 that does the following:
- Gets 2 messages from the adapter every 60 seconds.
- Gets the origin IP from the message.
- Checks whether the origin IP is present in the Self Starter Sample Table.
- If it is not present, calls getIPScore for it.
© 2021 FireEye
131
Security Orchestrator User Guide
CHAPTER 6: Sample Playbooks and Exercises
Lesson 3: Gateways, Forms, and Scripts
Lesson 3 introduces a conditional flow called a gateway. The Lesson 3 playbook checks the status of the host. If the host is alive, the playbook retrieves alert messages and uses a script to find the HTTP status codes in the messages. If the HTTP code is equal to 200, the playbook checks for the IP score and, if the score is greater than 50, stores it in a table.
This lesson uses Self Starter Sample Playbook 3, which is part of the the fireeye.self_starter_learn_package-1.0.0 package. Check the Playbooks page to make sure this playbook is available in your Security Orchestrator instance.
The playbook for this lesson has seven tasks. Lesson 3 explains only the three new concepts introduced here: gateways, forms, and scripts.
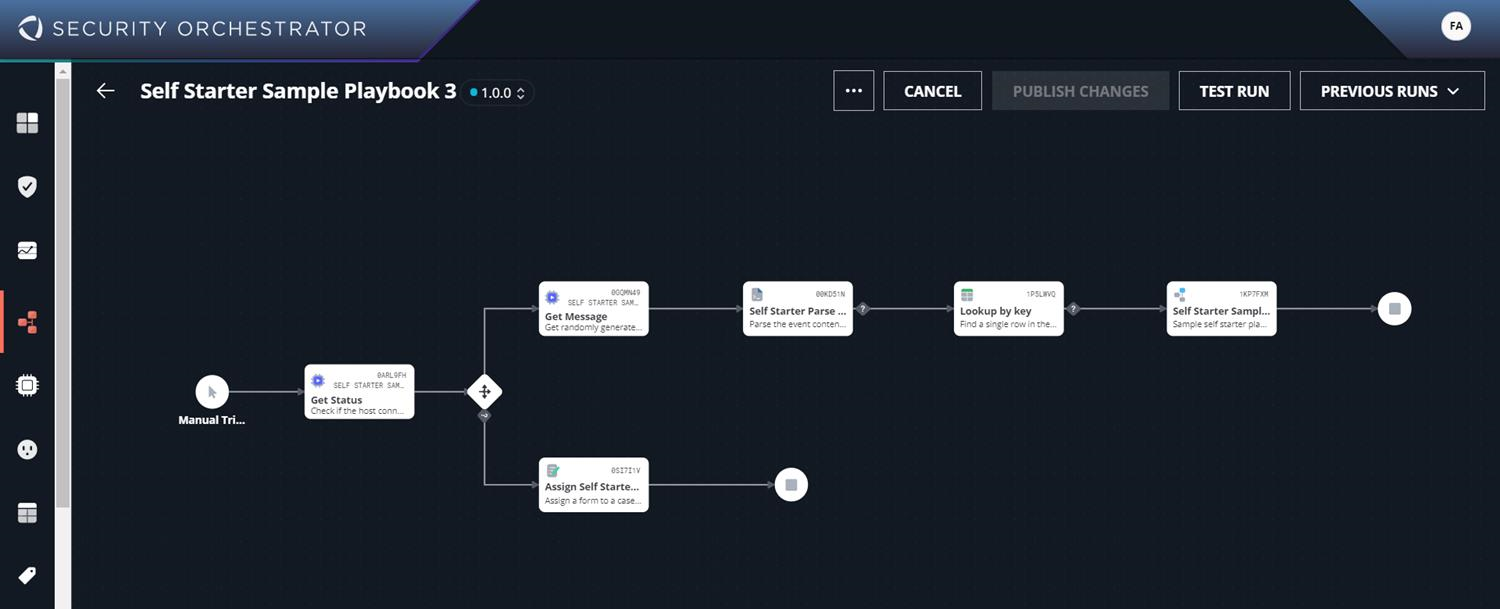
Exercise
Identify which device commands each task uses and how they map to the summary of the playbook given above.
Gateways
The third task in the sample playbook is a gateway task, available in the workflow builder screen. A gateway enables you to build a playbook to fork execution flow based on condition. The conditions can be defined in each sequence flow. You can view the conditions used in the sample by selecting the sequence flow and selecting Edit Condition.
132
© 2021 FireEye
Release 6.1
Lesson 3: Gateways, Forms, and Scripts
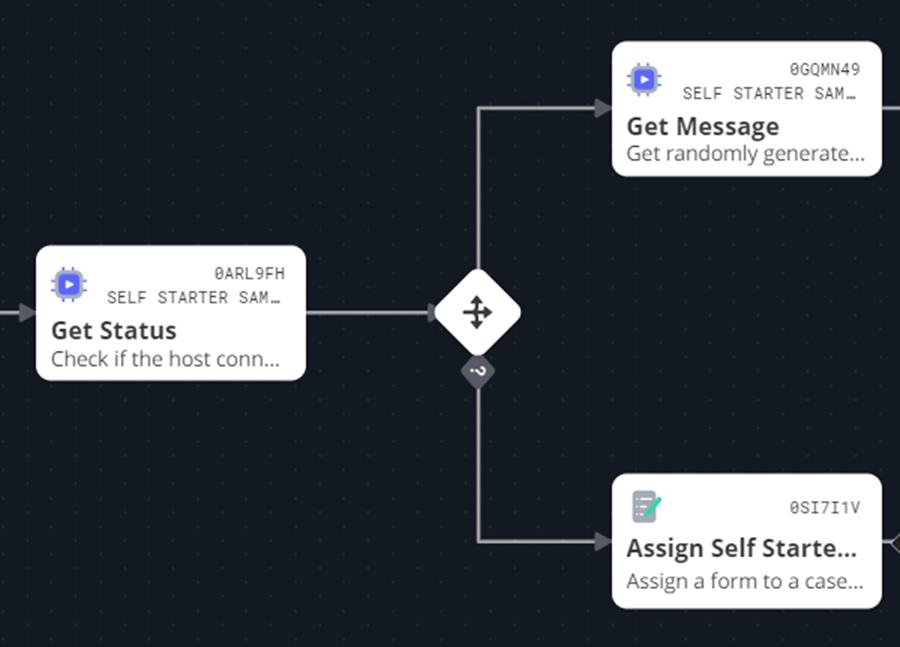
See Configuring Gateways on page 72 for more details.
Forms
Forms are used to display values and to create interactive forms with which users can provide input as part of the playbook workflow. The first task below the gateway task, Assign Self Starter Form, explains the use of forms in a playbook. The ‘Self Starter Sample Form’ is used in this task. You can view the form from the Forms page.
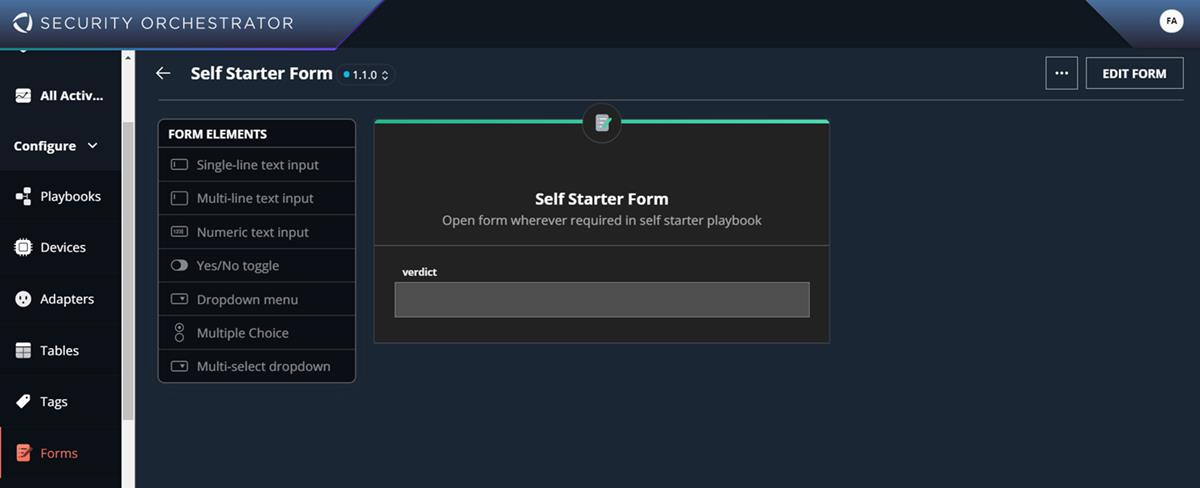
In the Self Starter Sample Playbook 3, this form is used to display a verdict based on a condition check in the gateway. Open the Sample Playbook 3 in the workflow builder and open the task below the gateway.
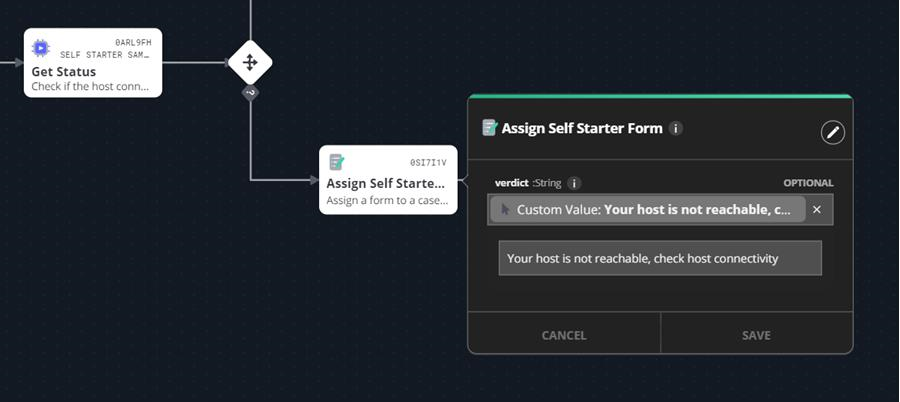
If the task Get Status returns false, the form is displayed with the text "Your host is not reachable. Check host connecivity."
See Configuring Forms on page 86 for more details.
© 2021 FireEye
133
Scripts
Scripts are used to run your own Javascript functions to manipulate complex data and return output that is easier to process in playbook tasks. The Self Starter Sample Playbook 3 uses the Self Starter Parse Event script to parse the event from the message. You can view the Self Starter Parse Event script from the Scripts page. See Scripts and Templates on page 88 for more details.
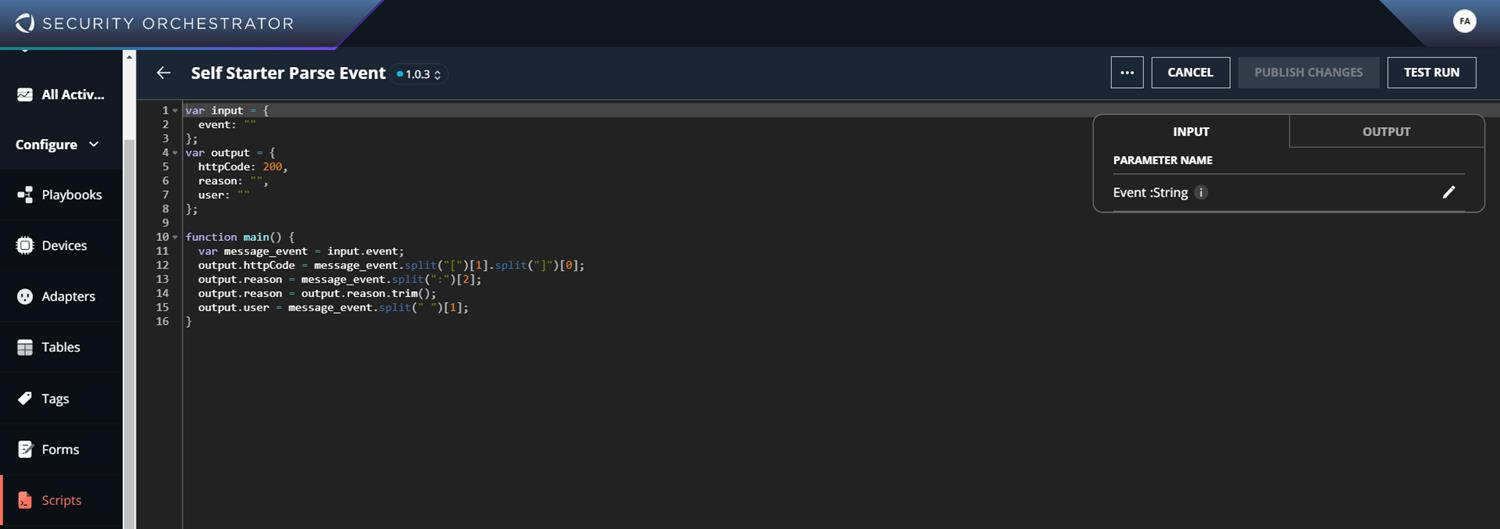
The script takes the event as input in the form of a string value. The function parses this string and creates four output values. The output values that are read from the event are httpCode, reason, and user. The script is used in the second task above the gateway task.
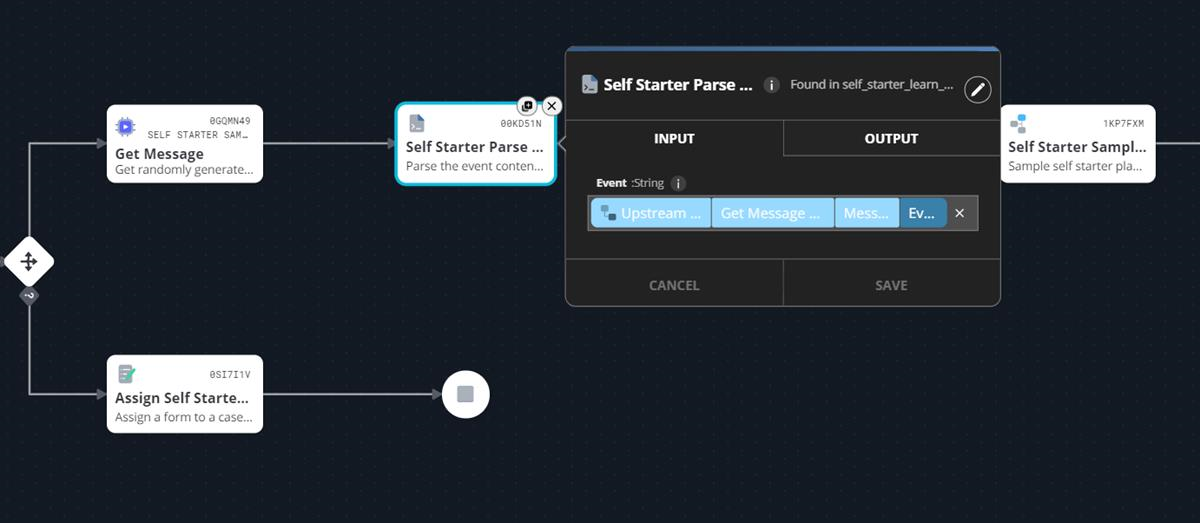
The event, which is the required input, is retrieved from the upstream task of Get Message.
Exercise
Write a new script that reads the HTTP status code from the event. If the code is 200, display the string "Success."
Open the Self Starter Sample Playbook 3 in the workflow builder and select Test Run, or go to the Playbooks page and select Run Action. Go through the All Activity page and analyze the output of the playbook to better understand each task. One difference from previous playbook run output is that if the gateway did not execute a particular path of execution, the tasks are greyed out and the sequence flow leading to that path is shown in red.
Release 6.1 Lesson 3: Gateways, Forms, and Scripts
[IMAGE PLACEHOLDER: A dark-themed workflow/playbook diagram showing connected action blocks, a conditional diamond, and a branch leading to a Self Starter Sample action.]
Exercise
Create a new playbook that does the following:
- Gets a new message from the Self Starter Sample Device.
- Parses the event to retrieve the HTTP status code.
- Displays the appropriate message for the status code in the Self Starter Sample Form:
- If the status code is 200, display OK.
- If the status code is 401, display Unauthorized.
- If the status code is 404, display Unavailable.
- If the status code is any other value, display Error.
Security Orchestrator User Guide
CHAPTER 6: Sample Playbooks and Exercises
Lesson 4: Prompting Users for Input and Updating Cases
Lesson 4 introduces asking questions and updating cases based on the user's response. The Lesson 4 playbook checks the status of the host. Finds the http status codes in alert messages by using script and if http code is equal to 200, it checks for IP Score & stores it in table(if score > 50). If http code is not equal to 200 asks user if IP Score is to be checked, if yes then IP Score is generated again, else case is closed with low priority.
This lesson uses Self Starter Sample Playbook 4, which is part of the the fireeye.self_starter_learn_package-1.0.0 package. Check the Playbooks page to make sure this playbook is available in your Security Orchestrator instance.
The playbook for this lesson has 10 tasks and 3 gateways.
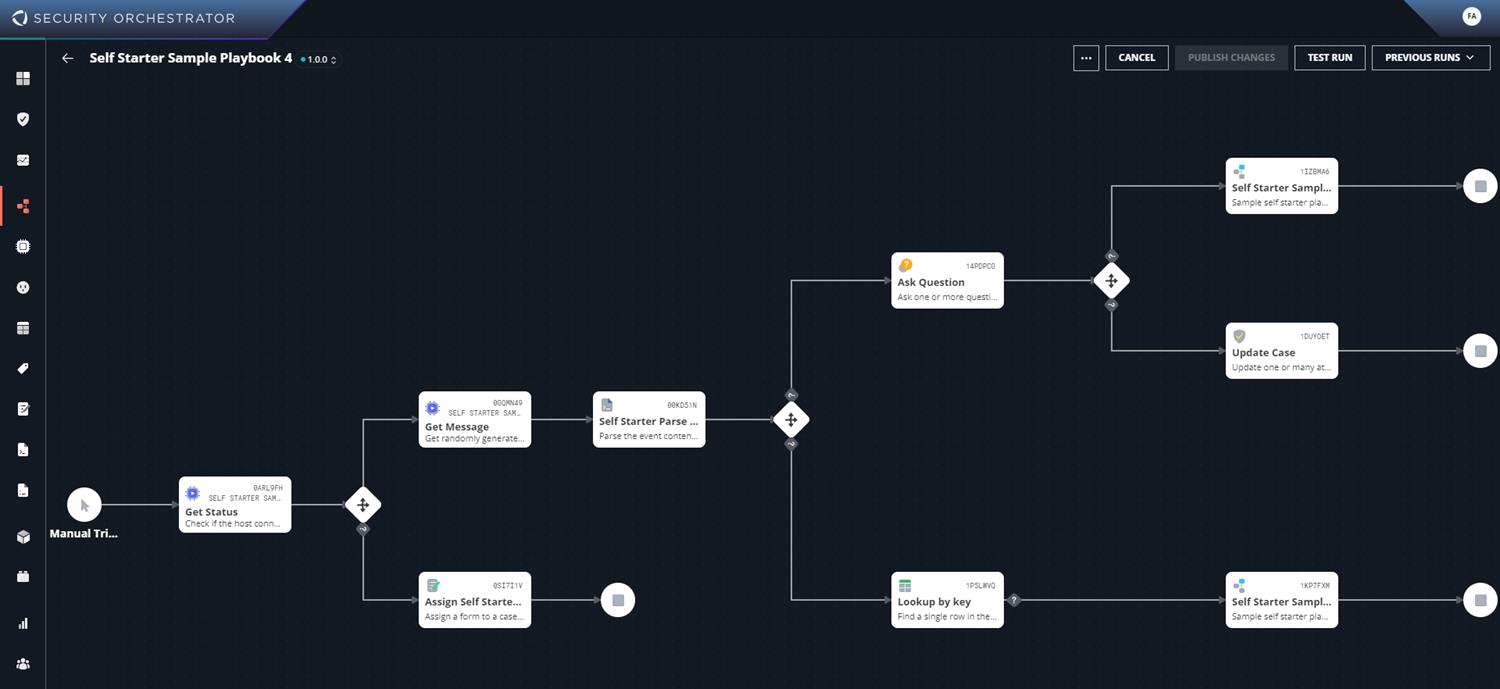
Exercise
Go through each task and relate it to the use case it solves, which is defined at the beginning of this lesson.
Asking Questions
The Ask Question task question is used to prompt for an user interaction to approve the next task in the execution of the playbook. In the Self Starter Sample Playbook 3, the ask question task was used to get confirmation from the user if the IP score should be regenerated.
136
© 2021 FireEye
Release 6.1
Lesson 4: Prompting Users for Input and Updating Cases
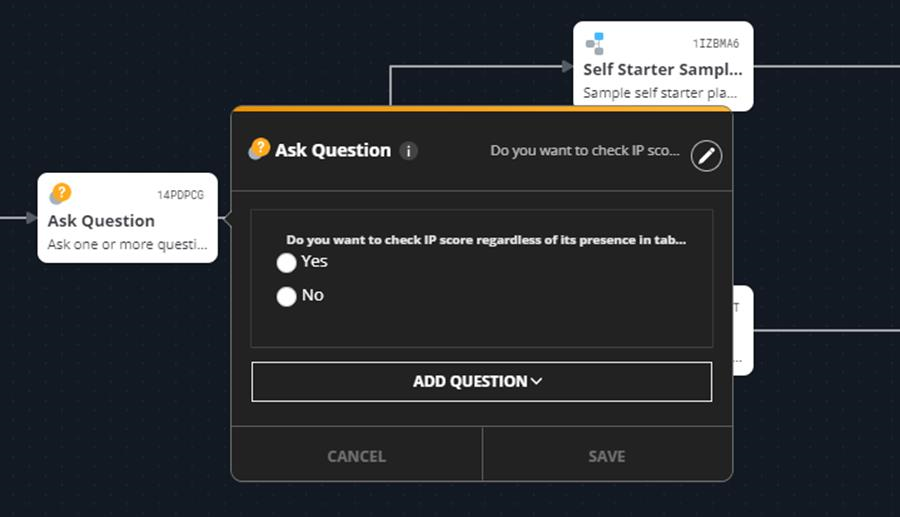
The interactive form to ask the question can be built from the Edit screen of the task.
Update Case
Cases can be used to triage an execution workflow of a playbook in Security Orchestrator. In Self Starter Sample Playbook 4, if the user answers "No" to the question whether to regenerate the IP score, the case associated with the playbook run is set to low priority and closed.
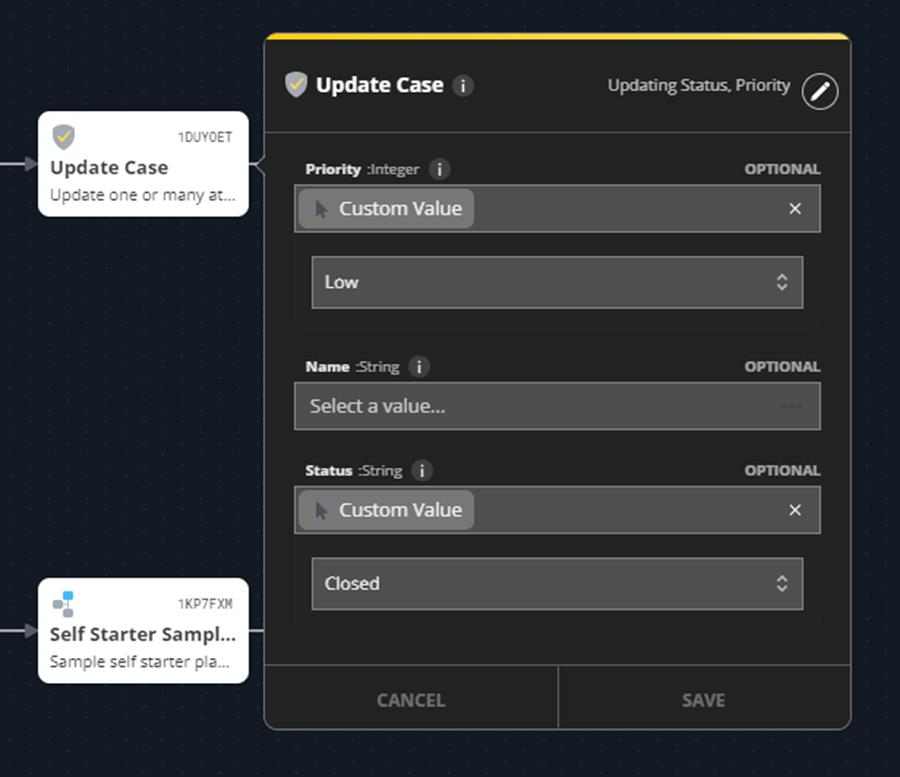
Putting It All Together
The following exercises combine all the building blocks to make a complex playbook.
Exercise 1
- Identify and install a plugin available in the FireEye Market for a third-party system available in your environment.
© 2021 FireEye
137
Security Orchestrator User Guide
CHAPTER 6: Sample Playbooks and Exercises
- Create and configure a device instance for the installed plugin.
- If an Adapter command is available as part of the plugin, create and configure an adapter with a time interval of 60 seconds.
- Create a new playbook that does the following:
- Runs a device command from the plugin that returns a long string.
- Runs a script to retrieve a section of the long string and include it as a task that takes the long string as an input.
- Includes a gateway task based on the retrieved value to check for a specific condition that has two outcomes (1 and 2).
- Create a table with the columns Input String and Processing.
- As part of outcome 1, create an entry in the table that includes the retrieved string from b in the Input String column and "Started" in the Processing column.
- As part of outcome 1, after the table is updated, get confirmation from the user whether the processing has to be continued.
- If yes, update the table entry to Done and end the workflow. If no, display "Not processing" on a user form and end the workflow.
- As part of outcome 2, update the case to Closed.
138
© 2021 FireEye
Technical Support
For technical support, contact FireEye through the Support portal:
Documentation
Documentation for all FireEye products is available on the FireEye Documentation Portal (login required):
| © 2021 FireEye | 139 |
FireEye, Inc. | 601 McCarthy Blvd. | Milpitas, CA | 1.408.321.6300 | 1.877.FIREEYE | www.fireeye.com
© 2021 FireEye, Inc. All rights reserved. FireEye is a registered trademark of FireEye, Inc. All other brands, products, or service names are or may be trademarks or service marks of their respective owners.