All users can log in to the Trellix IAM Web UI to manage their own account preferences. The User Information view of the Manage Passwords and Security page enables you to configure the following information for your account:
User information―An avatar, nickname, job title, and time zone.
Contact information―Email address and phone number.
Account preferences―Language and security message notification method.
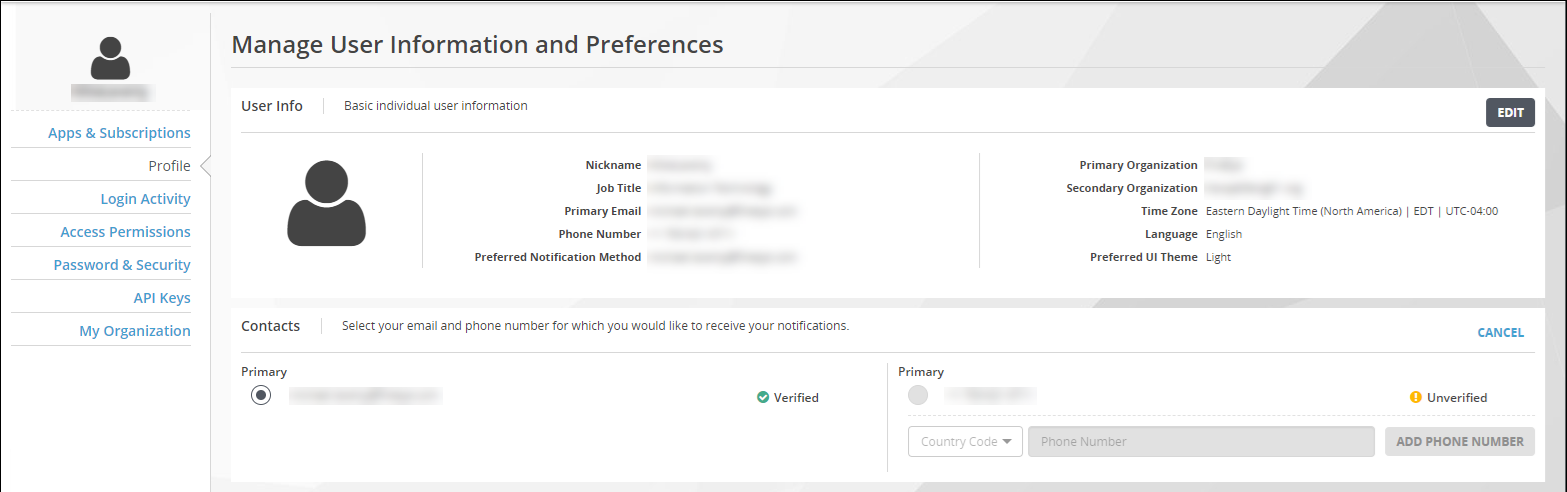
The following table describes the panels and fields in the User Information view:
Panel and fields | Description |
|---|---|
User Information | |
 | (Optional) Click the upload icon and select a local avatar file (up to 5 MB) to upload. |
Nickname | (Optional) |
Job Title | (Optional) |
Primary Email | The email address that is the primary user of this account. Initially this is the email address that was used to enroll your account. You can use the Email Addresses panel below to add another email address and designate that address as the primary. |
Phone Number | The phone number to which Trellix IAM sends your security messages (if SMS is your preferred notification method) and one-time passwords (if you use Google 2-Step Verification). Initially this is the phone number specified when you enrolled your account. You can use the Phone Numbers panel below to add another phone number and designate that number as the primary. |
Preferred Notification Method | The notification method you prefer for receiving security messages (such as notices of changes made to your account) from Trellix IAM:
|
Primary Organization | (Read‑only) The name of the local IAM organization with which you initially registered your account. |
Secondary Organization | (Read‑only) More organization information you provided when you initially registered your account. |
Time Zone | (Optional) Select the time zone used to display and report Trellix IAM events. |
Language | The default setting is English. |
Preferred UI Theme | The type of UI background you want, Light or Dark. |
Contacts | |
Contacts | The list of email addresses and phone numbers associated with this user account. Contacts that are enrolled in the IAM organization are indicated with a check mark: |
 | (Optional) Add another contact to this account. |
Email Address |
|
 | Designate the primary contact if more than one is listed. |
 | (Optional) Click the settings icon to remove a contact from the list. |
Country Code Phone Number |
|

Select My Settings > Profile to go to the Manage User Information and Preferences page.
Click Edit to change from view to edit mode.
To upload or update your avatar, click the upload icon and select the avatar file from your local drive.
To change your nickname, click the Enter Nickname field and enter a new nickname.
To change your job title, click Enter Job Title field and enter or select a new job title.
To change your time zone, select a new time zone from the Select Time Zone field.
To change your Preferred Notification Method, select a method from the list.
To change your Preferred Language, select English or Japanese from the list.
Note
Selecting Japanese causes sections of the Helix Enterprise Web UI to be displayed in Japanese. To see the change take effect, log out of Helix Enterprise and then log in again.
To change your Preferred UI theme, select either Light or Dark.
To change the primary email address associated with your account, if multiple addresses are listed, select the Primary option for that address.
To delete an email address associated with your account, click the settings icon for that address and then click Remove.
To add an email address to your account:
Click Add New and select Email Address.
Enter the new email address and click Add Email.
Open your email message from fireeyeapps@fireeye.com.
Click Verify Email in the email message.
If you did not receive the email message, or if the link expired, click Re-send.
To change the primary phone number on your account, select the Primary option for that number.
To delete a phone number from your account, click the settings icon for that phone number, and then click Remove.
To add a new phone number to your account:
Click Add New and select Phone Number.
Enter the country code and phone number, and click Add Phone Number.
Check your phone a one-time-password in an SMS text message.
Enter the password in the SMS Text Authentication dialog box, and then click Verify.
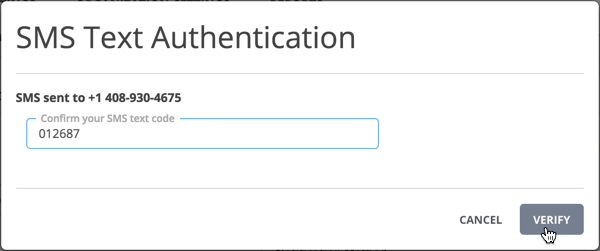
If you did not receive the SMS text message, or if the code expired, click Resend Verification.