The SAML IdP and Trellix appliance (SP) must be registered with each other's metadata for SAML authentication requests and authorization responses to occur.
To register the IdP for SAML authentication, you must upload the SAML IdP metadata that contains the endpoint on the IdP where SAML requests are posted. The metadata is also referred to as the IdP login URL.
You can upload the IdP metadata directly on to a standalone or from the Central Management System appliance for a managed appliance using the Web UI or CLI.
Admin access to the Trellix appliance operating as SAML SP.
Admin access to the SAML IdP server.
SAML Web policy setting is enabled by using the CLI.
SAML IdP metadata file.
To upload the IdP metadata using the Web UI:
Log in to the appliance Web UI as an admin user.
Go to the Settings > Authentication > SAML IdP Configuration tab.
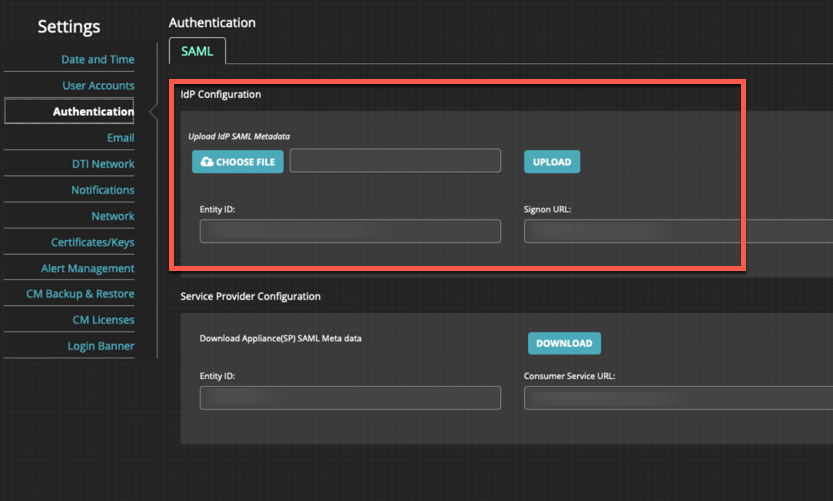
Click Choose File. This is the metadata file obtained from your SAML IdP server.
Click Upload to import the file onto the appliance.
To upload the IdP metadata using the CLI:
Log in to the appliance CLI as an admin user.
Go to CLI configuration mode:
hostname # enable hostname # configure terminal
Specify the IdP metadata file to upload to the appliance.
If the IdP uses a a self-signed certificate, turn off the verification of SSL server certificates.
hostname # no aaa authentication saml ssl cert-verifyUpload the IdP metadata file.
hostname # aaa authentication saml idp fetch meta-data-url <meta-data-pathname>Examples:
aaa authentication saml idp fetch meta-data-url https://172.16.142.99/IDPMetadata.xmlTo use SCP to copy the IdP metadata file:
aaa authentication saml idp fetch meta-data-url scp://username[:password]@hostname/path/filename