Associating a policy to the domain
To manage which connect or custom rule policies are associated with a domain:
On the Domains page, click the name of a domain.
The Policies section shows the number of policies directly associated with a domain and inherited from the parent domain group. The policies associated at the domain level will have higher priority than policies inherited from the parent domain group.
In the Policies section, click the Manage link.
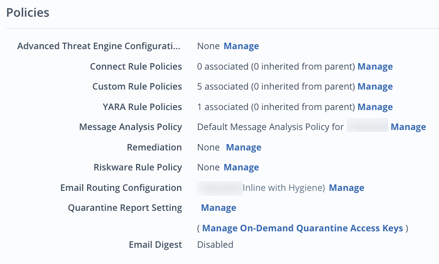
The screen displays the existing rule policies associated with this domain or inherited from the domain group in priority order.
Click Manage.
Select the policies to be associated with the domain.
Click OK to view the new assignment of policies.
Administrators can change the priority of custom rule policies by clicking the
 (up) or
  (down) arrows in the Priority column.
Click Save.
Note
Inherited policies can only be associated or disassociated at the domain group level.
To remove a policy from a domain's connect rules or custom rules:
Select the policy to be deleted by clicking its checkbox.
Click the Remove (
 ) icon. Inherited policies can only be associated or removed at the domain group level.
Click Save.
About connect rule policies
From a policy's details page, you can perform the following functions:
Add entries
Delete entries
Upload CSV (you can append or replace the existing entries)
Note
The connect rule policy functionality is only available to Email Security — Cloud Hygiene users.
Connect rule policy functionality is not available in Outbound view.
Connect rule policy functionality is not available for Native domains.
A connect rule policy can have multiple rules and each rule has five possible actions: Accept, Deny, Throttle, TLS, and Trusted Sender.
For Accept, Deny, and Throttle, each action has six possible attributes: Connect reverse domains, countries, recipients, sender IPs, senders, and sender domains.
TLS rules only have one attribute: Sender domains. Trusted sender rules have two attributes: Sender domains and senders.
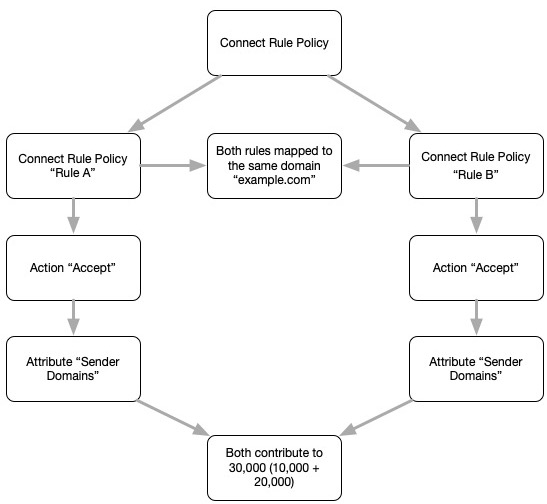
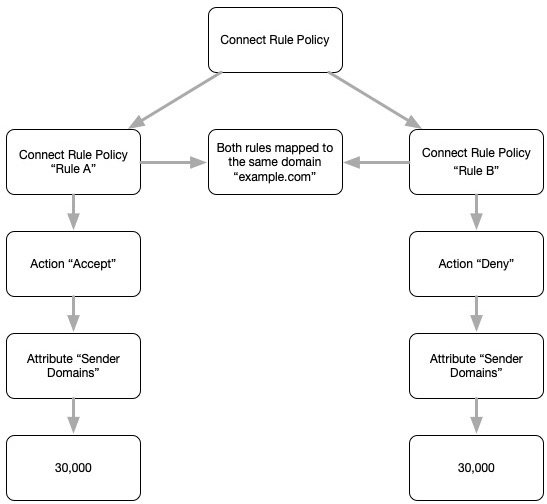
Each attribute for an action associated with a single domain or parent group domain has a limit of 30,000 entries. For example, the total number of "Accept" rules with the attribute "Sender Domains" in all Connect Rules associated with a domain or domain group is limited to 30,000.
rThe trusted sender list is evaluated prior to the accept list. When a message is identified as originating from a trusted sender, Email Security — Cloud performs the following actions:
Standard anti-spam, anti-virus, and anti-threat (AS/AV/AT) scanning is bypassed.
To maintain security and prevent sender impersonation, emails from trusted senders must pass Sender Policy Framework (SPF) validation. If an SPF check fails, the sender is not treated as trusted, regardless of established rules.
If a rate limit condition is already active for a sender, that period must roll over before the trusted sender status takes effect.
The maximum volume for trusted sender email delivery is governed by your organization's license count.
In the figure below, "Rule A" and "Rule B" have both been mapped to "example.com." Since the action and attribute are the same for both rules and they have been mapped to the same domain, the number of combined entries cannot exceed 30,000.
In the figure below, "Rule A" and "Rule B" have both been mapped to "example.com." Since the actions are different for each rule, each attribute can have up to 30,000 entries.
Accept, Deny, and Throttle Policy Descriptions
Category | Description |
|---|---|
Accept rules | Any email meeting the criteria will bypass antispam filtering as well as DMARC/DKIM/SPF |
Deny rules | Any email meeting the criteria will be rejected |
Throttle rules | Any email meeting the criteria will be delayed 15 seconds |
TLS rules | Domains that will require a TLS connection |
Trusted sender | Any email meeting the criteria will bypass inbound sender address/domain rate-limiting configuration settings |
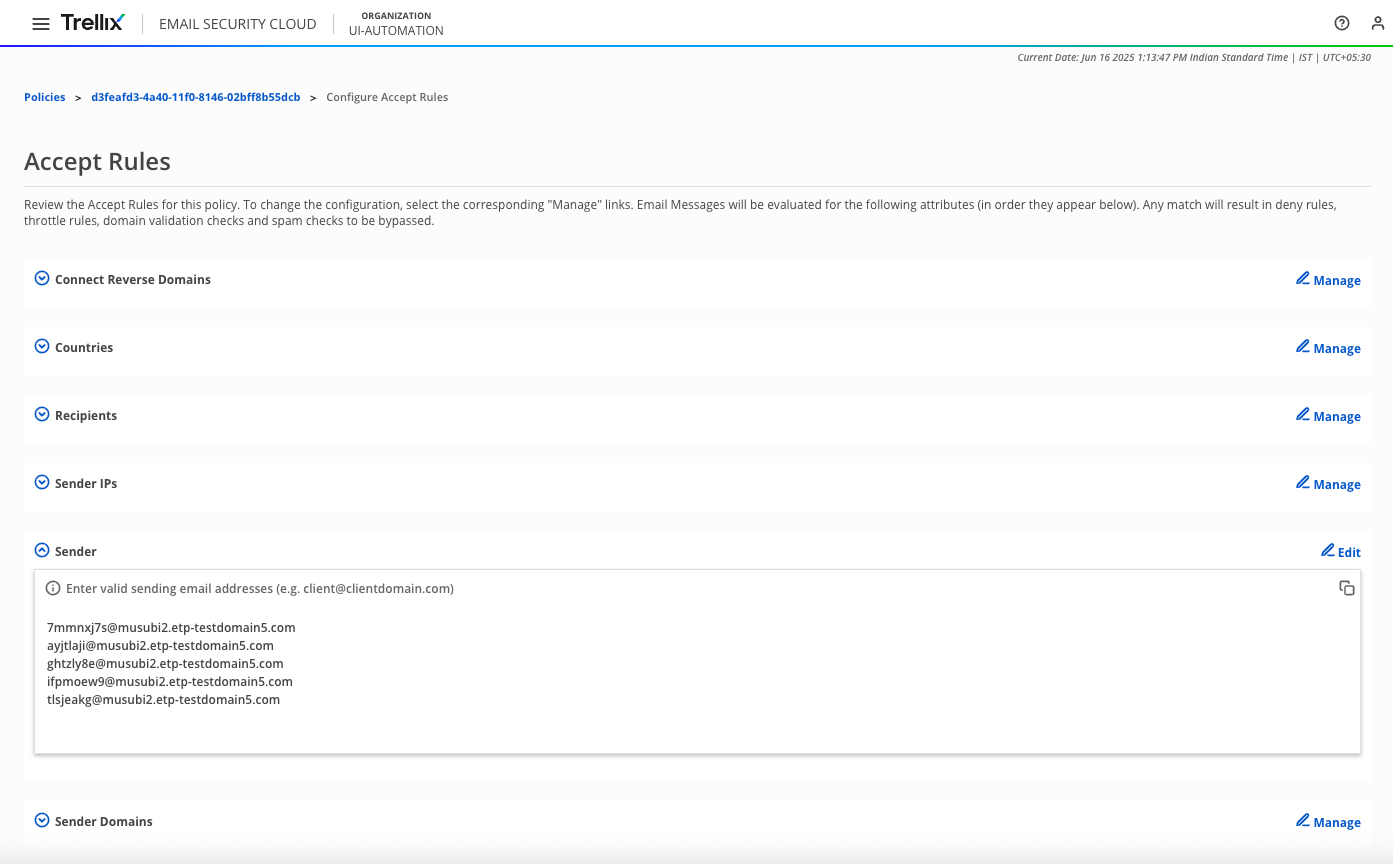
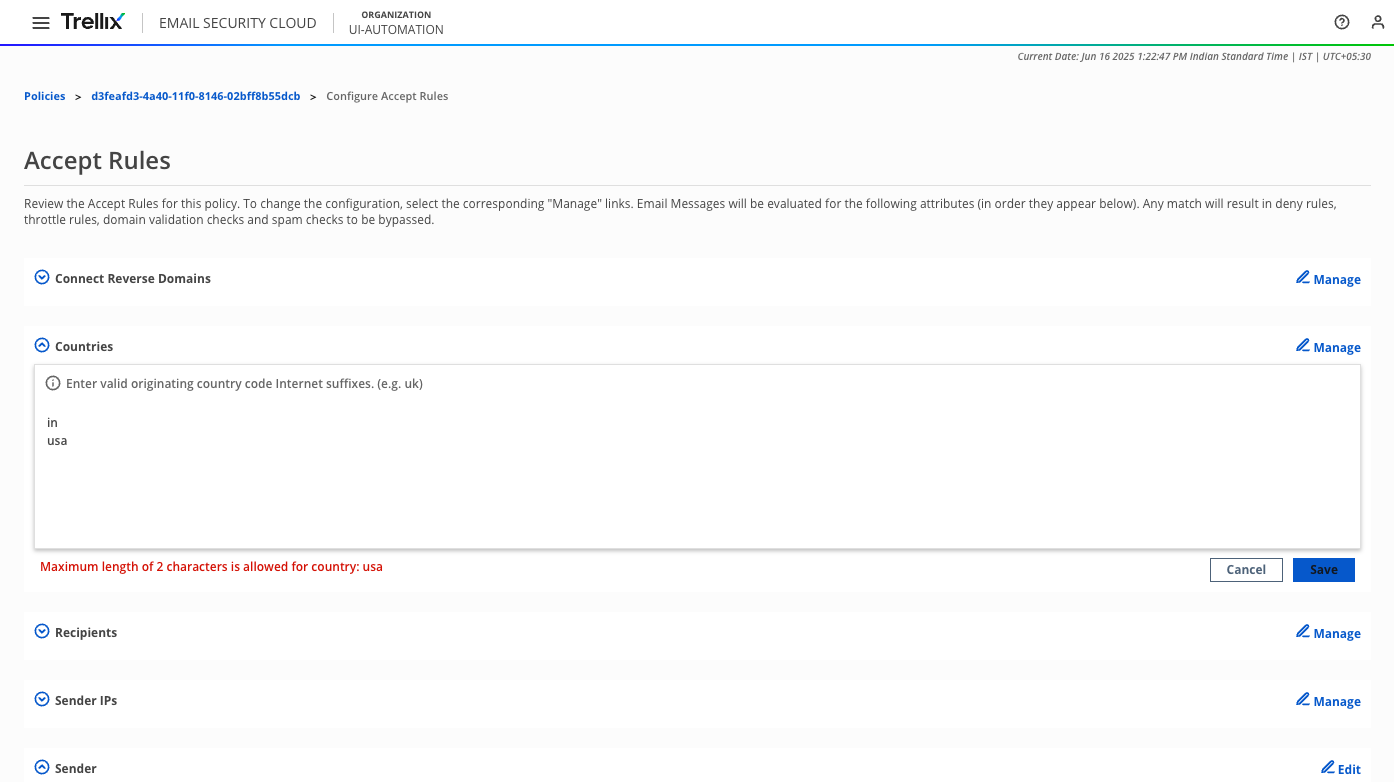
Click the Manage link for any of the above rules to manage the following attributes:
Category | Description |
|---|---|
Connect Reverse Domains | The rule will be triggered when the system does a reverse domain name system (DNS) lookup on the sending email domain and determines that it matches the sending message transfer agent (MTA) Internet Protocol (IP) address. The value should be entered in the format of an Internet domain suffix (for example, |
Countries | The rule will be triggered when an email is received from a specific country. The value should be entered in the format of a country Internet domain suffix comprising of two characters (for example, |
Recipients | The rule will be triggered when an email to a specific recipient is detected. The value should be entered in the format of an email address (for example, |
Sender IPs | The rule will be triggered when an email is received from a specific IP address. The value should be entered in classless inter-domain routing (CIDR) format (for example, |
Senders | The rule will be triggered when an email from a specific email address is detected. The value should be entered in the format of an email address (for example, |
Sender Domains | The rule will be triggered when an email from a specific Internet domain is detected. The value should be entered in the format of an Internet domain (for example, |
Adding and deleting values
On the policy configuration screens, values for the attributes listed in the table above can be entered in bulk as line-separated entries. The values can be added manually or can be copied from a CSV file and pasted in the field provided.
To add or delete values:
On the Policies page, click the name of a connect rules policy.
On the policy's details page, click Manage next to either Accept Rules, Deny Rules, Throttle Rules, Trusted Sender, or TLS Rules.
On the Rules Configuration page, click Manage next to the attribute you want to match emails against, for example, Sender. Add each value in separate lines. You need not add any punctuation (comma or hyphen) to separate the values.
If your values are in a CSV file, copy the column of required values and paste in the field.
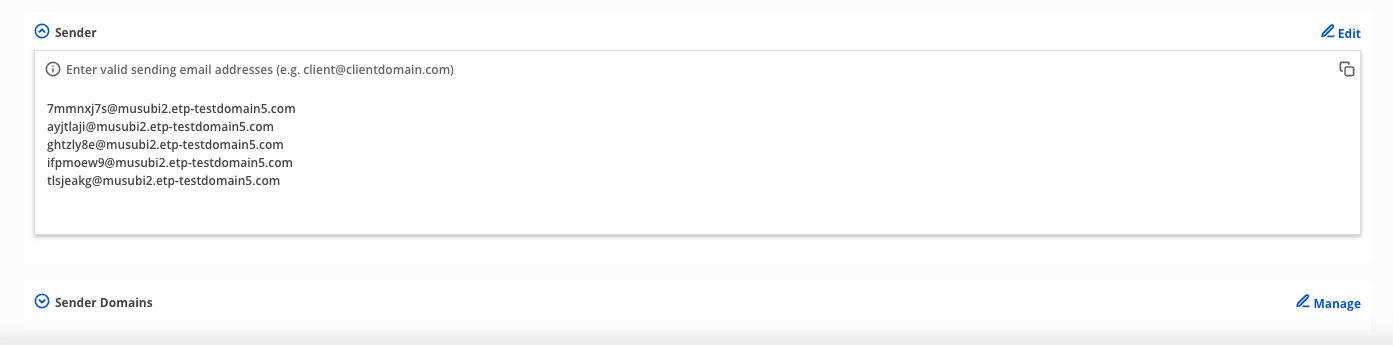
Note
The Edit button will appear when an attribute has a list of values.
You can use the Copy button on the top-left of the field to copy the list of entries.
Click Save.