VirusTotal and URLScan.IO integration
You can query URLScan.IO and VirusTotal and analyze the results within Email Security - Cloud for URLs. You can also query VirusTotal and analyze the results for attachments.
For more information on VirusTotal, see the VirusTotal documentation. For more information on URLScan.IO, see the URLScanIO documentation.
To enable VirusTotal or URLScan.IO integration:
Click Configuration > More... > Third party integrations.
Select Virus total or URLScan.IO.
Enter the API key provided by VirusTotal or URLScan.IO.
Click Submit.
The API key is stored in Email Security - Cloud. Click the eye icon to toggle between displaying the API key and hiding it.
Click Validate to validate the API key against VirusTotal or URLScan.IO. If the API key is valid a green check mark is displayed in the API key entry box. If it is invalid a red check mark is displayed.
To edit the API key, click the pencil icon. To copy the API key, click the clipboard icon to copy the key. To delete the API key, click the trashcan icon.
Using VirusTotal or URLScan.IO with Email Security - Cloud
To query VirusTotal or URLScan.IO and analyze the results for a URL:
Open the message details page of a message:
Click Quarantine in the top navigation bar, then select a message.
Click Investigate > Alerts, then select a message.
At the bottom of the Message Details page, click the URLs tab.
Click Query in the row of the URL you'd like analyzed.
Click VirusTotal or URLScan.IO.
For VirusTotal the threat severity level and score are displayed in the Web UI. Select Query VirusTotal to open the results in VirusTotal.
For URLScanIO the category, verdict, and score are displayed in the Web UI. Select Query URLScan.IO to open the results in URLScan.IO.
To query VirusTotal and analyze the results for an attachment:
Open the message details page of a message:
Click Quarantine in the top navigation bar, then select a message.
Click Investigate > Alerts, then select a message.
At the bottom of the Message Details page, click the Attachments tab.
In the VirusTotal column, click Query in the row of the attachment you'd like analyzed.
The threat severity level and score are displayed in the Web UI. Select Query VirusTotal to open the results in VirusTotal.
Google Security Operations integration
The Google Security Operations (Google SecOps) platform (formerly known as Chronicle) enables you to compile security events, create reports and dashboards related to security incidents.
You can create a Google SIEM account and integrate it with the Email Security - Cloud appliance to transfer events to the SecOps instance and analyse them using the Google Ingestion APIs.
Note
To use Google SIEM, you need to have a Google Cloud project and enable the Chronicle API. Also, you need to create the Google SecOps instance through Google support.
Understanding SIEM log fields The act or deviceaction fields in the SIEM log output reflect the action specified by the policy rule that triggered the alert. Please note that these fields do not represent an actual enforcement action (such as blocking or quarantining) taken by Email Security - Cloud on the message.
Manage your Google SecOps instances using the Email Security - Cloud appliance:
Click Menu > Third-party integrations > Google SecOps. You will be redirected to a list of existing Google SecOps instances.
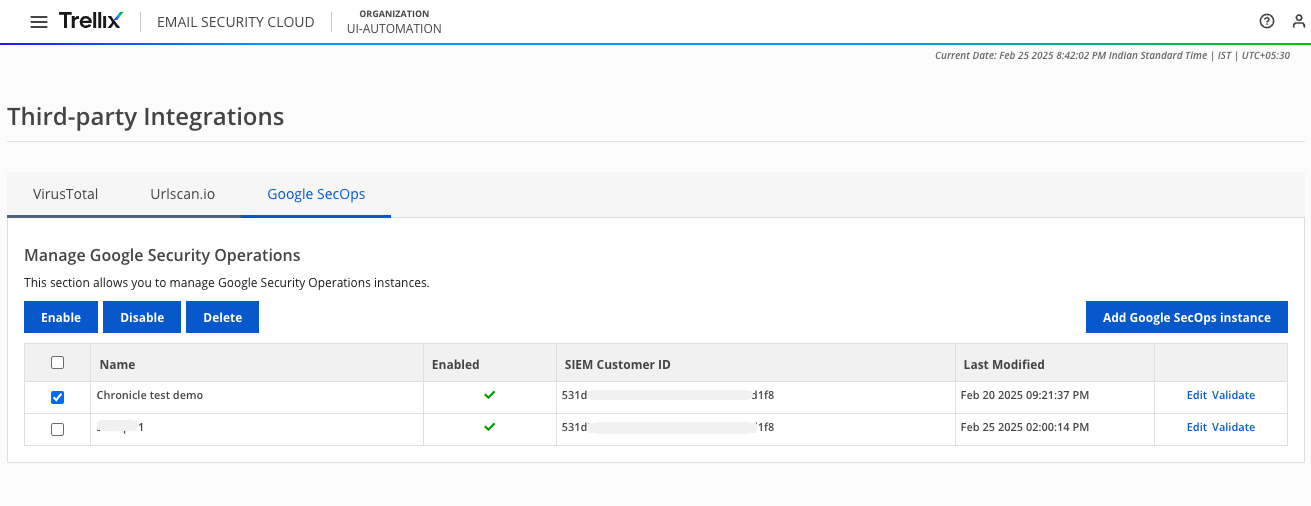
You can use the checkboxes in the first column to select one or more Google SecOps instances to Enable, Disable or Delete them.
By Default, the checkboxes in the Enabled column will be already selected and greyed out when you add a new instance. You can update the checkbox in edit mode.
You can use the Edit buttons in the last column to edit general settings and SIEM account credentials for the respective Google SecOps instance.
Use the Validate button to validate the SIEM account details and uploaded credentials.
To create a new Google SecOps instance:
Click Add Google SecOps instance on the top-right of the table. The form will appear.
Note
You can add upto a maximum of 3 SecOps instances. Post that, the Add button will be disabled.
The form has two sections, General Settings and Google Security Operations Configurations.
Under General Settings, the Enable checkbox will be enabled by default. You can edit this option after the instance is created.
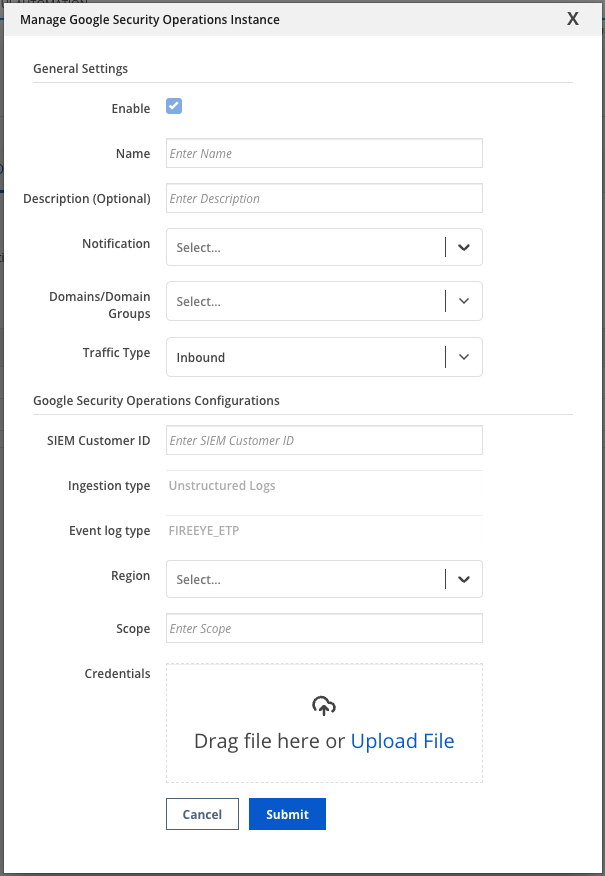
Enter a Name and Description for the Google SecOps Instance.
In the Notification field, select the event type to which the notification will be sent.
Select the Domains and Domain Groups to be associated with the events selected above.
Select the Traffic Type as inbound, outbound or both.
Under Google Security Operations Configurations, enter the SIEM Customer ID of the SIEM account that you created.
The Event Log Type and the Ingestion Type will have default values already added.
Select the Region where your SIEM account is created and stored.
Add the Scope required for ingestion of unstructured logs:
https://www.googleapis.com/auth/malachite-ingestion
Upload a .json file containing your SIEM account credentials in the Credentials field.
You can download the credentials file from your Google SIEM account from Settings > SIEM Settings > Collection Agents > Ingestion Authentication File.
Select Submit to save your changes. Your SIEM account details and uploaded credentials will be validated and saved.
Webhooks
Manage all your webhooks integrations for queue threshold notifications at one place. Webhooks prevents delivery delays caused by Mail Transfer Agent (MTA) congestion.
Webhook notifications are sent only for the domains and domain groups associated with the webhook.
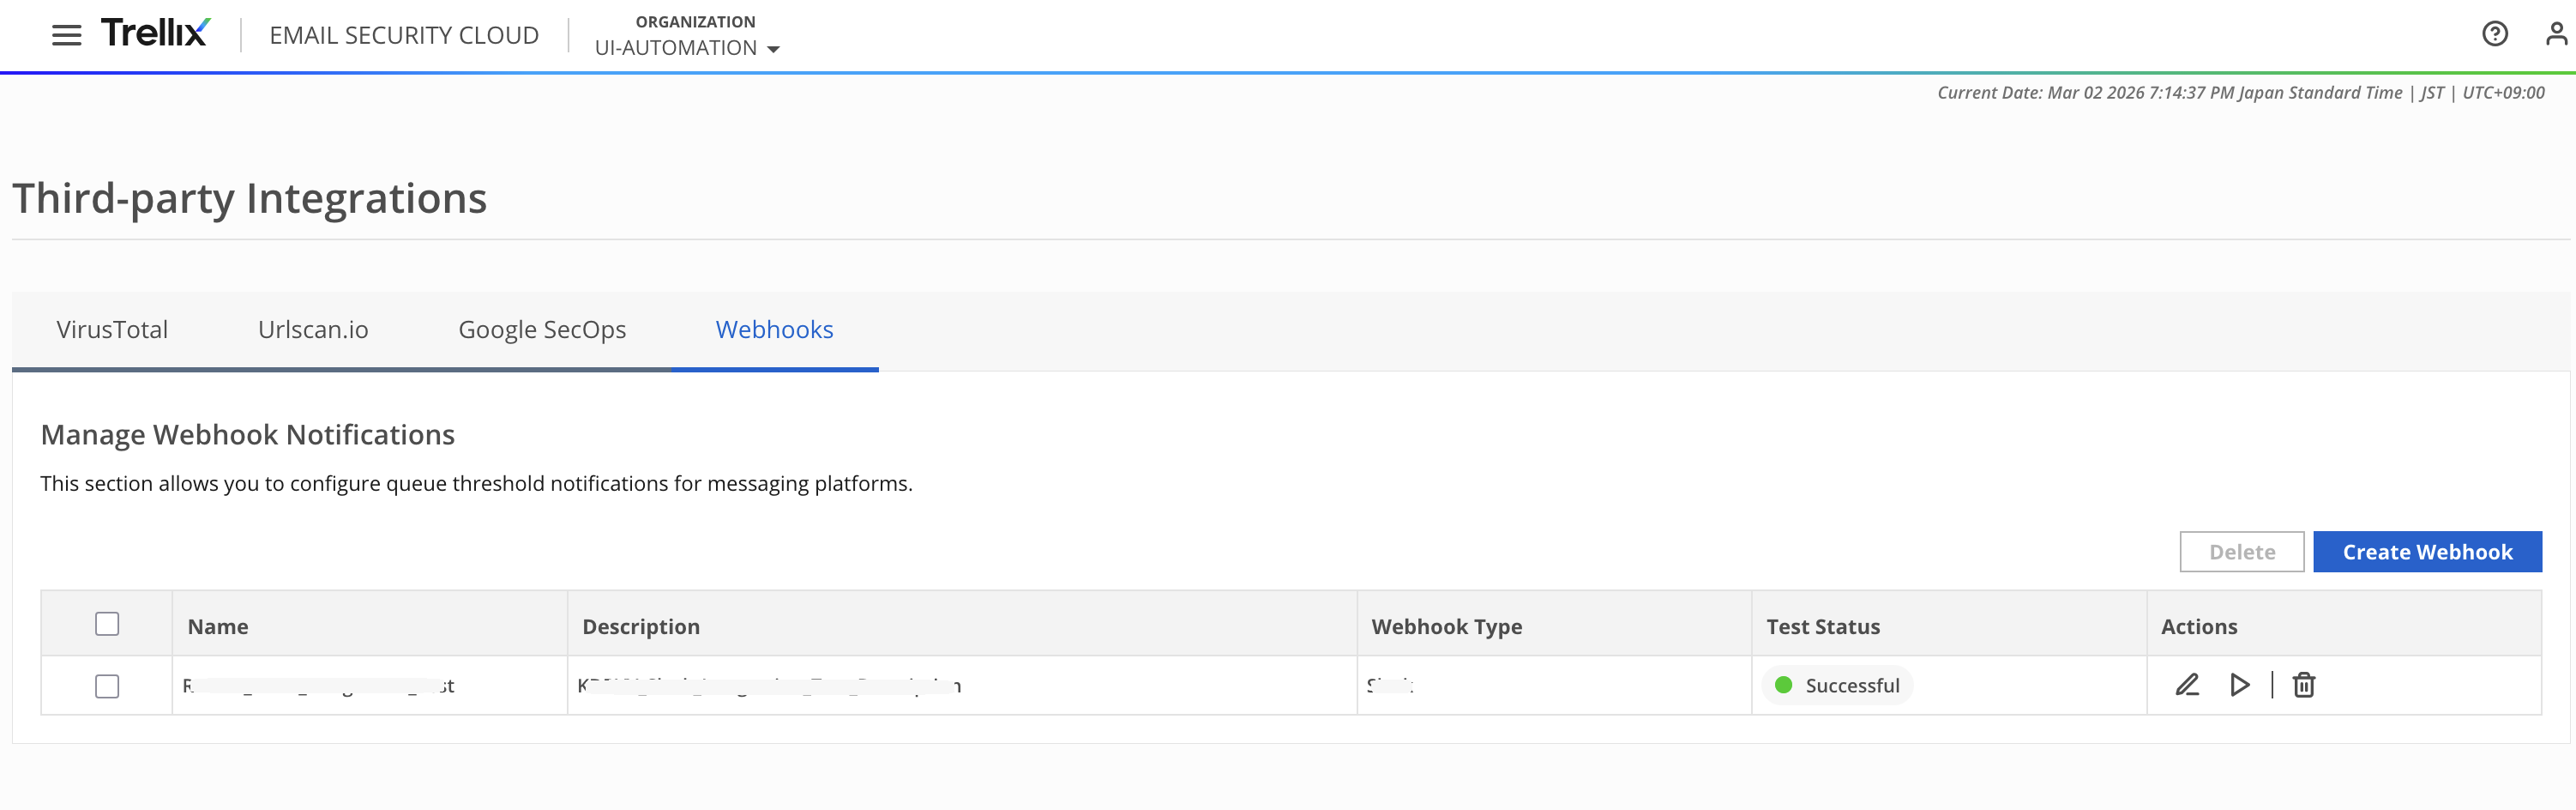
Create an incoming webhook URL to receive notifications in a dedicated channel.
Click Create Webhook and enter a name and description. You can create a maximum of 15 webhooks.
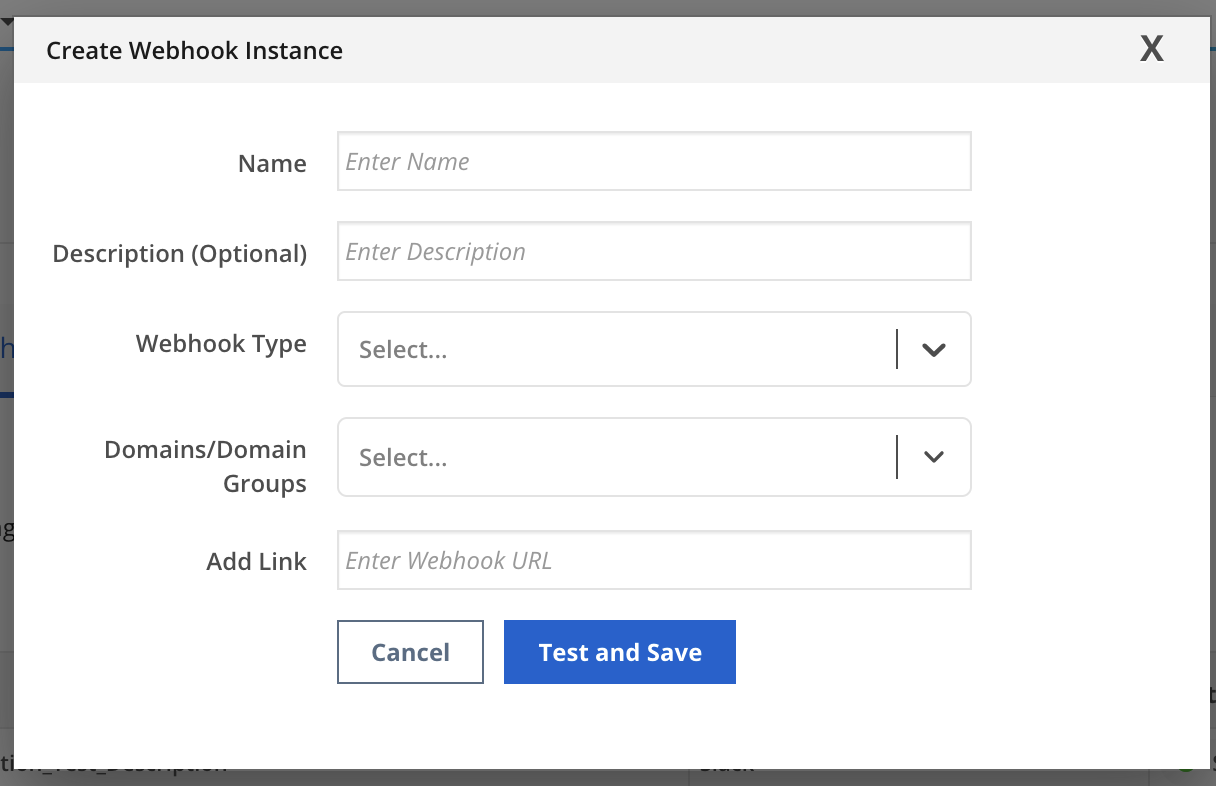
Select the type of webhook.
Select the domains and domain groups to send the notification.
Add the webhook URL in the Add Link field and select Test and Save.
A test message will be sent to the webhook. Verify on your chat application that the message is received correctly.
You can view all the webhooks in the table below. Use the respective buttons in the Action column to edit, test or delete a webhook. On using the Test button, a test message will be sent to the webhook. Verify on your chat application that the message is received correctly.