A newly created authorization is not able to take action on your behalf until it is verified and assigned to a remediation policy in the Email Security — Cloud Web UI. An authorization has the status "Pending" when it is created. After you verify the authorization, the status changes to "Authorized".
To verify an authorization:
Go to the Authorization Configuration page of your authorization.
Under Status, select Manage.
For MS365 authorizations, enter the app ID, app password, and Tenant ID. For more information, see Creating and registering an app.
For Google Workspace authorizations, enter the admin email and upload the credentials file. For more information, see Configuring Google Workspace authorizations.
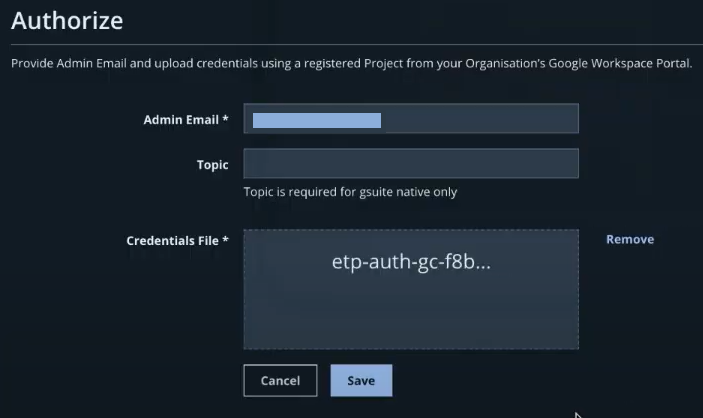
Click Save. If the information provided is invalid or missing, the details will appear in the page.
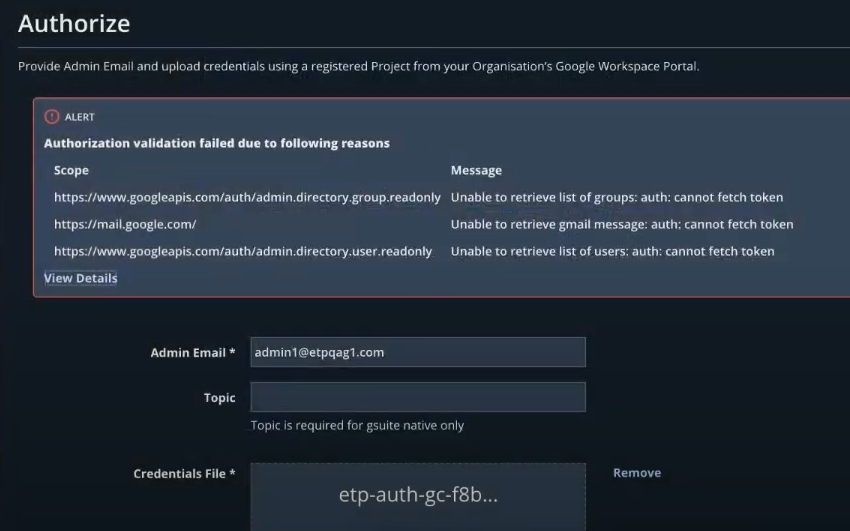
Click View Details to view more details. The following pop-up will show the reasons for failed validation.
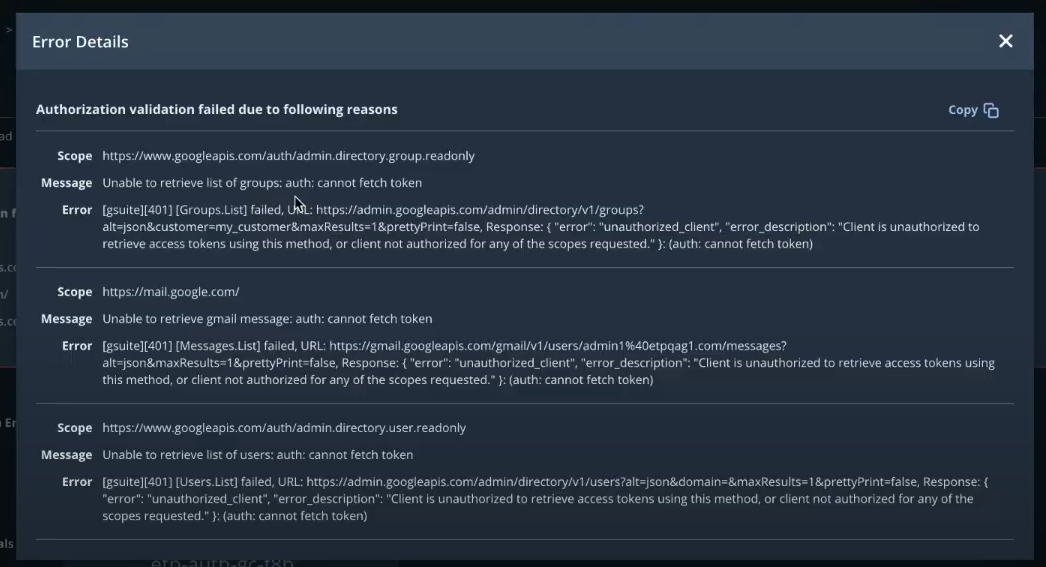
You can correct the details and save again.