Last Updated: October 17, 2025
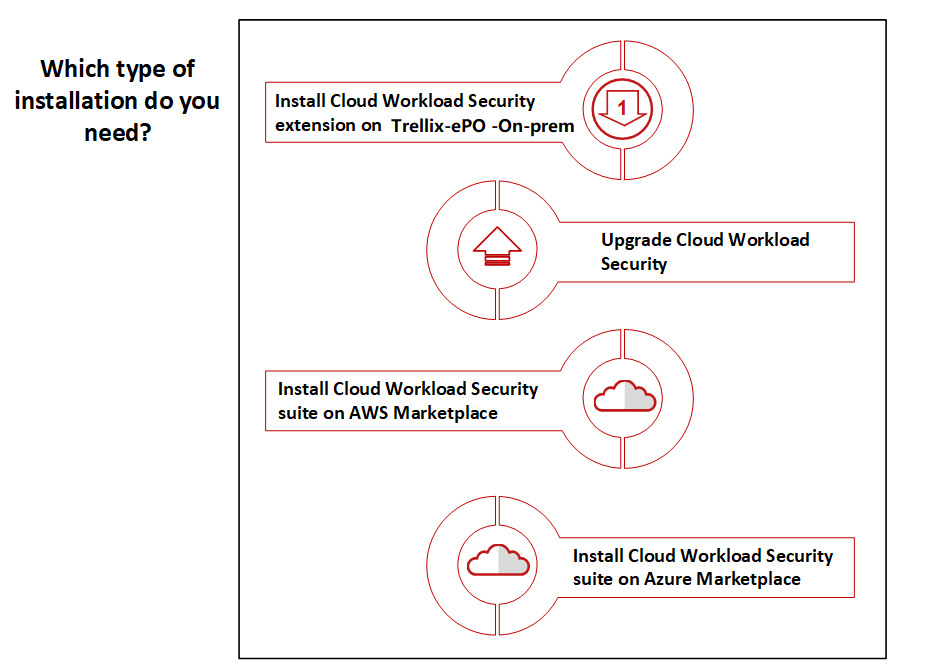
Which type of installation do you need?
Install Trellix Cloud Workload Security (Trellix CWS) on ePolicy OrchestratorTM - On-prem by installing a suitable Trellix CWS extension or using cloud services such as Amazon Web Services (AWS) and Microsoft Azure.
Trellix CWS extension installation workflow
Trellix CWS is packaged in public, hybrid, and private variants to support different cloud vendor accounts. Install any of these packages on server to deploy and configure your products based on your requirements.
Ensure that you have installed on your system.
Download the appropriate Trellix CWS suite from the download site using your grant number.
Log on to the server as an administrator.
Install the appropriate Trellix CWS extension bundle.
Deploy Trellix® Agent to manage your systems.
AWS AMI deployment workflow
You can use Trellix Cloud Workload Security suite Amazon Machine Image (AMI) from the AWS Marketplace to launch with all Trellix CWS products to secure your cloud instances.
You can launch Trellix CWS Paid AMI and Bring Your Own License (BYOL) AMI from the AWS Marketplace.
Create a user permission policy and assign the policy to a user.
Configure AWS Identity and Access Management (IAM) permissions to the user.
Launch Trellix Cloud Workload Security suite AMI from the AWS Marketplace.
Log on to server as an administrator.
Deploy Trellix Agent to manage your systems.
Azure virtual machine deployment workflow
You can use Trellix Cloud Workload Security from the Azure Marketplace to install with all Trellix CWS products to secure your cloud instances.
You can create a Virtual Machine (VM) for Trellix CWS from the Azure Marketplace.
Create a VM from the Trellix Cloud Workload Security offering page.
Provide the user credentials and resource group details for the VM.
Select the virtual network and subnet details.
Start the Trellix Cloud Workload Security VM.
Note: The Trellix CWS installation process takes about 60 minutes.
Log on to server as an administrator.
Deploy Trellix Agent to manage your systems.
Upgrade Trellix CWS
Upgrade your existing Trellix CWS software to a newer version.
Upgrade the extension manually
Download and install the Trellix CWS extension on server.
Download the appropriate Trellix CWS suite from the download site using your grant number
Install the Trellix CWS extension on the server.
Upgrade the extension through Software Catalog
For ePO 5.10.x and later, use On-prem Software Catalog. For 5.9.x and below, use On-prem Software Manager(the previous name for the Software Catalog) to upgrade Trellix CWS extension.
Log on to the server as an administrator.
From the Software Catalog, select your Trellix CWS 5.3 variant and click Check In All.
Scaling installed on AWS
Trellix Cloud Workload Security for AWS discovers and imports the inventory details of your Amazon EC2 instances from AWS in to . With this feature, recognizes elastic scaling of EC2 instances.
As your managed network grows, distributed repositories and Agent Handlers can help improve performance and network protection.
Distributed repositories work as file shares that store and distribute security content for your managed client systems. Agent Handlers allow you to move Trellix Agent requests and added management logic closer to the systems making these requests.
Agent Handlers also allow you to scale your network infrastructure horizontally, reduce the load on your server, and save bandwidth.
If is installed on an AWS server:
Enable termination protection for server to avoid accidental termination.
Use elastic IP on server for public IP.
supports SSD only. Magnetic disks are not supported.
Configure ports and security group rules for server appropriately. For more information, see KB66797.
System requirements
To install the Trellix CWS extension, make sure that your system is running a supported version of the management platform and software.
Component | Version |
|---|---|
5.3.3, 5.9 (EPO590HF1208662), 5.9.1, 5.10.0 | |
Common UI core | 1.3 or later |
Trellix Agent | 5.5.1.362 and later. |
Browsers |
|
Configuring AWS cloud accounts
You must register your AWS cloud account on . Trellix CWS offers various privileges to discover workloads, discover traffic, and remediate security groups based on the policies assigned to your instance. You can configure your AWS account according to your requirements.
Create an AWS user
You can create a user with Access Key ID and Secret Access Key on the AWS management console.
Log on to AWS management console.
Click All services → Security, Identity & Compliance → IAM to load the Identity and Access Management (IAM) dashboard.
From the Users section, click Add user.
Type a valid name in the User name field under the Set user details section.
Select an access type under the Select AWS access type section.
Programmatic access — To create an access key and secret access key.
AWS Management Console access — To create a password to log on to AWS Management Console.
You can add the created user to a group, set permissions, and attach or add policies.
Click Create user.
Click Download .csv and save the CSV file.
You can view Access Key ID and Secret Access Key for the created user in the same page.
Create a user permission policy
You can create a policy to use Trellix CWS with minimum required permissions.
Log on to AWS management console.
Click All services → Security, Identity & Compliance to load IAM dashboard.
Set policies based on the required privilege.
Click Review policy.
Type a valid name and description.
Policy for EC2 discovery/visibility
This policy allows you to create an AWS user with limited privilege user permission policy to discover EC2 assets and read firewall rules. This is a mandatory policy for using Trellix CWS.
{
"Version": "2012-10-17",
"Statement": [
{
"Effect": "Allow",
"Action": "ec2:Describe*",
"Resource": "*"
}
]
}Policy for Security Groups remediation
This policy allows you to remediate Security Groups.
{
"Version": "2012-10-17",
"Statement": [
{
"Sid": "",
"Effect": "Allow",
"Action": [
"ec2:AuthorizeSecurityGroupEgress",
"ec2:AuthorizeSecurityGroupIngress",
"ec2:CreateSecurityGroup",
"ec2:DeleteSecurityGroup",
"ec2:ModifyInstanceAttribute",
"ec2:ModifyNetworkInterfaceAttribute",
"ec2:RevokeSecurityGroupEgress",
"ec2:RevokeSecurityGroupIngress",
"ec2:CreateTags"
],
"Resource": [
"*"
]
}
]
}Policy for Amazon GuardDuty
This policy allows Trellix CWS to discover Amazon GuardDuty events.
{
"Version": "2012-10-17",
"Statement": [
{
"Sid": "DiscoverGuardDuty",
"Effect": "Allow",
"Action": [
"guardduty:GetThreatIntelSet",
"guardduty:GetIPSet",
"guardduty:ListIPSets",
"guardduty:GetFindings",
"guardduty:ListThreatIntelSets",
"guardduty:GetThreatIntelSet",
"guardduty:GetMasterAccount",
"guardduty:GetIPSet",
"guardduty:ListFindings",
"guardduty:GetMembers",
"guardduty:GetFindingsStatistics",
"guardduty:GetDetector",
"guardduty:ListMembers",
"guardduty:ListDetectors",
"guardduty:GetInvitationsCount",
"guardduty:ListInvitations"
],
"Resource": "*"
}
]
}Policy for workload shut down
This policy allows you to shut down the selected workload as a remediation measure.
{
"Version": "2012-10-17",
"Statement": [
{
"Sid": "VisualEditor0",
"Effect": "Allow",
"Action": "ec2:StopInstances",
"Resource": "*"
}
]
}Policy to enable Network Traffic Discovery
This policy allows you to enable network traffic flow logs at VPC levels. Trellix CWS discovers network traffic logs using this policy.
{
"Version": "2012-10-17",
"Statement": [
{
"Sid": "",
"Effect": "Allow",
"Action": [
"logs:CreateLogGroup",
"logs:DeleteLogGroup",
"logs:DescribeLogGroups",
"logs:DescribeLogStreams",
"logs:FilterLogEvents",
"logs:GetLogEvents",
"logs:CreateLogStream",
"logs:PutLogEvents",
"iam:PassRole",
"ec2:CreateFlowLogs",
"ec2:DeleteFlowLogs"
],
"Resource": [
"*"
]
}
]Policy for Amazon Auto Scaling Group and CloudWatch
This policy allows you to create an AWS user with the privileges to read CloudWatch events and access Auto Scaling Group.
{
"Version": "2012-10-17",
"Statement": [
{
"Effect": "Allow",
"Action": "ec2:GetLaunchTemplateData",
"Resource": "*"
},
{
"Effect": "Allow",
"Action": [
"cloudwatch:ListMetrics",
"cloudwatch:GetMetricStatistics",
"cloudwatch:Describe*"
],
"Resource": "*"
},
{
"Effect": "Allow",
"Action": "autoscaling:Describe*",
"Resource": "*"
}
]
}Create an IAM role with flow logs for your AWS account
An IAM role with flow log policies enables you to access the IP traffic flow in your virtual networks. You can view the IP traffic flows of your Virtual networks in the Trellix CWS console.
Log on to AWS management console.
Click All services → Security, Identity & Compliance → IAM to load the IAM dashboard.
Select Roles → Create role.
Select EC2 for EC2 instances.
Click Next: Permissions.
Click Next: Review.
In the Role name field, enter McafeeFlowLogger, and type a meaningful description.
Select Create role.
Type a name for your role.
Under Permissions, choose Add inline policy.
Select the JSON tab and copy this policy and paste it.
{
"Version": "2012-10-17",
"Statement": [
{
"Action": [
"logs:CreateLogGroup",
"logs:CreateLogStream",
"logs:PutLogEvents",
"logs:DescribeLogGroups",
"logs:DescribeLogStreams"
],
"Effect": "Allow",
"Resource": "*"
}
]
}
Select Review policy. Type a name for your policy and select Create policy.
Select Edit trust relationship. Delete any existing policy document.
Copy and paste this policy, and click Update trust policy.
{
"Version": "2012-10-17",
"Statement": [
{
"Sid": "",
"Effect": "Allow",
"Principal": {
"Service": "vpc-flow-logs.amazonaws.com"
},
"Action": "sts:AssumeRole"
}
]
}
]
}15. From the Summary page, take note of the ARN for your role to create your flow log.
Assign the policy to a user
Assign the required policy to the user on the AWS management console to provide necessary permissions to the user.
Ensure that you have created a new user.
Ensure that you have created the required permissions policy.
Log on to AWS management console.
Click All services → Security, Identity & Compliance → IAM to load IAM dashboard.
Select the user from the Users section.
On the Summary page, select the policy that you created, then click Attach policy.
Go back to the Summary page, then click the Security Credentials tab.
Click Create access key.
Secret access key is generated when you create the access key. Use the access key and the secret access key when registering your cloud account using .
Create an IAM role to access other AWS accounts
IAM roles are a secure way to grant permissions to trusted entities. Creating an IAM role to access other accounts allows you to build trust relationships with third party AWS accounts.
Log on to AWS management console.
Click All services → Security, Identity & Compliance → IAM to load the IAM dashboard.
Select Roles → Create role.
Select Another AWS account under Select type of trusted entity in the Create role section.
In the Account ID field, type an existing AWS account ID from which you want to grant access to your account resources.
Click Next: Permissions and select a permission.
Click Next: Review.
Type a role name in the Role name field.
Click Create Role.
Configuring Kubernetes accounts
Register a Kubernetes cluster with so that can communicate with the Kubernetes account that manages container applications.
Deploy pod
You must deploy pod before registering a Kubernetes cluster account in .
Ensure that these conditions are met:
You have installed Kubernetes 1.9.0 or later hosted on any of these environments.
bare metal
Google Kubernetes Engine (GKE)
Google Compute Engine (GCE)
AWS (for unmanaged Kubernetes cluster)
Amazon Elastic Container Service for Kubernetes (Amazon EKS) (for managed Kubernetes cluster)
Microsoft Azure (for unmanaged Kubernetes cluster)
Azure Kubernetes Service (AKS) (for managed Kubernetes cluster)
On-premise VMware vSphere
You have CNI network plug-in that supports network policies
You have a container image registry to host Docker images
By default, the pod is deployed in the kube-system namespace
Note
Ensure that your AKS environment has network policy support. For more information, see AKS documentation.
The Docker images must be hosted on a Docker registry for the ease of deployment of pod on multiple clusters and nodes. For example, the Docker registry, registry.my-company.com is a container image registry.
For ePO 5.10.x and later, download the software from the On-prem Software Catalog. For 5.9.x and below, download the software from the On-prem Software Manager (the previous name for the Software Catalog).
3 | Installation overview
Best Practice: We recommend using a LoadBalancer to expose the service that controls, configures, and reports the security posture of the cluster.
Load the Docker images locally on a Linux system on which the Docker engine is running.
$ docker load -i mfe-apiserver:v5.1.0 $ docker load -i mfe-security:v5.1.0 $ docker load -i mfe-cert-issuer:v5.1.0Tag the images with a registry host name and push them into the registry.
$ docker tag mfe-apiserver:v5.1.0 registry.my-company.com/mfe-apiserver:v5.1.0 $ docker tag mfe-security:v5.1.0 registry.my-company.com/mfe-security:v5.1.0 $ docker tag mfe-cert-issuer:v5.1.0 registry.my-company.com/mfe-cert-issuer:v5.1.0 $ docker push registry.my-company.com/mfe-apiserver:v5.1.0 $ docker push registry.my-company.com/mfe-security:v5.1.0 $ docker push registry.my-company.com/mfe-cert-issuer:v5.1.0(Optional) Create a persistent volume for pod, then enter a new storageClassName.

Note
You need not perform this step if the vendor environment supports dynamic volume.
apiVersion: v1 kind: PersistentVolume metadata: name: mfe-persistent-volume namespace: kube-system spec: capacity: storage: 1Gi accessModes: - ReadWriteOnce persistentVolumeReclaimPolicy: Retain storageClassName: my-storage-class # Uncomment the relevant volume type # AWS example, EBS volume must already exist # awsElasticBlockStore: # volumeID: vol-312381473264 # fsType: ext4 # GCE example, PD must already exist # gcePersistentDisk: # pdName: my-data-disk # fsType: ext4 # vSphere example, VMDK volume must already exist # vsphereVolume: # volumePath: "[DatastoreName] volumes/myDisk" # fsType: ext4Customize
mfe-deployment-v5.1.0.yaml.
Change image tags. For example, registry.my-company.com/mfe-security:v5.1.0.
Change storageClassName. For example, my-storage-class.
Change default targetPort 8080 to a port which can expose services to perform security posture assessment.
Note: Make sure that you set the same port number in Network Policy ingress field.
5. Deploy pods.
kubectl create:
$ kubectl create -f mfe-deployment-v5.1.0.yaml
serviceaccount "mfe-svc-accnt" created
persistentvolumeclaim "mfe-storage" created
clusterrolebinding "mfe-role-binding" created
clusterrole "mfe-role" created
deployment "mfe-security" created
service "mfe-service" created
networkpolicy "mfe-network-policy" createdValidating pod
You can validate the pod after deploying it.
To validate pod, check if these resources are created.
Check if the namespace kube-system contains the service account mfe-svc-accnt.
$ kubectl get serviceaccount -n kube-system mfe-svc-accnt NAME SECRETS AGE mfe-svc-accnt 1 11mCheck if the namespace kube-system contains the persistent volume claim mfe-storage, and status Bound state.
$ kubectl get persistentvolumeclaim -n kube-system mfe-storage NAME STATUS VOLUME CAPACITY ACCESS MODES STORAGECLASS AGE mfe-storage Bound mfe-persistent-volume 1Gi RWO manual 12mCheck if the namespace kube-system contains cluster role binding mfe-role-binding and cluster role mfe-role.
$ kubectl get clusterrolebinding -n kube-system mfe-role-binding NAME AGE mfe-role-binding 16m $ kubectl get clusterrole -n kube-system mfe-role NAME AGE mfe-role 16mCheck if the namespace kube-system contains the deployment mfe-security.
$ kubectl get deployment -n kube-system mfe-security
NAME DESIRED CURRENT UP-TO-DATE AVAILABLE AGE
mfe-security 1 1 1 1 17mCheck if the namespace
kube-systemcontains the servicemfe-service, and check if the load balancer has an IP address or FQDN to access the service outside the cluster.
$ kubectl get service -n kube-system mfe-service
NAME CLUSTER-IP EXTERNAL-IP PORT(S) AGE
mfe-service 100.65.148.246 acfe801473a2a... 443:31185/TCP 17mDelete pod
You can delete the deployed pod when you no longer need it.
Delete the deployed pod.
$ kubectl delete -f mfe-deployment-v5.1.0.yaml serviceaccount "mfe-svc-accnt" deleted persistentvolumeclaim "mfe-storage" deleted deployment "mfe-security" deleted clusterrolebinding "mfe-role-binding" deleted clusterrole "mfe-role" deleted service "mfe-service" deleted networkpolicy "mfe-network-policy" deletedDelete the Transport Layer Security (TLS) secrets created by pod.
$ kubectl delete secret -n kube-system mfe-tls mfe-server mfe-client secret "mfe-tls" deleted secret "mfe-server" deleted secret "mfe-client" deleted
Creating a minimal RBAC authorization
Role Based Access Control (RBAC) uses an API group to take authorization decisions and configure policies through Kubernetes API.
The role in the RBAC API contains rules that represent a set of permissions.
For a Kubernetes cluster hosted in GKE, you must use this command to create a role.
kubectl create clusterrolebinding cluster-admin-binding \
--clusterrole cluster-admin --user [USER_ACCOUNT]Note
[USER_ACCOUNT] is your email address.
These roles allow you to create a minimal RBAC.
apiVersion: v1
kind: ServiceAccount
metadata:
name: mfe-epo-accnt
---
apiVersion: rbac.authorization.k8s.io/v1
kind: ClusterRoleBinding
metadata:
name: mfe-epo-binding
roleRef:
apiGroup: rbac.authorization.k8s.io
kind: ClusterRole
name: mfe-epo
subjects:
- kind: ServiceAccount
name: mfe-epo-accnt
namespace: default
---
apiVersion: rbac.authorization.k8s.io/v1
kind: ClusterRole
metadata:
name: mfe-epo
rules:
- apiGroups:
- ""
resources:
- pods
- services
- namespaces
verbs:
- get
- list
- apiGroups:
- "networking.k8s.io"
resources:
- networkpolicies
verbs:
- delete
- get
- list
- patch
- update
- watch
- create
---For a Kubernetes 1.22.0 or later, token generation is not automated.
These roles allow you to create a minimal RBAC.
apiVersion: v1
kind: ServiceAccount
metadata:
name: mfe-epo-accnt
secrets:
- name: mfe-epo-secret
---
apiVersion: v1
kind: Secret
metadata:
name: mfe-epo-secret
annotations:
kubernetes.io/service-account.name: mfe-epo-accnt
namespace: default
type: kubernetes.io/service-account-token
---
apiVersion: rbac.authorization.k8s.io/v1
kind: ClusterRoleBinding
metadata:
name: mfe-epo-binding
roleRef:
apiGroup: rbac.authorization.k8s.io
kind: ClusterRole
name: mfe-epo
subjects:
- kind: ServiceAccount
name: mfe-epo-accnt
namespace: default
---
apiVersion: rbac.authorization.k8s.io/v1
kind: ClusterRole
metadata:
name: mfe-epo
rules:
- apiGroups:
- ""
resources:
- pods
- services
- namespaces
verbs:
- get
- list
- patch
- update
- watch
- create
- apiGroups:
- "networking.k8s.io"
resources:
- networkpolicies
verbs:
- delete
- get
- list
- patch
- update
- watch
- create
---Configuring Microsoft Azure cloud accounts
You can register your Microsoft Azure account on to view your cloud account details in the System Tree and Trellix CWS console.
Create an application in the Microsoft Azure console
Create an application in Microsoft Azure Active Directory to access the resources in your subscription. This application allows you to create default roles only.
Make sure that these conditions are met:
You have installed Azure Resource Manager modules in Microsoft Azure PowerShell.
You have registered Microsoft.insights provider under User Account → My Permissions → Resource provider status.
You can get your client ID, tenant ID, and configure your Client key after creating the application.
Log on to the Microsoft Azure portal and select Azure Active Directory from the left pane.
Select App registrations.
Click New registration.
On the Register an application page, type a name for your application.
From Supported account types, select Accounts in this organizational directory only.
Under the Redirect URI (Optional) section:
Select the type of application that you want to build — Web or Public client (mobile & desktop).
Enter the redirect URI (or reply URL) for your application.
The uniqueness or existence of the endpoint is not validated.
Click Register to create your application.
Create an application using PowerShell script
Create an application using PowerShell scripts to create custom roles. You can access the tenant ID, client ID, and client key from the automatically generated MicrosoftAzurecloudaccountdetails.txt file.
Ensure that these conditions are met:
You have installed Azure Resource Manager modules in Microsoft Azure PowerShell.
You have registered Microsoft.insights provider under User Account → My Permissions → Resource provider status.
For more information about Azure PowerShell, see https://docs.microsoft.com/en-us/powershell/azure/overview?view=azurermps-5.1.1 and KB87316.
Download the required PowerShell script and copy it to the PowerShell installation folder.
Ensure that you have downloaded the correct script according to your Trellix CWS version.
Log on to PowerShell as administrator.
Type
cd "PowerShell directory path"to change the directory.
3 | Installation overview
Type
.\MicrosoftAzure_Prerequisite.ps1to run the script.Type the required parameters according to your subscription.
Register Microsoft.insights provider for traffic discovery.
For traffic discovery of a logged on single user, select any of these in the Register Cloud Accounts window.
Trellix CWS Basic — This set of rules allows you to discover Azure instances traffic and Network Security Groups (NSG) rules.
Trellix CWS Advanced — This set of rules allows you to discover Azure instances traffic, discover NSG rules, and remediate NSG rules.
For traffic discovery of multiple subscriptions associated with an account:
Create a web application for each selected subscription, or for all subscriptions.
In the Register Cloud Accounts window, select — Trellix CWS Basic or Trellix CWS Advanced.
Network Security Groups (NSG) flow logs allow Network Watcher to view information about the traffic in the NSG. When Network Watcher is enabled, the retention period set by Trellix CWS for NSG flow logs is 15 days. You can reconfigure the retention period under Network Watcher in the Azure portal. For more information, see https://docs.microsoft.com/en-us/azure/network-watcher/network-watcher-nsg-flow-logging-portal.
Finding Subscription ID, Tenant ID, and Client ID
After creating your application, you can make a note of the subscription ID, tenant ID, and client ID.
The subscription ID for your Microsoft Azure account is listed in Subscriptions → SUBSCRIPTION ID.
Select the application that you created and click Overview to see your Client ID and Tenant ID.
Configure client key
Configure your client key on Microsoft Azure Active Directory for your application.
Make sure that you have created an application in your Microsoft Azure Active Directory.
Log on to the Microsoft Azure portal.
Select the application that you created and click Certificates & secrets.
On the Client secrets section, click New client secret.
Provide Description and select the expiry duration of the secret key, then click ADD.
Copy the key displayed in the application. You will not be able to retrieve it after you leave this page.
Set delegated permissions
Set the delegated permissions to access the web APIs from the registered account.
Make sure that you have created your application.
Log on to the Microsoft Azure portal.
Select the application that you created, then click API permissions.
Select Add a permission.
In the Select an API section, select APIs my organization uses, then search for Windows Azure Service Management API and select it.
In the What type of permissions does your application require? section, select Delegated Permissions.
In the Select Permissions section, select the Access Azure Service Management as organization users checkbox.
Click Add permissions.
Assign the application to your subscription
Assign a role to your application and also assign it to your Microsoft Azure subscription.
Ensure that:
You have created an application in the Microsoft Azure console.
You have configured Client key for your application and set the delegated permissions.
On the Microsoft Azure console, click Subscription.
Select your subscription, and click Access icon.
Click Add → Select a role and select your role as Contributor.
Click Add users and search for your application, click Select and click OK.
Your application is assigned to your subscription.
Configure Network Security Manager accounts
Download the Virtual Probe installation script
A Virtual Probe must be installed to protect your instances using Network Security Platform. To install a Virtual Probe, you have to first download the Probe Installation script from the server.
Ensure that:
You have installed the Trellix CWS License extension on .
You have registered the Network Security Manager server.
Log on to as an administrator.
Select Menu → Systems → Cloud Workload Security.
Select your workload from Systems, then select an instance from the instance list under Total Workloads to view the properties of your virtual systems from your cloud account.
From Network Intrusion Prevention under the Workload Details pane, click Download to download the Probe Installer for vNSP.
Note
The probe installation script is platform-specific, and can be different for different vNet/Subnet combinations.
The probe installation script is downloaded onto your system.
Install the Virtual Probe
The procedure to install a Virtual Probe on your virtual machine is different for different operating systems running on it.
This section provides the installation steps for Linux and Windows virtual machines.
On your client system, run the downloaded script.
Windows client system — Open Windows PowerShell and run the script.
Linux client system — Start the terminal Shell prompt and run the script.
You can install the Virtual Probe on your AWS and Azure instances.
If you are using AWS and deploying new EC2, copy the generated script and paste it into the User Data field.

This allows you to start existing AMIs and automatically install and activate the Virtual probe at startup. The new instances must access the server specified in the deployment script.
If you are using Azure, select your virtual instance from the Trellix CWS console, then click Take Action → Install Network Intrusion Prevention.
Note
The Trellix Agent versions that are available depend on the Trellix Agent installation packages that are checked in to the Master Repository.
You can now select the virtual instance and install Network Intrusion Prevention using Trellix CWS.
Installing Cloud Workload Security Suite
Trellix CWS extension bundles and suites
Trellix CWS is packaged in public, hybrid, and private variants to support different cloud vendor accounts.
Trellix CWS packages
Trellix CWS variant | Supported cloud vendors | Package names |
|---|---|---|
Trellix CWS for Public cloud | AWS, Kubernetes connector, and Microsoft Azure | Cloud_Workload_Security_Public_5.3.0 |
Trellix CWS for Private cloud | Citrix Hypervisor, Kubernetes connector, Microsoft Hyper-V, VMware vSphere, and OpenStack | Cloud_Workload_Security_Private_5.3.0 |
Trellix CWS for Hybrid cloud | AWS, Citrix Hypervisor, Kubernetes connector, Microsoft Azure, Microsoft Hyper-V, VMware vSphere, and OpenStack | Cloud_Workload_Security_Hybrid_5.3.0 |
Note
License extension is a part of Trellix CWS advanced and essential suites. Install license extension to enable traffic discovery, traffic assessment, traffic visualization, and Network Security account registration. Install Kubernetes connector extension to register Kubernetes Cluster account, and discover, assess, and secure Docker containers on Kubernetes.
Extension list on
After installing the Cloud Workload Security extension, you can see these extensions by selecting Menu → Extensions → Trellix → Data Center Security.
CWS License extension
Data Center Visualization
AWS Connector
Azure Connector
OpenStack Connector
Data Center Assessment
vSphere Connector
Data Center Metering
MDCC
Kubernetes Connector
Installing Trellix CWS extension
Download and install the extension manually
Download and install the Public Cloud Security package on the server.
From the download site (http://www.trellix.com/en-us/downloads/), use your grant number and select your suite.
From the products listed, select and download Common UI 1.3 and your Cloud Workload Security variant.
Log on to the server as an administrator.
Select Menu → Software → Extensions → Install Extension.
Browse to and select the extension file, then click OK.
Install Common UI 1.3 first, then install Trellix Cloud Workload Security.
The Install Extension page displays the extension names and version details.
Install the extension through Software Catalog
For ePO 5.10.x and later, use On-prem Software Catalog. For 5.9.x and below, use Software Manager (Software Manager in 5.9 and earlier) to install the Trellix CWS extension.
Log on to the server as an administrator.
Select Menu → Software, then click Software Catalog.
From Software (by Label) → Messaging & Web Security, select Common UI 1.3 on and then click Check In All.
4. From Software (by Label) → Endpoint Security, select your Trellix CWS 5.3 variant and then click Check In All.
Installing Trellix CWS Suite AMI
Trellix CWS Suite AMI and a collection of security products designed to manage and secure your Amazon EC2 instances.
This suite is specifically designed to manage and secure cloud environment. The products are packed in to a single suite using Trellix CWS AMI. For more information about installing Trellix CWS Suite AMI, see Trellix Cloud Workload Security Suite Amazon Machine Image Installation Guide.
Installing Trellix CWS in Azure Marketplace
Trellix CWS delivers comprehensive security for Microsoft Azure, by discovering Azure resources and deploying other security products, to protect the elastic cloud environment.
For more information about installing Trellix CWS in Azure Marketplace, see KB90891.
Register an AWS account
Register an AWS account with so that can communicate with the AWS cloud.
Ensure that these conditions are met:
You have your AWS account and its details ready.
You have an access key ID and a secret access key set up in the AWS console.
You have permissions to use Trellix CWS.
The account you are registering with has an IAM role with flow log policies to view IP address of the traffic flows in your virtual network.
You have installed the Trellix CWS extension on .
Your system date and time are synchronized with the current date and time.
The server and the VMs in the AWS cloud are communicating with each other.
You have permissions to read CloudWatch events and access Auto Scaling Groups.
Log on to the server as an administrator.
Select Menu → Systems → Cloud Workload Security, to open the Cloud Workload Security page.
From the Accounts pane, click Add to open the Registered Cloud Account pane.
Select Amazon Web Service from the drop-down list, and type these details.
Option | Definition |
|---|---|
Account Name | A name for the AWS account in . Account names can include characters a–z, A–Z, 0–9, and [._-], without space. |
GovCloud | Select if the AWS account belongs to the AWS GovCloud (US) region. |
AWS China | Select if the AWS account belongs to China region. |
Option | Definition |
|---|---|
Access Key ID | Type the access key ID used by AWS connector to log on to AWS.
|
Secret Key ID | Type the secret access key used by AWS connector to log on to AWS.
|
Validate | Click to validate the account details and verify the connection to the AWS cloud. |
Assessment Policy | Click Assessment Policy to select the policy to be applied to your AWS account, or click |
Trellix ePO Tags (separated by commas) | List of tags that are applied on VMs discovered for this AWS account. Tag name can include characters a–z, A–Z, 0–9, and [._-], with space. For details about Tag usage, see the product documentation for . |
Import Tags | Click to sync the user defined AWS tags assigned to your workloads with the tags. |
Sync Interval (In Minutes) | Specify the interval for to AWS synchronization |

Option | Definition |
|---|---|
(the default value is 5 minutes. The maximum value is 60 minutes). If you specify the sync interval as 5 minutes, the next sync is scheduled 5 minutes after the completion of the current sync. | |
Enable Traffic Discovery | Select to discover and view traffic flow logs for instances in your AWS accounts. |
(Optional) Under Windows Domain Logon Credentials, type the credentials to deploy the Trellix Agent package.
Click Submit to register the cloud account.
This action registers the AWS cloud and imports all discovered VMs, which are unmanaged, into the System Tree. The instances are imported with the structure and hierarchy of the AWS cloud. The VMs that are already added and managed by are retained with the existing policy settings.
View the imported VMs:
Select Menu → Systems → Cloud Workload Security on to view, assess, and remediate your cloud asset information.
Select Menu → System Tree in . You can find your AWS account under the group AWS. The virtual machines from AWS are logically grouped with the hierarchy AWS → Cloud account name → Region → Availability zone → instances.
Register sub-accounts for your AWS account
You can register multiple sub-accounts under an AWS cloud account using the same access key and secret key. Creating sub-accounts resolves customer key rotation in AWS.
Ensure that these conditions are met:
You have your AWS account and its details ready.
You have an access key ID and a secret access key set up in the AWS console.
You have permissions to use Trellix CWS.
The account you are registering with has an IAM role with flow log policies to view IP address of the traffic flows in your virtual network.
The account that you are registering with has an IAM role to build trust relationships with third-party AWS accounts.
You have installed the Trellix CWS extension on .
Your system date and time are synchronized with the current date and time.
Log on to the server as an administrator.
Select Menu → Systems → Cloud Workload Security, to open the Cloud Workload Security page.
From the Accounts pane, click Add Account, to open the Registered Cloud Account pane.
From the Select Account Type drop-down list, select Amazon Web Service, and type these details.
Option | Definition |
|---|---|
Name | A name for the AWS account in . Account names can include characters a–z, A–Z, 0–9, and [._-], without space. |
Access Key ID | Type the access key ID used by AWS connector to log on to AWS.
|
Secret Key ID | Type the secret access key used by AWS connector to log on to AWS.
|
Validate | Click to validate your AWS account. |
Add Sub-accounts | Click to add sub-accounts for your AWS account. |
In the Add Sub-Accounts pane, select one of these options.
Select Enter the account information manually and type these details.
Option | Definition |
|---|---|
Sub-account Name | A name for the AWS sub-account in . Account names can include characters a–z, A–Z, 0–9, and [_.-], without space. |
Role ARN | Type the Amazon Resource Name (ARN) for the AWS sub-account in . The role ARN format is |
Select Upload CSV file, then click Choose file and select the CSV file that contains role ARN details and click Upload.
Note
The CSV file has two columns without any column headers. The first column is account name and the second is ARN number.
Register a Citrix Hypervisor account
Register a Citrix Hypervisor account with so that can communicate with the Citrix Hypervisor cloud.
Ensure that these conditions are met:
You have your Citrix Hypervisor account and its details ready.
You have the IP address to access the Citrix Hypervisor account.
You have the user name and password of the Citrix Hypervisor you want to register.
You have installed the Trellix CWS extension on .
You have permissions to use Trellix CWS.
Your system date and time are synchronized with the current date and time.
The server and the VMs in the Citrix Hypervisor cloud are communicating with each other.
We recommend that you register each Citrix Hypervisor individually. If your environment includes a pool of Citrix Hypervisor, you must register the master Citrix Hypervisor only.
Log on to the server as an administrator or as a user with Add Account permission for Trellix CWS.
Select Menu → Systems → Cloud Workload Security, to open the Cloud Workload Security page.
From the Accounts pane, click Add to open the Registered Cloud Account pane.
Select Citrix Hypervisor from the drop-down list, and type these details.
Option | Definition |
|---|---|
Account Name | A name for the Citrix Hypervisor account in . Account names can include characters a–z, A–Z, 0–9, and [_.-], without space. |
Server Address | Type the IP address of the Citrix Hypervisor. |
Username | Type the user name that was provided when setting up the Citrix Hypervisor. |
Password | Type the password to access Citrix Hypervisor. |
Assessment Policy | Click Assessment Policy to select the policy to be applied to your Citrix Hypervisor account, or click to go to the Policy Catalog page to create or select a policy. |
Trellix ePO Tags (separated by commas) | List of tags that are applied on VMs discovered for this Citrix Hypervisor account. Tag name can include characters a–z, A–Z, 0–9, and [_.-], with space. For details about Tag usage, see the product documentation for . |
Port | Type a valid port number to establish connection with the Citrix Hypervisor. |
Sync Interval (In Minutes) | Specify the interval for to Citrix Hypervisor synchronization (the default value is 5 minutes. The maximum value is 60 minutes). If you specify the sync interval as 5 minutes, the next sync is scheduled 5 minutes after the completion of the current sync. |
Tag | Type the tag names that are applied on VMs discovered for this Citrix Hypervisor account. |

Click Test Connection to validate the account details and verify the connection to the Citrix Hypervisor.
Select Next.
The Validate Certificate wizard appears.
Select Accept.
The Citrix Hypervisor Summary wizard appears.
Review the Citrix Hypervisor Summary details, then click Submit.
This action registers the Citrix Hypervisor cloud and imports all discovered VMs, which are unmanaged, into the System Tree. The instances are imported with the structure and hierarchy of the Citrix Hypervisor cloud. The VMs that are already added and managed by are retained with the existing policy settings.
View the imported VMs:
Select Menu → Systems → Cloud Workload Security on to view, assess, and remediate your cloud asset information.
Select Menu → System Tree in . You can find your Citrix Hypervisor account under the group Citrix Hypervisor. The virtual machines from Citrix Hypervisor are logically grouped with the hierarchy Citrix Hypervisor → Cloud Account Name → Instances.
Register a Kubernetes cluster
Register a Kubernetes cluster with so that can communicate with the Kubernetes account that manages container applications.
Ensure that these conditions are met:
You have your Kubernetes account and its details ready.
You have Kubernetes endpoint URL and access token details ready.
The RBAC for access token has minimum required role.
You have deployed pod.
Kubernetes users have permissions to use Trellix CWS.
You installed the Trellix CWS extension on .
Log on to the server as an administrator.
Select Menu → Systems → Cloud Workload Security, to open the Cloud Workload Security page.
From the Accounts pane, click Add Account, to open the Registered Cloud Account pane.
From the Select Account Type drop-down list, select Kubernetes Cluster, and type these details.
Option | Definition |
|---|---|
Account Name | A name for the Kubernetes cluster in . Account names can include characters a–z, A–Z, 0–9, and [_.-], without space. |
Kubernetes Account URL | The endpoint URL to log on to Kubernetes cluster. Use
|
Port | The name of the port. The default port is 443. |
Access Token | The token obtained from the Kubernetes cluster. Use |
Assessment Policy | Click Assessment Policy to select the policy to be applied to your Kubernetes account, or click |
 to go to the Policy Catalog page to create or select a policy.
Option | Definition |
|---|---|
| |
Sync Interval (In Minutes) | Specify the interval for to Kubernetes synchronization (the default value is 5 minutes. The maximum value is 60 minutes). If you specify the sync interval as 5 minutes, the next sync is scheduled 5 minutes after the completion of the current sync. |

Click Test Connection to validate the account details and verify the connection to the Kubernetes cluster.
Click Next.
Trellix CWS displays certificates for Kubernetes API cluster, and pod.
Click Accept to accept the certificates.
Click Submit to register the cluster.
Register a Microsoft Azure account
Register a Microsoft Azure account with so that can communicate with the Microsoft Azure cloud.
Ensure that these conditions are met:
You have your Microsoft Azure account and its details ready.
You have created an application in the Microsoft Azure console.
You have the Client ID and Tenant ID from the Microsoft Azure console after creating the application.
You have configured the Client key for your application.
You have set the delegated permissions for your application.
You have assigned the newly created application to a role and to your Microsoft Azure cloud account subscription.
You have installed the Trellix CWS extension on .
Your system date and time are synchronized with the current date and time.
Log on to the server as an administrator.
Select Menu → Systems → Cloud Workload Security, to open the Cloud Workload Security page.
From the Accounts pane, click Add Account, to open the Registered Cloud Account pane.
Select Microsoft Azure from the drop-down list.
Select the Enter the account information manually option and type these details.
Note
This option allows you to register a single Microsoft Azure account.
Option | Definition |
|---|---|
Account Name | Specify a name for the cloud account in . Account names can include characters a–z, A–Z, 0–9, and [_.-], without space. |
GovCloud | Select if the account belongs to the Microsoft Azure GovCloud (US) region. |
Azure Endpoint | Specify the URL of Microsoft Azure endpoint.
|
Subscription ID | Specify the subscription ID of your account. For details, see Finding Subscription ID, Tenant ID, and Client ID. |
Tenant ID | Specify the unique ID of the organization in Microsoft Active Directory. For details, see Finding Subscription ID, Tenant ID, and Client ID. |
Option | Definition |
|---|---|
Client ID | Specify the unique ID of the application. For details, see Finding Subscription ID, Tenant ID, and Client ID. |
Client Key | Specify the client key of the application. For details, see Configure Client Key. |
Assessment Policy | Click Assessment Policy to select the policy to be applied to your Microsoft Azure account, or click |
Trellix ePO Tags (separated by commas) | Specify the tag that is applied on the VMs discovered for this cloud account. Tag name can include characters a–z, A–Z, 0–9, and [_, -], with space. For details about Tag usage, see the product documentation for . |
Import Tags | Click to sync the user-defined Microsoft Azure tags assigned to your workloads with the tags. |
Sync interval (In Minutes) | Specify the interval for to the cloud synchronization (the default value is 5 minutes. The maximum value is 60 minutes). If you specify the sync interval as 5 minutes, the next sync is scheduled 5 minutes after the completion of the current sync. |
Enable Traffic Discovery | Select to discover and view traffic flow logs for instances in your Microsoft Azure accounts. |

(Optional) Under Windows Domain Logon Credentials, type the credentials to deploy the Trellix Agent package.
Click Test Connection to validate the account details and verify the connection to the cloud.
Click Submit to register the cloud account.
This action registers the Microsoft Azure cloud account and imports all discovered VMs, which are unmanaged, into the System Tree. The instances are imported with the structure and hierarchy of the Microsoft Azure cloud.
Note
The VMs that are already added and managed by are retained with the existing policy settings.
9. View the imported VMs.
Select Menu → Systems → Cloud Workload Security on to view, assess, and remediate your cloud asset information.
Select Menu → Systems → System Tree in . After the discovery, you can find your account under the group Azure. The VMs from each Microsoft Azure account are logically grouped under different geographical zones in .
Register multiple Microsoft Azure accounts
You can register multiple Microsoft Azure accounts with so that can communicate with the Microsoft Azure cloud.
Ensure that these conditions are met:
You have your Microsoft Azure account and its details ready.
You have created an application in the Microsoft Azure console.
You have the Client ID and Tenant ID from the Microsoft Azure console after creating the application.
You have configured the Client key for your application.
You have set the delegated permissions for your application.
You have assigned the newly created application to a role and to your Microsoft Azure cloud account subscription.
You have downloaded the CSV file format from <KB link> and filled all mandatory fields.
You have installed the Trellix CWS extension on .
Your system date and time are synchronized with the current date and time.
Log on to the server as an administrator.
Select Menu → Systems → Cloud Workload Security, to open the Cloud Workload Security page.
From the Accounts pane, click Add Account, to open the Registered Cloud Account pane.
Select Microsoft Azure from the drop-down list.
Select the Upload the CSV file option to register one or more Microsoft Azure accounts, then select the CSV file that you want to upload and click Upload.
The CSV file contains information about the Microsoft Azure account parameters.
Parameter | Description | Mandatory/Optional |
|---|---|---|
AccountNameParam | The name of the Microsoft Azure account. Account names can include characters a–z, A–Z, 0–9, and [._-], without space. | Mandatory |
accessKeyIDParam | The access key of the Microsoft Azure account. | Mandatory |
subscriptionIdParam | The subscription ID of the Microsoft Azure account. | Mandatory |
secretKeyParam | The secret key of the Microsoft Azure account. | Mandatory |
tagsParam | The tag to be applied on the VMs discovered for the Microsoft Azure account. Tag name can include characters a–z, A–Z, 0–9, and [._-], without space.
| Optional |
isGovCloudRegion | Specify if the cloud accounts belong to the Microsoft Azure GovCloud (US) region. | Optional |
isEnableVpcFlowlog | Specify if you have to enable Virtual Private Cloud (VPC) flow logs for the VMs discovered for the Microsoft Azure account. | Optional |
syncIntervalMinsAttr | The time taken to synchronize with the Microsoft Azure account. The minimum sync interval value is 5 minutes and the maximum value is 60 minutes. | Optional |
Parameter | Description | Mandatory/Optional |
|---|---|---|
vendor | The name of the vendor. The vendor name is azure.vendor . | Optional |
AutoDeployMA | Specify if you want to deploy Trellix Agent automatically. The values can include 0, 1, and 2. | Optional |
generalPolicy | The name of the general assessment rule | Optional |
isPolicyChanged | Specify if you want to change the policies assigned to the VMs associated with this cloud account. The values can include TRUE or FALSE. | Optional |
winDomain | The Windows domain credentials to deploy Trellix Agent. | Optional |
winUsername | The user name to deploy Trellix Agent. | Optional |
winPassword | The password to deploy Trellix Agent. | Optional |
endpointURL | The Endpoint URL to deploy Trellix Agent. | Optional |
Parameter | Description | Mandatory/Optional |
|---|---|---|
TenantID | The tenant ID of the Microsoft Azure account. | Mandatory |
ClientID | The client ID of the Microsoft Azure account. | Mandatory |
changeSecretKeyParam | Specify if you want to change the Secret key. The values include TRUE and FALSE. | Optional |
changeWinLoginPw | Specify if you want to change the Windows logon password. The values include TRUE and FALSE. | Optional |
cardBasedUI | Specify if you want to use the cloud-based user interface. The values include TRUE and FASLE. | Optional |
cloudTags | List of the user-defined Microsoft Azure tags assigned to your workloads. | Optional |
Register a Microsoft Hyper-V cloud account
Register a Microsoft Hyper-V cloud account to manage the hypervisors and virtual machines hosted in your Microsoft Hyper-V private cloud.
Ensure that these conditions are met:
You have added the server to Domain Controller.
You have installed the Microsoft System Center Virtual Machine Manager (SCVMM) console on .
You have the Domain Controller details ready.
You have the SCVMM IP address ready.
You have installed the Trellix CWS extension on .
You have permissions to use Trellix CWS.
Your system date and time are synchronized with the current date and time.
Note
Your Hyper-V server must be associated with the SCVMM server domain to fetch the CPU utilization of the hypervisors associated with the new domain. The new domain must be registered in .
Log on to the server as an administrator or as a user with Add Account permission for Trellix CWS.
Select Menu → Systems → Cloud Workload Security, to open the Cloud Workload Security page.
From the Accounts pane, click Add to open the Registered Cloud Account pane.
Select Microsoft Hyper-V from the drop-down list and type the details in the SCVMM Account Details wizard.
Option | Definition |
|---|---|
Account Name | A name for the SCVMM account in . Account names can include characters a–z, A–Z, 0–9, and [._-], without space. |
Domain Name | Type the domain name of your private cloud. |
Server Address | Type the IP address of the SCVMM server. |
Username | Type the user name that was provided when setting up the SVCMM server. |
Password | Type the password to access SCVMM server. |
Assessment Policy | Click Assessment Policy to select the policy to be applied to your SCVMM account, or click |
Trellix ePO Tags (separated by commas) | List of tags that are applied on VMs discovered for this SCVMM account. Tag name can include characters a–z, A–Z, 0–9, and [._-], with space. For details about Tag usage, see the product documentation for . |
Sync Interval (In Minutes) | Specify the interval for to SVCMM server synchronization (the default value is 5 minutes. The maximum value is 60 minutes). If you specify the sync interval as 5 minutes, the next sync is scheduled 5 minutes after the completion of the current sync. |
Tag | Type the tag names that are applied on VMs discovered for this SCVMM server account. |

Click Test Connection.
Click Save.
View the imported VMs:
Select Menu → Systems → Cloud Workload Security on to view, assess, and remediate your cloud asset information.
Select Menu → System Tree in . You can find your Hyper-V account under the group Hyper-V. The virtual machines from Hyper-V are logically grouped with the hierarchy Hyper-V → Cloud Account Name → Instances.
Register an LDAP server
You can register a Lightweight Directory Access Protocol (LDAP) server with a new domain name in .
Log on to the server as an administrator.
Select Menu → Configuration → Registered Servers.
Select LDAP server from the Server drop-down list.
Type a name for the LDAP server in the Name field and add a description in the Notes field (optional), then click Next.
Select Active Directory from the LDAP server drop-down list.
Select Domain name from the Server drop-down list, then type a new domain name.
Set your credentials using the User name, Password, and Confirm password fields.
Click Save.
The new domain is now registered with the server to fetch the CPU usage details during an on-demand scan.
Register a VMware vSphere account from the Accounts pane
Register a VMware vSphere account with so that communicates with the VMware vCenter, which manages the ESXi servers.
Ensure that:
The VMware vCenter server that manages the ESXi servers is configured to host the guest VMs.
The Cloud Workload Security extension is installed on .
Log on to as an administrator.
Select Menu → Systems → Cloud Workload Security, to open the Cloud Workload Security page.
From the Accounts pane, click Add Account, to open the Registered Cloud Account pane.
From the Select Account Type drop-down list, select VMware vSphere.
In the vCenter Account Details page, type these details.
Option | Definition |
|---|---|
Account Name | A name for the vCenter account in . Account names can include characters a–z, A–Z, 0–9, and [._-], without space. |
Server Address | Specify the URL of VMware VSphere endpoint. |
vCenter Username | Type the vCenter user name to log on to VSphere. |
vCenter Password | Type the vCenter password to log on to VSphere. |
Assessment Policy | Click Assessment Policy to select the policy to be applied to your vCenter account, or click |

Option | Definition |
|---|---|
Trellix ePO Tags (seperated by commas) | List of tags that are applied on VMs discovered for this vCenter account. Tag name can include characters a–z, A–Z, 0–9, and [._-], with space. For details about Tag usage, see product documentation. |
Port | Specify the port name. |
Sync Interval (In Minutes) | Specify the interval for to vCenter synchronization (the default value is 5 minutes. The maximum value is 60 minutes). If you specify the sync interval as 5 minutes, the next sync is scheduled 5 minutes after the completion of the current sync. |
(Optional) Under Windows Domain Logon Credentials, type the credentials to deploy the Trellix Agent package.
Important
Make sure that the server and the VMs in the vSphere cloud can communicate with each other.
Click Test Connection to validate VMware vCenter account details and verify the connection to the VMware vCenter, then click Next to open the vCenter Summary page.
The summary page has vCenter, vCNS, and NSX summary.
Click Accept to accept the certificates.
Click Submit to register the cloud account.
This action registers the VMware vCenter and imports all discovered virtual machines, which are unmanaged, into the System Tree. The instances are imported with the similar structure and hierarchy present in VMware vCenter.
Note: The virtual machines that are already added and managed by are retained with the existing policy settings, but the virtualization properties for these machines are added.
10. View the imported VMs:
Select Menu → Systems → Cloud Workload Security on to view your cloud asset information.
Select Menu → Systems → System Tree in . After the discovery, you can find your vCenter account under the group vSphere. The clusters and hosts from vCenter are logically grouped under each Data Center group in .
Register an OpenStack account
Register an OpenStack account with so that can communicate with the OpenStack cloud.
Ensure that you have your OpenStack account and its details ready.
The OpenStack account is generic because you can provide the URL of the OpenStack implementation under Identity Service Endpoint and configure the cloud account. OpenStack extension for Trellix CWS 5.2.0 version supports OpenStack Pike release.
Log on to the server as an administrator.
Select Menu → Systems → Cloud Workload Security, to open the Cloud Workload Security page.
From the Accounts pane, click Add Account, to open the Registered Cloud Account pane.
From the Select Account Type drop-down list, select OpenStack, and type these details.
Option | Definition |
|---|---|
Account Name | A name for the OpenStack account in . Account names can include characters a–z, A–Z, 0–9, and [_.-], without space. |
Identity Service Endpoint | The URL of the account. |
Username | The user name of the account in the format |
Password | The password of the account. |
Assessment Policy | Click Assessment Policy to select the policy to be applied to your OpenStack account, or click
to go to the Policy Catalog page to create or select a policy. |
Trellix ePO Tags (separated by commas) | List of tags that are applied on VMs discovered for this OpenStack account. Tag name can include characters a–z, A–Z, 0–9, and [._-], with space. For details about Tag usage, see the product documentation for . |
Sync Interval (In Minutes) | Specify the interval for to OpenStack synchronization (the default value is 5 minutes. The maximum value is 60 minutes). If you specify the sync interval as 5 minutes, the next sync is scheduled 5 minutes after the completion of the current sync. |

(Optional) Windows Domain Logon Credentials: type the credentials to deploy the Trellix Agent package.
Important
Make sure that the server and the VMs in the OpenStack cloud can communicate with each other.
Click Test Connection to validate the account details and verify the connection to the OpenStack cloud.
Click Submit to register the cloud account.
This action registers the OpenStack cloud and imports all discovered VMs, which are unmanaged, into the System Tree. The instances are imported with the structure and hierarchy of the OpenStack cloud. The VMs that are already added and managed by are retained with the existing policy settings.
View the imported VMs:
Select Menu → Systems → Cloud Workload Security on to view, assess, and remediate your cloud asset information.
Select Menu → System Tree in . You can find your OpenStack account under the group OpenStack. The virtual machines from OpenStack are logically grouped with the hierarchy OpenStack → Cloud account name → Region → instances.
Register a Network Security Manager account
Register a Trellix Intrusion Prevention System Manager account with so that can communicate with the Manager server.
Ensure that:
You have your Manager account and its details ready.
You have installed the Trellix CWS License extension on .
After registering your Manager account, you can deploy vNSP probe to your cloud infrastructure using Trellix CWS.
Log on to the server as an administrator.
Select Menu → Systems → Cloud Workload Security, to open the Cloud Workload Security page.
From the Network Security Account pane, click Add Account, to open the Register Security Account pane.
From the Select Account Type drop-down list, select NSM Account, and type these details.
Option | Definition |
|---|---|
NSM Server Name | Specify the name of the NSM server. |
NSM Server IP | Specify the IP address of the NSM server. |
User Name | Specify the user name of your account. |
Password | Specify the password of your account. |
Click Next.
Trellix CWS displays a certificate for Network Security Manager account.
Click Accept to accept the certificate.
Click Submit to register your account.
Note
The synchronization between Trellix CWS and the Manager account occurs with AWS and Azure accounts.
Note
You can deploy Trellix Agent to the registered VMs to manage product installation and network security of the virtual instances on .
REST API for registering cloud accounts
Trellix CWS uses Representational State Transfer (REST) architecture for the bulk registration of cloud accounts.
Trellix CWS administrator users can use REST API calls in PowerShell script or shell script to register cloud accounts in bulk.
To use this feature, the Trellix CWS administrators must be valid users with permissions that allow them to perform the actions invoked by the APIs.
For information about how to use REST API to register cloud accounts, see KB90932.
Configuring your security products and viewing reports
After installing the Trellix CWS extension and registering cloud accounts, configure the security products on your server.
Configure your firewall policies in Policy Catalog and assign them to required systems.
View your cloud account information from Menu → Systems → Cloud Workload Security.
This graphical visualization of your cloud accounts gives you visibility into your cloud infrastructure assets and their hierarchy. The Total Workloads pane highlights any immediate issues or violations on your workload based on firewall settings or assigned policy settings.
After visualizing cloud account structure and seeing which systems are at risk, you can activate any missing protection with a few clicks.
Manage your instances by installing Trellix Agent.
Install other products on your instances.
Secure the instances in your network by correcting your firewall settings.
You can see the encryption status of your AWS volumes in the Trellix CWS dashboard.
Track the usage of AWS and Microsoft Azure cloud VMs using the metering feature. You can get a monthly report of your usage hours for your cloud instances. You can also create custom queries to display this information.
Select Dashboards → Public Cloud to see the security summary of your EC2 instances and EBS volumes.
You can also see details about Data Centers, OS Distribution, Anti-Malware Status, Security Incidents, Host Firewall Status, File Integrity Monitoring Status, Instance Assessment Report, and Usage Metering Report.
Delete a cloud account
You can delete a cloud account when you no longer need it.
Select the account that you want to delete from the Accounts pane.
Click the delete icon next to the account.
Click Delete.
Note
The account will be marked for deletion if account sync is in progress for that account or any related sub accounts. The account will be deleted only after sync completion.
Uninstall the extensions
Remove Trellix Cloud Workload Security software extensions from the server in the Extensions.
Delete your cloud account from the server by selecting Menu → Configuration → Registered Servers, and selecting Actions → Delete.
Log on to the server as an administrator.
Select Menu → Software → Extensions.
In the left pane, select Data Center Security group, then select the extensions in this order and click Remove.
CWS License extension
Data Center Visualization
AWS Connector
Azure Connector
OpenStack Connector
Data Center Assessment
vSphere Connector
Data Center Metering
MDCC
Kubernetes Connector
Delete your cloud account from the server by selecting Menu → Configuration → Registered Servers, and selecting Actions → Delete.
Terminate the Trellix CWS instances on public cloud
You can terminate an instance when you no longer need it.
Uninstall the installed Trellix CWS products using .
Delete the registered accounts.
Remove the packages from the Master Repository and the extensions from the Extension List page.
Terminate the instance.
For instructions on how to terminate your AWS and Microsoft Azure instances, see the AWS and Microsoft Azure documentation respectively.