Installation overview
First-time installation workflow
The installation and configuration of Trellix Endpoint Security for Servers involve the installation of extensions on Trellix ePolicy Orchestrator - On-premises, registering a cloud account, and configuring the Smart Scheduler settings for resource-intensive tasks.
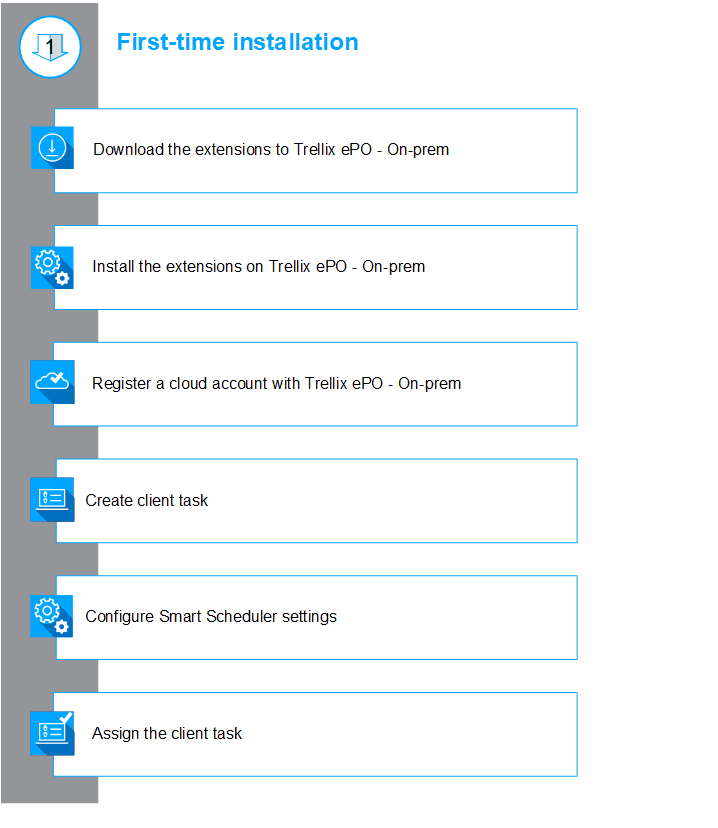
First-time installation
Download the extensions to Trellix ePO - On-prem
Install the extensions on Trellix ePO - On-prem
Register a cloud account with Trellix ePO - On-prem
Create client task
Configure Smart Scheduler settings
Assign the client task
Upgrade installation workflow
You can upgrade your software to stay updated with the new features in Trellix Endpoint Security for Servers.
You have to create a Product update task in to upgrade Trellix ENS for Servers. For more information, see Create a Product Update for AMCore Content Package (page 9) under Upgrade to a new software version.
System requirements
System and hardware requirements
Your virtual systems require specific hardware and software to run Trellix Endpoint Security for Servers. Make sure that your servers or workstations are running a supported version of Microsoft Windows and Linux, and conform to the requirements.
Review the requirements and recommendations before installing the software to make sure that your installation is successful.
For a complete list of current system (Windows) requirements, see Trellix Knowledge Base article: KB82761.
For a complete list of current system (Linux) requirements, see Trellix Knowledge Base article: KB87073.
Supported Trellix management platform and software
Your systems must be running a supported version of management platform and software.
Software | Version |
|---|---|
Common UI Core | 1.3 or later |
Trellix CWS | 5.3.0 or later |
Trellix Agent | 5.7.8 or later |
Trellix Endpoint Security (ENS) Threat Prevention | 10.7.0 or later |
Smart Scheduler | 5.5.3 or later |
Microsoft Hyper-V | 5.3.0 or later |
Citrix XenServer | 5.3.0 or later |
Supported public cloud platforms
You can install the Trellix Endpoint Security for Servers extension on the that is deployed on the public cloud platforms mentioned below:
Amazon Web Services
Microsoft Azure
Supported private cloud platforms and software
You can install the Trellix Endpoint Security for Servers extension on the that is deployed on the private cloud platforms mentioned below:
Appliance and software | Version |
|---|---|
VMware vCenter | 7.0.3 |
VMware ESXi | 7.0.3 |
System Center Virtual Machine Manager (SCVMM) console | 2012 R2 |
System Center Virtual Machine Manager (SCVMM) server | 2012 R2 |
Citrix XenServer | 7.0 |
Microsoft Hyper-V | 2012 R2, 2012 Core, or above |
Install software for the first time
Download software extensions and packages
Download the software extensions and product packages to the server from the downloads site.
<step>
From the downloads site (http://www.trellix.com/us/downloads/), download these software extensions and packages.
For Public cloud platform: Download these packages for Smart Scheduler to function on the public cloud platforms such as AWS and Microsoft Azure
Common UI Core.zip - The Common UI Core extension is required to install Trellix Cloud Workload Security.
Cloud_Workload_Security_5.3.0.zip - Install Trellix CWS extension to fetch system information and import it to the System Tree.
MA-WIN-579.zip: Trellix Agent client package (Windows).
MA-GENLNX-579.zip: Trellix CWS client package (Linux).
EPOAGENTMETA.zip: Trellix Agent extension.
Trellix_Agent_Smart_Scheduler_5.7.9.101.zip: Smart Scheduler extension.
</step>
<step>
For Private cloud platform: Download these packages for Smart Scheduler to function on the private cloud platforms such VMware vSphere, Microsoft Hyper-V, and Citrix XenServer.
Common UI Core.zip - The Common UI Core extension is required to install Trellix Cloud Workload Security.
Hyper-V_Ext_5.3.4.3.zip: Install Microsoft Hyper-V connector extension to discover the virtual machine information available in Hyper-V environment and import it to the System Tree.
XenServer_Ext_5.3.4.4.zip: Install Citrix XenServer connector extension to discover the virtual machine information available in XenServer environment and import it to the System Tree.
vSphere_Ext_5.4.0.149.zip: Install vSphere connector extension to discover the virtual machine information available in VMware environment and import it to the System Tree.
MA-WIN-579.zip: Trellix Agent client package (Windows).
MA-GENLNX-579.zip: Trellix CWS client package (Linux).
EPOAGENTMETA.zip: Trellix Agent extension.
Trellix_Agent_Smart_Scheduler_5.7.9.101.zip: Smart Scheduler extension.
</step>
Install software extensions on server
You must install the product extensions on before using the Smart Scheduler feature on your virtual machines. You can also check in the extensions directly from the software repository.
Make sure that the extension files are in an accessible location on the network.
Log on to as an administrator.
Select Menu → Software → Extensions → Install Extension.
Browse to and select each extension file in this order, then click OK.
For Public Cloud
Extension | Package name |
|---|---|
Common UI Core extension | Common UI Core.zip |
Trellix CWS extension | Cloud_Workload_Security_5.3.0.zip |
Trellix Agent extension | EPOAGENTMETA.zip |
Smart Scheduler extension | Trellix_Agent_Smart_Scheduler_5.7.9.101.zip |
For Private Cloud
Extension | Package name |
|---|---|
Common UI Core extension | Common UI Core.zip |
Microsoft Hyper-V Connector extension | Hyper-V_Ext_5.3.4.3.zip |
Citrix XenServer Connector extension | XenServer_Ext_5.3.4.4.zip |
VMware vCenter Connector extension | vSphere_Ext_5.4.0.149.zip |
Trellix Agent extension | EPOAGENTMETA.zip |
Smart Scheduler extension | Trellix_Agent_Smart_Scheduler_5.7.9.101.zip |
Review the extension details and click OK.
Upgrade to a new software version
Create a Product Update Task for AMCore Content Package
Create a Product Update task under Trellix Agent to update the managed client systems with AMCore Content Package.
The Trellix Agent and Endpoint Security Threat Prevention extensions are installed on the server.
The Trellix Agent and Endpoint Security Threat Prevention are installed on the target virtual systems.
Log on to as an administrator.
Select Menu → Policy → Client Task Catalog.
Under Client Task Types, expand Trellix Agent and select Product Update.
Click New Task.
Choose Product Update from the list of Task Types.
Enter the Task Name and Description.
(Optional) Select Update in Progress.
Choose Selected Packages.
Select AMCore Content Package.
Review the task settings and then click Save.
Go to the Smart Scheduler Catalog page and select the new task, which was created after previous step, from the list.
Select Actions and then Save.
The task is added to the list of client tasks for the selected client task type.
You have now added the Product Update task to the list of Smart Scheduler tasks.
Post-installation tasks
Register an AWS account
Register an AWS account with so that it can communicate with the AWS cloud.
Ensure that these conditions are met:
You have your AWS account and its details ready.
AWS users have an access key ID and a secret access key set up for them in the AWS console.
AWS users have permissions to use Trellix CWS.
You installed the Trellix CWS extension on .
Your system date and time are synchronized with the current date and time.
The server and the VMs in the AWS environment communicate with each other.
AWS users have read-access to CloudWatch events and Auto Scaling Groups.
You have configured Average CPU Utilization as the metric type.
Log on to the server as an administrator.
Select Menu → Systems → Cloud Workload Security, to open the Cloud Workload Security page.
From the Accounts pane, click Add Account, to open the Registered Cloud Account pane.
Select Amazon Web Service from the drop-down list, and type these details.
Option | Definition |
|---|---|
Account Name | A name for the AWS account in . Account names can include characters a–z, A–Z, 0–9, and [_.-], without space. |
GovCloud | Select if the AWS account belongs to the AWS GovCloud (US) region. |
AWS China | Select if the AWS account belongs to China region. |
Access Key ID | Type the access key ID used by AWS connector to log on to AWS.
|
Secret Key ID | Type the secret access key used by AWS connector to log on to AWS.
|
Validate | Click to validate the account details and verify the connection to the AWS cloud. |
Post-installation tasks
Option | Definition |
|---|---|
Assessment Policy | Click Assessment Policy to select the policy to be applied to your AWS account, or click to go to the Policy Catalog page to create or select a policy. |
Trellix ePO Tags (separated by commas) | List of tags that are applied on VMs discovered for this AWS account. Tag name can include characters a–z, A–Z, 0–9, and [._-], with space. For details about Tag usage, see the product documentation for . |
Sync Interval (In Minutes) | Specify the interval for to AWS synchronization (the default value is 5 minutes. The maximum value is 60 minutes). If you specify the sync interval as 5 minutes, the next sync is scheduled 5 minutes after the completion of the current sync. |
Enable Traffic Discovery | Select to discover and view traffic flow logs for instances in your AWS accounts. |
(Optional) Windows Domain Logon Credentials: type the credentials to deploy the Trellix Agent package.
(Optional) In the Add Sub-Accounts pane under Windows Domain Logon Credentials, select one of these options.
Select Enter Accounts Manually and enter the following details.
Option | Definition |
|---|---|
Sub-Account Name | A name for the AWS subaccount in . Account names can include characters a–z, A–Z, 0–9, and [._-], without space. |
Role ARN | Type the Amazon Resource Name (ARN) for the AWS subaccount in . |
Select Upload CSV and click Choose file to upload the .csv file which contains role ARN details, then click Upload.
Click Submit to register the cloud account.
This action registers the AWS cloud and imports all discovered VMs, which are unmanaged, into the System Tree. The instances are imported with the structure and hierarchy of the AWS cloud. VMs that are added and managed by are retained with the existing policy settings.
View the imported VMs:
Select Menu → Systems → Cloud Workload Security on to view, assess, and remediate your cloud asset information.
Select Menu → System Tree in . You can find your AWS account under the group AWS. The virtual machines from AWS are logically grouped with the hierarchy AWS → Cloud account name → Region → Availability zone → instances.
Create a user permission policy
You can create a policy to use Trellix CWS with minimum required permissions.
Log on to AWS management console.
Click All services → Security, Identity & Compliance to load IAM dashboard.
Set policies based on the required privilege.
Click Review policy.
Type a valid name and description.
Click Create policy.
Policy for EC2 discovery/visibility
This policy allows you to create an AWS user with limited privilege user permission policy to discover EC2 assets and read firewall rules. This is a mandatory policy for using Trellix CWS.
{
"Version": "2012-10-17",
"Statement": [
{
"Effect": "Allow",
"Action": "ec2:Describe*",
"Resource": "*"
}
]
}Policy for Amazon Auto Scaling Group and CloudWatch
This policy allows you to create an AWS user with the privileges to read CloudWatch events and access Auto Scaling Group.
{
"Version": "2012-10-17",
"Statement": [
{
"Effect": "Allow",
"Action": "ec2:GetLaunchTemplateData",
"Resource": "*"
},
{
"Effect": "Allow",
"Action": [
"cloudwatch:ListMetrics",
"cloudwatch:GetMetricStatistics",
"cloudwatch:Describe*"
],
"Resource": "*"
},
{
"Effect": "Allow",
"Action": "autoscaling:Describe*",
"Resource": "*"
}
]
}Register a Citrix XenServer account
Learn how to register a Citrix XenServer cloud account, and add the virtual machines and hypervisors that are created on Citrix XenServer to the System Tree in Trellix ePolicy Orchestrator - On-premises.
Check in the following extensions to in the order mentioned below. For more information about how-to check-in a package in , see [ Installation Guide].
MDCC
MDCC is an extension that is a part of Cloud_Workload_Security_Hybrid.zip file.
XenServerDCExtn
NOTE
You must register each Citrix XenServer individually. If your environment includes a pool of Citrix XenServers, then you must only register the master Citrix XenServer.
Log on to .
Select Menu → Configuration → Registered Cloud Accounts.
Choose Citrix XenServer as the cloud provider.
Citrix XenServer Account Details wizard appears.
Enter the account details:
Account Name: <Enter any name to identify this Citrix XenServer account.>
Server Address: <Enter the IP address of the Citrix XenServer.>
User Name: <Enter the user name that was provided while setting up the Citrix XenServer.>
Password: <Enter the password required to access Citrix XenServer.>
Port: <Enter the available port number to establish connection with the Citrix XenServer.>
Sync Interval (In Minutes): <Enter any value in minutes. The default value is 5>.
Tag: <Enter any name to identify the virtual machines from this Citrix XenServer account.>
Select Test Connection.
Select Next.
The Validate Certificate wizard appears.
Select Accept.
The Citrix XenServer Summary wizard appears.
Review the Citrix XenServer Summary details and select Finish.
The message Citrix XenServer account is added/updated successfully appears.
The Citrix XenServer account is added to the Registered Cloud Accounts page, and the virtual machines and hypervisors created on the Citrix XenServer are added to the System Tree.
Register a Microsoft Azure account
Register a Microsoft Azure account with so that can communicate with the Microsoft Azure cloud.
Ensure that these conditions are met:
You have your Microsoft Azure account and its details ready.
You have created an application in the Microsoft Azure console.
You have got the Client ID and Tenant ID from the Microsoft Azure console after creating the application.
You have configured the Client key for your application.
You have set the delegated permissions for your application.
You have assigned the newly created application to a role and to your Microsoft Azure cloud account subscription.
You have installed the Cloud Workload Security extension on .
Your system date and time are synchronized with the current date and time.
You have configured Average CPU Percentage as the metric type.
Log on to the server as an administrator.
Select Menu → Systems → Cloud Workload Security, to open the Cloud Workload Security page.
From the Accounts pane, click Add Account, to open the Registered Cloud Account pane.
From the Select Account Type drop-down list, select Microsoft Azure, then type the details.
Option | Definition |
|---|---|
Account Name | Specify a name for the cloud account in . Account names can include characters a–z, A–Z, 0–9, and [_.-], without space. |
GovCloud | Select if the account belongs to the Microsoft Azure GovCloud (US) region. |
Azure Endpoint | Specify the URL of Microsoft Azure endpoint.
|
Subscription ID | Specify the subscription ID of your account. For details, see [Where to find Subscription ID, Tenant ID, and Client ID.] |
Tenant ID | Specify the unique ID of the organization in Microsoft Active Directory. For details, see [Where to find Subscription ID, Tenant ID, and Client ID.] |
Client ID | Specify the unique ID of the application. For details, see [Where to find Subscription ID, Tenant ID, and Client ID.] |
Client Key | Specify the client key of the application. For details, see [Configure Client Key.] |
Assessment Policy | Click Assessment Policy to select the policy to be applied to your Azure account, or click
to go to the Policy Catalog page to create or select a policy. |
Trellix ePO Tags (separated by commas) | Specify tag that is applied on the VMs discovered for this cloud account. Tag name can include characters a–z, A–Z, 0–9, and [_.-], with space. For details about Tag usage, see the product documentation for . |
Sync interval (In Minutes) | Specify the interval for to the cloud synchronization (the default value is 5 minutes. The maximum value is 60 minutes). If you specify the sync interval as 5 minutes, the next sync is scheduled 5 minutes after the completion of the current sync. |
Enable Traffic Discovery | Select to discover and view traffic flow logs for instances in your Microsoft Azure accounts. |

(Optional) Windows Domain Logon Credentials: type the credentials to deploy the Trellix Agent package.
Click Test Connection to validate the account details and verify the connection to the cloud.
Click Submit to register the cloud account.
This action registers the Microsoft Azure cloud account and imports all discovered VMs, which are unmanaged, into the System Tree. The instances are imported with the structure and hierarchy of the Azure cloud.
NOTE
The VMs that are already added and managed by are retained with the existing policy settings.
View the imported VMs:
Select Menu → Systems → System Tree in . After the discovery, you can find your account under the group Azure. The VMs from each Microsoft Azure account are logically grouped under different geographical zones in .
Register a Microsoft Hyper-V cloud account
Register a Microsoft Hyper-V cloud account to manage the hypervisors and virtual machines hosted in your Microsoft Hyper-V private cloud.
Check in the following extensions to in the order mentioned below. For more information about how to check in a package in , see [ Installation Guide ].
(MDCC)
MDCC is an extension that is a part of Cloud_Workload_Security_Hybrid.zip file
Hyper-V Connector
Install System Center Virtual Machine Manager (SCVMM) console on your server and then restart the service. For more information about installation of SCVMM console, see System Center Virtual Machine Manager Documentation.
NOTE
If your Hyper-V server is not associated with the same domain as SCVMM server, it fails to fetch the CPU utilization of the hypervisors associated with the new domain. The new domain needs to be registered in . For more information about registering a domain in , see the next topic Configuring LDAP server.
Log on to .
Select Menu → Configuration → Registered Cloud Accounts.
Select Actions → Add Cloud Account.
The Add Cloud Account dialog box appears.
Choose Microsoft Hyper-V as the cloud provider.
SCVMM Account Details wizard appears.
Enter the account details.
Account Name: <Enter any name to identify this SCVMM account.>
Domain Name: <Enter the domain name of your private cloud.>
Server Address: <Enter the IP address of the SCVMM server.>
SCVMM User Name: <Enter the user name that was provided while setting up the SCVMM server.>
SCVMM Password: <Enter the password required to access SCVMM server.>
Sync Interval (In Minutes): <Enter any value. The default is 5 minutes.>
Tag: <Enter any name to identify the virtual machines from this SCVMM account.>
Select Test Connection.
Select Save.
The SCVMM account is added/updated successfully.
The SCVMM server is added to the Registered Cloud Accounts page, and the virtual machines and hypervisors available on the SCVMM server are added to the System Tree.
Configuring LDAP server
You can register an LDAP server with a new domain name in .
Log on to .
Select Menu → Configuration → Registered Servers.
Select LDAP server as Server type.
Enter any name in Name.
Add Notes (optional).
Select Next.
Choose Active Directory as the LDAP server type.
From Server name, select Domain name and enter the new domain name.
Enter the credentials: User name, Password and Confirm password.
Select Save.
The new domain is now registered with the server to fetch the CPU usage details during an on-demand scan.
Registering a VMware vSphere account
You must register a VMware vSphere account with so that communicates with VMware vCenter, which manages the ESXi servers.
Register a VMware vSphere account with from one of these locations.
Registered Cloud Accounts tab
Accounts pane under the tab Cloud Workload Security
NOTE
The configured user must have read access to VMware vCenter Server to use Trellix ENS for Servers.
Register a VMware vCenter account from the Registered Cloud Accounts page
To use Trellix ENS for Servers to manage the virtual machines in your data center, first add your VMware vCenter to the server.
Make sure that:
The VMware vCenter server that manages your ESXi servers is configured to host the guest VMs.
The Trellix CWS extension is installed on the server.
Log on to as an administrator.
Select Menu → Configuration → Registered Cloud Accounts, then click Add Cloud Account to open the Add Cloud Account dialog box.
From the Choose Cloud Provider drop-down list, select VMware vSphere, then click OK.
On the vCenter Account Details page, configure these options.
Account Name — A name for the VMware vCenter account in . Account names can include characters a–z, A–Z, 0–9, and [_.-], without space.
Server Address — (Required) IP address or the host name of the available VMware vCenter.
vCenter Username — (Required) User name of the available VMware vCenter account.
vCenter Password — (Required) Password of the available VMware vCenter account.
Sync Interval (In Minutes) — Specify the interval for running the next vCenter discovery (default value is 5 minutes).
Port — The port number required to establish the connection with the available VMware vCenter.
Tag — A way to identify the VMs. Tag names can include characters a–z, A–Z, 0–9, and [_.-], with space.
Click Test Connection to validate VMware vCenter account details and verify the connection to VMware vCenter, then click Next to open the Validate Certificate page.
Click Accept to validate the certificate, then click Finish.
When prompted to confirm, click OK to register the vCenter account.
This action registers the VMware vCenter and imports all discovered virtual machines, which are unmanaged, into the System Tree. The instances are imported with the same organization as the VMware vCenter.
NOTE
The virtual machines which are added and managed by are retained with the existing policy settings, but the virtualization properties for these systems are added.
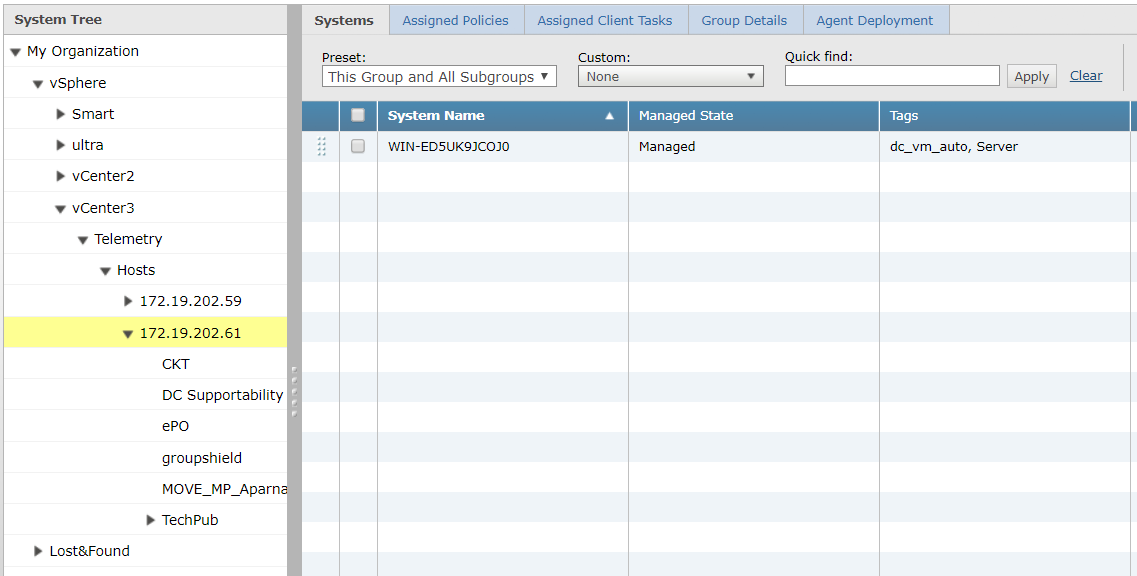
To verify that the VMs were imported, select Menu → Systems → System Tree.
After the discovery, you can find your vCenter account under the group vSphere. The clusters and hosts from vCenter are logically grouped under each data center group in the System Tree.
Register a VMware vSphere account from the Accounts pane
Register a VMware vSphere account with so that it communicates with VMware vCenter, which manages the ESXi servers.
Make sure that:
The VMware vCenter server that manages the ESXi servers is configured to host the guest VMs.
The Trellix CWS extension is installed on .
Log on to as an administrator.
Select Menu → Systems → Cloud Workload Security, to open the Cloud Workload Security page.
From the Accounts pane, click Add Account, to open the Registered Cloud Account pane.
From the Select Account Type drop-down list, select VMware vSphere.
On the vCenter Account Details page, type these details.
Option | Definition |
|---|---|
Account Name | A name for the vCenter account in . Account names can include characters a–z, A–Z, 0–9, and [._-], without space. |
Server Address | Specify the URL of VMware vSphere endpoint. |
vCenter User-name | Type the vCenter user name to log on to vSphere. |
vCenter Password | Type the vCenter password to log on to vSphere. |
Assessment Policy | Click Assessment Policy to select the policy to be applied to your vCenter account, or click
to go to Policy Catalog page to create or select a policy. |
Trellix ePO Tags (separated by commas) | List of tags that are applied on VMs discovered for this vCenter account. Tag name can include characters a–z, A–Z, 0–9, and [._-], with space. For details about Tag usage, see product documentation. |
Port | Specify the port name. |
Sync Interval (In Minutes) | Specify the interval for to vCenter synchronization (the default value is 5 minutes. The maximum value is 60 minutes). If you specify the sync interval as 5 minutes, the next sync is scheduled 5 minutes after the completion of the current sync. |
(Optional) Win-dows Domain Log-on Credentials | Enter the credentials to deploy the Trellix Agent to the registered VMs. |

IMPORTANT
Make sure that the server and the VMs in the vSphere cloud can communicate with each other.
Click Test Connection to validate VMware vCenter account details and verify the connection to VMware vCenter, then click Next to open the vCenter Summary page.
The summary page includes vCenter, vCNS, and NSX summary.
Click Submit to register the cloud account.
This action registers the VMware vCenter account and imports all discovered virtual machines, which are unmanaged, into the System Tree. The instances are imported with the similar structure and hierarchy present in VMware vCenter.
To verify that the VMs were imported, select Menu → Systems → System Tree.
After the discovery, you can find your vCenter account under the group vSphere. The clusters and hosts from vCenter are logically grouped under each data center group in the System Tree.
NOTE
The virtual systems that are already added and managed by are retained with the existing policy settings, but the virtualization properties for these machines are added.
Create an on-demand scan client task
Create an on-demand scan client task, so that you can add it to the Smart Scheduler task list.
Make sure that:
The Trellix Agent and Endpoint Security Threat Prevention extensions are installed on the server.
The Trellix Agent and Endpoint Security Threat Prevention are installed on the target virtual systems.
Follow the steps below to create a custom on-demand scan client task.
NOTE
To configure smart scheduling for Policy Based On-Demand Scan (On-Demand Scan — Full Scan or On-Demand Scan — Quick Scan), you do not need to create a task. You can directly configure the Smart Scheduler settings and assign the default policy-based on-demand scan task to your VMs.
Log on to as an administrator.
Select Menu → Policy → Client Task Catalog.
Select Custom On-demand Scan in the Client Task Types menu, then click New Task.
Select Custom On-demand Scan from the list, then click OK to open the Client Task Builder wizard.
Type a name for the task you are creating, and add any descriptive information in the Description field.
Configure the Custom On-demand Scan options, as needed.
Review the task settings, then click Save.
The task is added to the list of client tasks for the selected client task type.
You can now configure the Smart Scheduler settings for the task you created.
Remove the software
Remove the Trellix ENS for Servers extensions
You can remove the extensions from to uninstall Trellix ENS for Servers.
Log on to as an administrator.
Select Menu → Software → Extensions.
From the Extensions tab under Trellix group, select Smart Scheduler.
Next to Smart Scheduler extension, click Remove.
From the Extensions tab under Trellix group, select Data Center Security.
Click Remove next to each extension in this order:
Cloud connector (vSphere, Hyper-V, Citrix Xen, AWS, and Azure Connector)
MDCC