To create a custom role in your Trellix IAM organization, use the Role Definitions view of the Roles page. You need to specify a role name that is unique in your IAM organization, and you need to select a product type. Within the selected product type, you can assign multiple entitlements to the custom role.
Note
You can use a global role as a template for determining which entitlements to grant to a custom role. For lists of the entitlements granted to each role, as well as a full list of all Helix Enterprise entitlements, see IAM entitlements.
Tip
If the organization will have a large number of custom roles, use a naming convention that enables you to filter and sort on the Name field or the Description field to quickly find a group in the main view of the Roles page.
IAM Admin access to the Trellix IAM Web UI.
To create a custom role:
Log in to the Trellix IAM Web UI.
Select Organization Settings > Roles. The Role Definitions view lists the global and custom roles defined in your IAM organization.
Click Add.
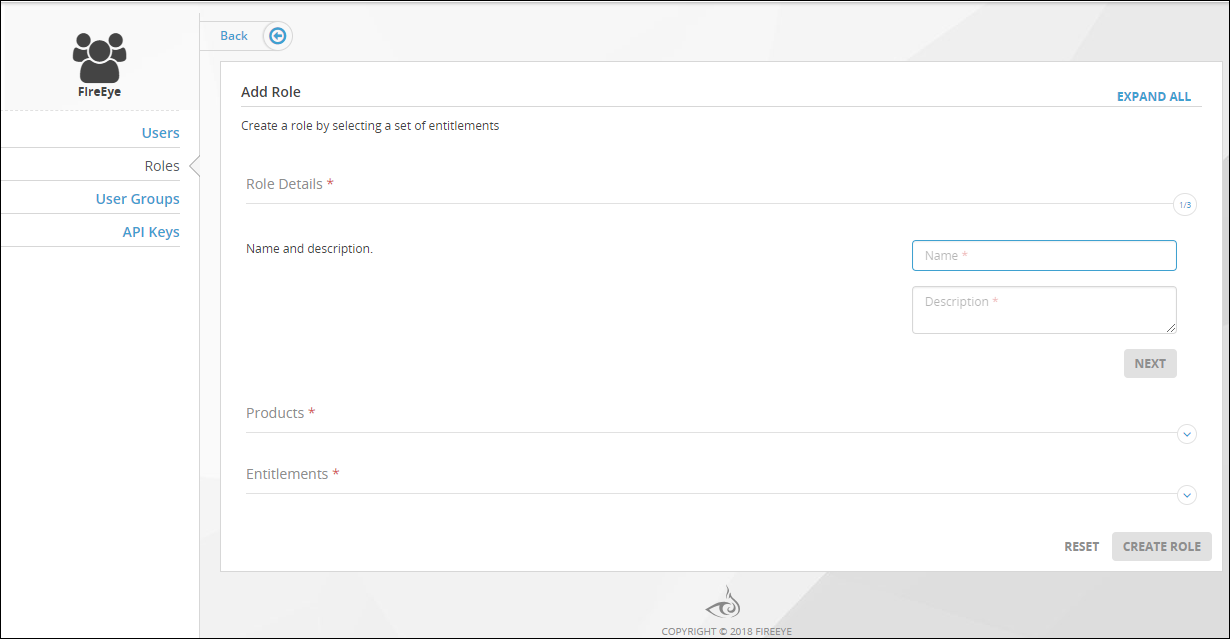
Enter a name and a description for the role and click Next.
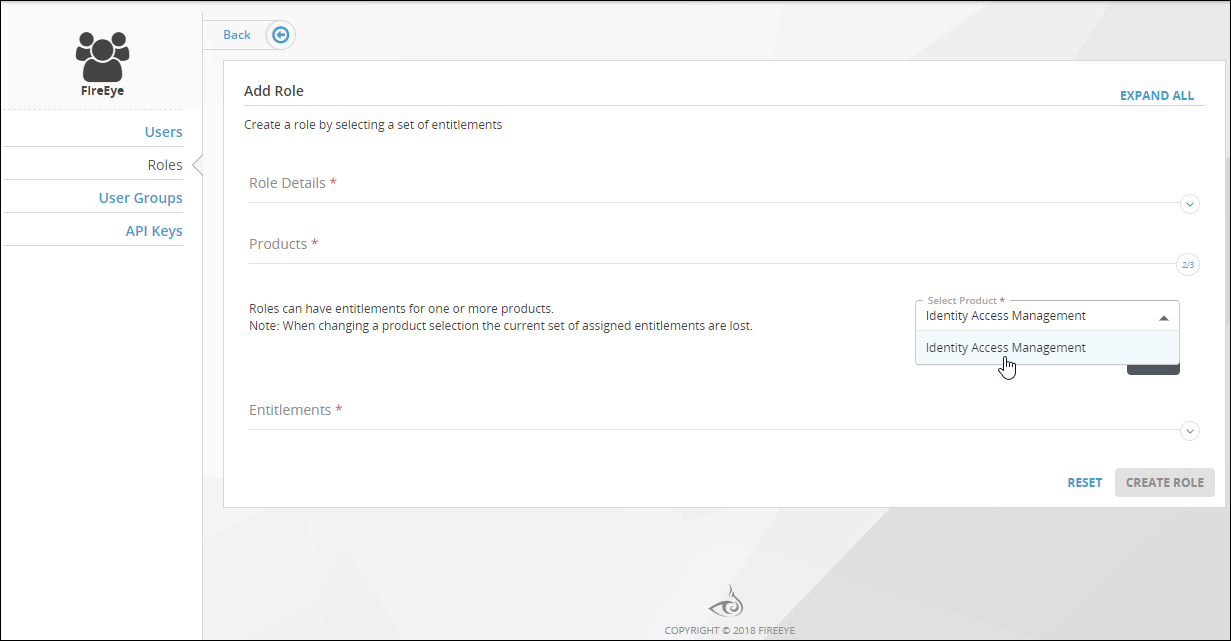
Select a product type for the role, and then click Next.
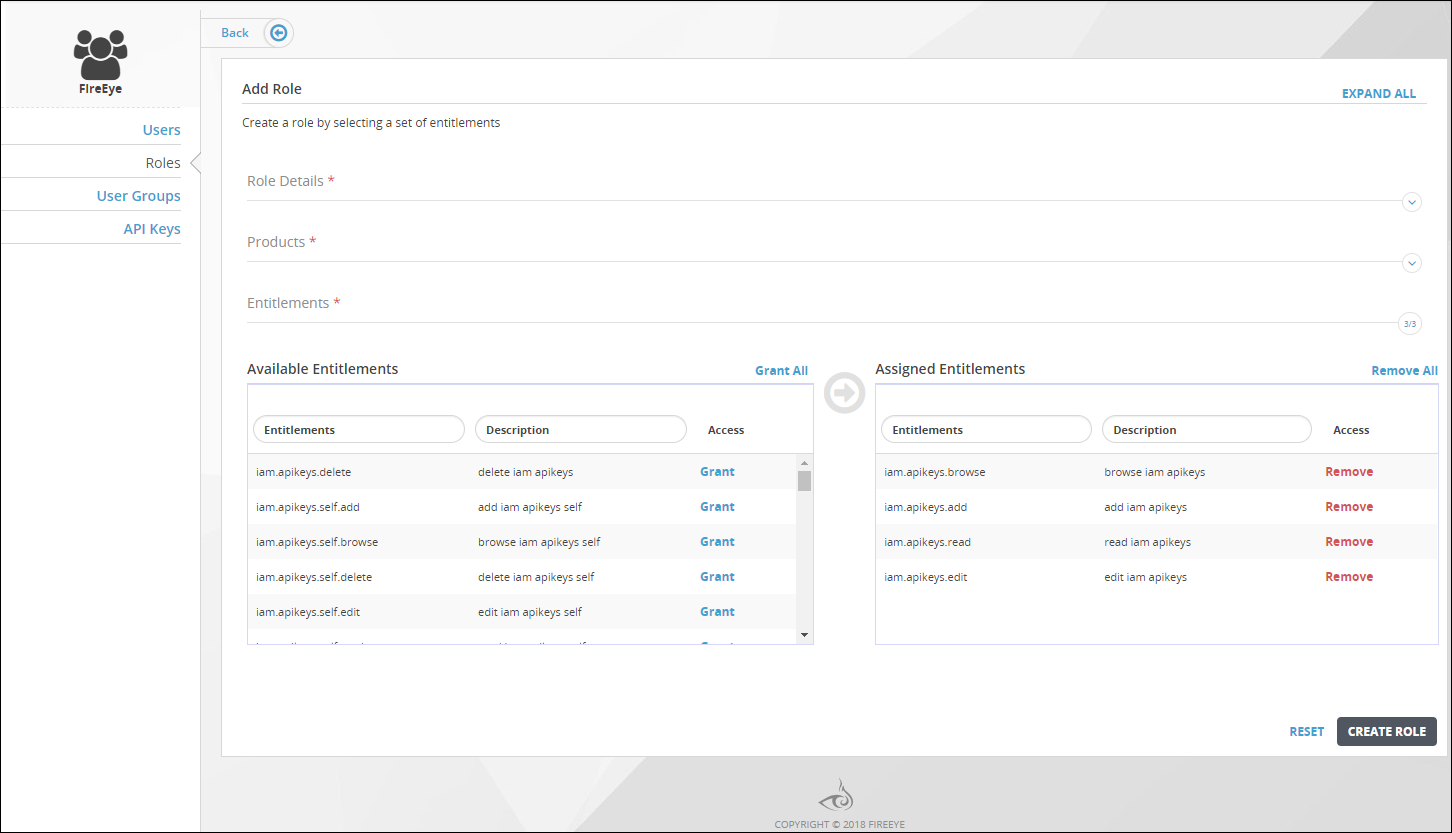
Assign entitlements to the role. Repeat the following steps for each entitlement you want to assign the custom role.
In the Available Entitlements list on the left, locate the entitlement you want to assign.
In the Access column for that entry, click Grant.
The entitlement moves from the Available Entitlements list to the Assigned Entitlements list on the right.
In the following example, browse, edit, read, and add entitlements are about to be assigned to a new custom role.
If you need to remove an entitlement from the role, do the following:
In the Assigned Entitlements list on the right, locate the entitlement you want to remove from the role.
In the Access column for that entry, click Remove.
The entitlement moves from the Assigned Entitlements list to the Available Entitlements list on the left.
After you have finished specifying entitlements, click Create Role.
Click OK.
The list in the Role Definitions view contains the name of the new custom role. The value in the Type field is Custom to This Org.