This section describes how to upload the EDR Telemetry Store OVA file and deploy it as a virtual machine in the Nutanix environment.
You must configure the EDR Telemetry Store virtual appliance using the following steps in sequential order:
Upload the EDR Telemetry Store OVA file
Upload the EDR Telemetry Store virtual appliance to Nutanix using an OVA file or a URL.
Log on to Nutanix as an administrator.
Navigate to Menu → Compute → OVAs.
Click Upload OVA, then choose an upload method and enter the required parameters:
Upload an OVA file:
Select the AHV Cluster.
Enter the name for the EDR Telemetry Store virtual appliance.
Enter the checksum string. SHA-256 is selected by default.
Under Choose OVA File, click Upload to select the file from your system.
Click Upload.
Upload from a URL:
Select the AHV Cluster.
Note
You can upload the OVA to multiple clusters using the URL.
Enter the name for the EDR Telemetry Store virtual appliance.
Enter the checksum string. SHA-256 is selected by default.
Enter the OVA URL.
Click Upload.
The uploaded OVA file is available on the List tab.
Configure the general parameters
In the List tab, select the uploaded OVA file.
Select Actions → Deploy as VM.
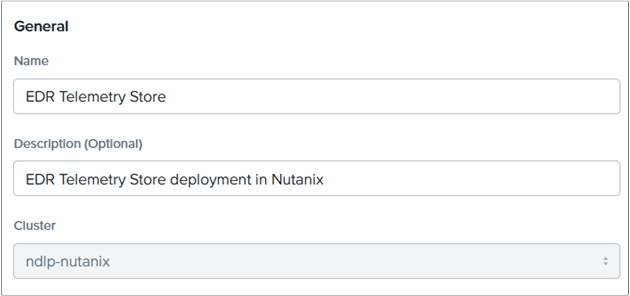
In the Configuration tab, specify these General parameters:
Name: Enter a name for the EDR Telemetry Store virtual appliance.
Description: Enter a description. This field is optional.
Cluster: Verify the automatically populated target cluster path.
Retain these default allocation settings for the VM properties:
CPUs: 4 vCPUs
Cores Per CPU: 1 Core
Memory: 7.9 GB
For more information, see EDR Telemetry Store hardware specifications and Increase or add storage on a virtual appliance.
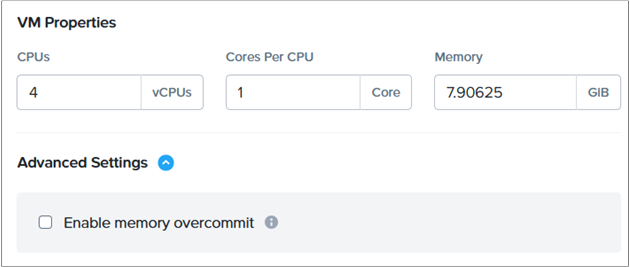
Verify that the Enable memory overcommit checkbox under Advanced Settings is cleared.
Note
Memory overcommit can increase resource utilization and reduces cluster performance. For more information, see Nutanix Memory Overcommit.
Click Next.
Configure the resources
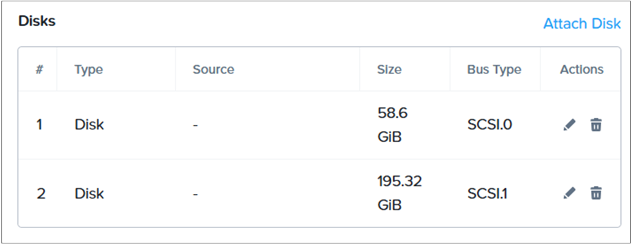
In the Resources tab, review the disk configuration. Use Attach Disk to add more storage based on your requirements.
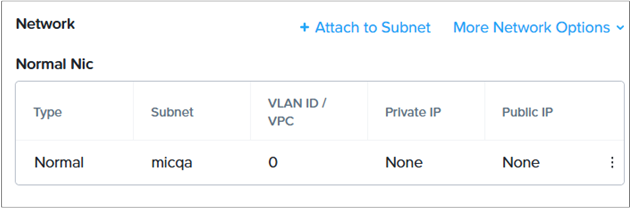
Under Network, click Attach to Subnet.
In the Attach to Subnet dialog box, configure the following parameters:
Select the required subnet.
Retain the default values for Network Connection State and Attachment Type.
Review the options for Network Offload and Attach NIC Profile.
Click Save.
Under Boot Configuration, select Legacy BIOS Mode.
Click Next.
Configure the management settings
In the Management tab, review the categories, time zone, and agent status parameters.
Select an option from the Script Type drop-down menu under the Guest customization:
Select No Customization if you do not use deployment scripts. This option is selected by default.
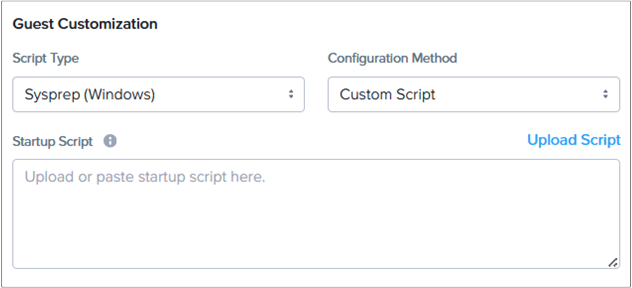
Select Sysprep for Windows or Cloud-init for Linux to apply guest OS initialization.
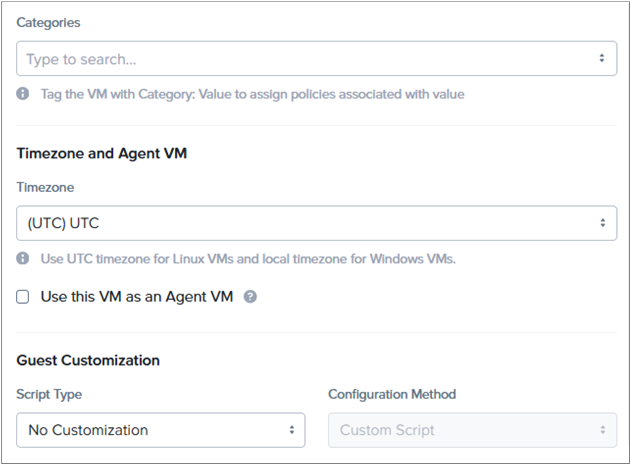
Select the customization settings in the Configuration Method field.
The available options include Custom Script and Guided Script.
Upload your script using the Startup Script field to complete the script-based customizations.
Click Next.
Review the configuration
In the Review tab, verify the configuration settings.
Select Edit to modify the parameters.
Click Create VM.
The EDR Telemetry Store virtual appliance is created in the Nutanix environment.