Access quarantine report settings by selecting Configuration > Quarantine Reports. To modify any report settings, click the name of a report on the Quarantine Report Setting page.

Creating a quarantine report
To configure a new quarantine report setting
Click Create Quarantine Report Setting.
Select an integration type: SMTP, MS365 API, or Google Workspace API.
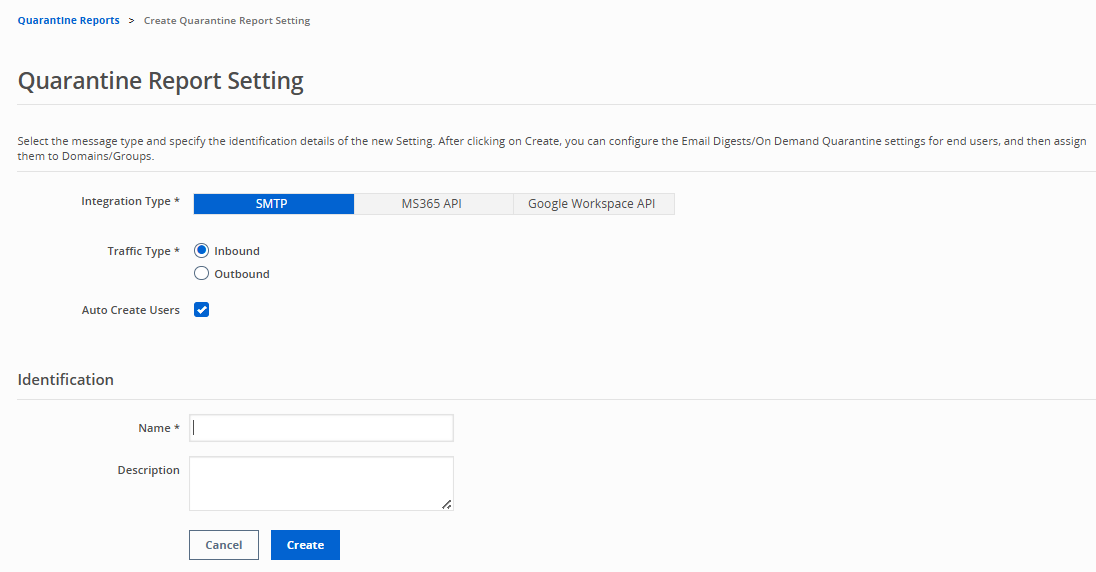
For SMTP integration, select a traffic type: Inbound or Outbound.
(Optional) Select Auto Create Users.
If auto create user is enabled addresses not found in the Users list automatically have a user created for them and receive an email digest.
If the feature is disabled, quarantine digests are sent only to users already existing in the Users list. For new users to receive email digests, they must be added to the Users list by an administrator. See View and manage non-administrative user details.
Note
When this feature is enabled after being disabled, the newly enabled users will not receive retroactive alerts. Email digests will start once a new message has been quarantined.
Under Identification, enter a Name, Description (optional) and click Create.
You will be redirected to the Quarantine Report Setting page. Refer to the section below for configurations options.
Manage quarantine report settings
Identification
Click Manage next to Identification.
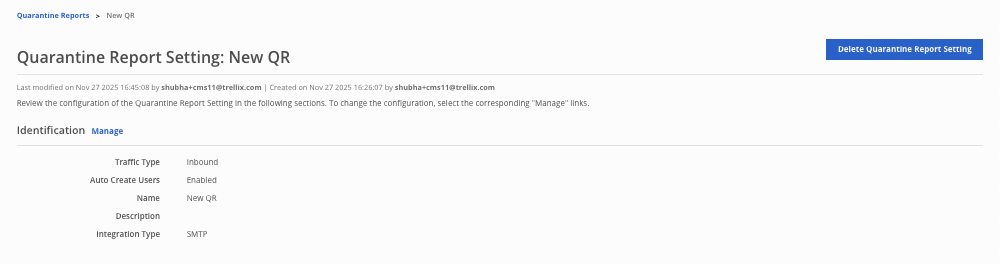
User auto creation is enabled if the box is checked.
Edit the name and optional description and click Save.
End user features
Refer to Configuring end user on-demand quarantine features for more details.
Access controls
Access controls configurations apply to Email Digest and On Demand Quarantine reports. Configure the access that end users have to messages in their Quarantine Reports. Users are able to configure the report at the domain level for the following options:
Exclude certain users from the daily report
Specify what information is included in the daily report
Note
This setting is only available to Email Security - Cloud Hygiene users.
To configure access controls:
Click Manage next to Access Controls.
For each category, select Yes or No under Reported and Releasable columns.
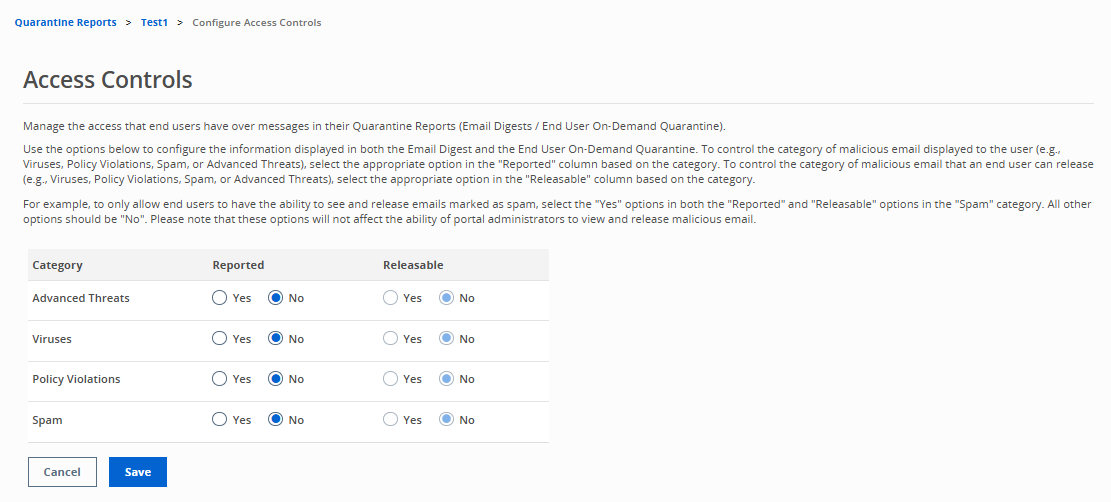
Click Save.
Email notification
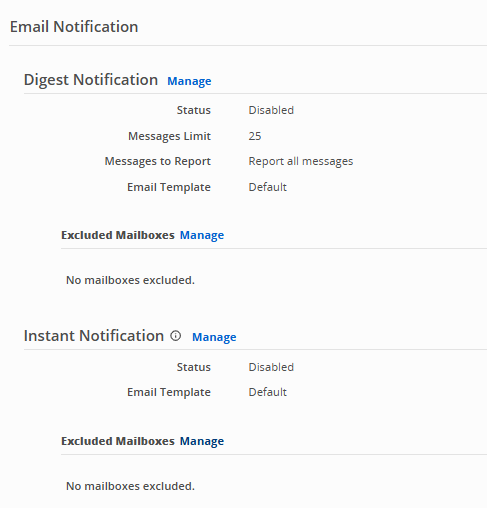
Manage the daily email quarantine digest as well as instant notifications sent to end users. You can also add or delete excluded mailboxes.
Manage digest notification
Select a quarantine report.
Select Email Notification > Digest Notification > Manage.
Select the desired options:
Enable email digest: Check or uncheck the box.
Digest delivery times: Add or delete delivery times. You can add a maximum of 6 digest delivery times.
Number of messages per digest: 10, 25, 50, or 100.
Messages to report: All, or those received since the last digest.
Email template: Select a custom template or the default template from the drop-down menu.
Click Save.
Manage instant notification
Use this setting to control notification behavior for specific email events.
Click Manage.
Enable/disable Instant Notification for the following events:
DLP-violated emails in outbound mode and encrypted attachment notifications in inbound mode.
Select the appropriate Notification template from the drop-down menu.
Save the settings.
Note
In inbound mode, you can enable/disable and select instant notification templates for quarantined emails with encrypted attachments.
In outbound mode, you can enable/disable and select instant notification templates for quarantined emails with DLP violations.