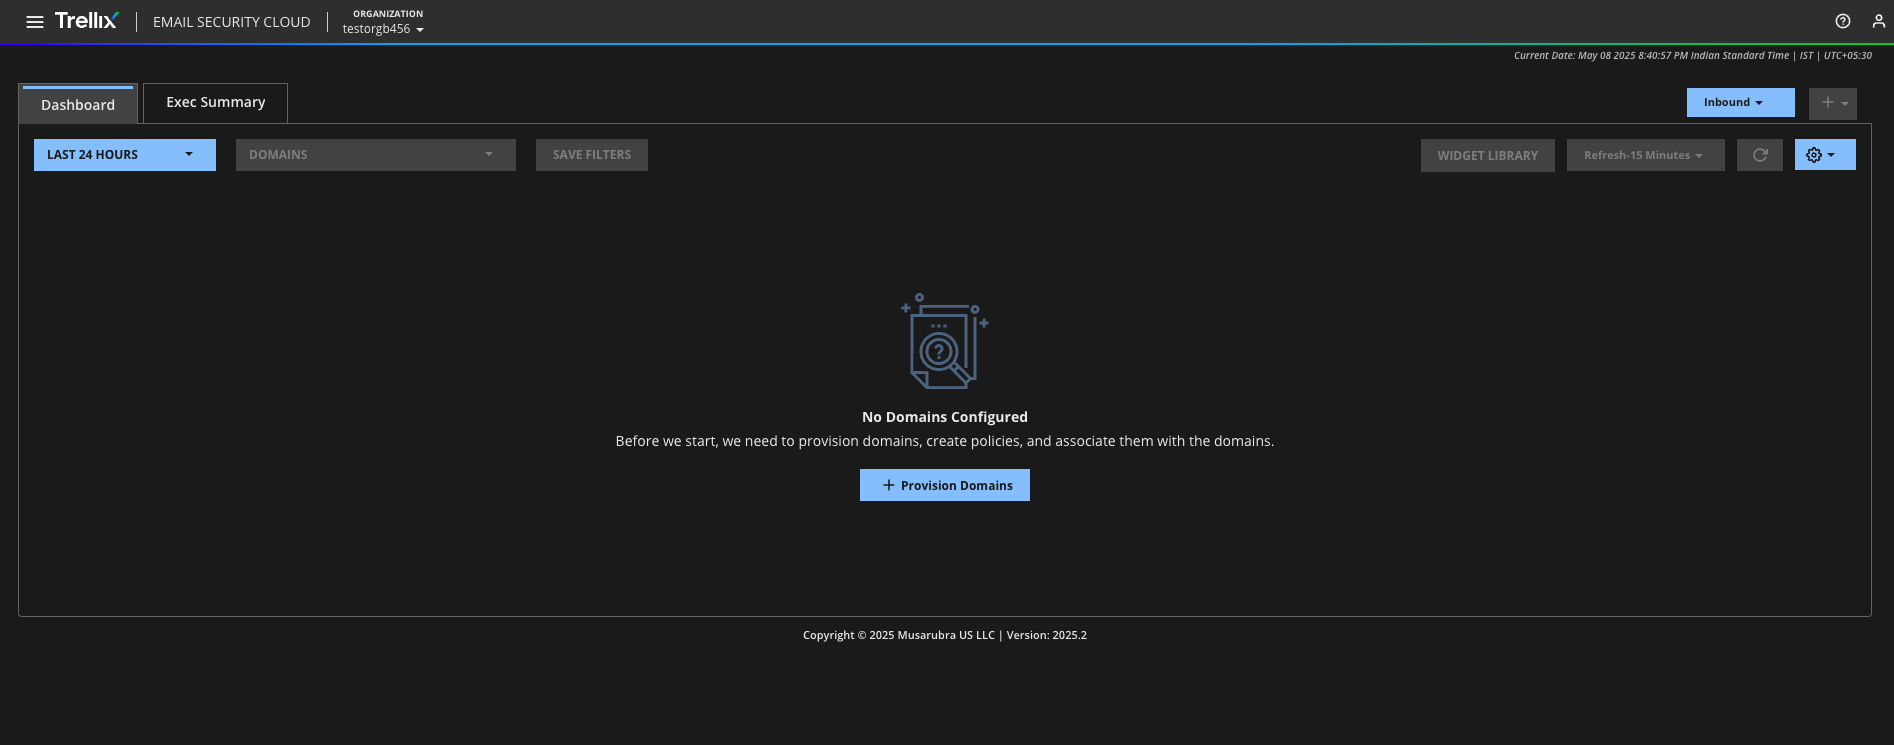
The domain provisioning workflow guides you to provision domains, create policies and associate the policies with the newly provisioned domains. If you are using the Email Security - Cloud for the first time, you will be prompted to use the domain provisioning wizard to provision a new domain.
You can also access the workflow from the Provision Domains page.
Only the Beta version of this feature is available.
Follow the steps below to use the domain provisioning wizard:
Click Provision Domains on the Dashboard page.
Section 1: Integration with a mail platform
In first section, you need to select how to protect your mailbox and the platform with which you would like to integrate your Email Security - Cloud.
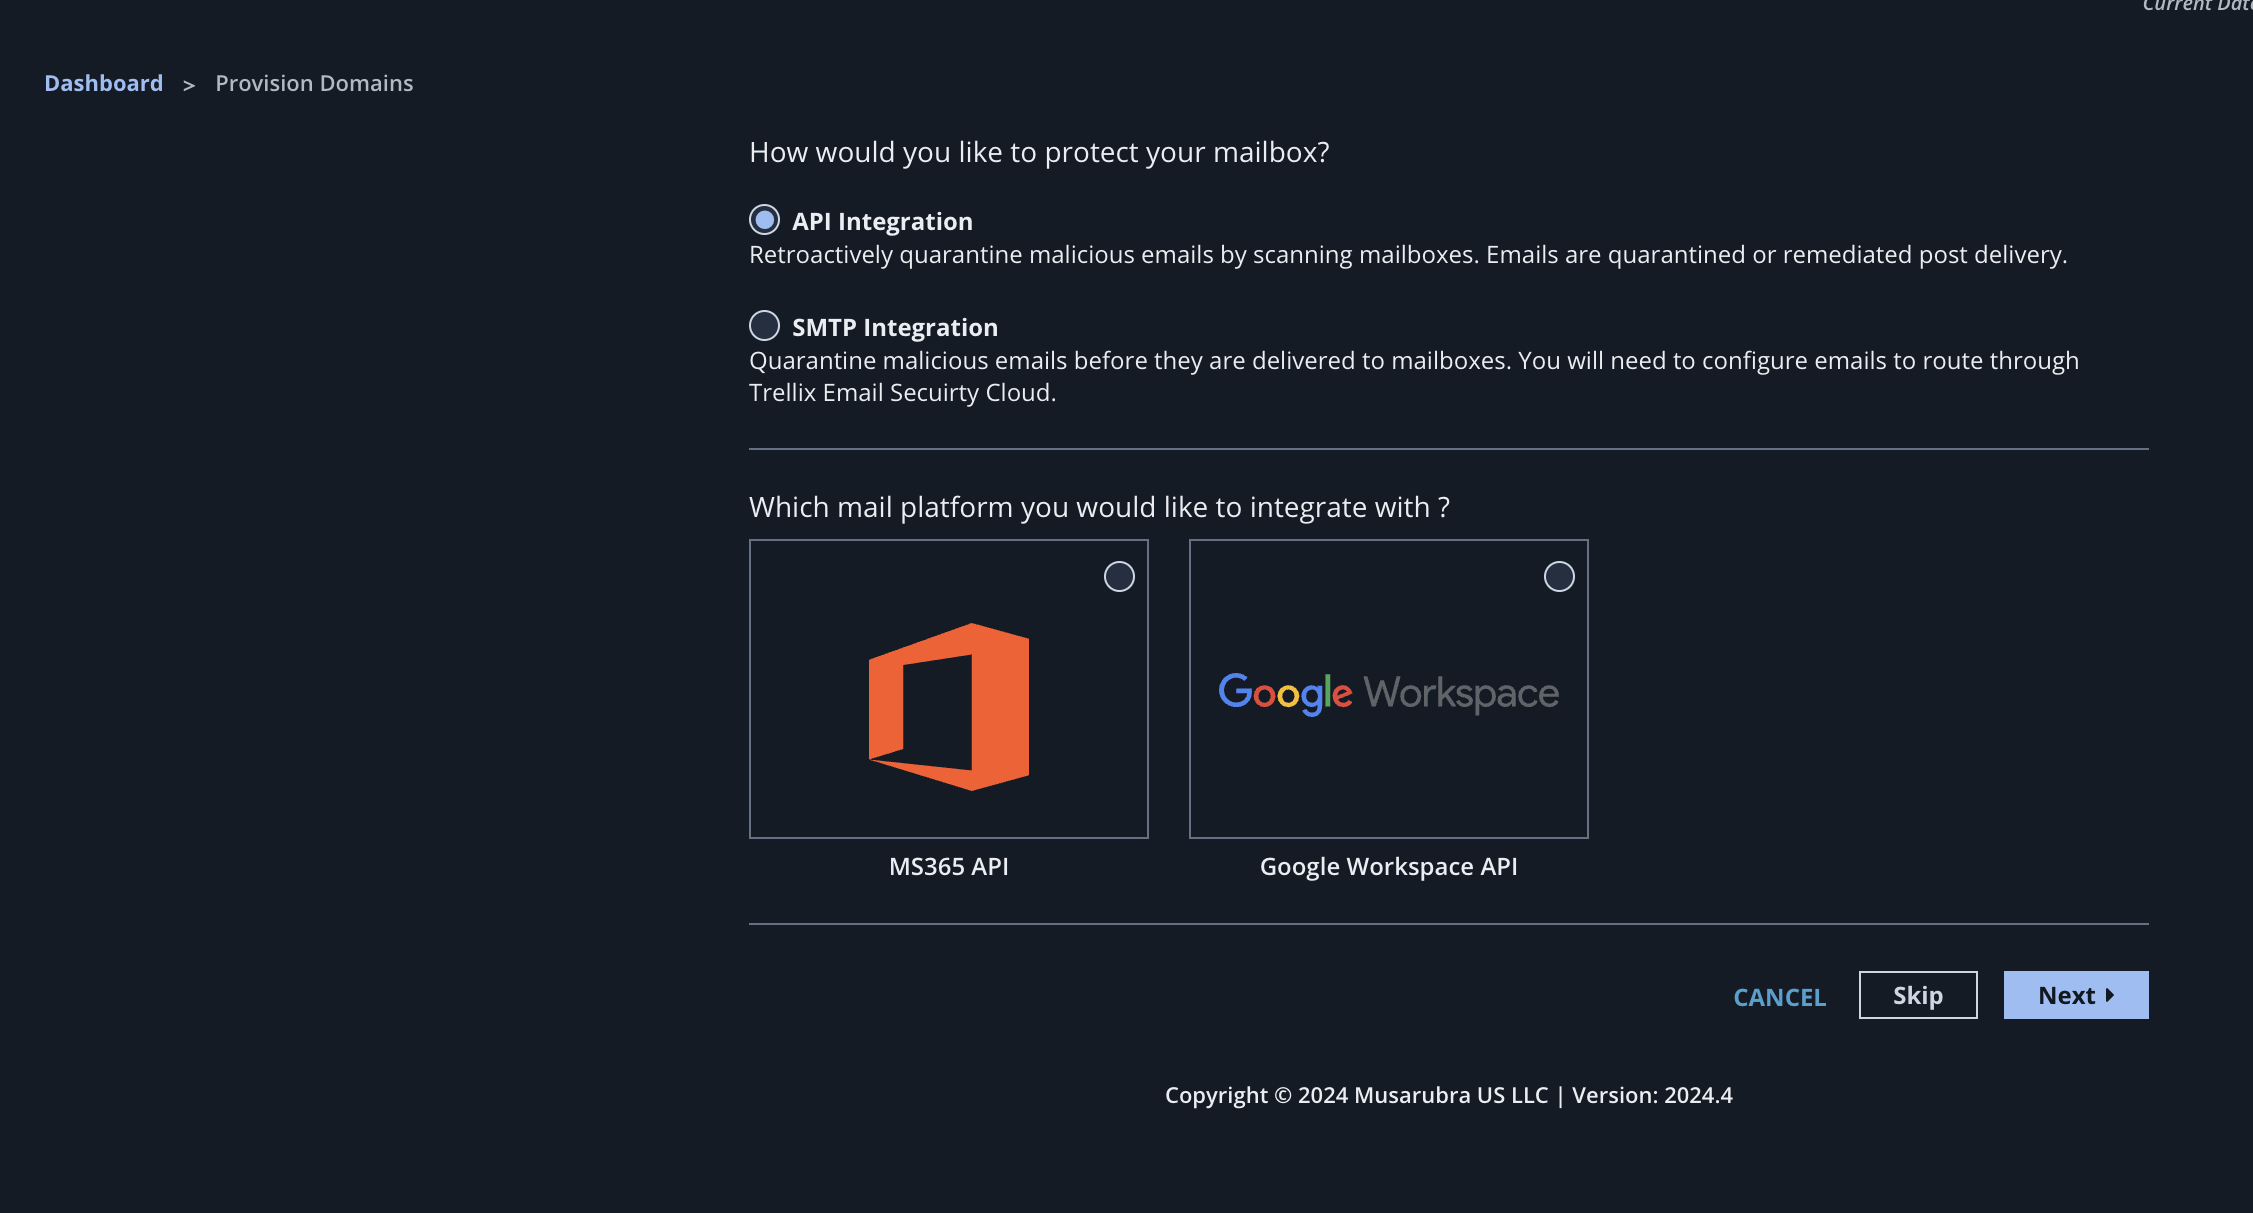
API Integration is selected by default. For API integration, the platform options are MS365 API and Google workspace API.
For selecting SMTP as the platform, select SMTP Integration and click Next.
You can also click Skip to go to section 2. You can directly select and configure the platform in Section 2.
For more details on mail platform integration, see Provisioning domains.
Section 2: Domain Provisioning Setup
Section 2A: Workflow Configuration
If you selected SMTP Integration in section 1, SMTP is selected as the default integration path.
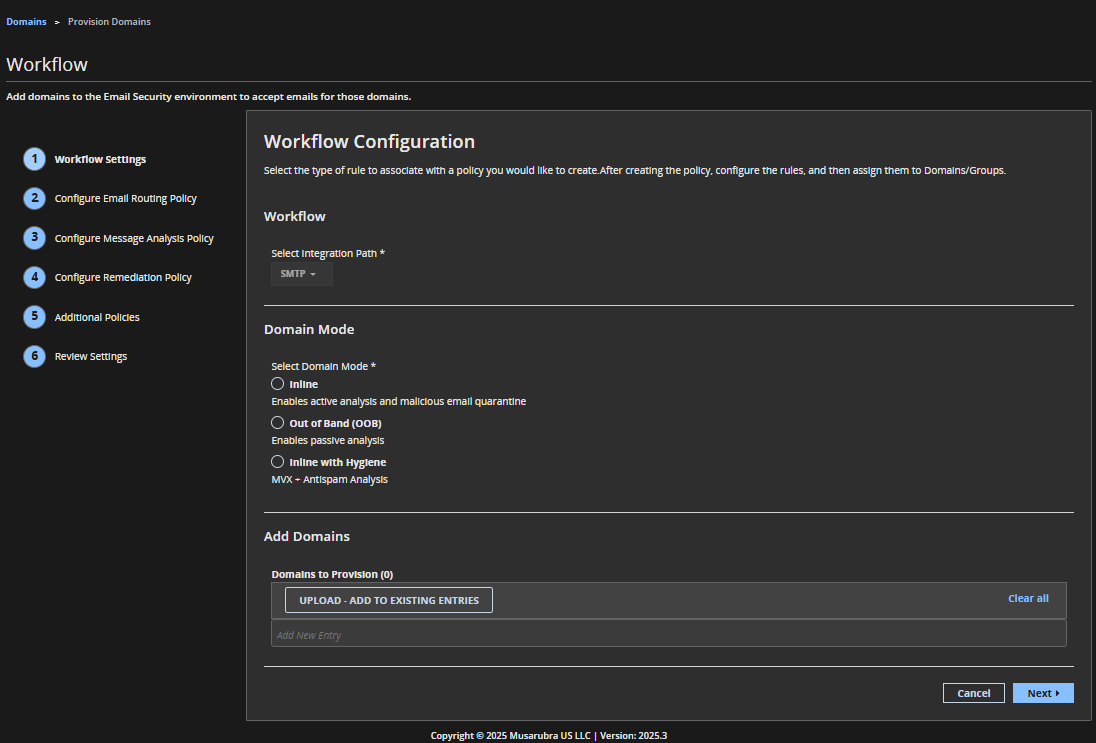
If you skipped section 1, select the default integration path from the drop-down menu.
Select the domain mode. The Inline with Hygiene mode is available if hygiene license is already enabled.
Type in the domains or upload a CSV file containing the domains. Click Next.
Section 2B: Configure Email Routing Policy
Note
This section is only applicable for SMTP mode.
Create a new policy or select from the list of existing policies.
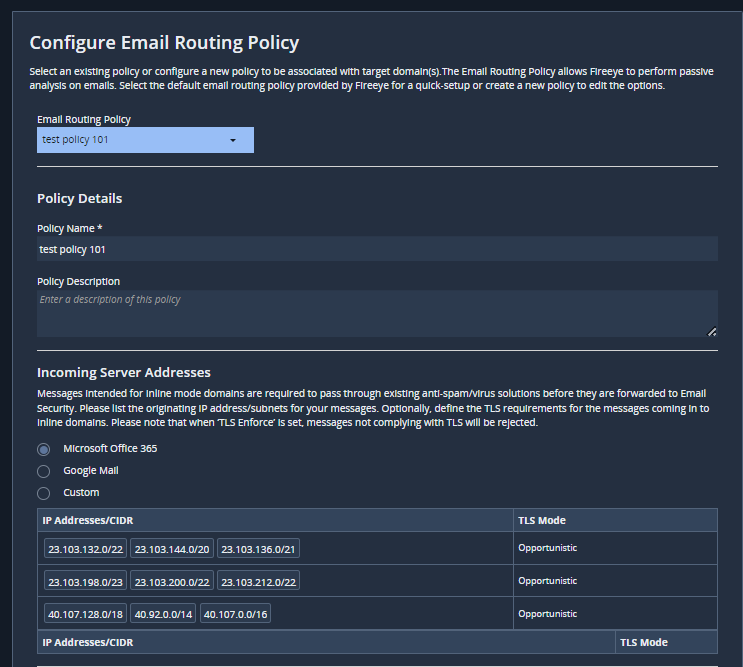
If you select an existing policy, the policy details will appear on the page. The details are not editable.
If you create a new policy, enter the policy name and description.
Select the sending server's platform. This will be the subnets from which the Email Security - Cloud will receive emails from. Also, follow the instructions specified in this section for IP addresses.
For inline with hygiene mode, the custom option is pre-selected with the sender address already populated.
Specify the outgoing server addresses. For Google Mail, the default types and records will appear automatically. For custom, you need to select the the types and records.
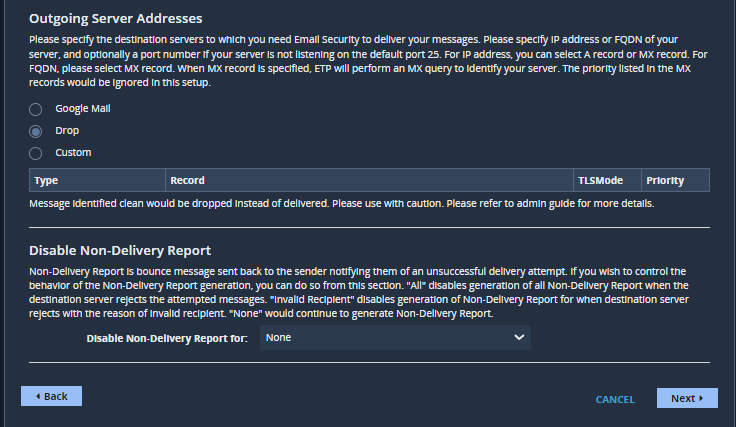
If required, add the journaling server addresses.
Configure a non-delivery report, if required.
Click Next. You can also click Back to go back to modify settings in section 2A.
To know more, see Email routing configuration policies.
Section 2C: Create Message Analysis Policy
Create a new policy or select from the list of existing policies.
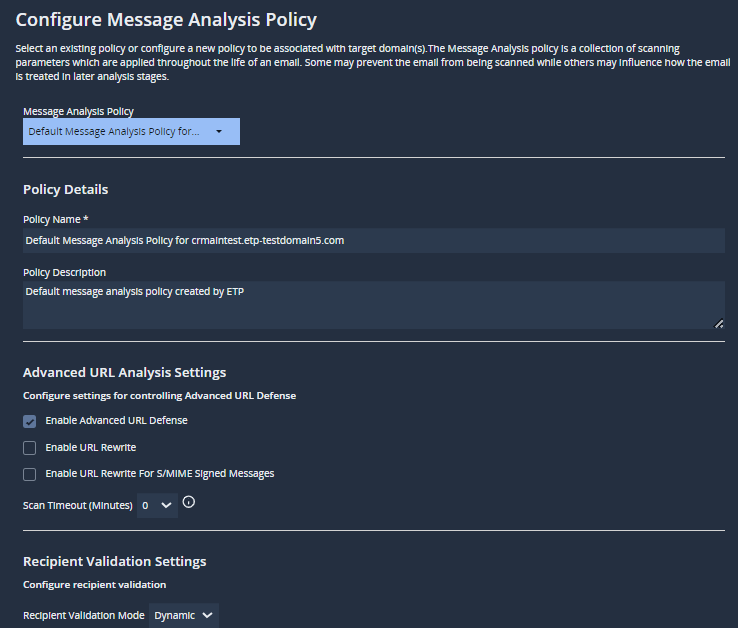
If you select an existing policy, the policy details will appear on the page. The details are not editable.
If you create a new policy, enter the policy name and description.
Configure the Advance URL Analysis settings, Recipient Validation settings, Sender Verification settings, Message size, Hygiene Settings (only for Inline with Hygiene mode) and Rate Limit settings as per your requirement.
The default settings are selected based on the domain mode selected in section 2A.
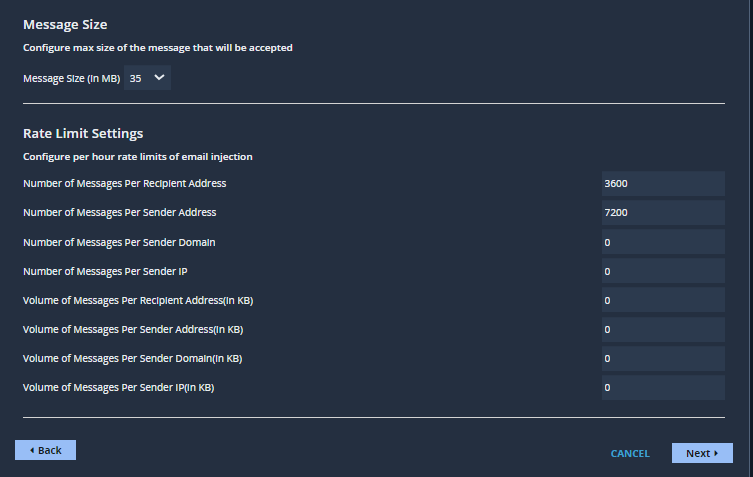
Click Next. You can also click Back to go back to modify settings in section 2B.
To know more, see Message analysis policies.
Section 2D: Configure Remediation Policy (optional for SMTP mode only)
Configuring a remediation policy is optional. You can click Skip at the end of the section to skip this option.
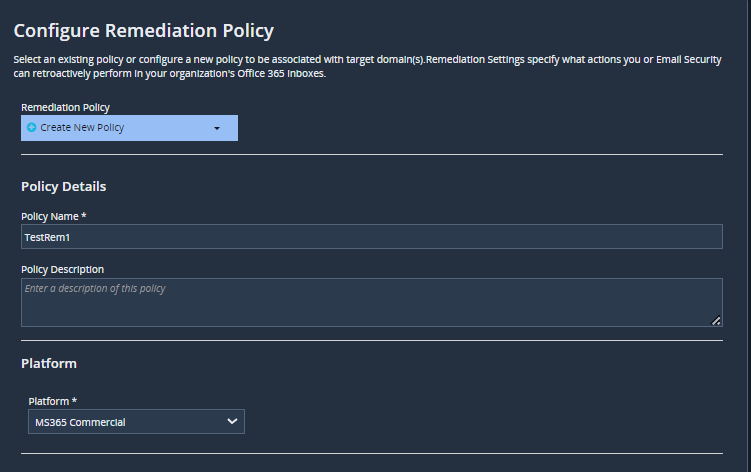
Create a new policy or select from the list of existing policies.
If you select an existing policy, the policy details will appear on the page. The details are not editable.
If you create a new policy, enter the policy name and description.
Configure the Platform, Authorization, Policy Mode and Advanced Threat Action.
For authorization details, see Creating and registering an app.
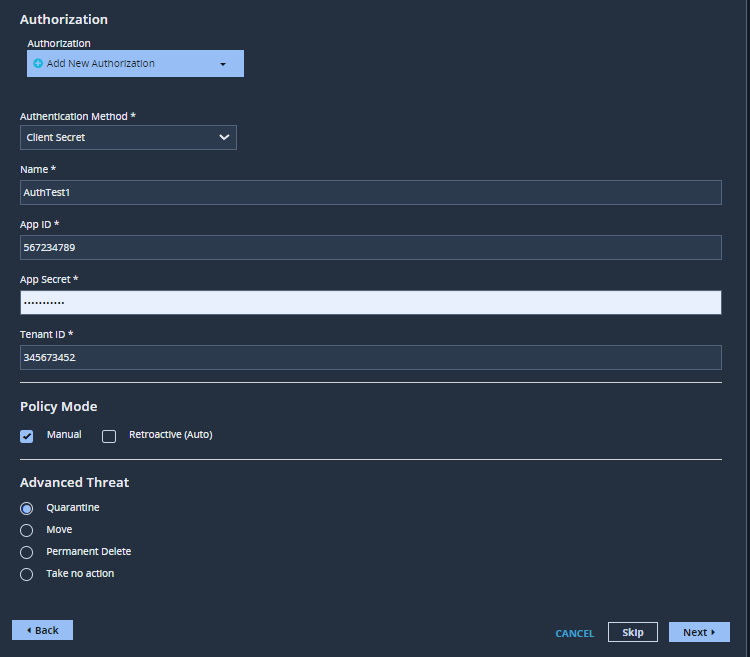
Click Next. You can also click Back to go back to modify settings in section 2C.
To know more, see Managing remediation policies.
Section 2E: Additional Policies (optional)
You can select additional policies to associate with the domains from the following six sets of rules: custom rules, YARA rules, connect rules, advanced threat engine configuration, quarantine report and riskware policy.
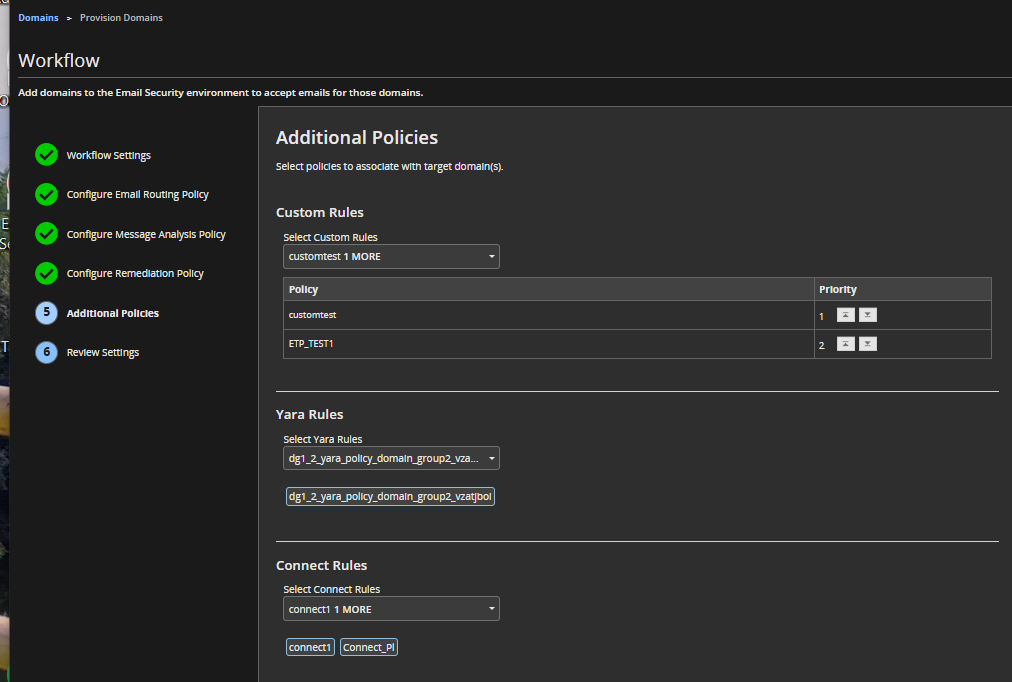
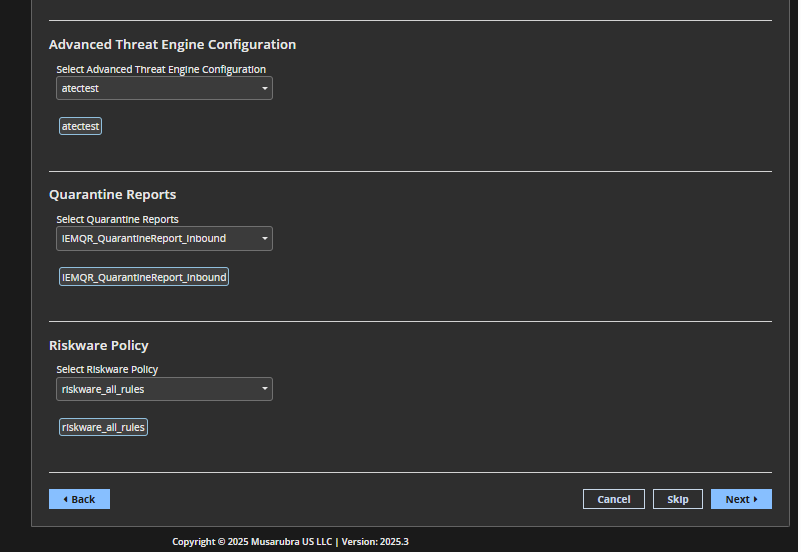
You can select multiple rules under custom rules, YARA rules, and connect rules. However you can select only one rule each for advanced threat engine configuration, quarantine report and riskware policy.
To delete a selected policy, go back to drop-down menu and click the Check mark against the selected policy.
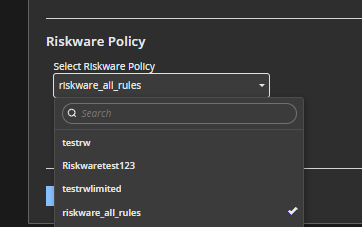
You can also skip this step. You can go to the next page without selecting any rules.
Section 2F: Review Settings
Review the settings and configurations that you selected. You can click Edit to go back and modify the settings in a section.
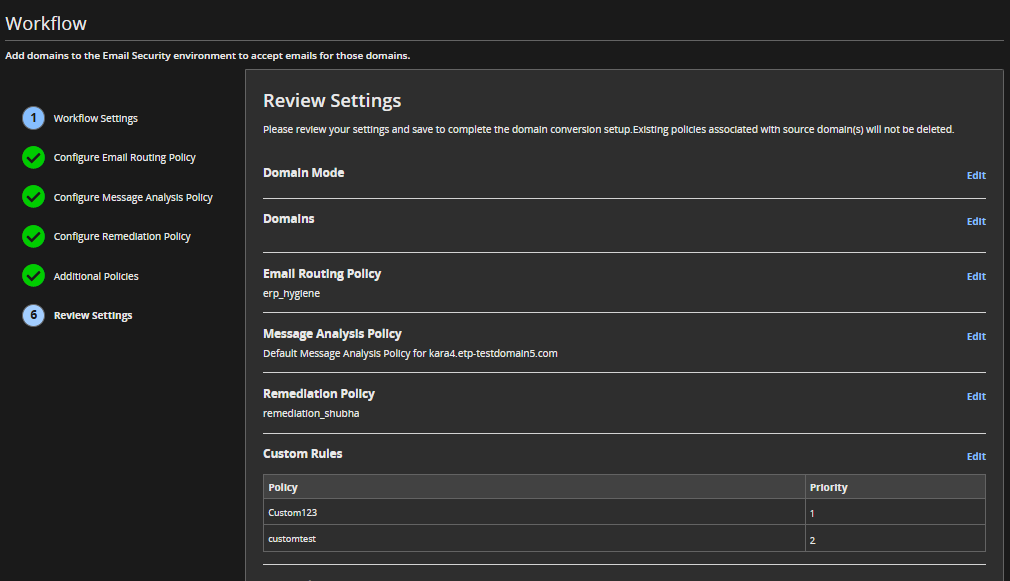
Click Submit to save your settings.
A confirmation dialog box will appear. Click Proceed to save your settings.