A message analysis policy is a collection of scanning parameters that are applied throughout the life of a message. Some parameters prevent the message from being accepted. Others may influence how the message is treated in the later stage of its analysis.
To associate a message analysis policy with a domain:
On the Domains page, click the name of a domain.
Click the Manage link next to Message Analysis Policy.
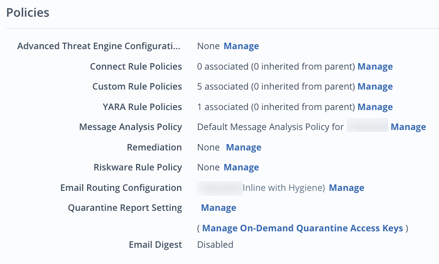
The subsequent screen displays the message analysis policy, if any, associated with this domain or inherited from the domain group.
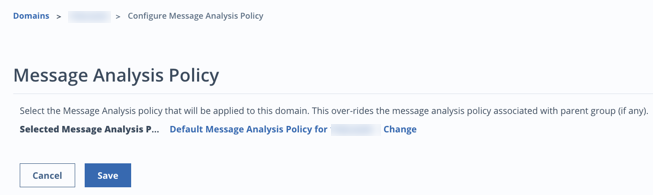
Click the Manage link to specify a policy, or Change if a policy is already associated with the domain. Only one message analysis policy can be associated with a domain.
Select a policy, or None.
Click OK.
Click Save.
To configure a message analysis policy:
On the Policiespage, click the name of a message analysis policy. You will be redirected to the policy details page.
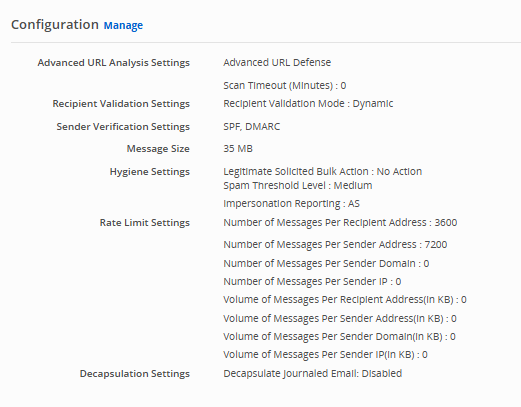
In the Configuration section, you can view the current settings. Click Manage to modify the settings. All settings are optional.
Note
Only Advanced URL Analysis settings and hygiene Settings are configurable for MS365 API and Google Workspace API.
Click Save. Allow up to 5 minutes for modifications to take effect.
You can configure the following settings from the Message Analysis configuration page:
Advanced URL Analysis settings
Advanced URL defense (Applicable for both inbound and outbound mode)
URL rewrite
Customizing block and warning pages for Advanced URL defense
Customer-hosted pages
Scan timeout
Configure Advanced URL Analysis settings
Message size (Applicable for both inbound and outbound mode)
Newsletter, mail magazine, and marketing email detection
Anti-spam/anti-virus scanning settings
Impersonation reporting
Spam threshold level
DKIM signing (Applicable for outbound mode only)
Configure hygiene settings
Rate limit settings (Applicable for both inbound and outbound mode)
Advanced URL analysis settings
Advanced URL defense
The advanced URL defense feature lets you identify suspicious URLs that are embedded in an email message. This feature prevents access to these URLs so that your system will not be infected by malware.
When the Email Security — Cloud platform identifies a suspicious URL within an email message body, it seeks additional intelligence from the Dynamic Threat Intelligence (DTI) Cloud for a complete analysis.
The advanced URL detection engine also uses a sandbox environment to open malicious URLs and capture the screen they open. You can view and download screenshots of URLs from the Message Details page of an alert. Screenshots captured by the advanced URL detection engine do not contain any live malware. Email Security — Cloud stores screenshots for 30 days after the alert is generated. After 30 days, the screenshot is no longer available.
URL rewrite
Email Security — Cloud
If the URL is detected as malicious, you are redirected to a page indicating that the URL is blocked and that the site contains malicious content.
If the URL is detected as suspicious, you are redirected to a page informing you that the site might contain malicious content.
If the URL is detected as non-malicious, you can access the original URL in the email message.
Email can contain one or more suspicious URLs. The URLs that match a set of heuristic rules are sent back to the DTI Cloud for further analysis. The Email Security — Cloud platform prepends protect2.fireeye.com to the rewritten URL, as in the following example:
https://protect2.fireeye.com/v1/url?k=df35d163-2d4a-45fb-8df2-62d3517eae72&u=http://protection-update.team.com1serv13.webs001cr-cm-l0gin-submit-id.app1-lo0gin-submit-id.pp1-login-login-2014.ap.serv64.idmsa-protection.com
When URL Rewrite and Advanced URL Defense are both enabled, URLs in the email with unknown verdicts are rewritten, regardless of whether or not they are in the process of being analyzed by the Trellix advanced URL detection engine.
Warning
If you do not enable rewriting URLs, emails containing a URL will be delivered to you with the links intact. If a verdict is returned later from the advanced URL detection engine that the email is malicious, your system will not be protected if you click on the link.
Note
If URL rewrite is enabled, you can enable or disable URL rewrite separately for S/MIME signed messages.
Note
URL rewrite is not available for MS365 API or Google Workspace API.
Customizing block and warning pages for Advanced URL defense
Before customizing block and warning pages for Advanced URL Defense, make sure that the following tasks have been completed:
A template has been created.
You have contacted your Trellix technical support representative.
Advanced URL Defense has been enabled.
As an organization administrator, you can customize the block and warning pages by using Trellix-hosted pages or your own hosted pages for advanced URL defense. The block and warning pages can be adapted to the needs of your organization. The custom block and warning pages allow you to define the content in the message and the attributes of the pages, such as a logo and a help desk number.
Note
The custom block and warning pages can be previewed before they are deployed to the Trellix advanced URL detection engine service.
You must work with Trellix technical support to customize the block and warning pages.
Important
For more information on customizing block and warning pages, see the community article on this topic.
Trellix -hosted pages
If you want to use the Trellix-hosted pages, you must upload the following HTML template files to the production advanced URL detection engine environment using the Trellix advanced URL detection engine Landing Pages Provisioning Web Application with the assistance of Trellix technical support. Pages must be less than 64KB in size:
HTML File | Description |
|---|---|
susp.html | Template that you can construct for a warning page that informs the recipient that a site might contain malicious content. The suspicious page is used in cases where the URL is still being analyzed and a definitive verdict is not yet available. |
mal.html | Template that you can construct for a block page that informs the recipient that a site contains malicious content. If a URL is detected as malicious, the customer is redirected to this page. |
error.html | Template that you can construct to inform the recipient that there was a problem processing the URL. |
spam.html | Template that you can construct to inform the recipient that a site contains spam. |
Important
The supporting files (for example, images and style sheets) that supply the text and styles for the custom block and warning pages must be hosted on your own server and must be accessible from the Internet.
If the URL may be suspicious, a warning page similar to the following appears when the recipient accesses the rewritten URL:
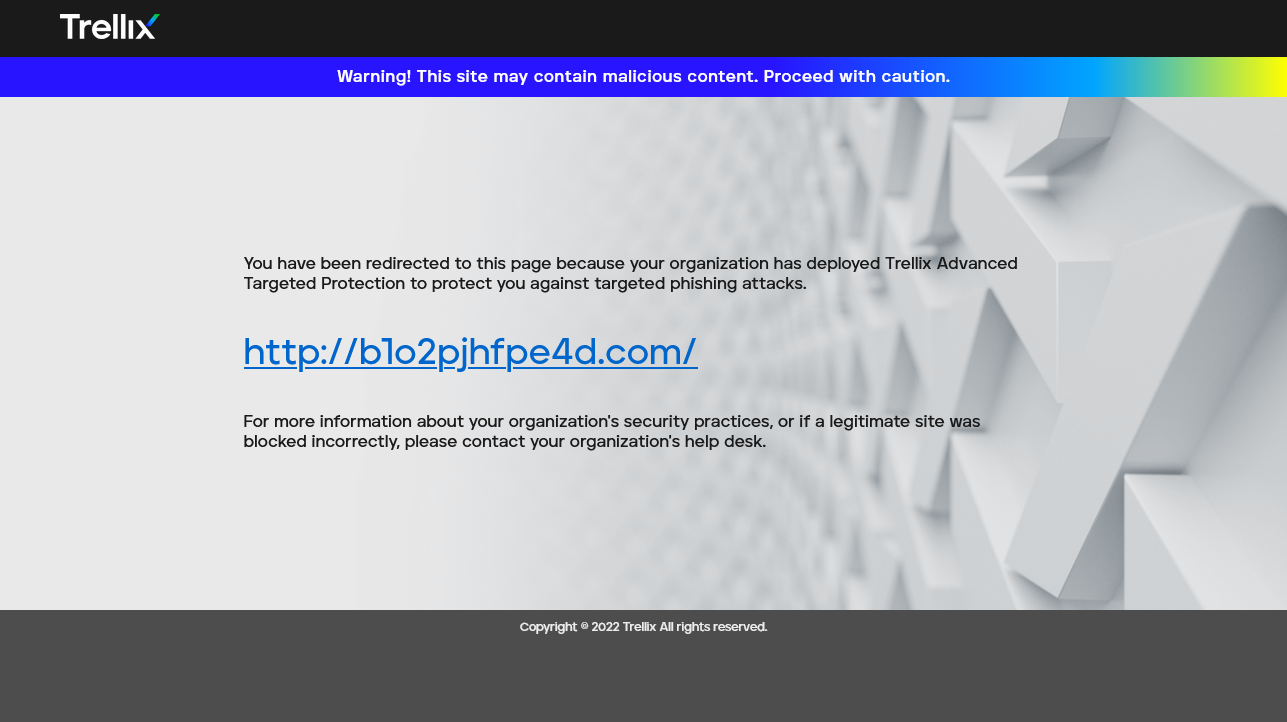
If the URL is detected as malicious, a block page similar to the following appears when the recipient accesses the rewritten URL:
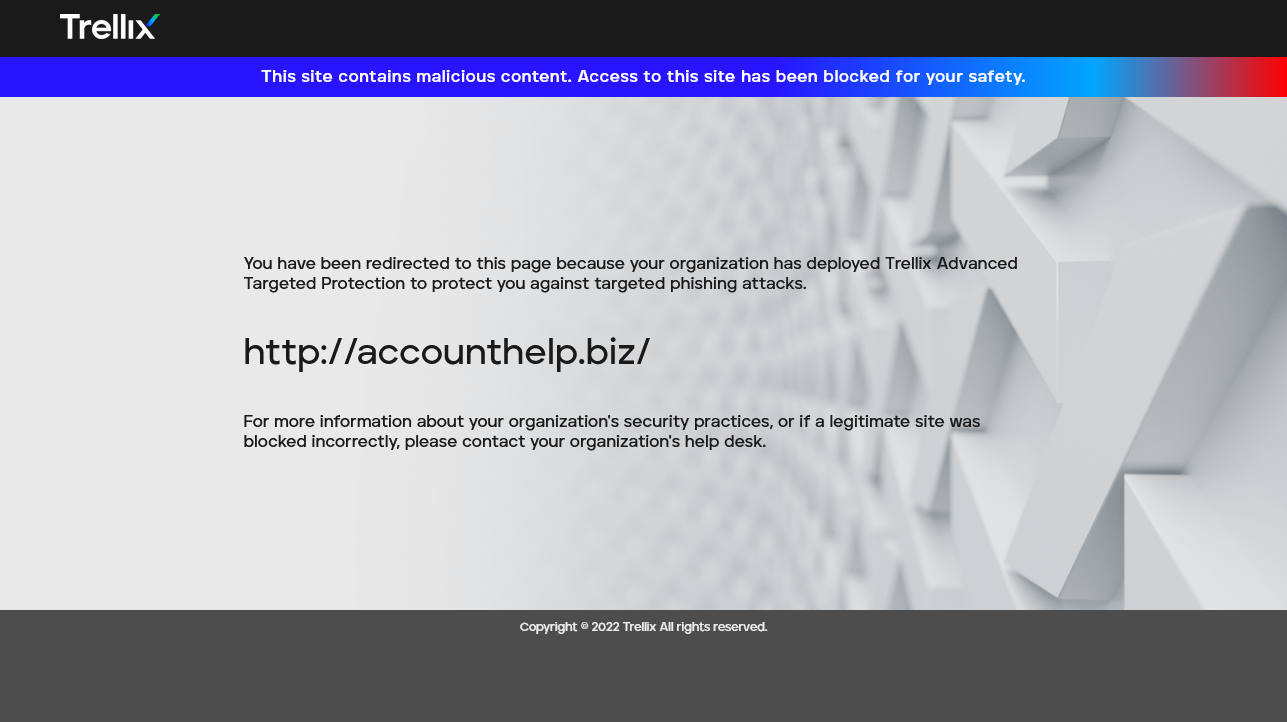
If there was a problem processing the URL, an error page similar to the following appears:
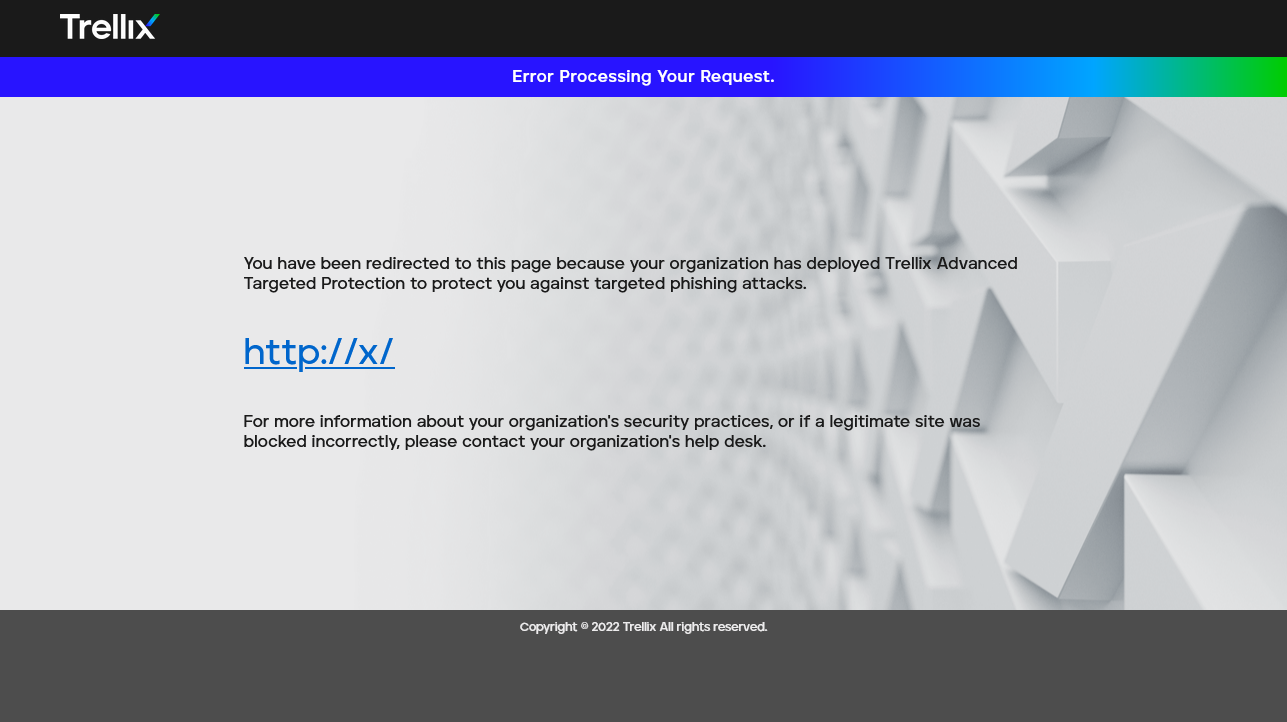
If spam is detected, an error page similar to the following appears:
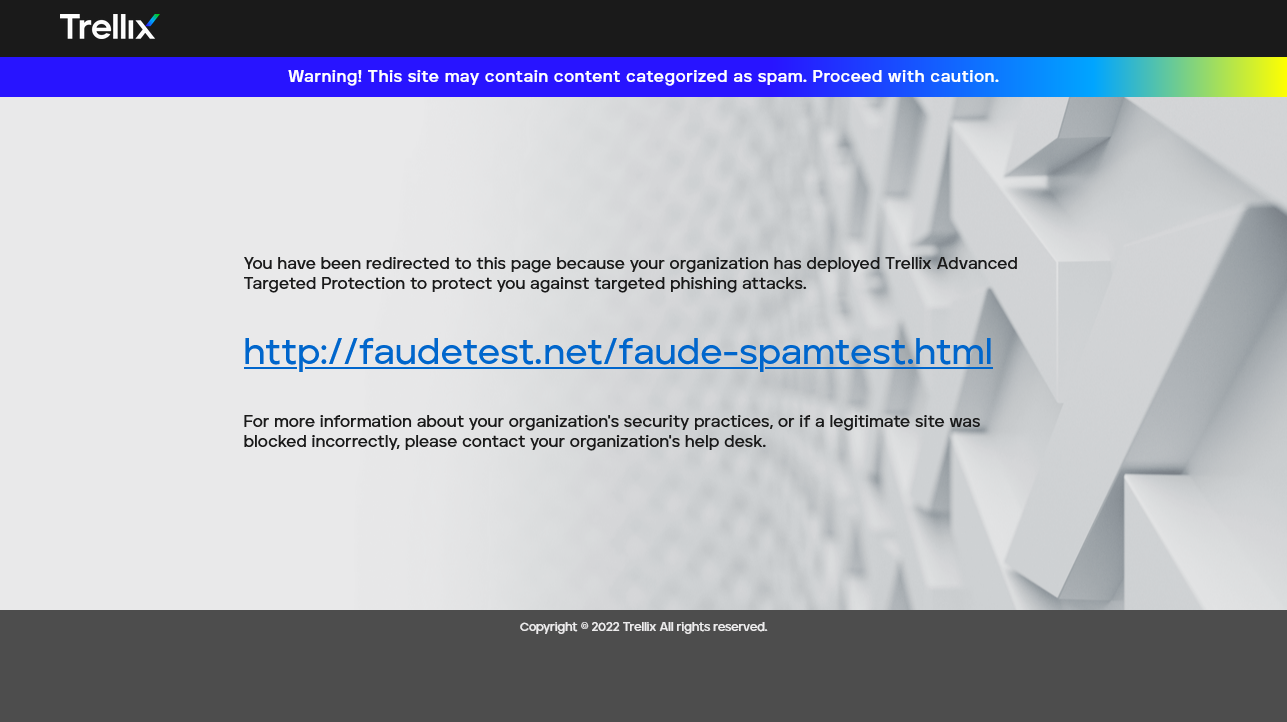
Customer-hosted pages
If you want to use your own hosted pages, you must work with Trellix technical support to upload a redirect configuration file to the production Trellix advanced URL detection engine environment. You must provide your own URL that the advanced URL detection engine redirects to and choose whether to encode the original URL within the query string parameters.
Scan timeout
The scan timeout (only for inline and hygiene) option allows you to set the scanning timeout against the advanced URL analysis detection engine. You can select a time between 0 to 10 minutes from the dropdown available. The default duration is 0 (disabled). If the analysis does not complete before the timeout, the message would proceed further with it's subsequent processing. Messages declared positive after the timeout would be handled as retroactive alert.
Note
Scan timeout is available only for hygiene and inline modes.
Configure Advanced URL Analysis settings
Click on the checkboxes to enable or disable Advanced URL Defense, URL Rewrite and URL Rewrite For S/MIME Signed Messages.
Select the Scan Timeout duration in minutes from the drop down menu.
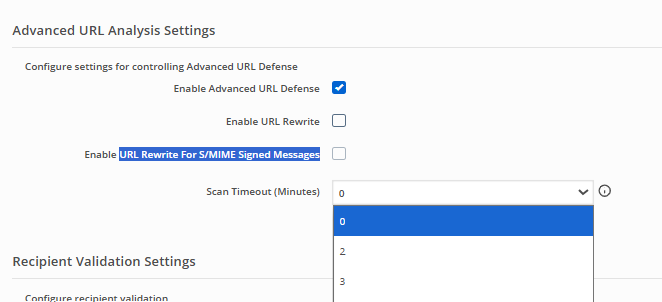
Click Save.
Recipient validation settings
You can now select between dynamic or static recipient validation within message analysis policies, or disable the feature. Microsoft Entra ID (formerly Azure AD) sync must be enabled to utilize static recipient validation.
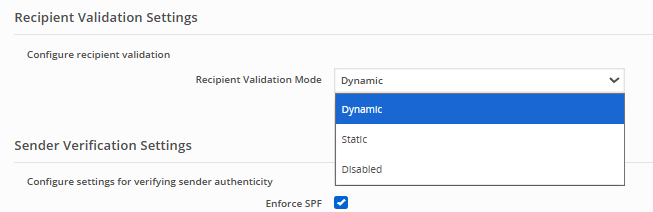
When dynamic recipient validation is enabled, messages for recipient addresses that are not yet known to the system are accepted and then scanned. If the message is rejected upon delivery by next hop MTA, the rejection is cached. Subsequent messages for the same recipient address are rejected for the next 3 days. When static recipient validation is enabled, email addresses are synced from MS GraphAPI every 12 hours. Addresses not in the local database are rejected.
Important
It is mandatory for the system to have visibility for all of your organization's email addresses through the syncing process. The system syncs addresses found in mail, proxyAddresses, otherMails, and userPrincipalName attributes against users and groups objects.
Hybrid mode deployment involving on-prem exchange setup is not supported by this feature.
Please review your existing directory setup before enabling this feature. If the syncing process continues to fail for over 24 hours, the recipient validation feature is automatically disabled.
Sender verification settings
Enable or disable SPF, DKIM, DMARC and DMARC report functionalities to achieve reliable delivery of the notification emails.
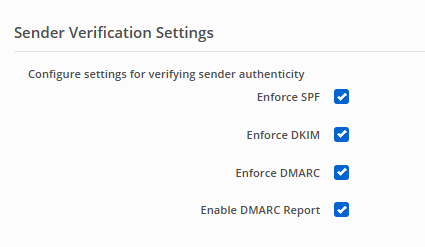
Selecting the Enable DMARC Report checkbox configures the system to send aggregate DMARC reports directly to the sender domain’s RUA address. This action provides insight into how your domains are used within email traffic.
Note
Sender verification settings is only available in hygiene domain mode.
Message size
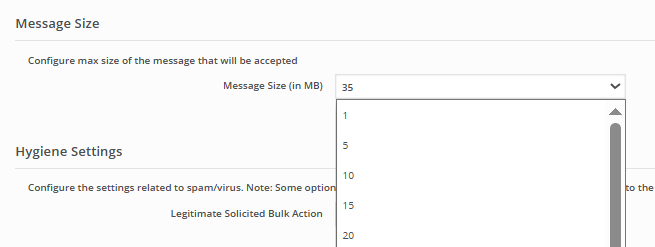
You can set the maximum size of messages. Messages exceeding the configured size will not be accepted. The maximum acceptable message size is 150 MB.
Hygiene settings
Important
Hygiene settings are only applicable for domains in hygiene license deployments.
Newsletter, mail magazine, and marketing email detection
Note
This is an inbound feature only available to Inline with Hygiene customers and Inline customers with Second Hop Hygiene service.
Header tags are available for Inline with Hygiene mode only.
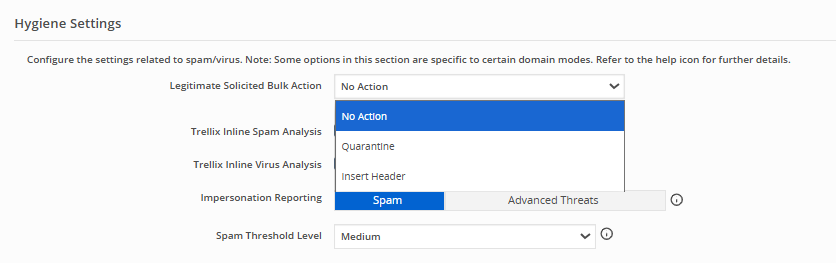
You can quarantine or add header tags to newsletters, mail magazines, and marketing emails through a message analysis policy, via Legitimate Solicited Bulk Action setting.
Anti-spam/anti-virus scanning settings
You can enable either anti-spam scanning, anti-virus scanning, or both as the second layer of defense for the Inline domains associated with a message analysis policy. This mimics the additional detection capabilities of the Inline with Hygiene mode of service, which has spam and virus analysis enabled by default for all domains.
Important
AS/AV settings are available for Inline with Hygiene customers only.
Note
Inline Spam Analysis and Inline Virus Analysis are not available for MS365 API or Google Workspace API.
Impersonation reporting
Important
Impersonation detection and reporting is an inbound feature. This feature is for Inline with Hygiene customers and Inline customers with second-hop hygiene service added only.
Email Security — Cloud uses synthetic variations of submitted user names and emails to quickly identify suspected impersonation attempts during anti-spam checks. Impersonation attacks can be reported as either spam or advanced threats.
Spam threshold level
You can set the spam threshold level to enable the Email Security — Cloud appliance to filter out probable spam messages.
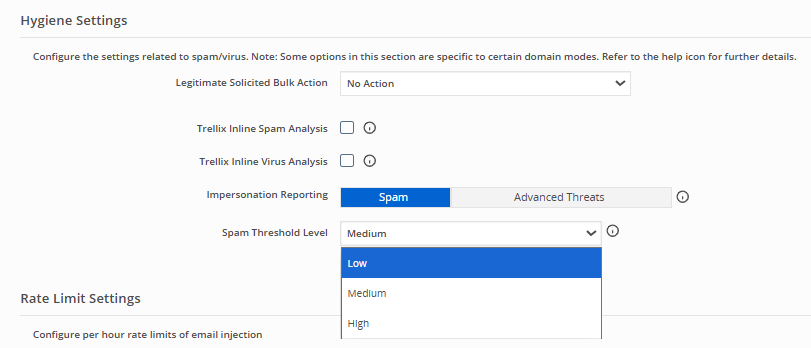
The higher you set the spam threshold level, the appliance is more likely to detect lesser spam emails which in turn also decreases the risk of false positive results. The lower the spam threshold level, the appliance will detect more spams as well as more false positives.
The spam threshold level is referred to as the spam level in the Message details page and the Email Trace search page. You can view the spam level in the event log of an alert message.
DKIM signing
Important
DKIM signing is available for outbound mail only.
Domain Keys Identified Mail (DKIM) signing is an email authentication method used to detect forged sender addresses. DKIM affixes a digital signature that is linked to a domain name to outgoing email messages.
When DKIM signing is enabled, outbound emails are signed using a 2048-bit DKIM key published by Trellix. Because the emails will be signed with the Trellix key, you do not need to publish public keys in your DNS records. Email Security - Cloud does not support custom DKIM keys per domain. Trellix recommends that you enable DKIM signing, because it can reduce the likelihood of an email being marked as spam.
To configure DKIM signing:
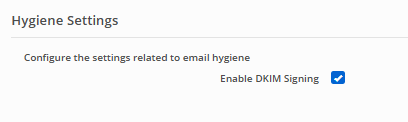
Under Hygiene Settings, enable or disable DKIM Signing using the check box.
Click Save.
Configure hygiene settings for inbound mode
Select an action for Legitimate Solicited Bulk Action (Inline with Hygiene only) from the drop-down menu.
Enable or disable Inline Spam and Virus Analysis.
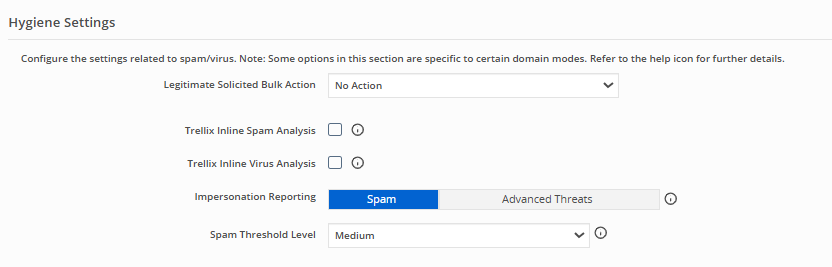
Select whether flagged impersonation attempts are reported as Spam or Advanced Threats. By default, impersonation alerts are reported as spam.
Select the Spam Threshold Level from the drop-down menu.
Click Save.
Rate limit settings
Sender-based rate limit settings in message analysis policies let you limit how much mail your domains accept within an hour. You can configure rate limits based on sender domain, IP address, or email address.
Recipient-based rate limit settings in message analysis policies let you limit how much mail your recipients can accept within an hour. You can configure rate limits for each recipient email address.
Though rate limits are configured on an hourly basis, limits are enforced every 15 minutes. If Email Security — Cloud detects that the amount of mail injected by any one sender, or for any one recipient, matches or exceeds rate limits, excess email is deferred back to the sending Mail Transfer Agent. The MTA will then attempt another delivery based on its own retry mechanism.
For example, if you set the rate limit at 1000 messages per sender IP per hour, Email Security — Cloud will check every 15 minutes whether the number of messages received from the sender matches or exceeds one quarter of the hourly limit, or 250 messages. If Email Security — Cloud detects 250 messages from that sender within a 15-minute period, mail is refused temporarily. In the sender MTA the message acceptance status for excess mail shows temporary failure.
Administrators with threshold notifications enabled will receive email notifications when the rate limits set for their organization have reached 75%. If multiple rate limits have reached 75%, information for all inbound rate limits at the threshold will be sent in a grouped notification and information for all outbound rate limits at the threshold will be sent in a grouped notification, if applicable. For information on enabling threshold notifications, see View and manage administrative details.
Configure rate limit settings:
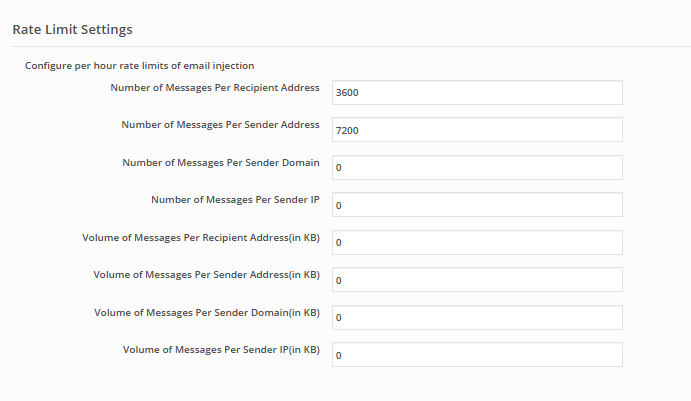
Under Rate Limit Settings, enter the required values in the respective fields.
Click Save.
For SMTP inbound domains, the default rate limit for message count per recipient address is 3600 messages per hour and 7200 messages per hour for message count per sender address. Other rate limits are disabled in message analysis policies by default. Disabled rate limit settings appear as "0" in the Configure Message Analysis page of a policy. For SMTP outbound domains, default configurations are pre-populated. You cannot disable rate limiting for outbound message analysis policies.
There are system hard limits in place for rate limiting. The maximum rate limit is dependent on your individual license.
Decapsulation settings
Journaling is a feature available on the Microsoft O365 platform which sends copies of customer emails to the email server in the form of attachments. Decapsulation enables you to receive the actual details contained in the journaled emails.
When the Email Security - Cloud receives the journal report attached to an email, it extracts the report from the email. It then drops the report and reinjects the email for further analysis.
Hence, you will see two entries in the email trace:
The entry with the status "Dropped (OOB)" refers to the journal report.
The entry with the status "Scanned" corresponds to the original email or attachment extracted from the journal report and processed further.
Important
Decapsulation of journaled emails is only applicable in inline domain mode.
If decapsulation is disabled in the message analysis policy, the Email Security - Cloud will reject the journal reports. To view all rejected emails, use a trace filter with status as rejected and rejection reason as Invalid configuration.
To enable or disable decapsulation:
Under Decapsulation Settings, enable or disable decapsulation.
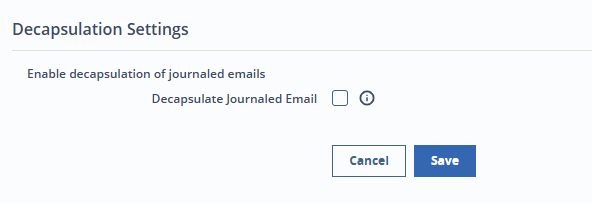
Save your changes.
To add new journal rules using Microsoft O365 Exchange admin center:
In the O365 Exchange admin center, select Other Features > Journal Rules.
Click the + button to create a new journaling rule.
In Journal rule settings page, set the domain and email server to send emails to. You will find the email server address in Mode field in General Settings section. Click here to find General Settings for a domain.
Enter a name for the journal rule.
Note
Use a name that is easy to identify, such as "Email Security - Cloud Inline Journal Rule A."
To scan messages of a specific user or group, select the option, A specific user or group otherwise select the option, Everyone.
Select the type of message as External messages only and click Next to go to the next page. You can also cancel your changes.
In the Finish page, review your options and save your changes.
To add new journal rules using Microsoft Purview:
On the left pane, select Solutions > Data Lifecycle Management.
Select Exchange (legacy) > Journal rules.
On the journal rules page, select New rule to add a new journal rule.
In Send journal reports to field, enter the email addresses required.
Enter a Journal rule name.
Select the group of people to receive journal messages from.
Select the type of message to journal.
Go to the next page to review and save your settings.